Welcome to Smart Doll Land
Welcome!
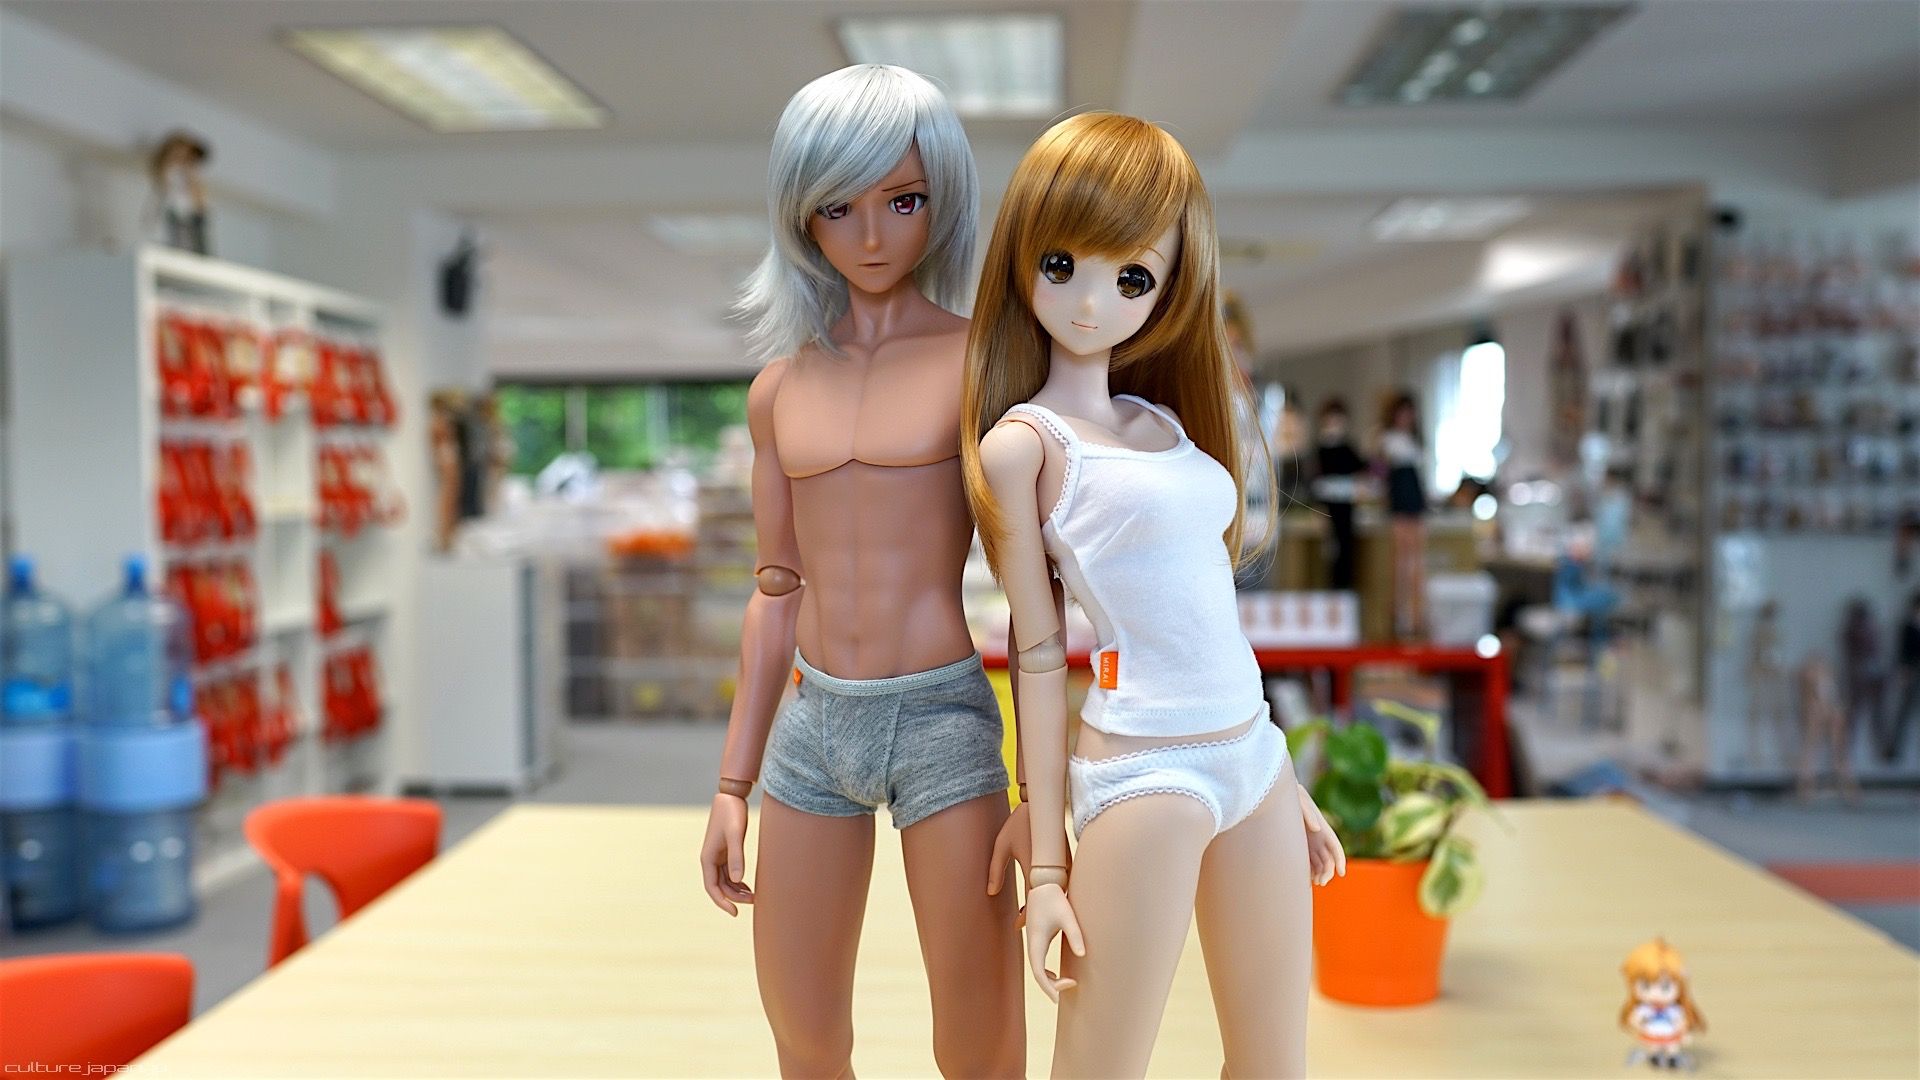
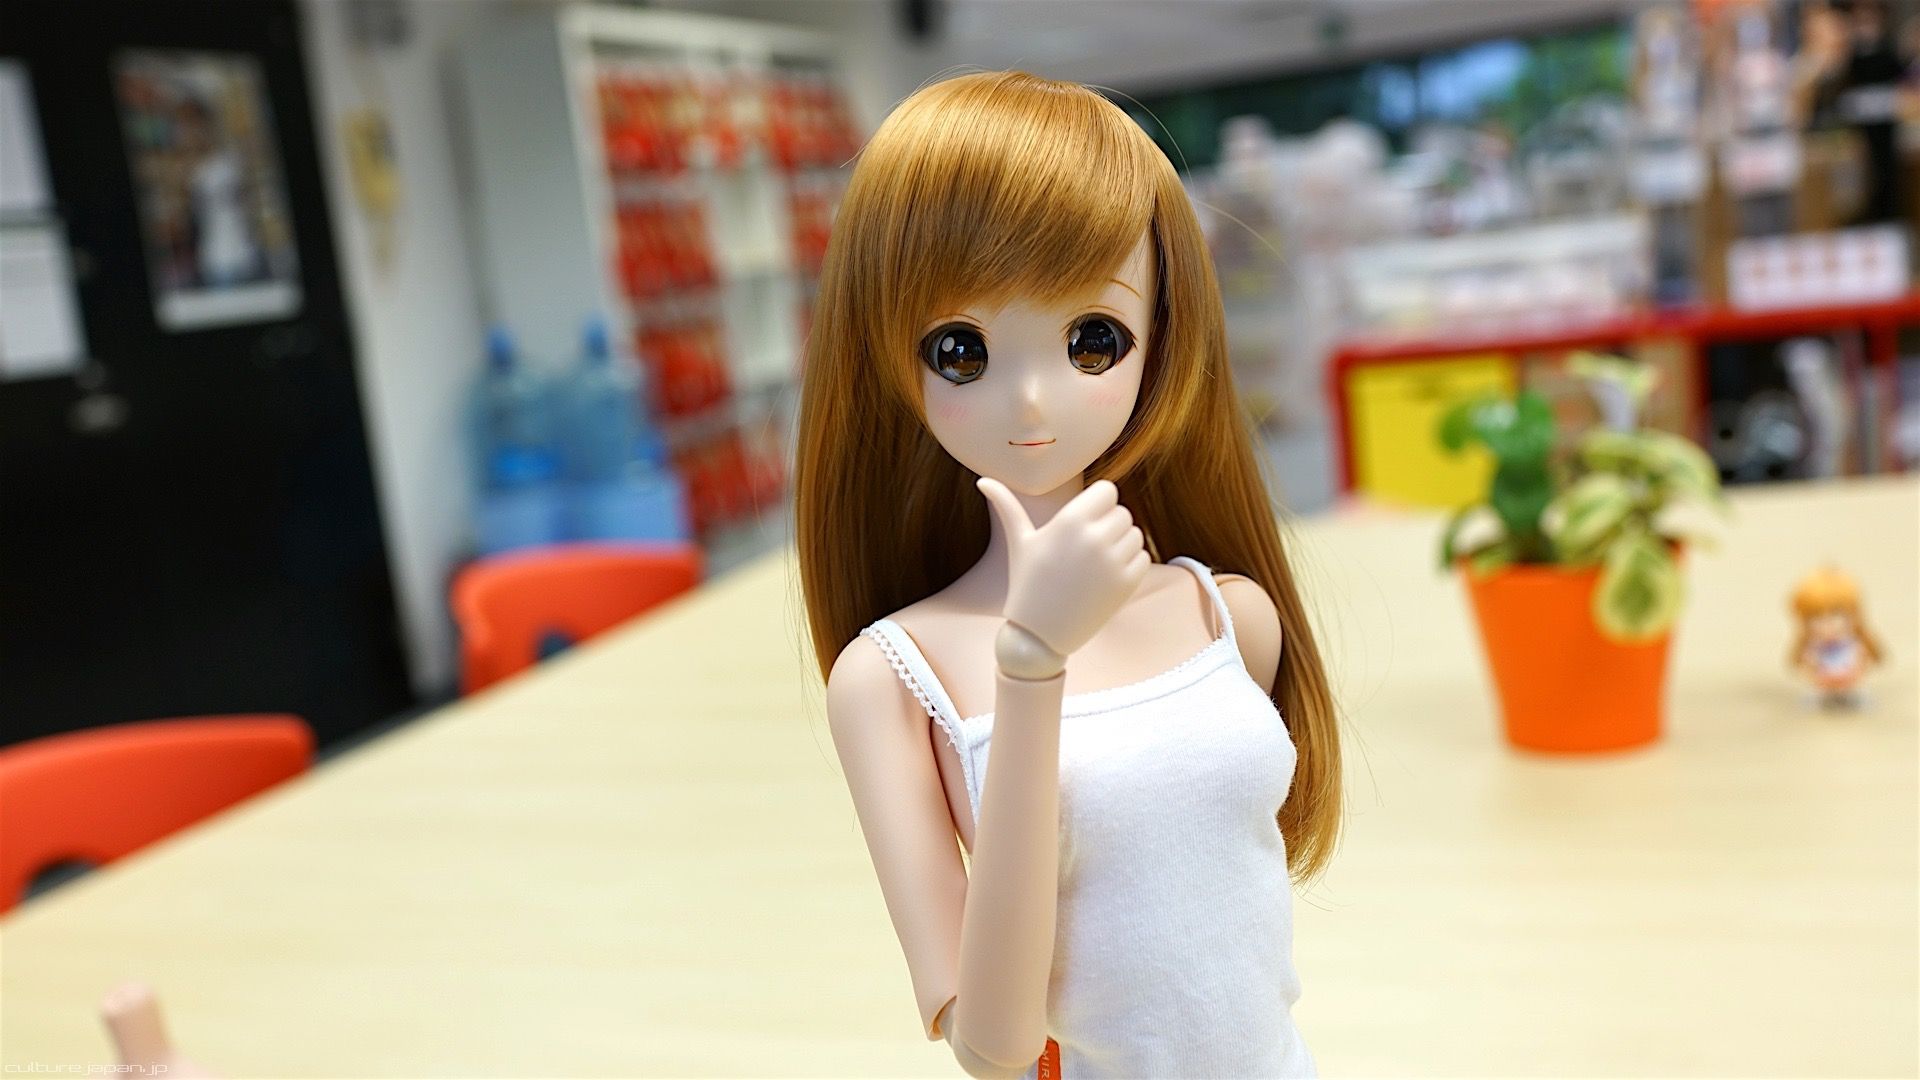
Hey Folks! My name is Danny Choo and I'm the creator of Smart Doll. I hope they bring you as much inspiration as much as they have brought us right here at Culture Japan! Read on to learn more about your new Smart Doll.
Owner Registration
If you did not order Smart Doll from the Online Store then you could have got one from our retailers, events or even walked into Mirai Store but forgot to leave your email address.
We need an email address so we can manage the 1 year warranty for your Smart Doll so make sure you register here if you did not leave an email with a Culture Japan Staff member.
Squeaky
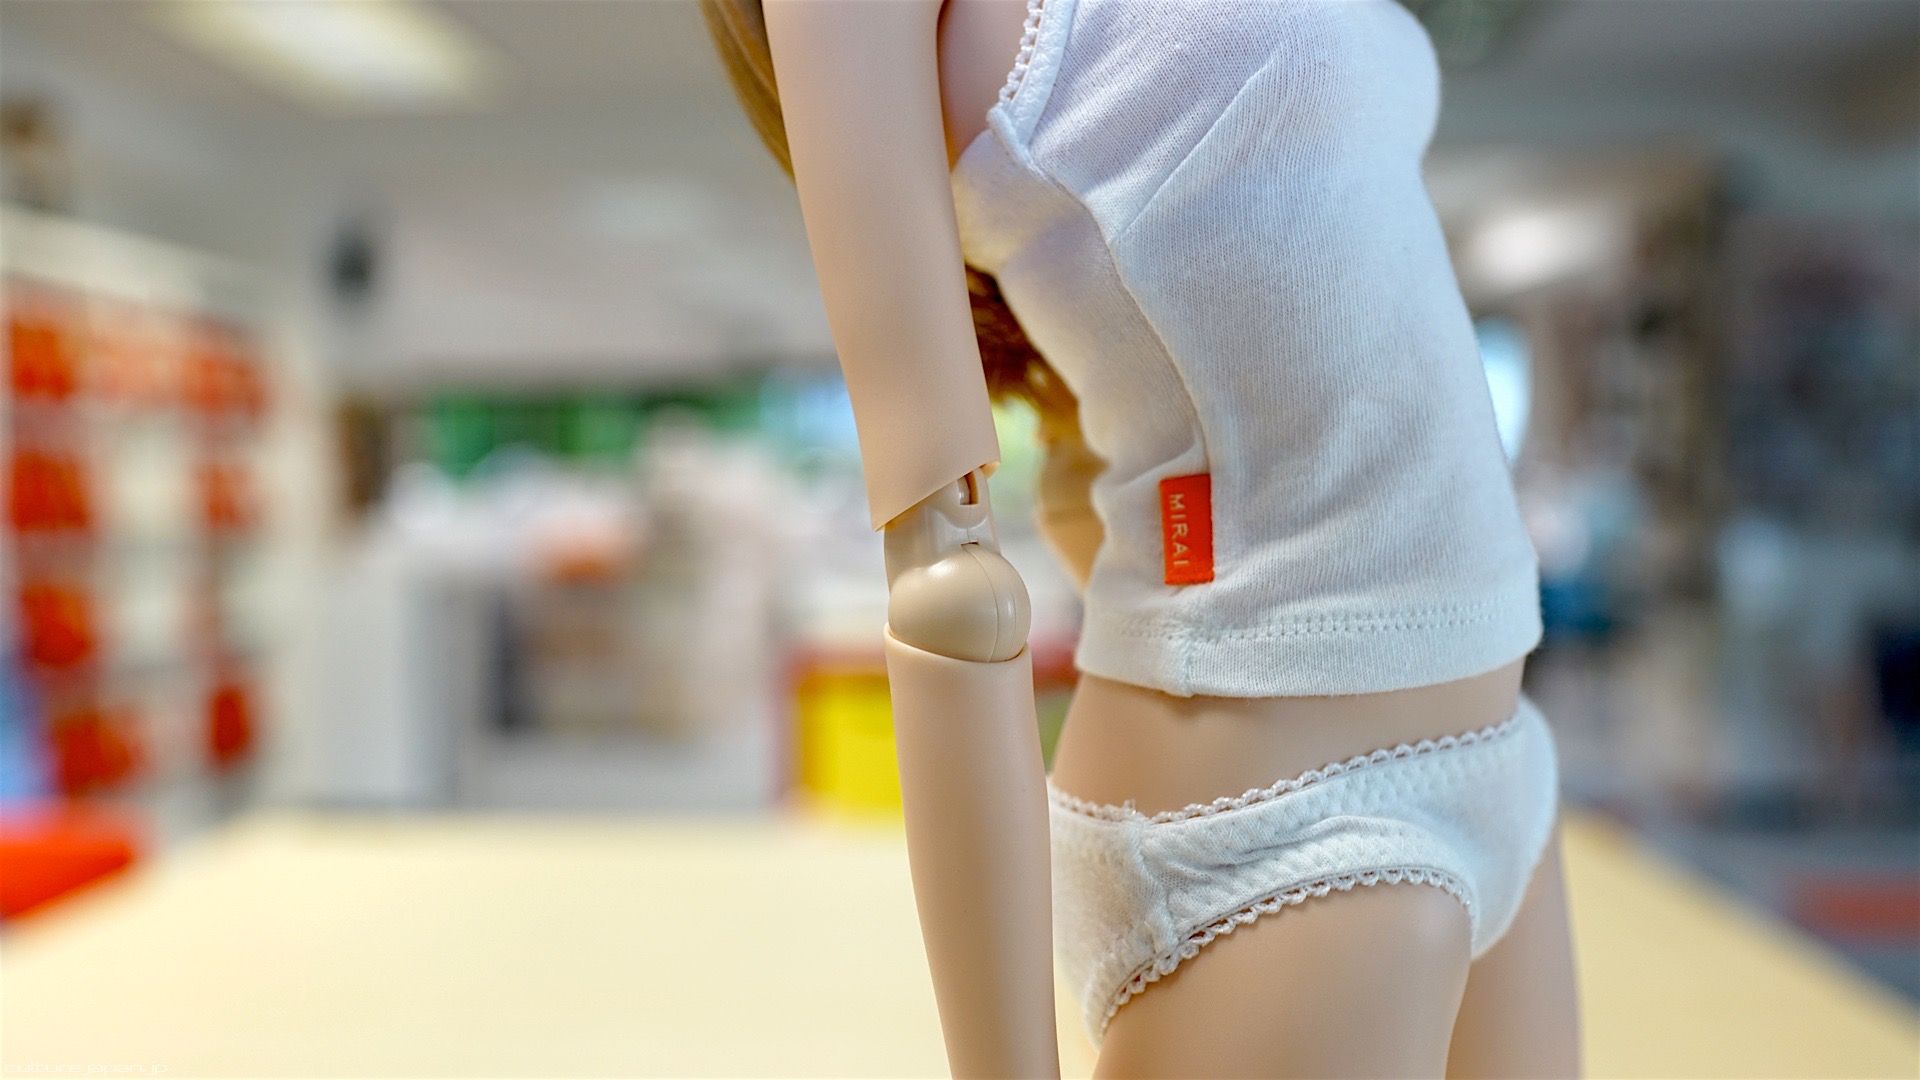
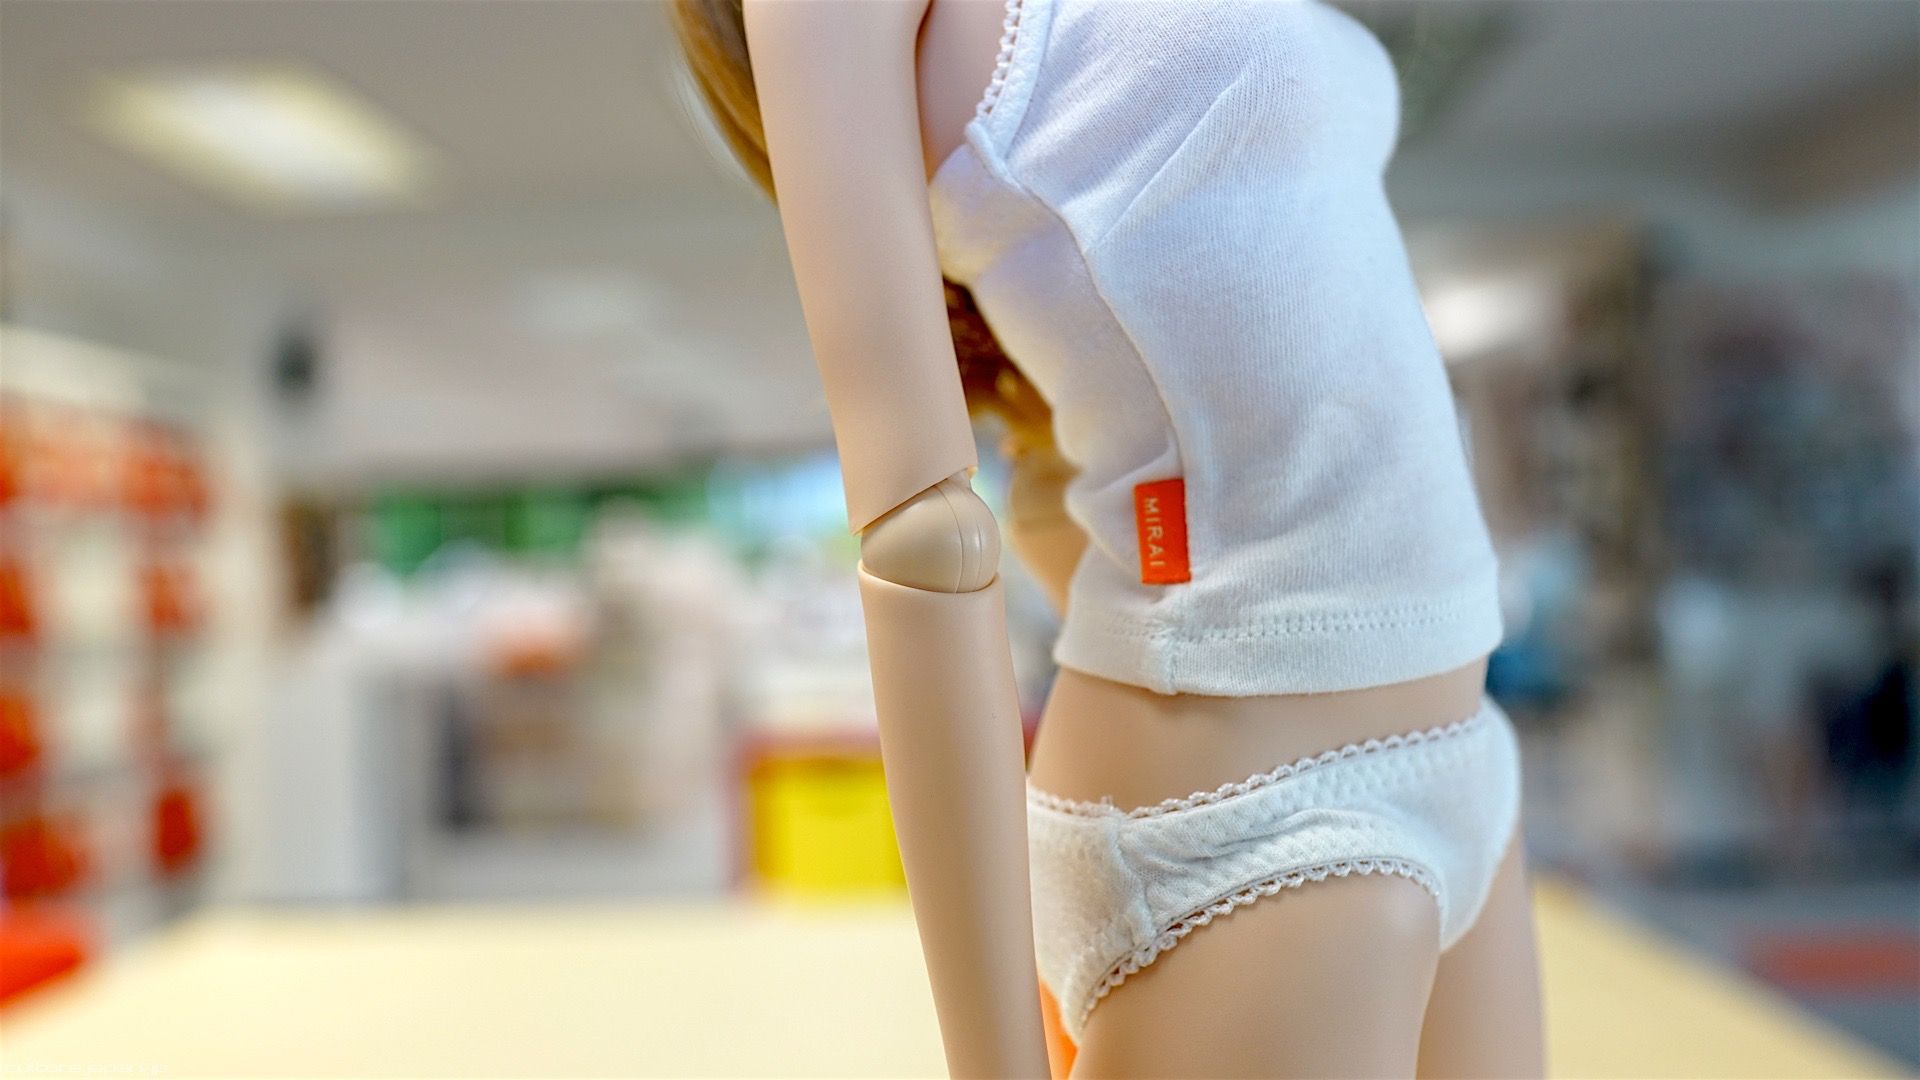
All cute things squeak from time to time - just like Smart Doll. Actually this is because the joints are generally stiff which enables them to hold their pose. The only joint that is not designed to be stiff is the spine.
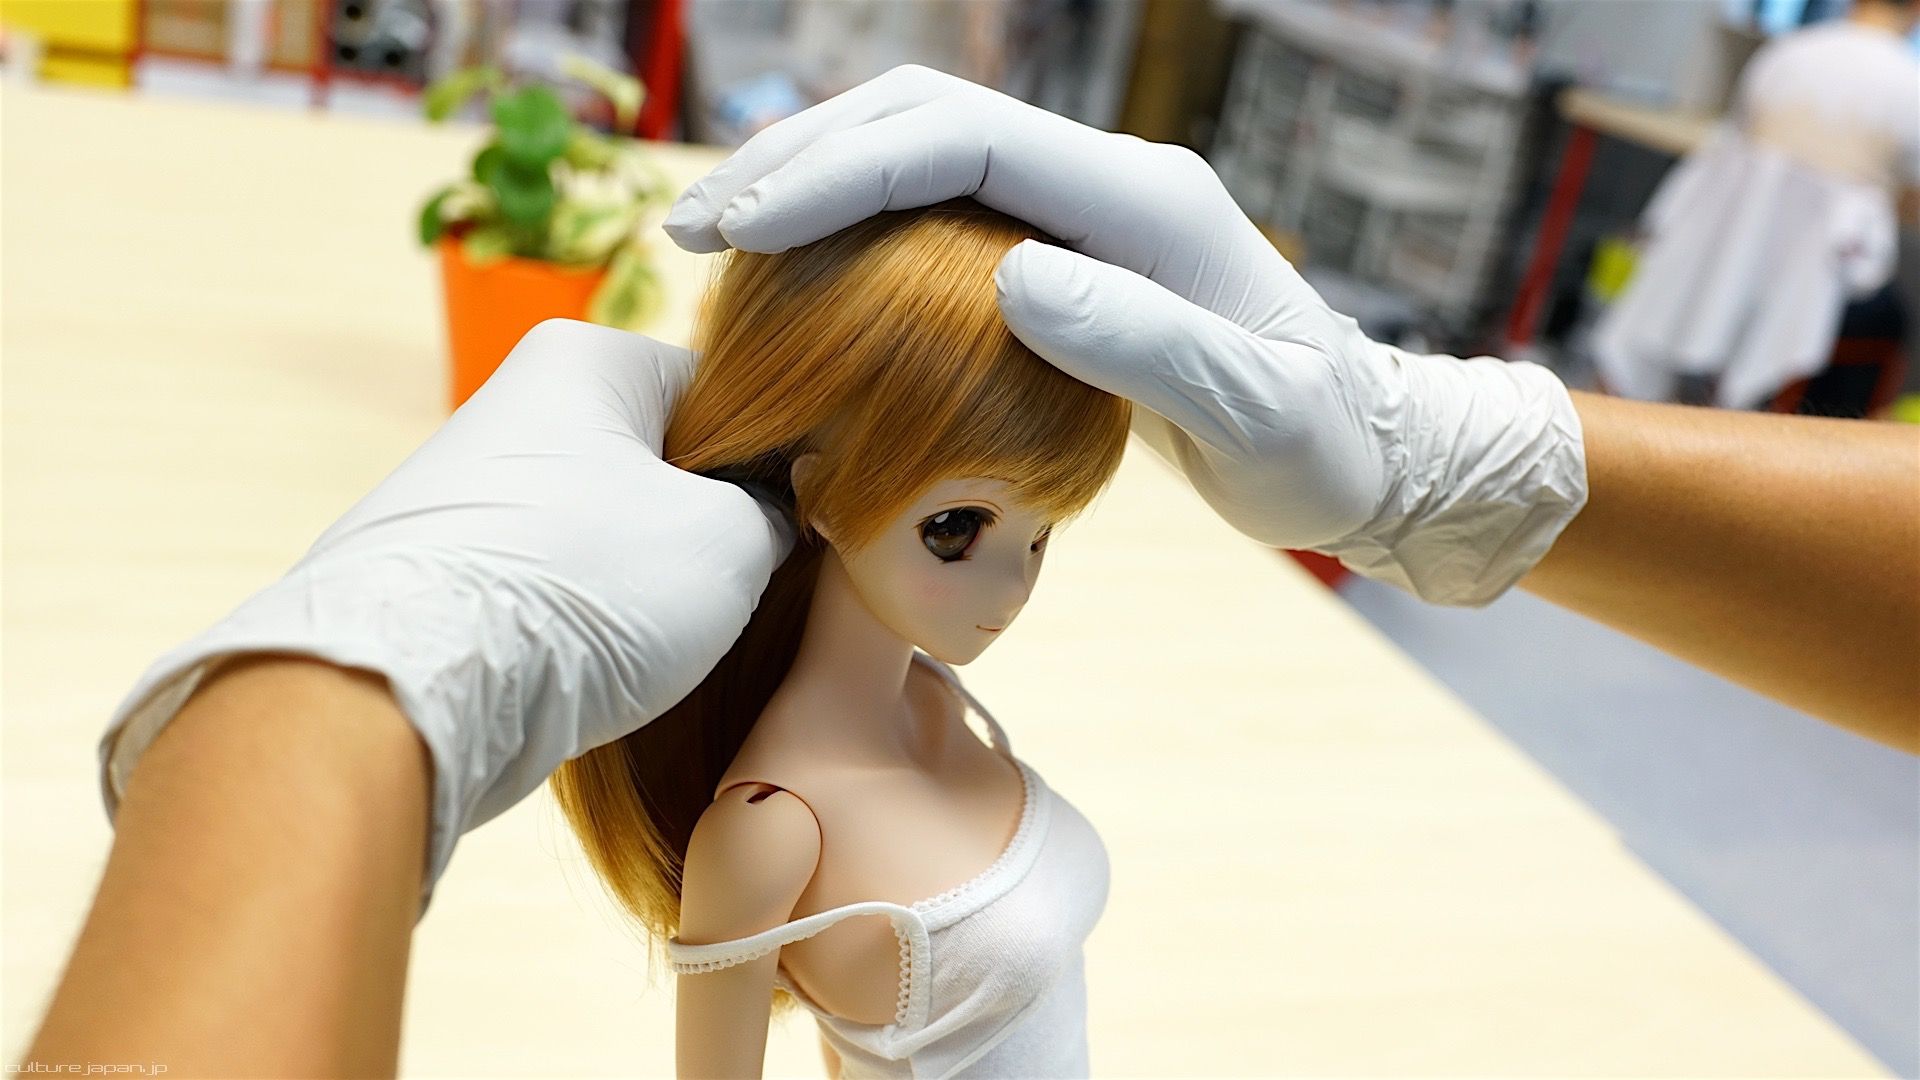
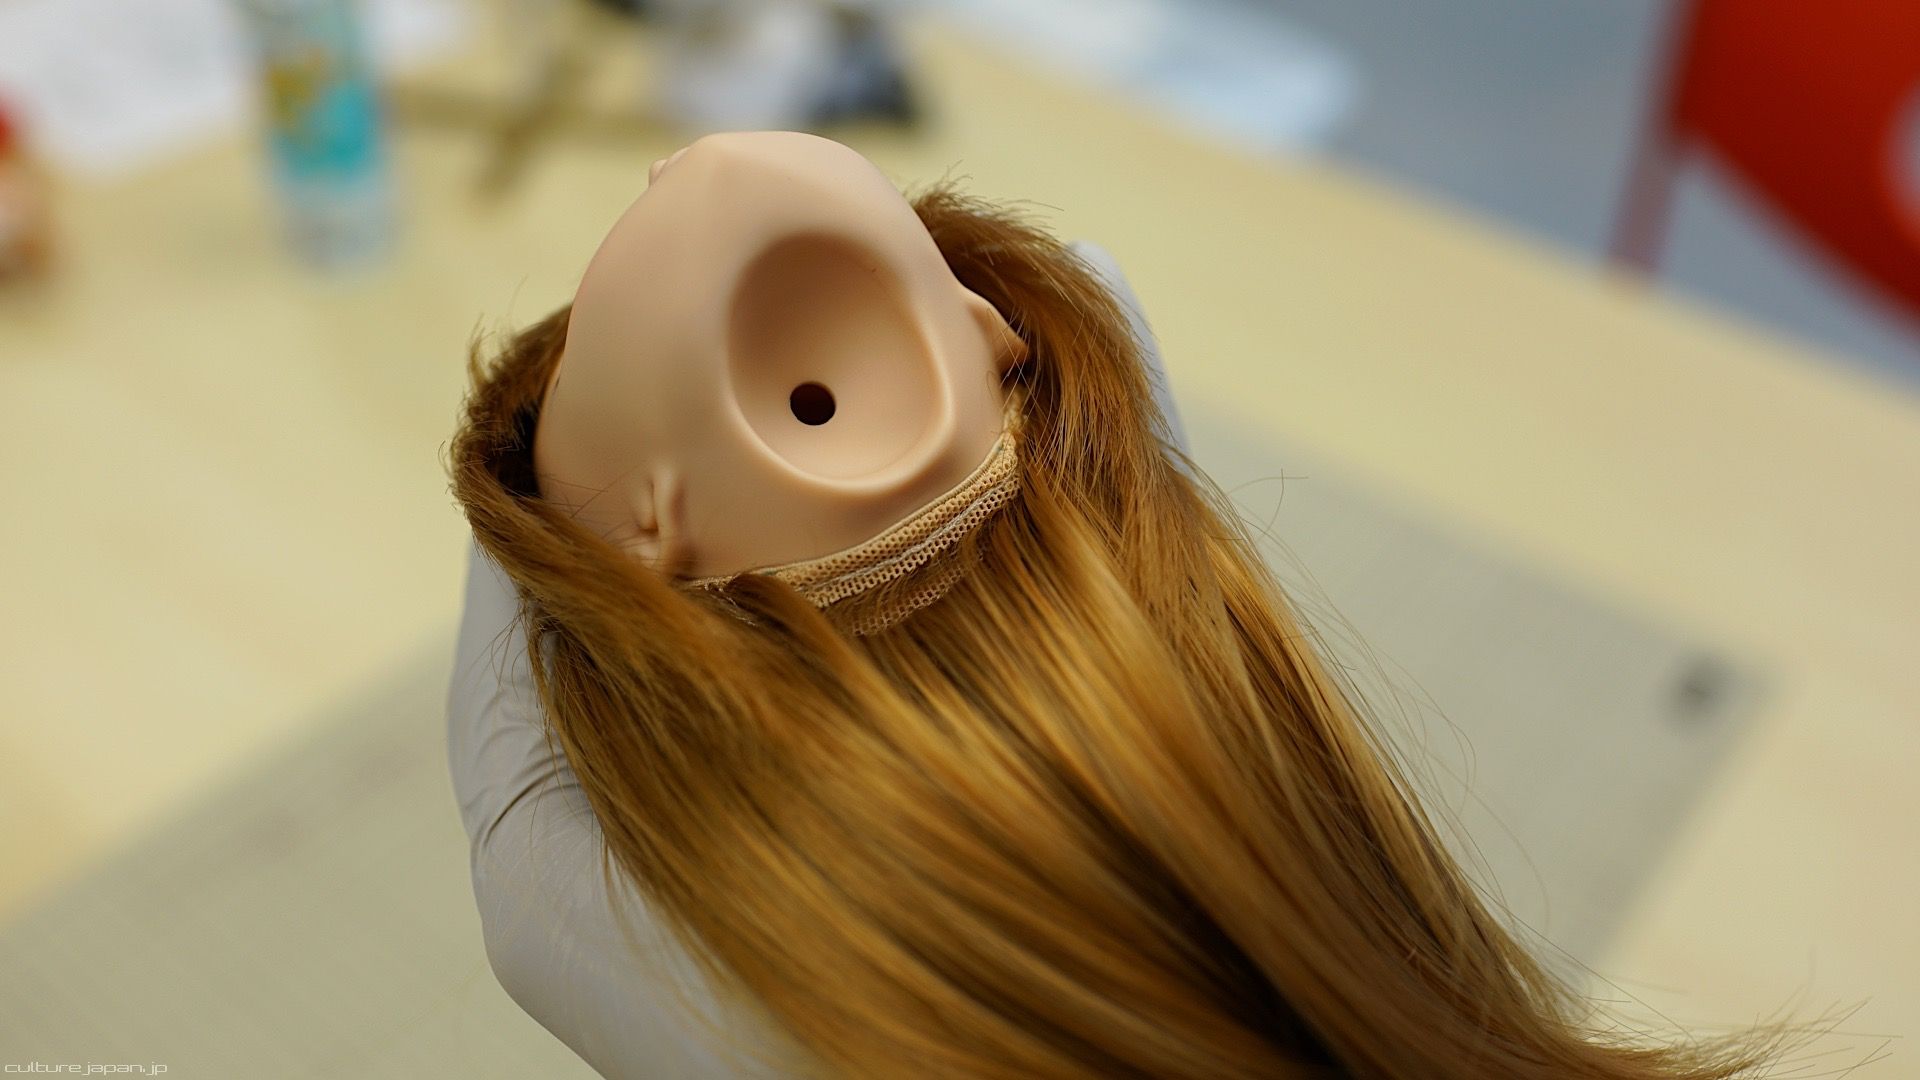
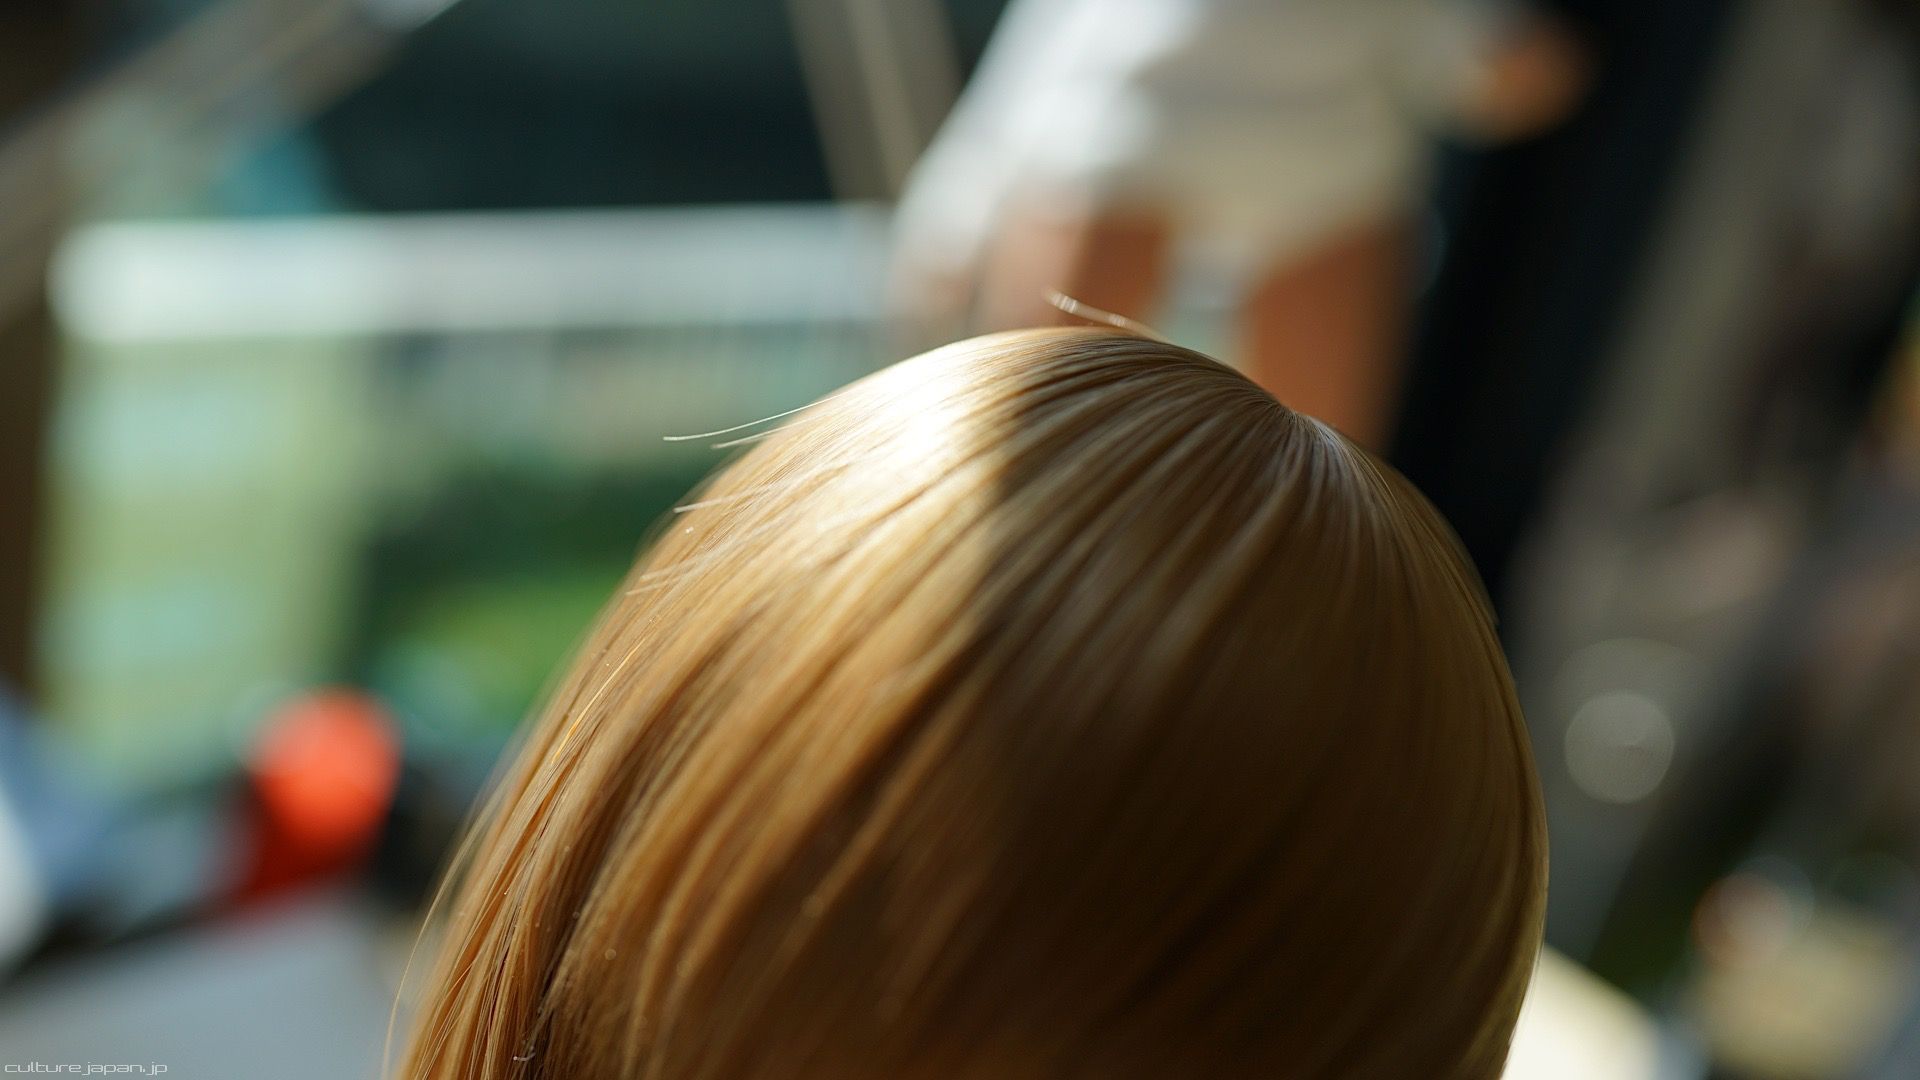
Stylish Hair
The wigs that we manufacture can be difficult to put on - this is because I wanted to make them tight enough so that they would not slip off.
The trick is to try to rest the rim of the wig on the front of the head and push down on the back until there is no space left between the wig and top of the head. You may need to pull on the back of the wig to get it in place. Watch the video below and read the rest of the post to make sure you become a ninja at doing this.
The trick is to try to rest the rim of the wig on the front of the head and push down on the back until there is no space left between the wig and top of the head. You may need to pull on the back of the wig to get it in place. Watch the video below and read the rest of the post to make sure you become a ninja at doing this.
Make sure the wig cap does not get crumpled when you do this and that it covers the head properly.

If you are still having difficulty putting on the wig then stretch the wig cap like this - pull on either side and from top to bottom too which will loosen up the elastic.

An easier way to put the wigs on involves removing the head - take the wig and hold it in one hand making a cup shape with your fingers which helps support the sides of the wig.
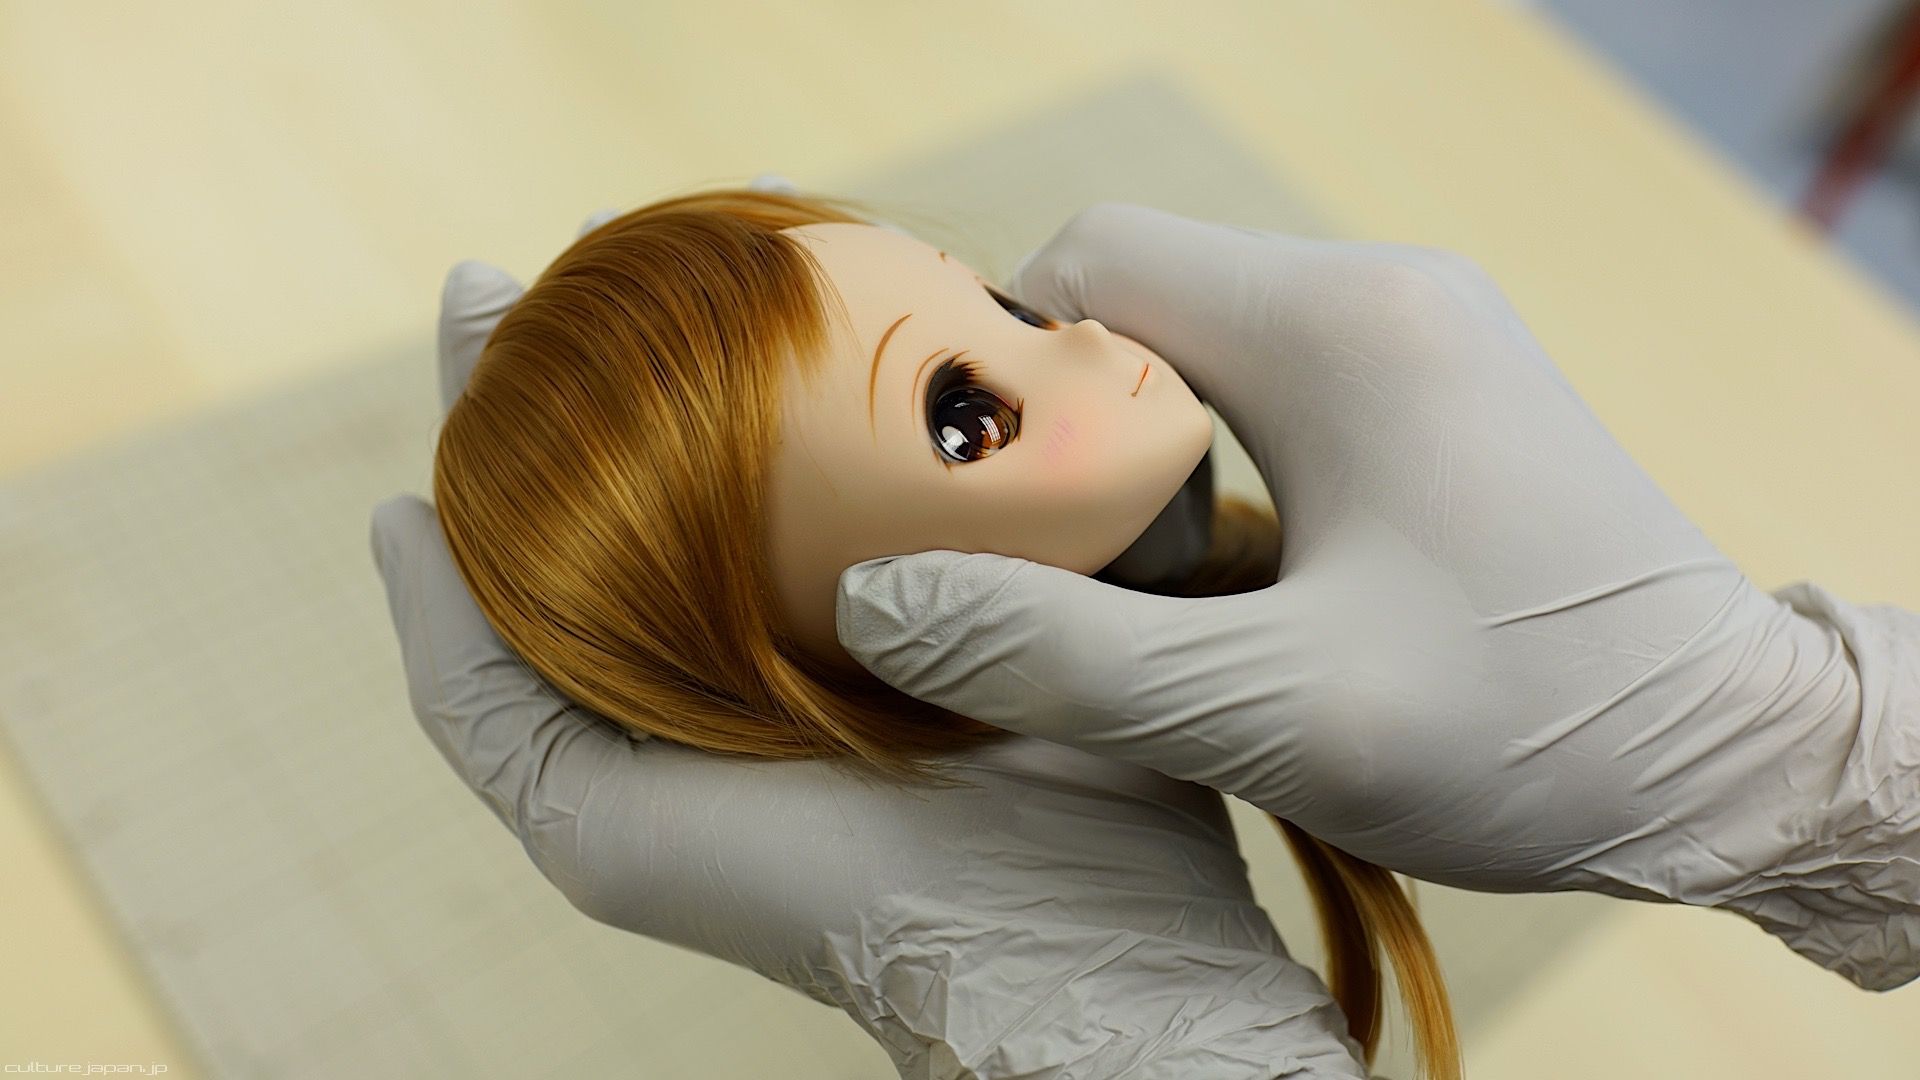
Then place the Smart Doll head into the wig cap and wriggle it in.
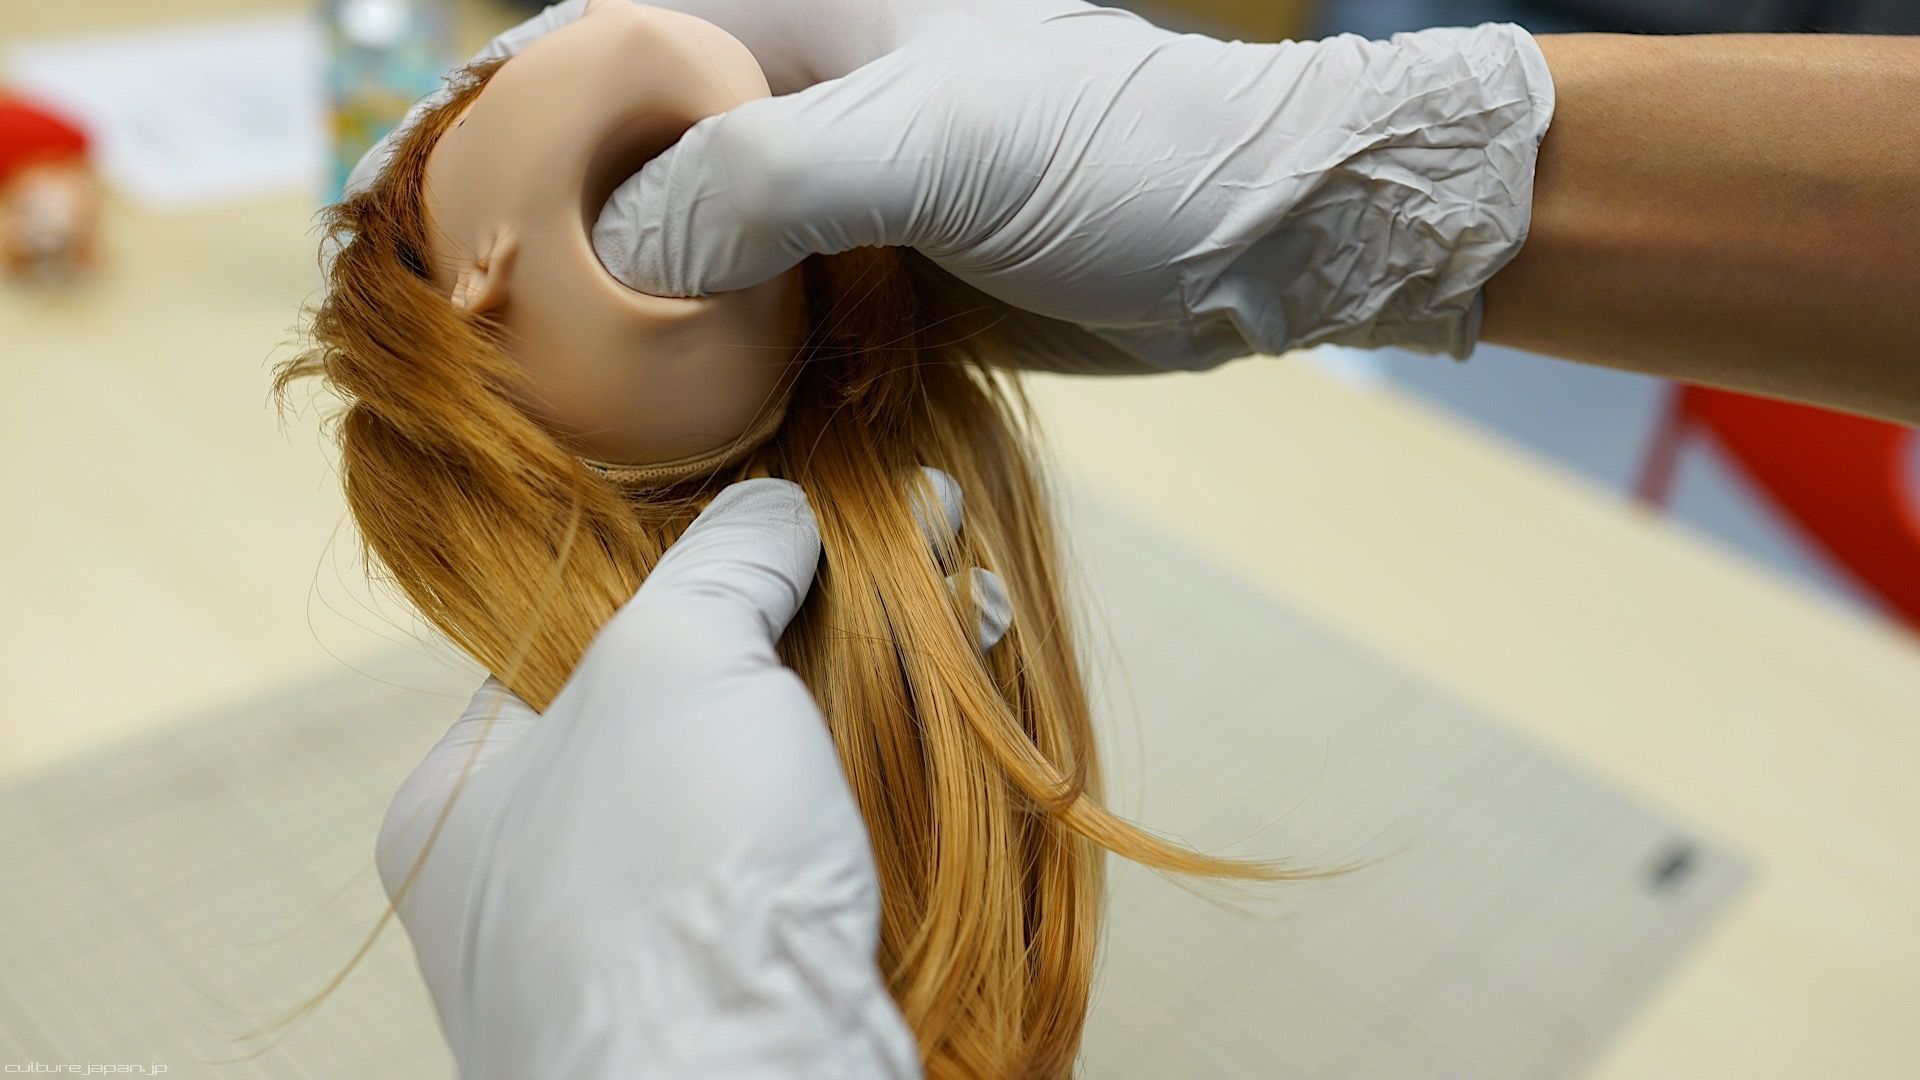
You may need to pull on the bottom of the wig like so...
The bottom of the wig cap should look like this.
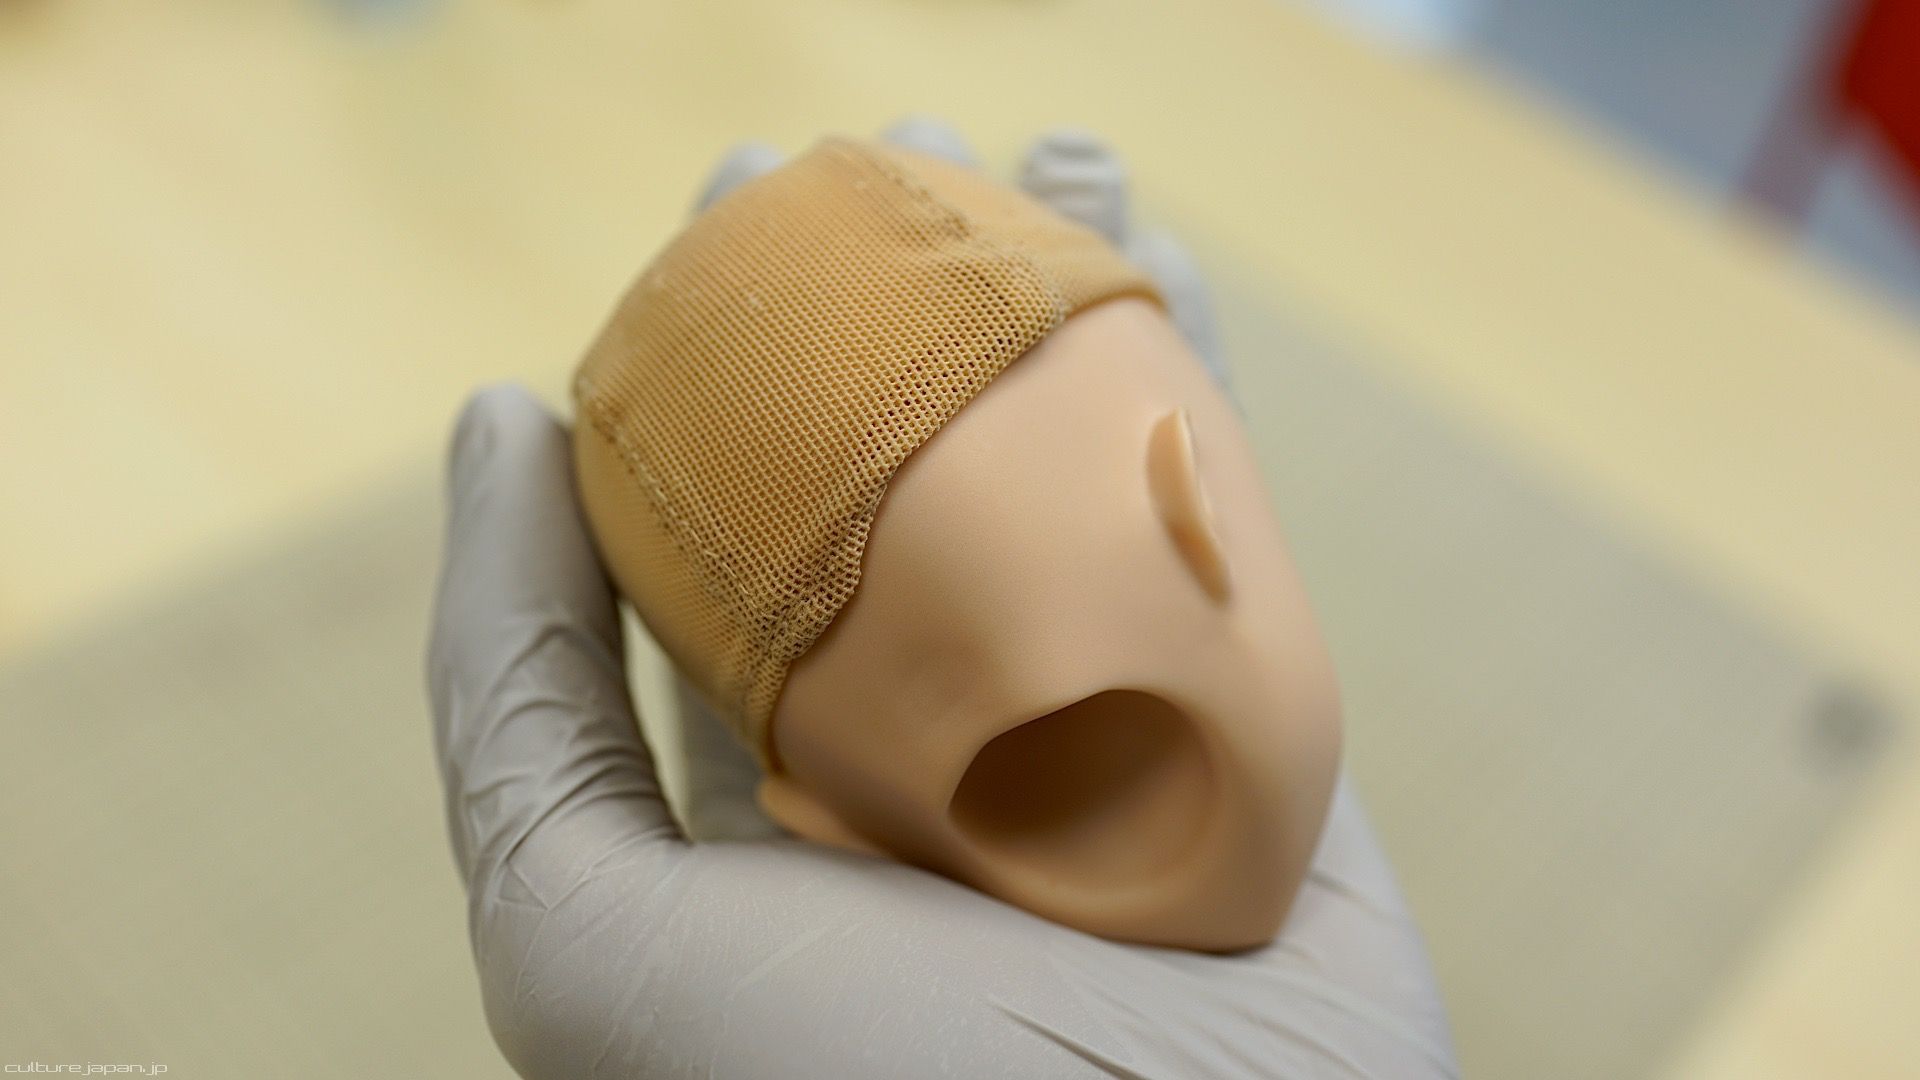
This is the wig cap without the hair so I can demonstrate explain myself better! Make sure not to get the wig cap twisted like this or the wig just looks odd.
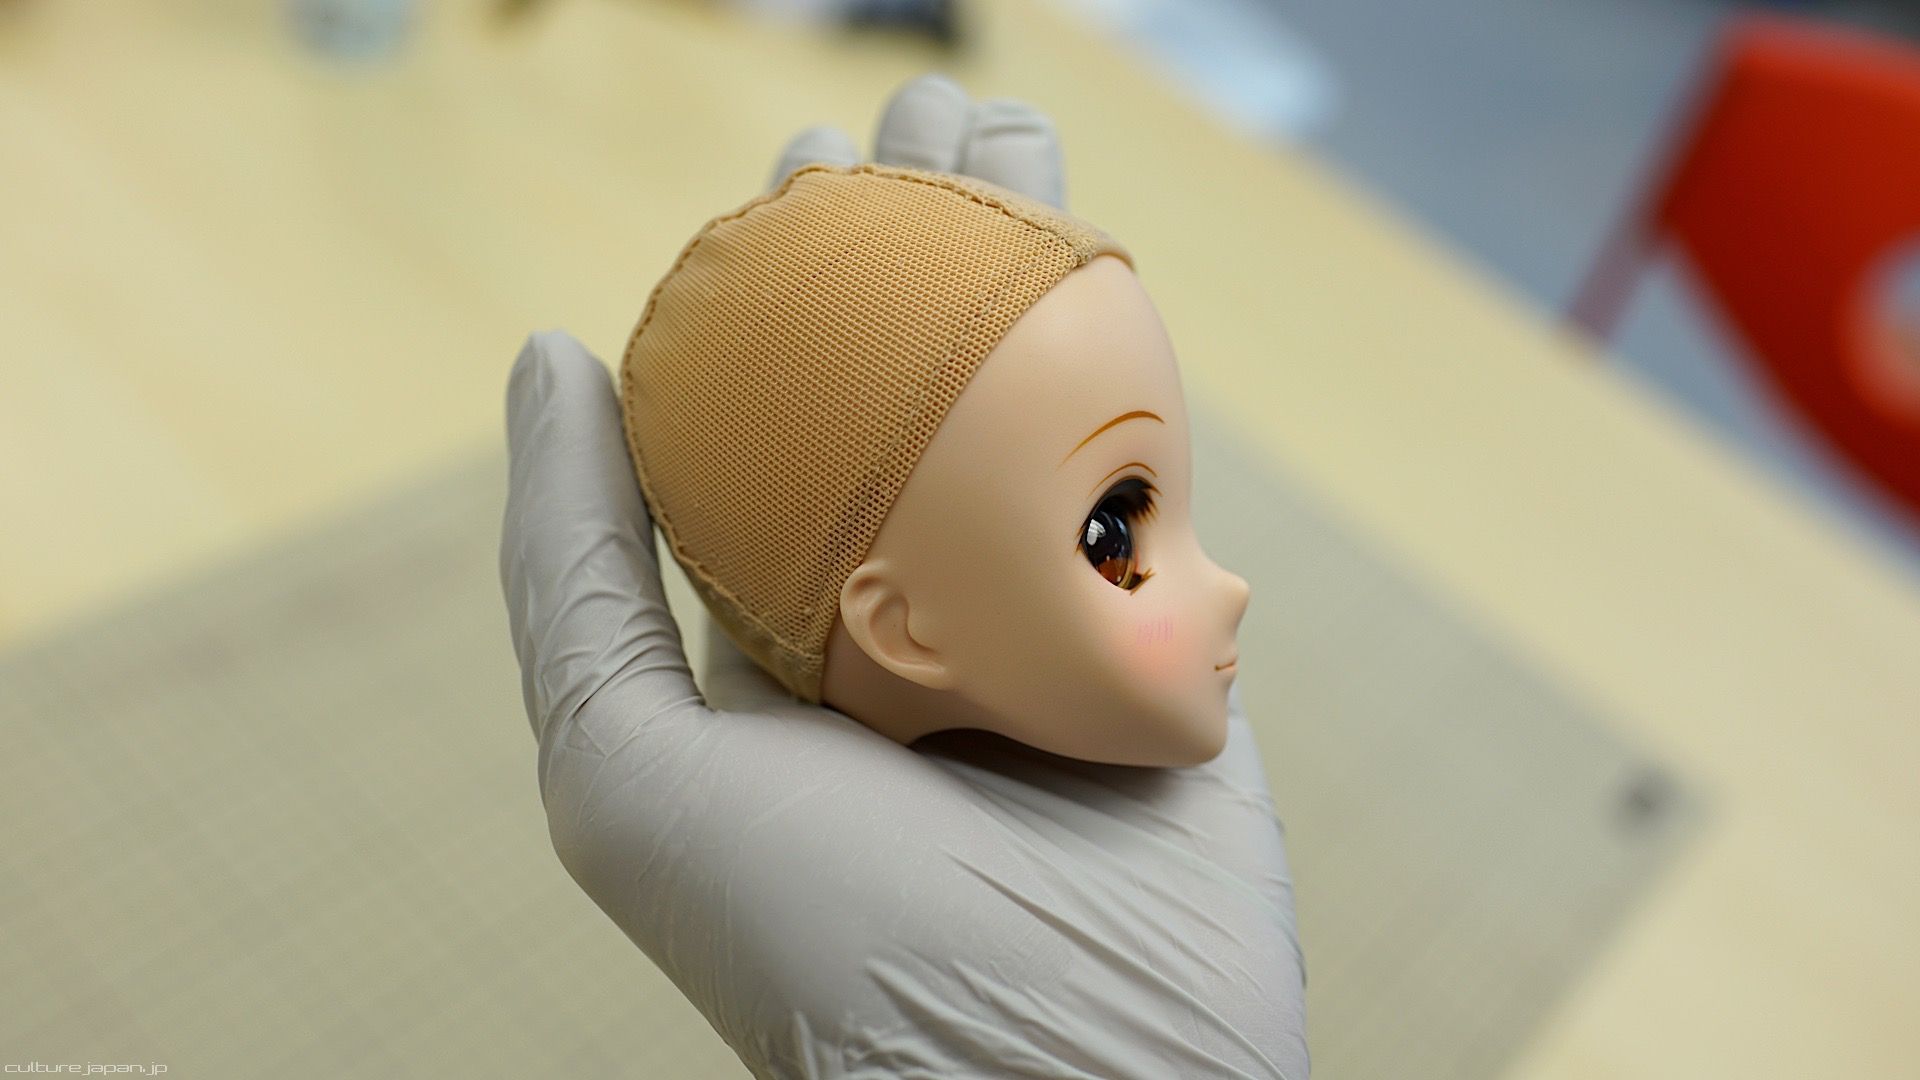
This is what the wig cap should look like when its on properly.
This is a bad example of wig placement - too much forehead showing!
This is a good example of wig placement - if you are not sure then check my photos on the Smart Doll store.
All wigs are hand made so there maybe a few strands of hair that just don't want to listen from the start - put them out of their misery by pulling them out.
About Joints
Smart Doll joints are generally stiff - this is because I wanted them to be able to hold their position and not give into gravity. The stiffness means that Smart Doll can stand on their own two feet too. As long as you follow the guide below and bend them properly then you should be OK.
About arms
Looking from the side, this is how the ball joint of the elbow should be facing - don't face it backwards because if you do then when you bend the elbow then something may break.
The arm can bend at the elbow this much so that Smart Doll can touch their shoulder. When you do this, the elbow socket will extend.
This is what the elbow socket looks like in extended mode. When Smart Doll does not feel like touching their shoulders anymore, the socket should be reset and pushed back into the original position.
This is what the elbow looks like after being reset.

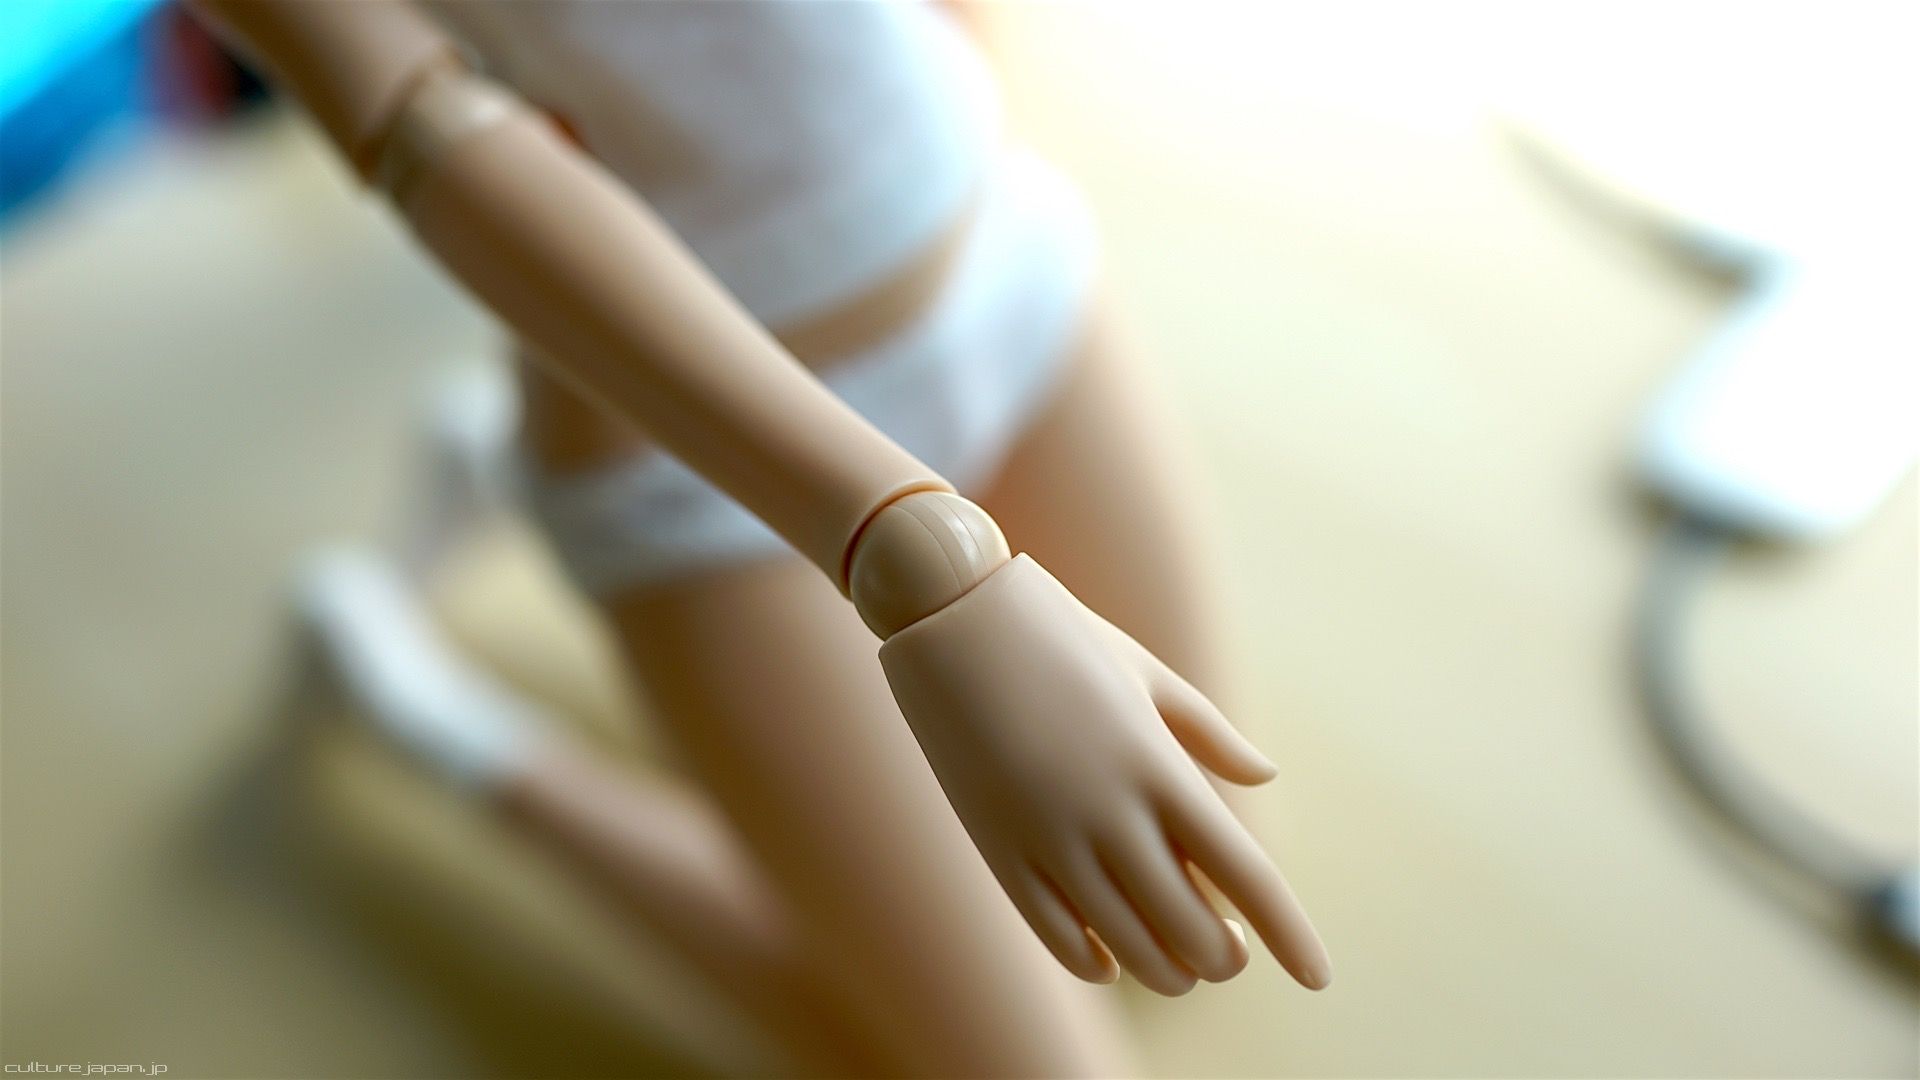
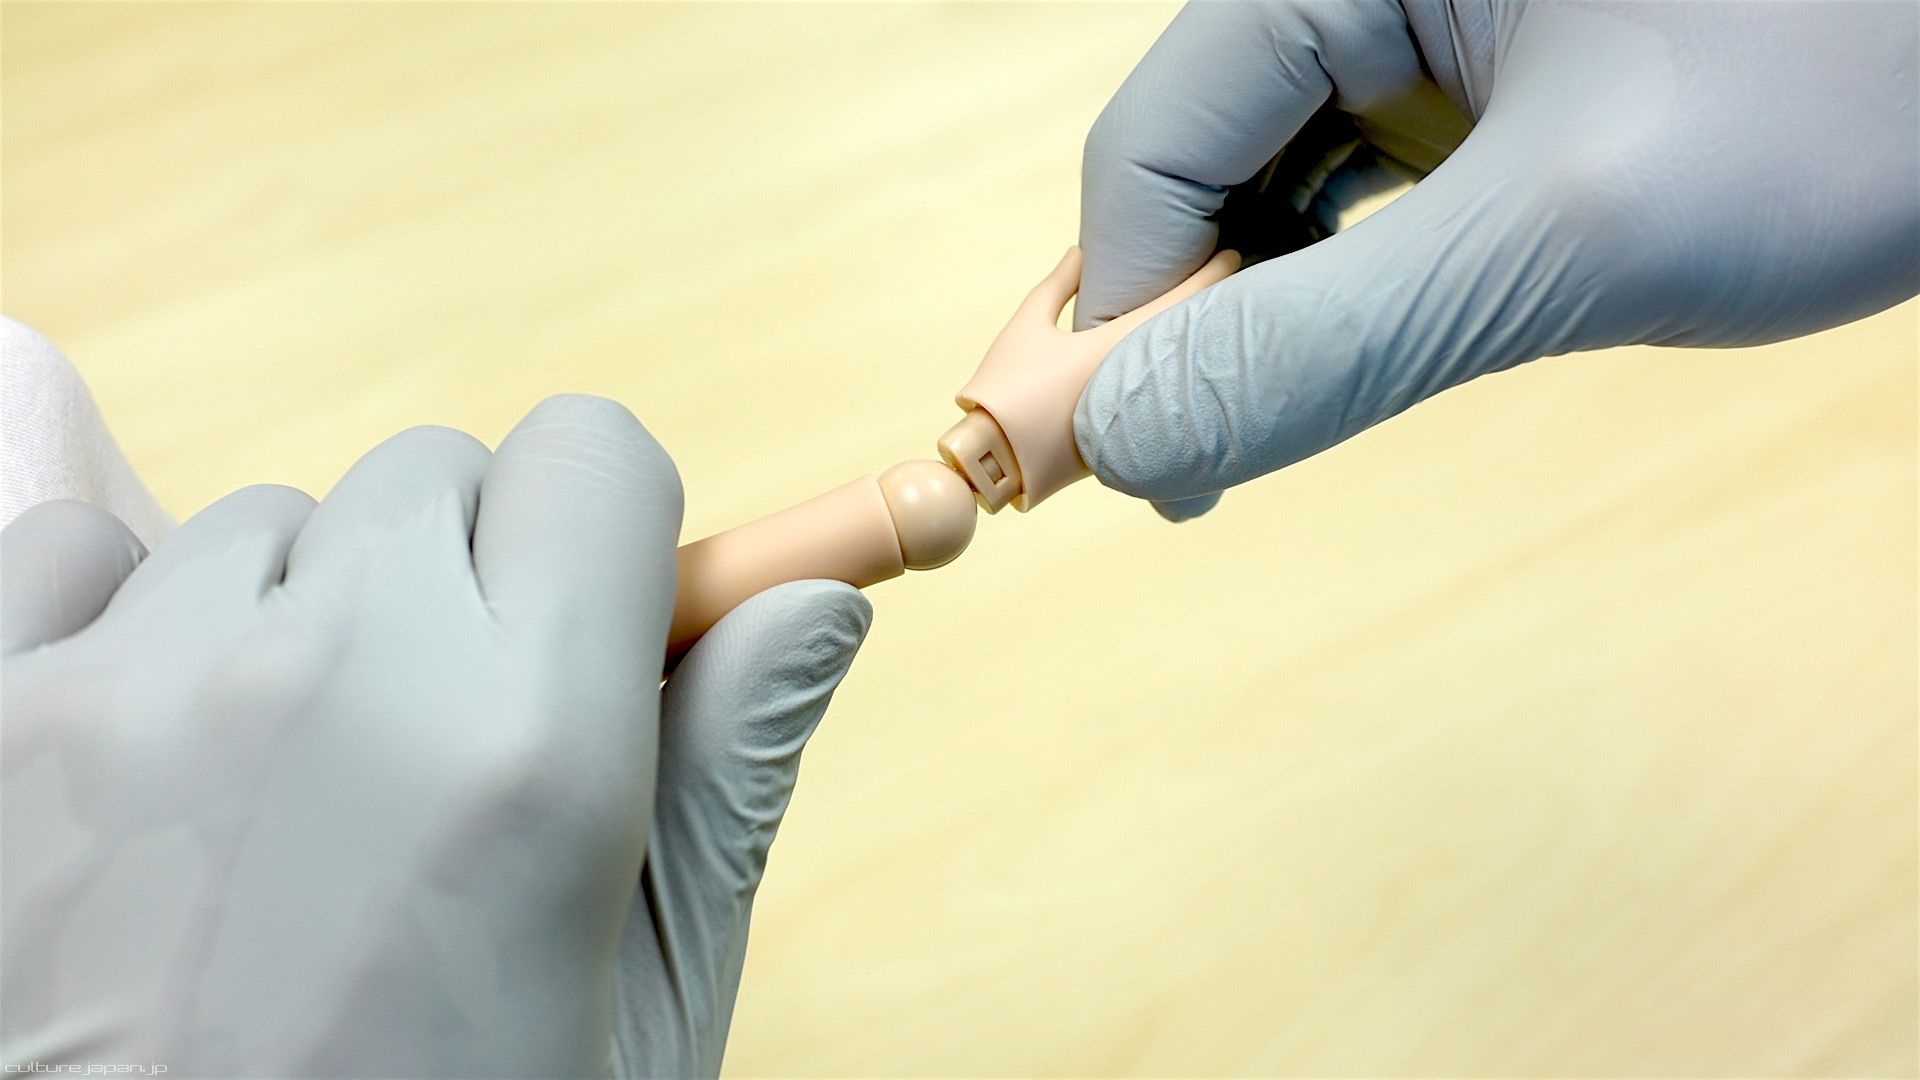
Wrists
When posing the wrists, you need to take note of the axis which you can see in this photo. Never try to force the wrist in an axis that does not exist or the wrist may break causing pain to Smart Doll.
Note that there should not be a gap between the forearm and ball joint - if there is then just hold the hand and ball joint then wriggle it back into place.
Note that there should not be a gap between the forearm and ball joint - if there is then just hold the hand and ball joint then wriggle it back into place.
Something is leaking!
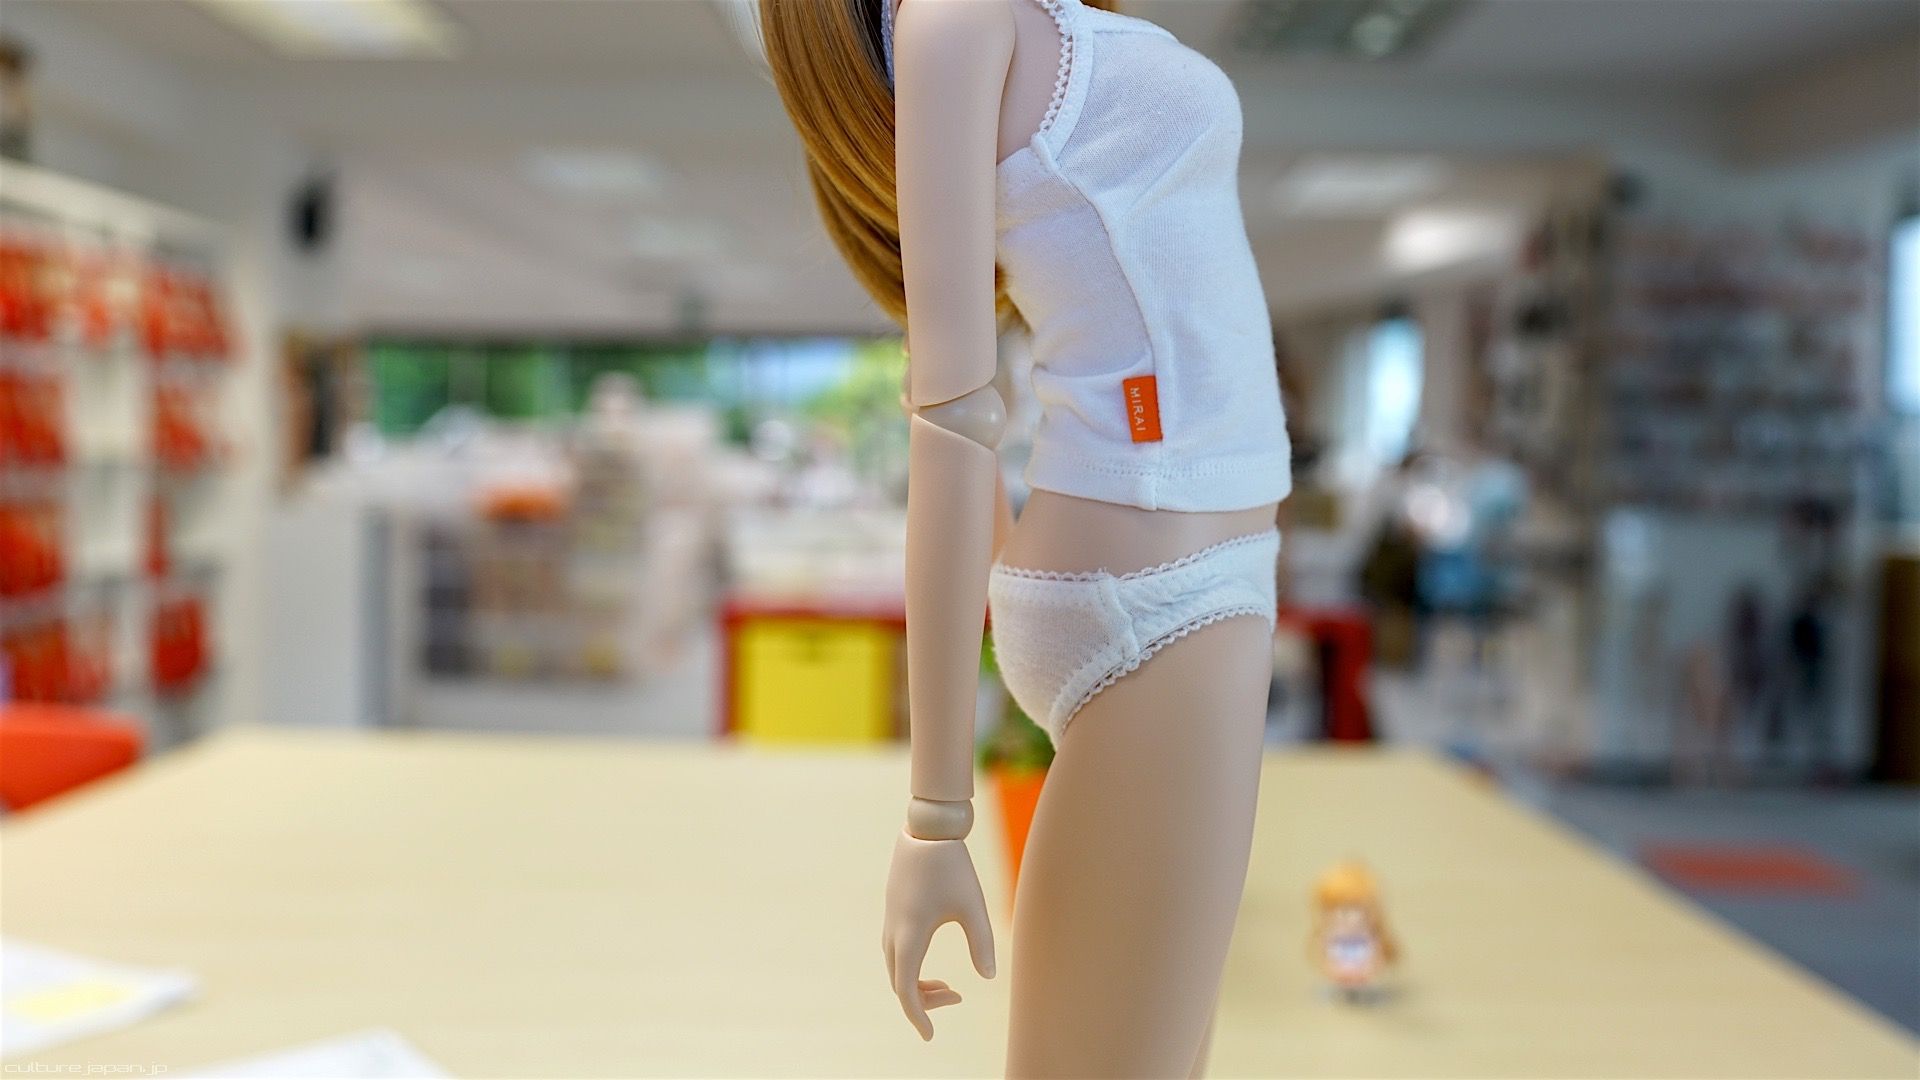
The frame inside Smart Doll is made of sturdy POM (Polyoxymethylene) which is essential to the durability of Smart Doll. We need to apply small amount of grease to the joints and some may seep out from the wrists or ankles when you first get them - all you need to do is to wipe it off with some tissue paper or your best friends T-shirt.
If a gap develops between the forearm and wrist joint when posing, you should do a reset by grasping the wrist joint and twisting it back in position.
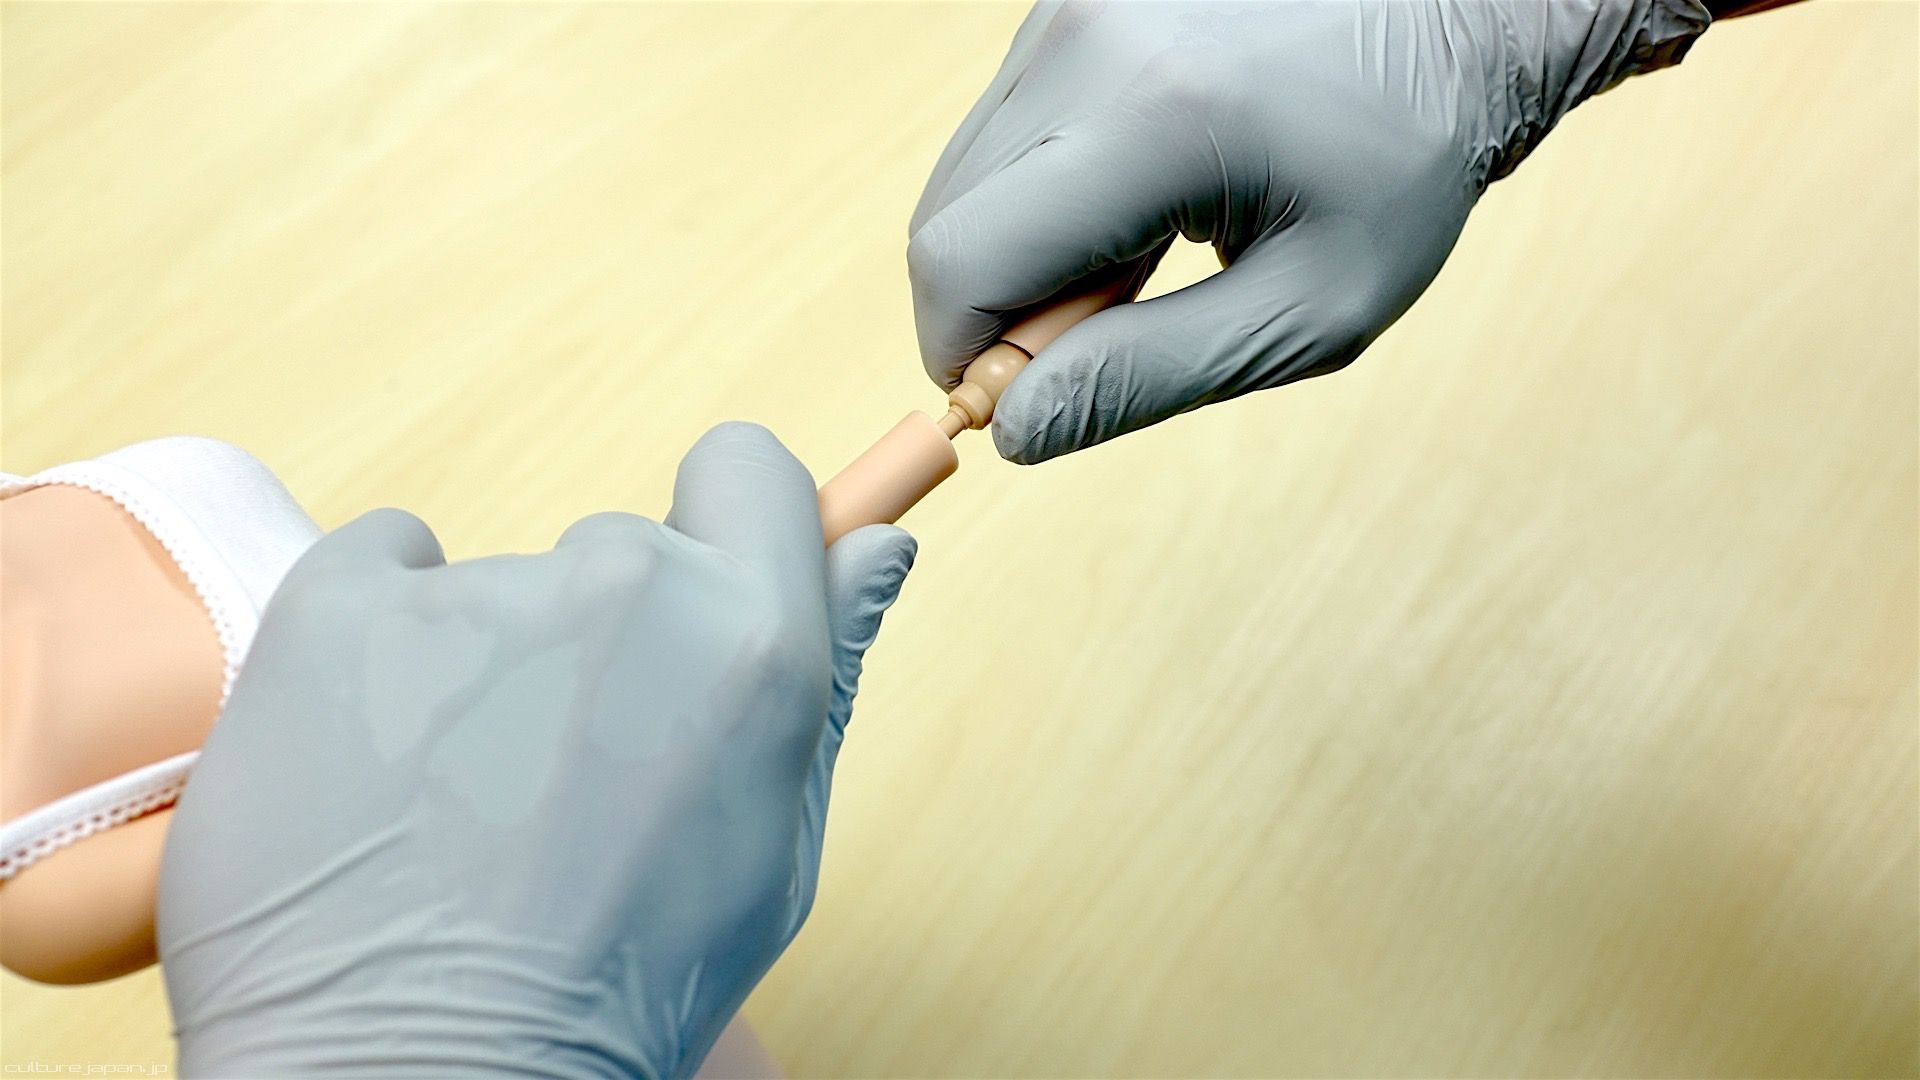
Hands
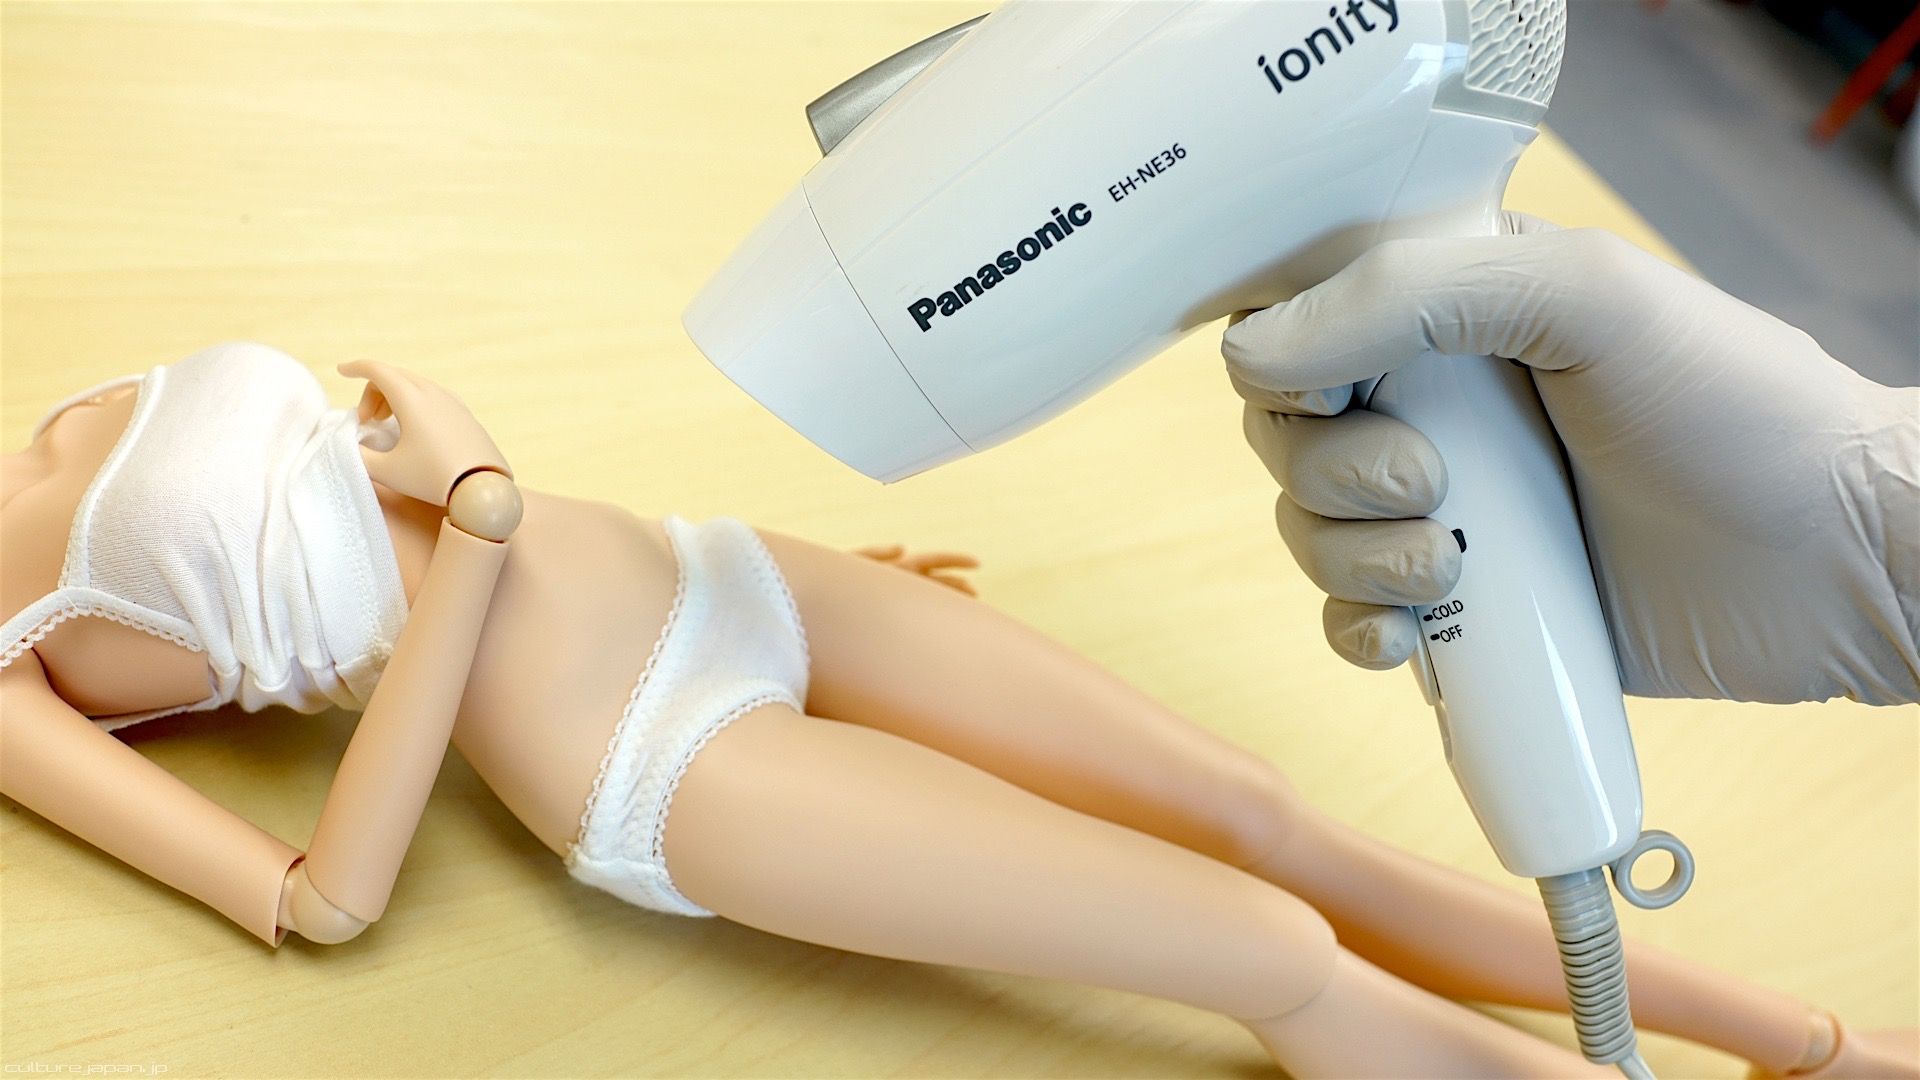
There are many hand parts available for Smart Doll. Refer to the photo when swapping them out. Back in 2014, the hands were made of a harder material but now they are much softer enabling you to swap them without the aid of that portable hairdryer - unless you live in Antartica which may make the parts very hard.
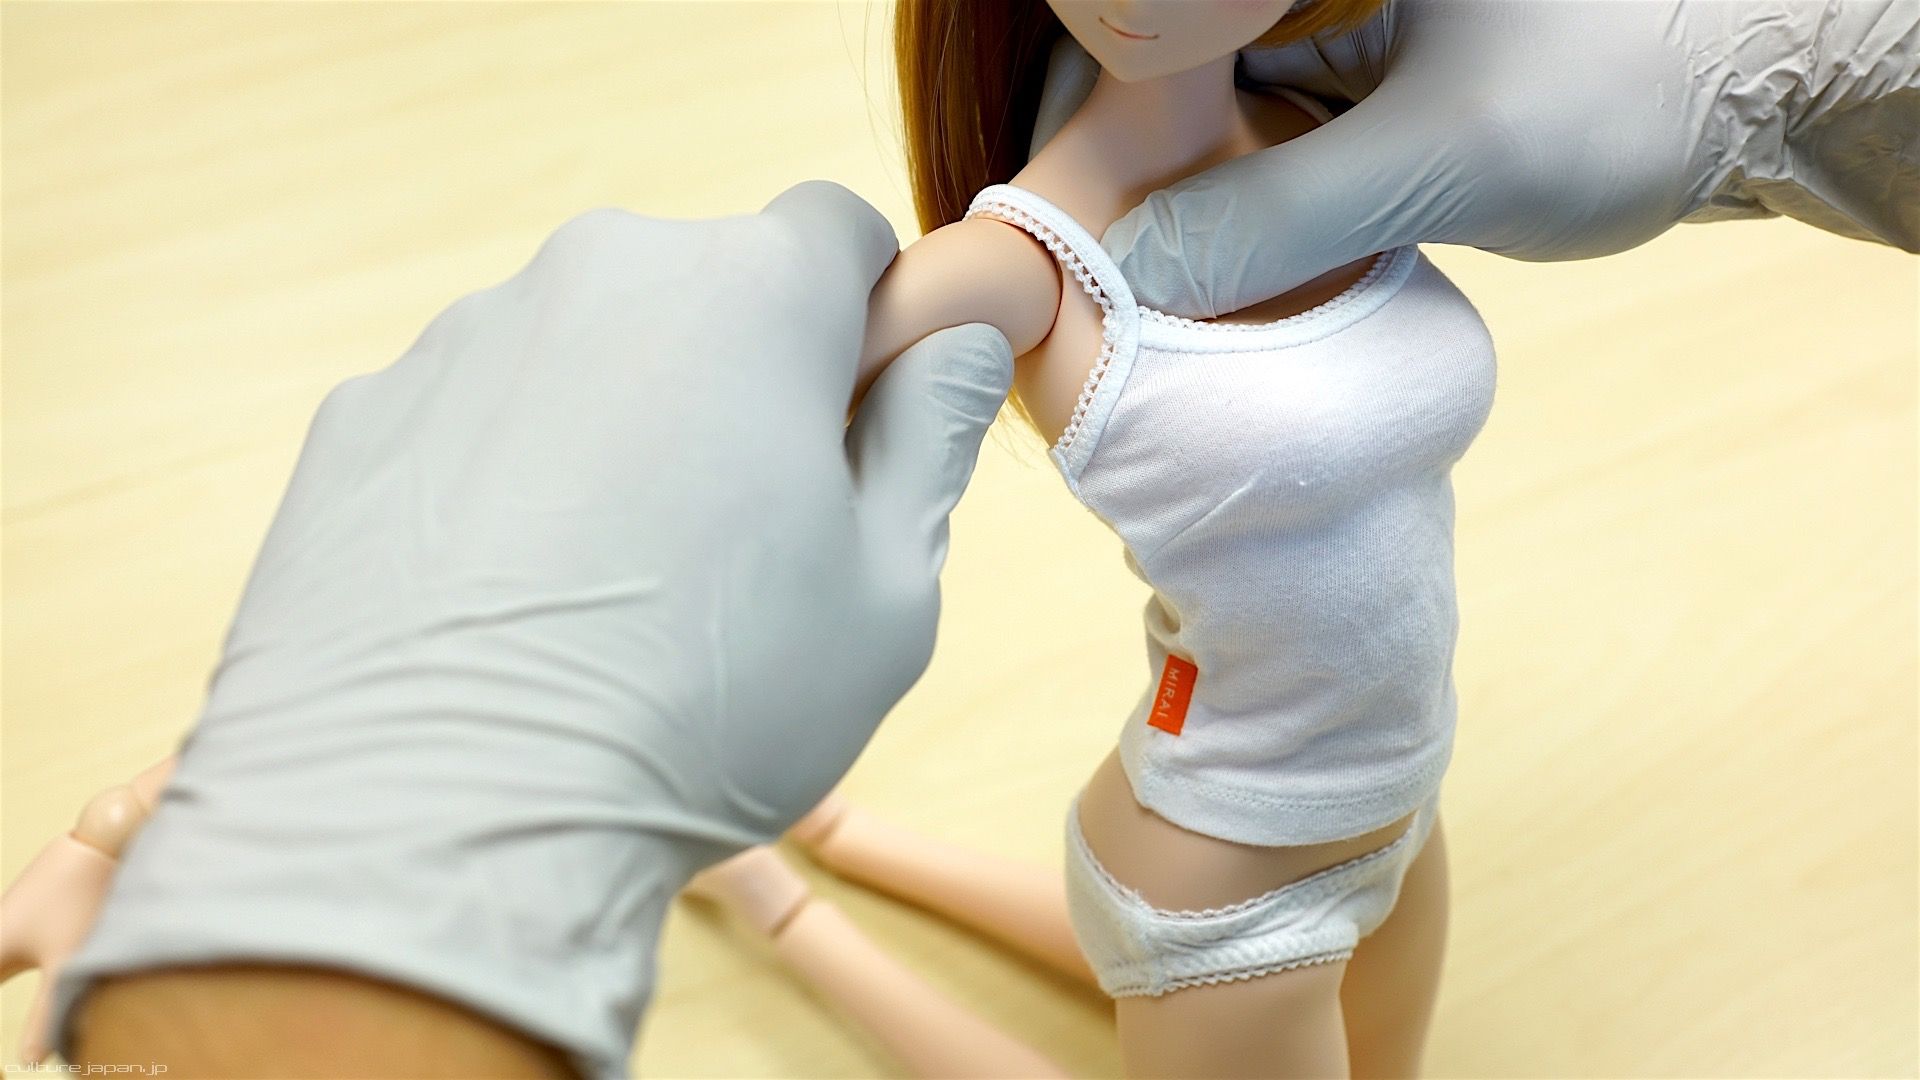
Removing Arms
You may need to remove the arms when dressing up Smart Doll and will have to remove them if you want to change their bust size. While this may cause moderate pain for a human, Smart Doll is designed to feel no pain during this process.
Hold the shoulder with one hand and pull of the arm with your other hand like so.
Hold the shoulder with one hand and pull of the arm with your other hand like so.
To replace the arm, just reverse the process but make sure that the arm clicks into place at the shoulder.
With our Smart Doll guys, you need to grip the shoulder with force so that you also grip the frame inside - if you don't do this properly then you won't be able to push the arm back into the socket properly.
If you know how to use the other type of force then you won't need to touch any of the parts at all.
If you know how to use the other type of force then you won't need to touch any of the parts at all.
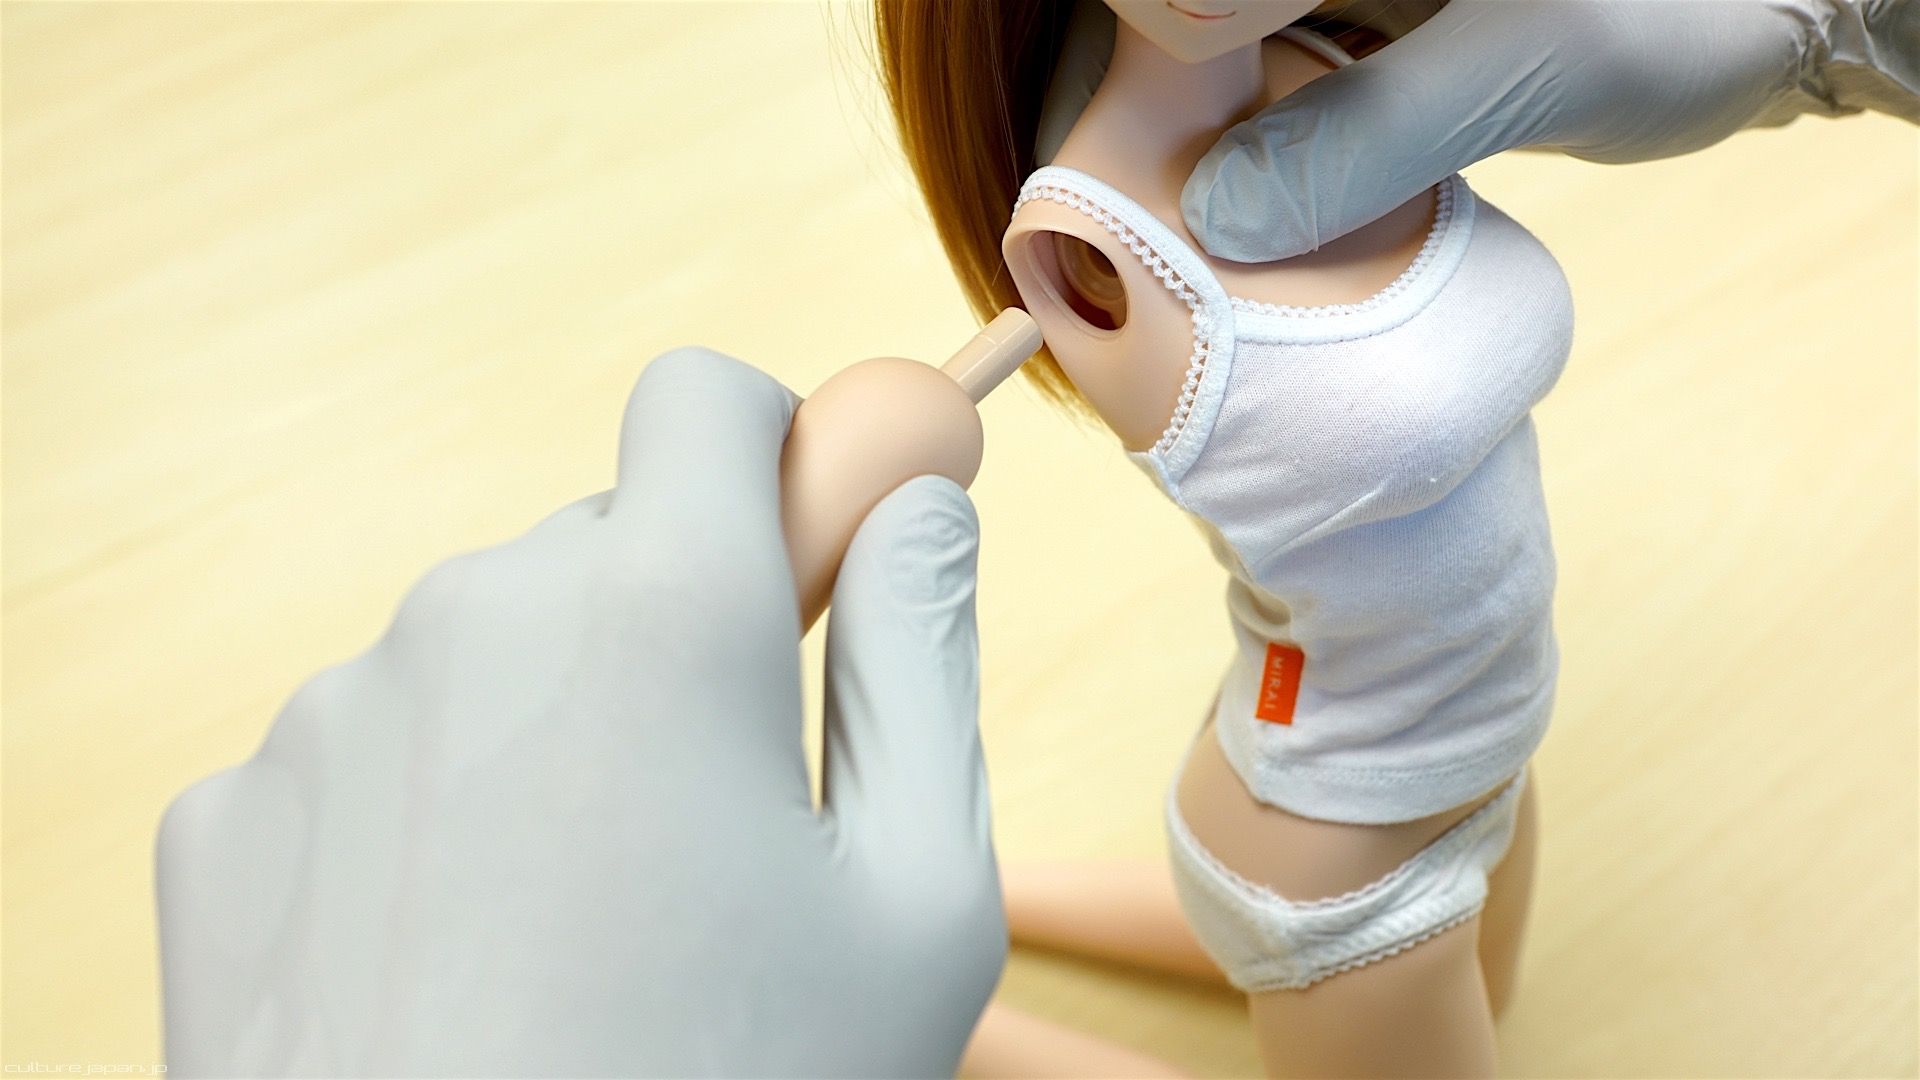
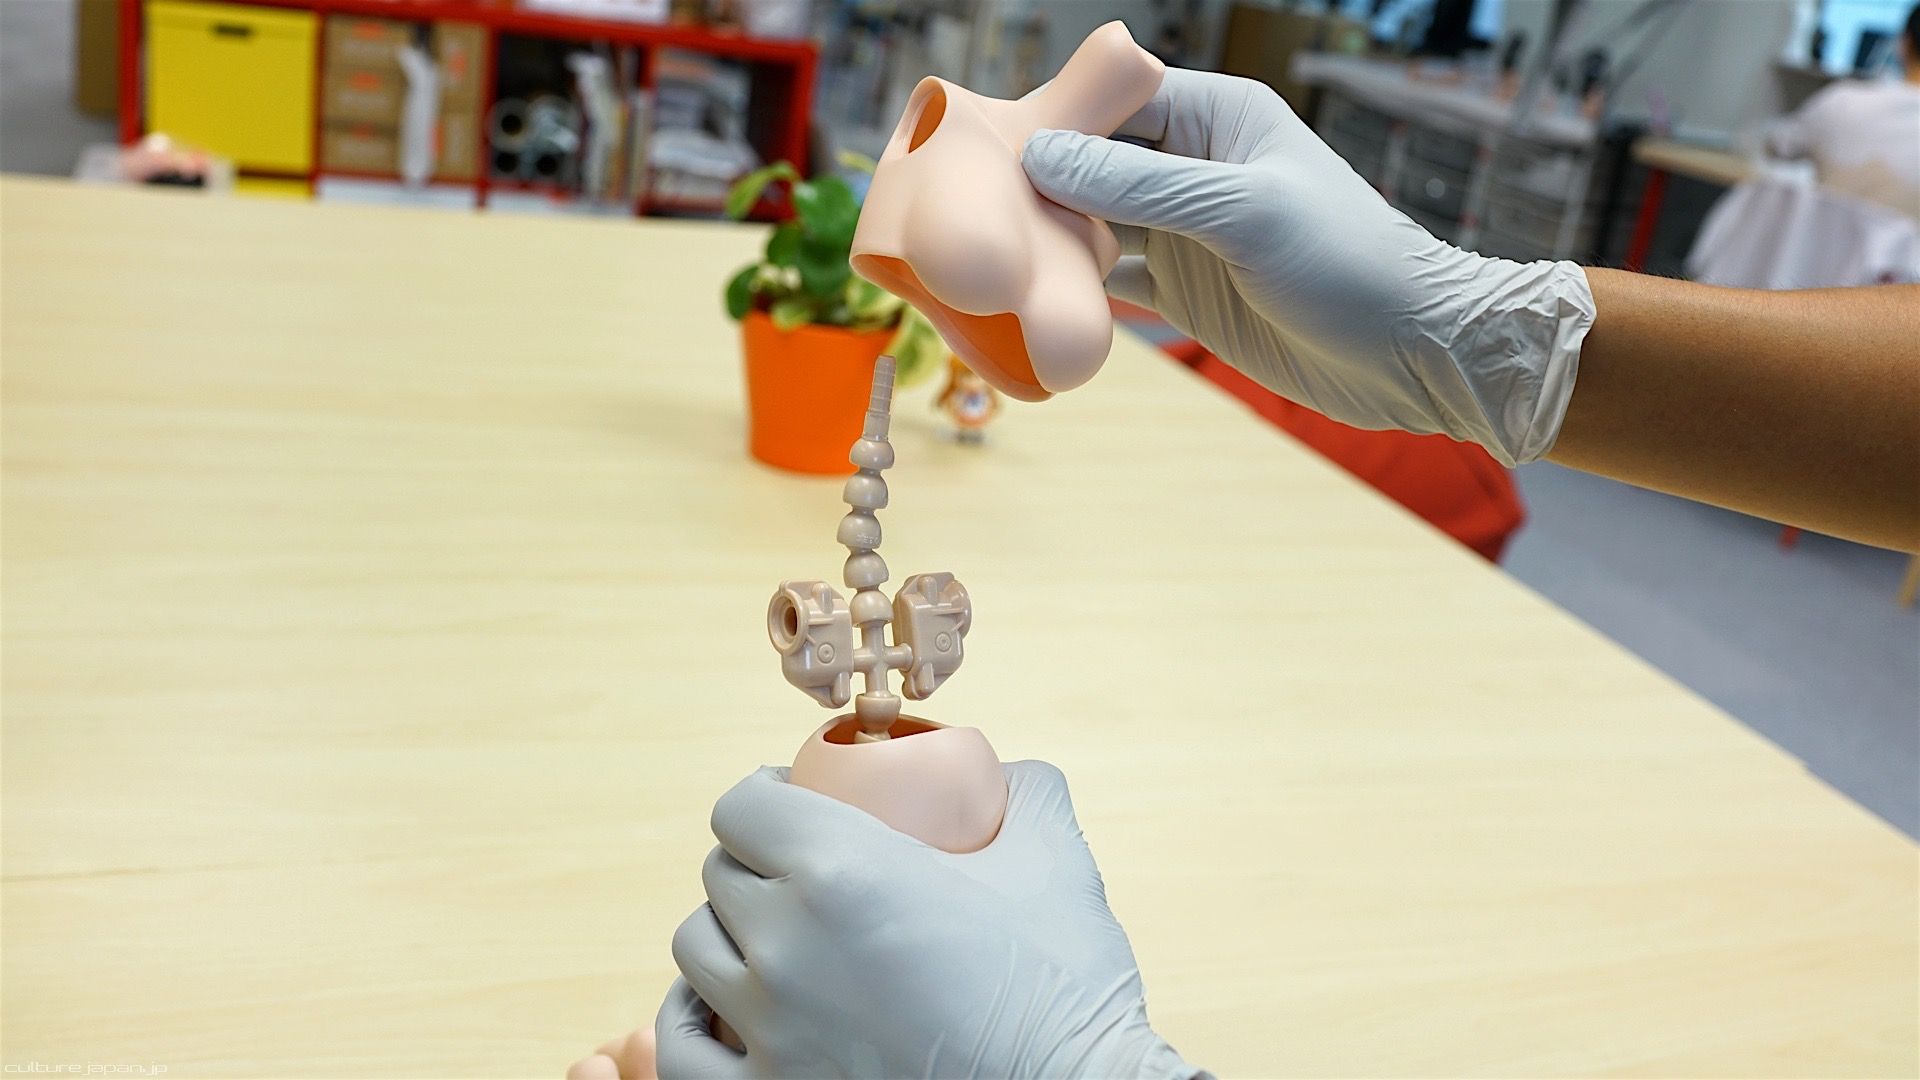
Removing the head
Some apparel items require the head to be removed and you certainly have to remove it when changing bust sizes.
Grab the whole head with one hand and hold the neck firmly before pulling upwards on the head. When replacing the head, make sure there is no gap left between the head and neck. Also make sure not to push too much on the head when putting it back on or the chest will look encaved - which is not a bad thing - its just not part of the Smart Doll design.
Grab the whole head with one hand and hold the neck firmly before pulling upwards on the head. When replacing the head, make sure there is no gap left between the head and neck. Also make sure not to push too much on the head when putting it back on or the chest will look encaved - which is not a bad thing - its just not part of the Smart Doll design.
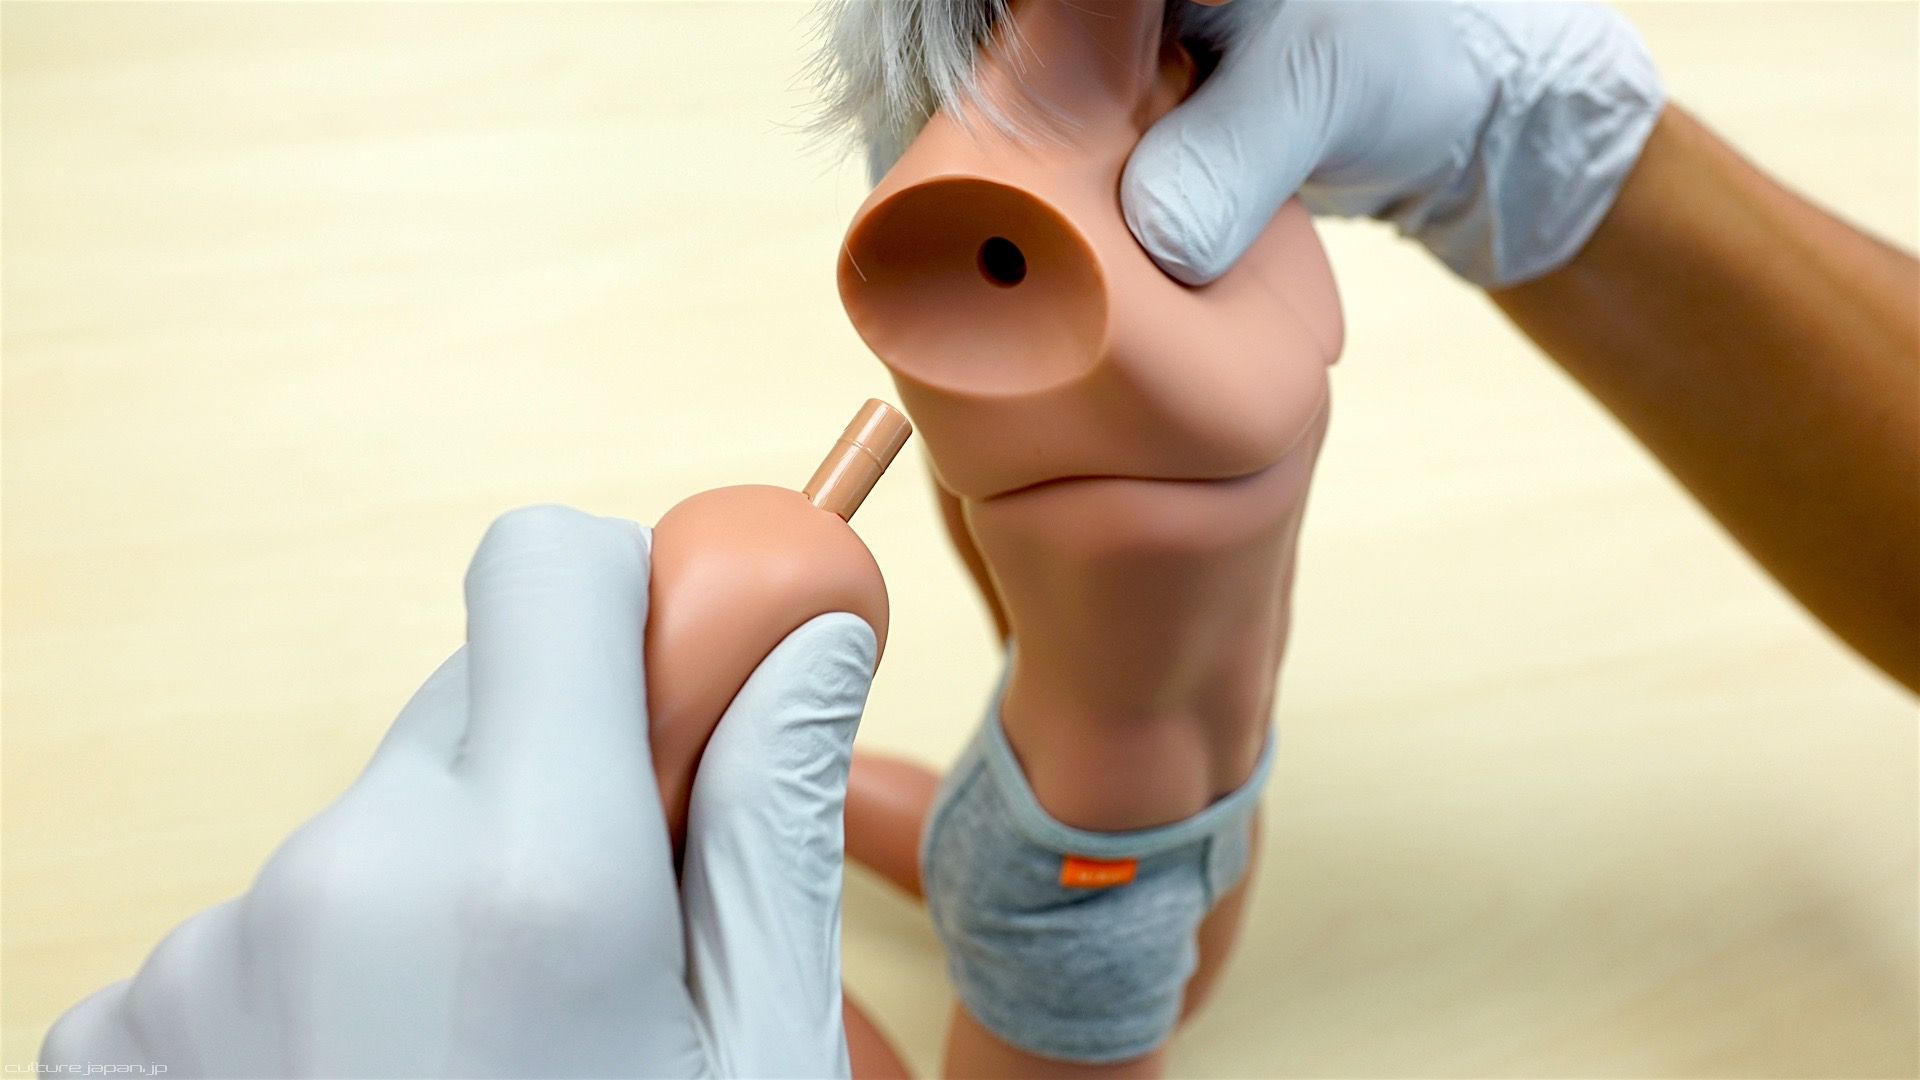
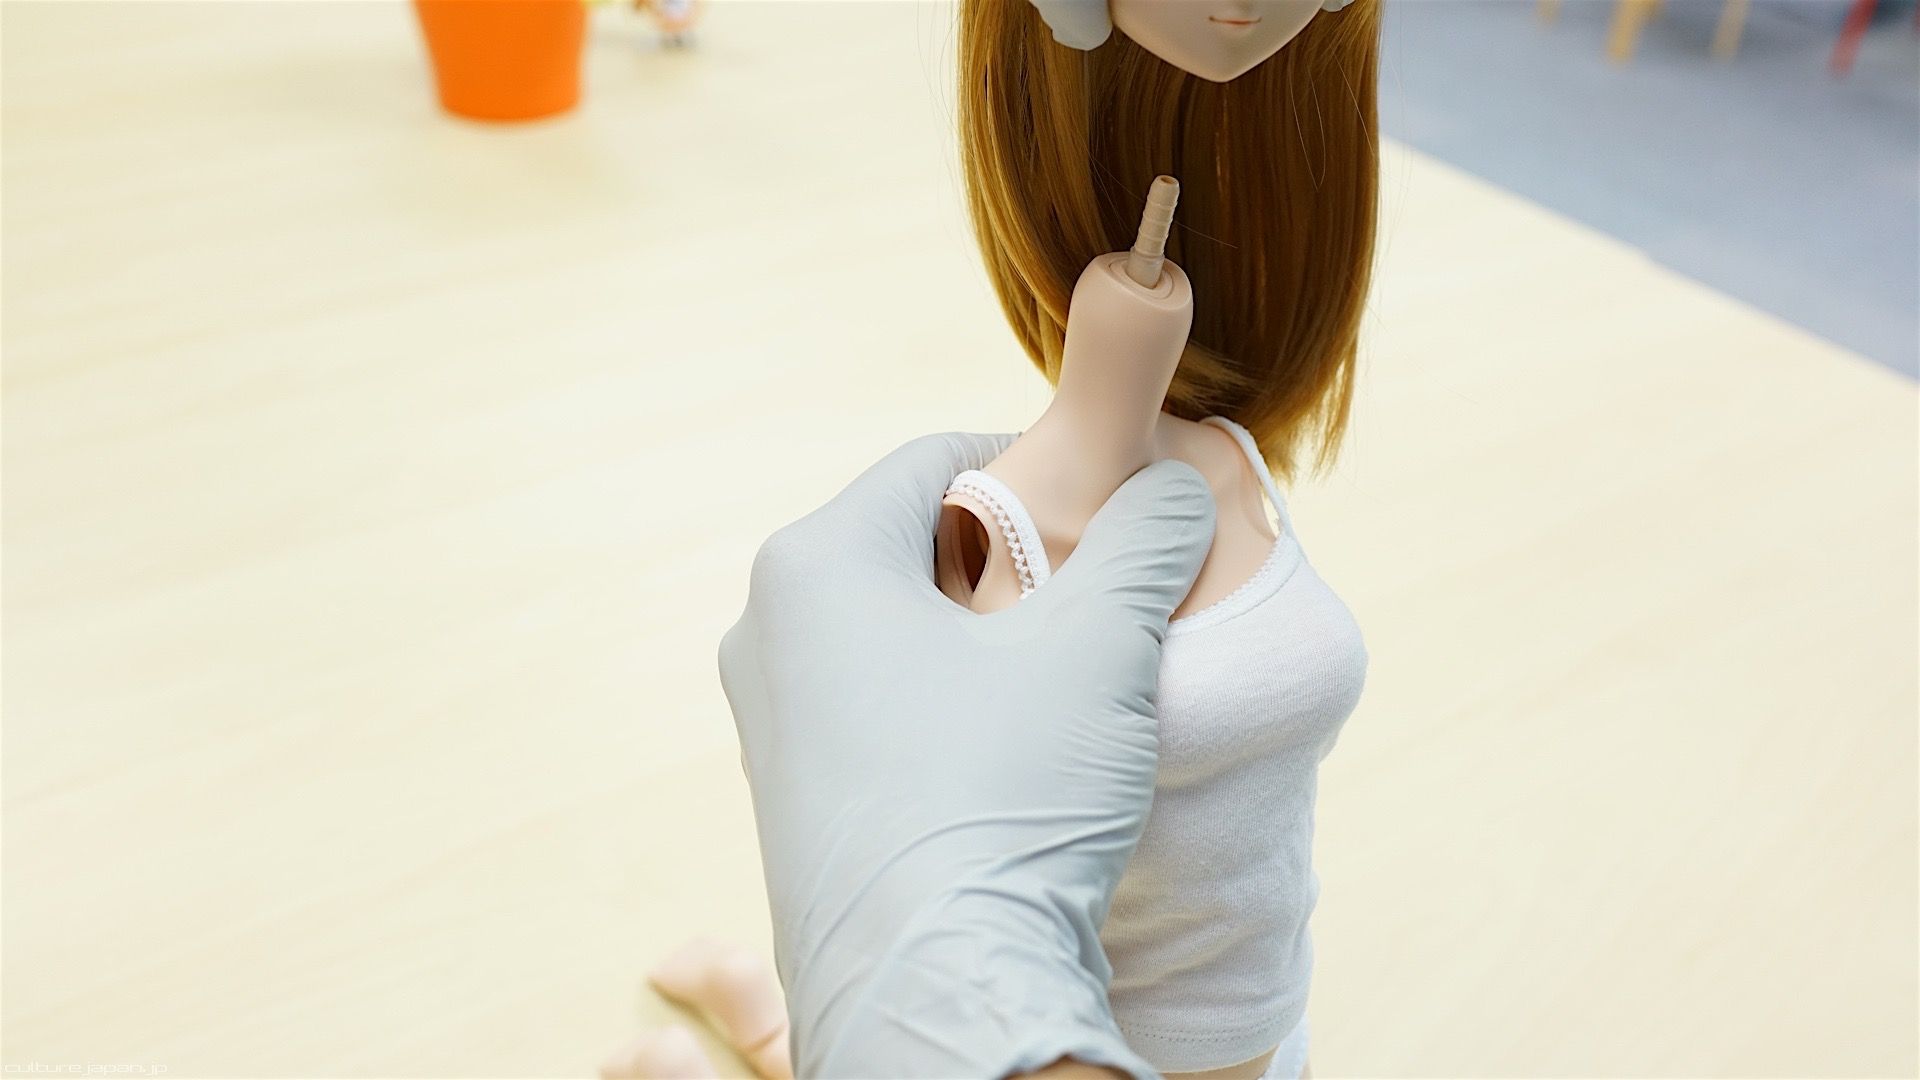
Replacing Busts
Once the head and arms are removed, all you need to do is remove the bust and replace it.
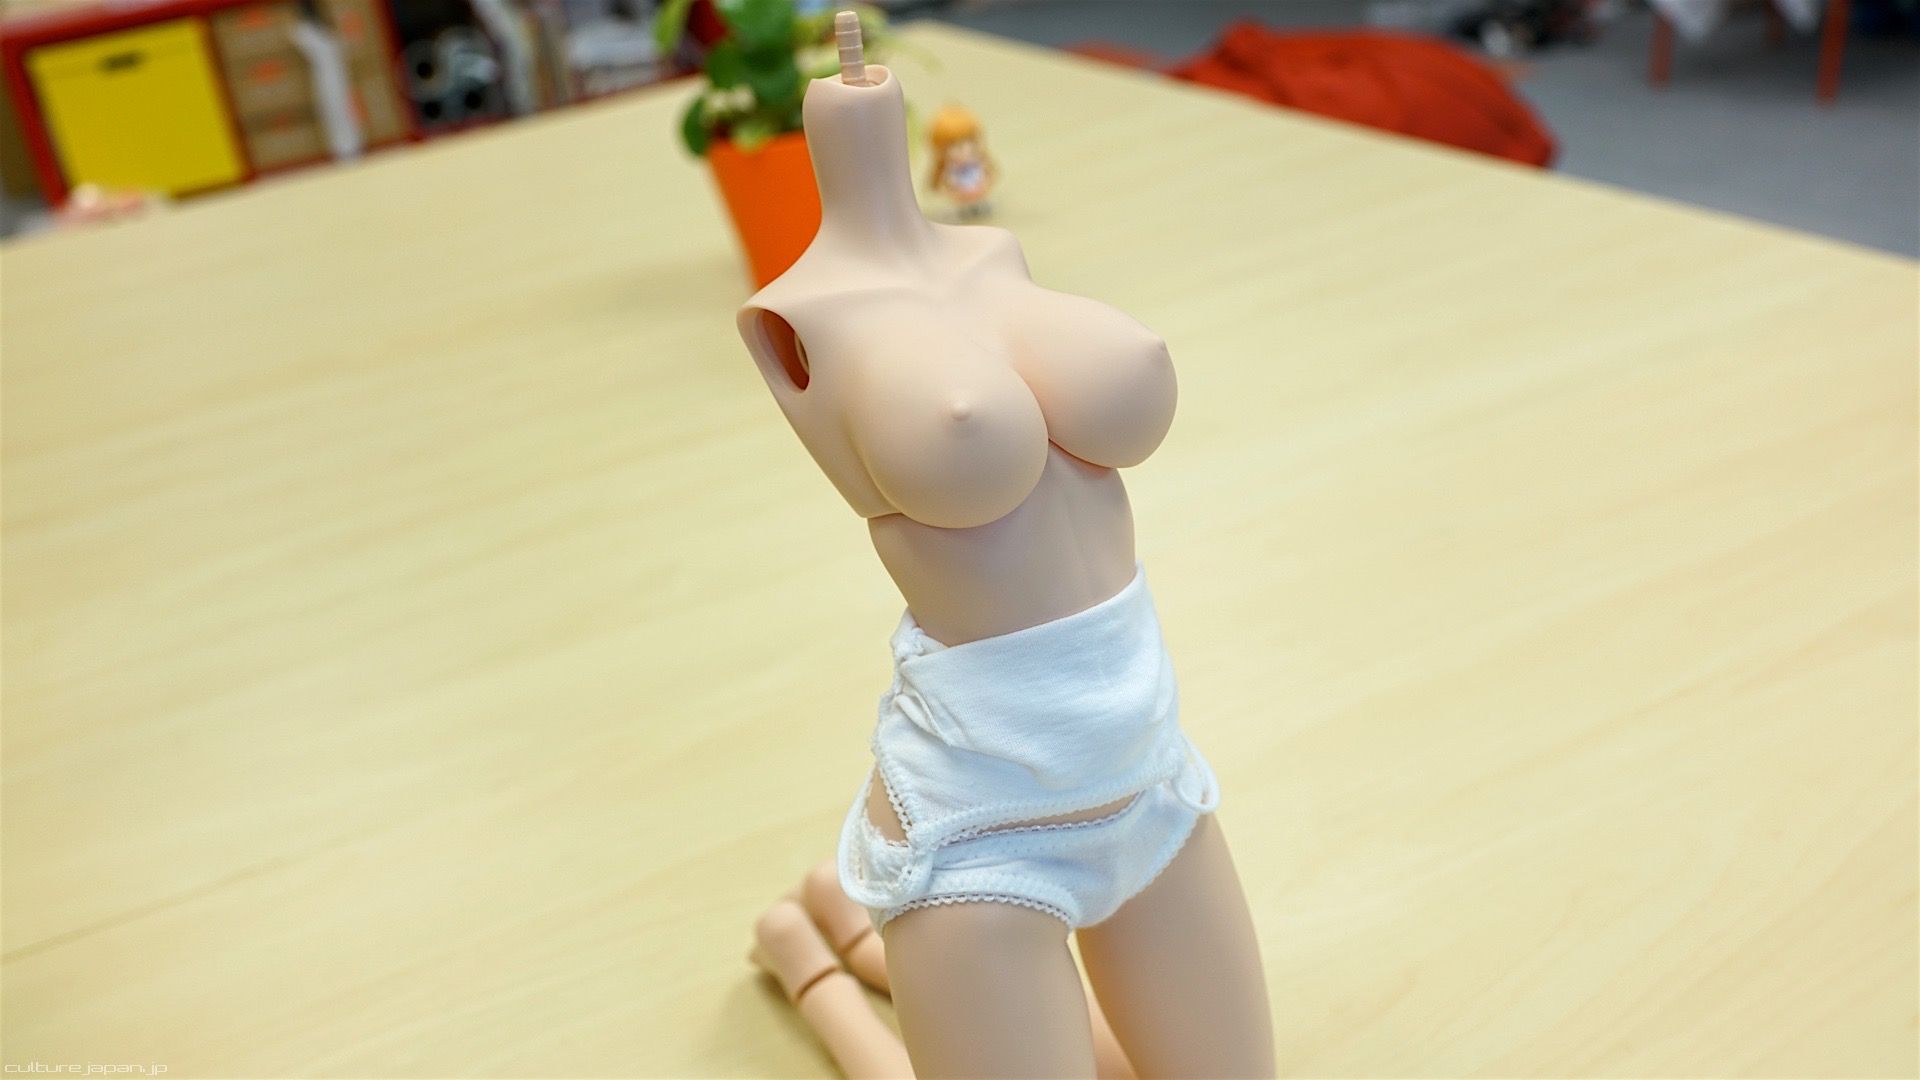
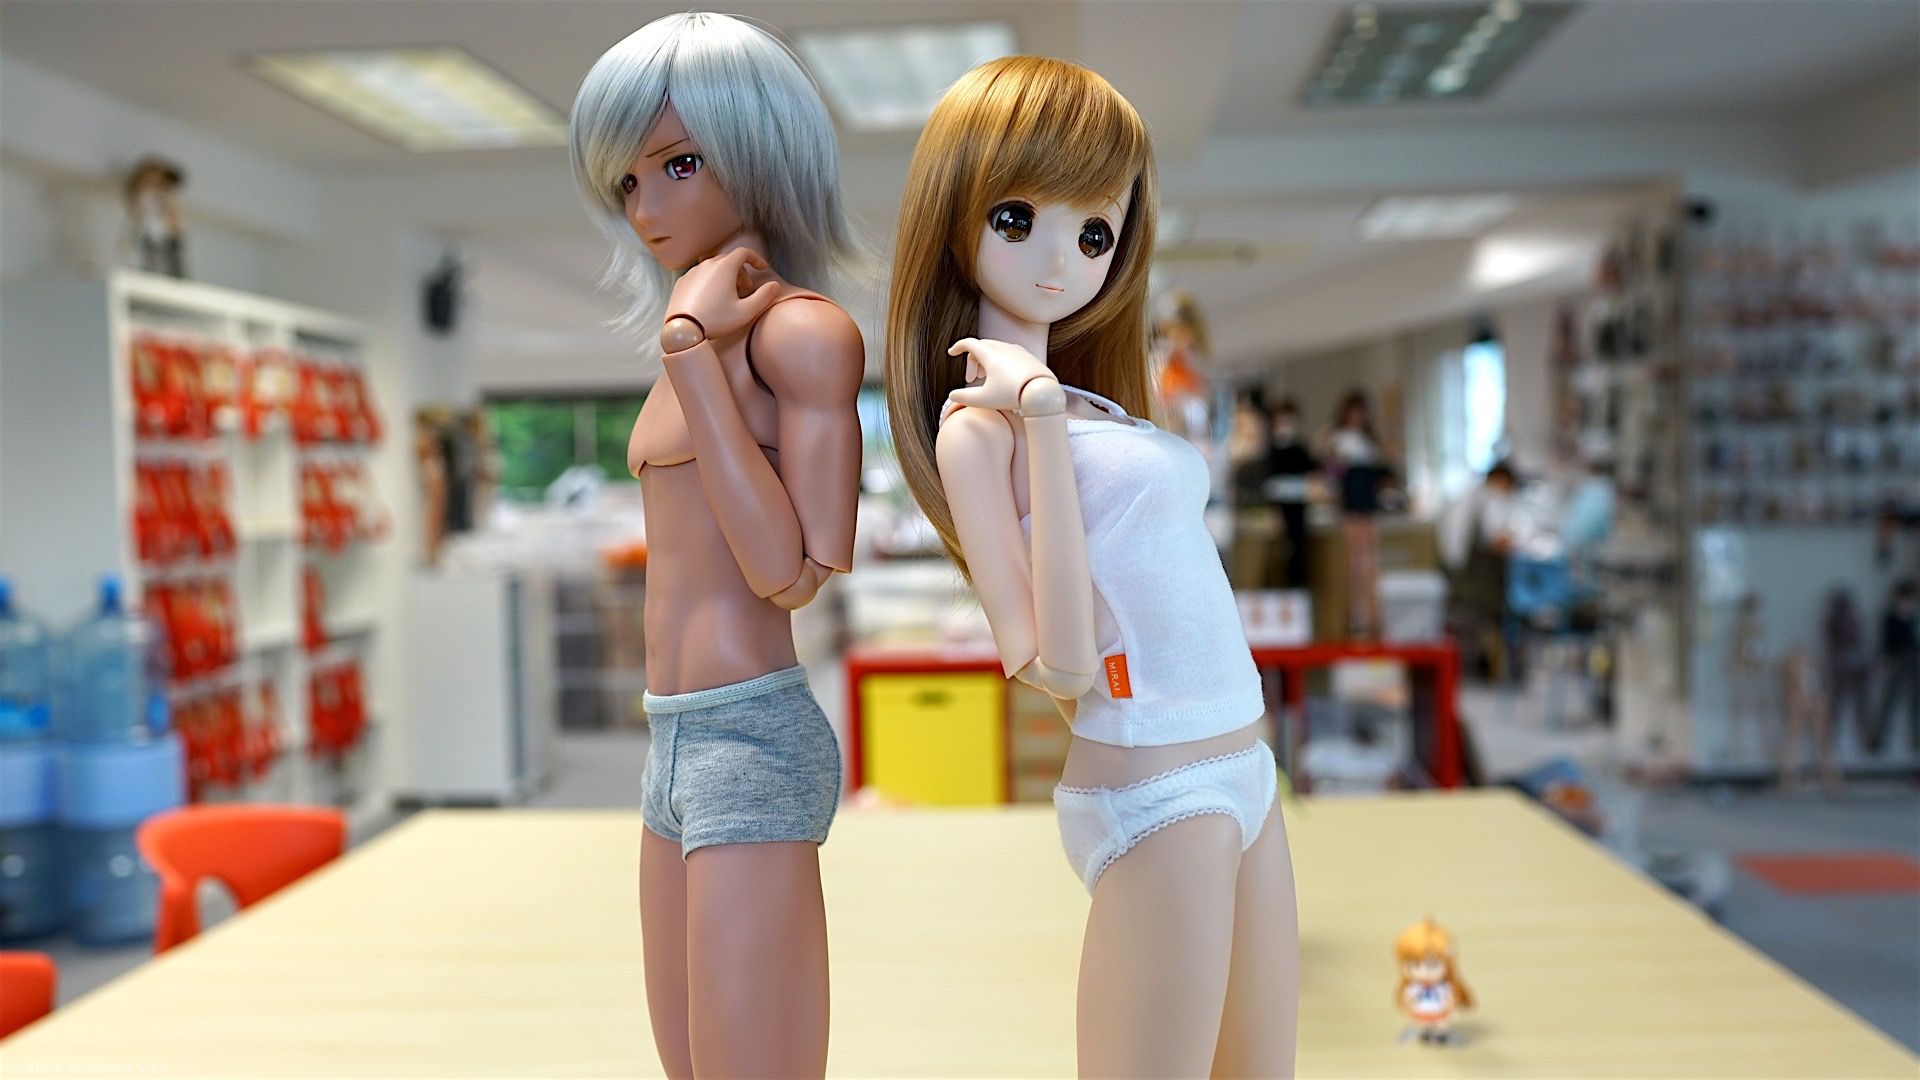
Bigger boobies are better for...
Some apparel is designed to look good with the L bust size - for example the Maid Uniform and various bikini. However I personally don't recommend that you wear a tight T-shirt over them and take Smart Doll outside because they get shy due to their headlights showing - but this is completely up to you.
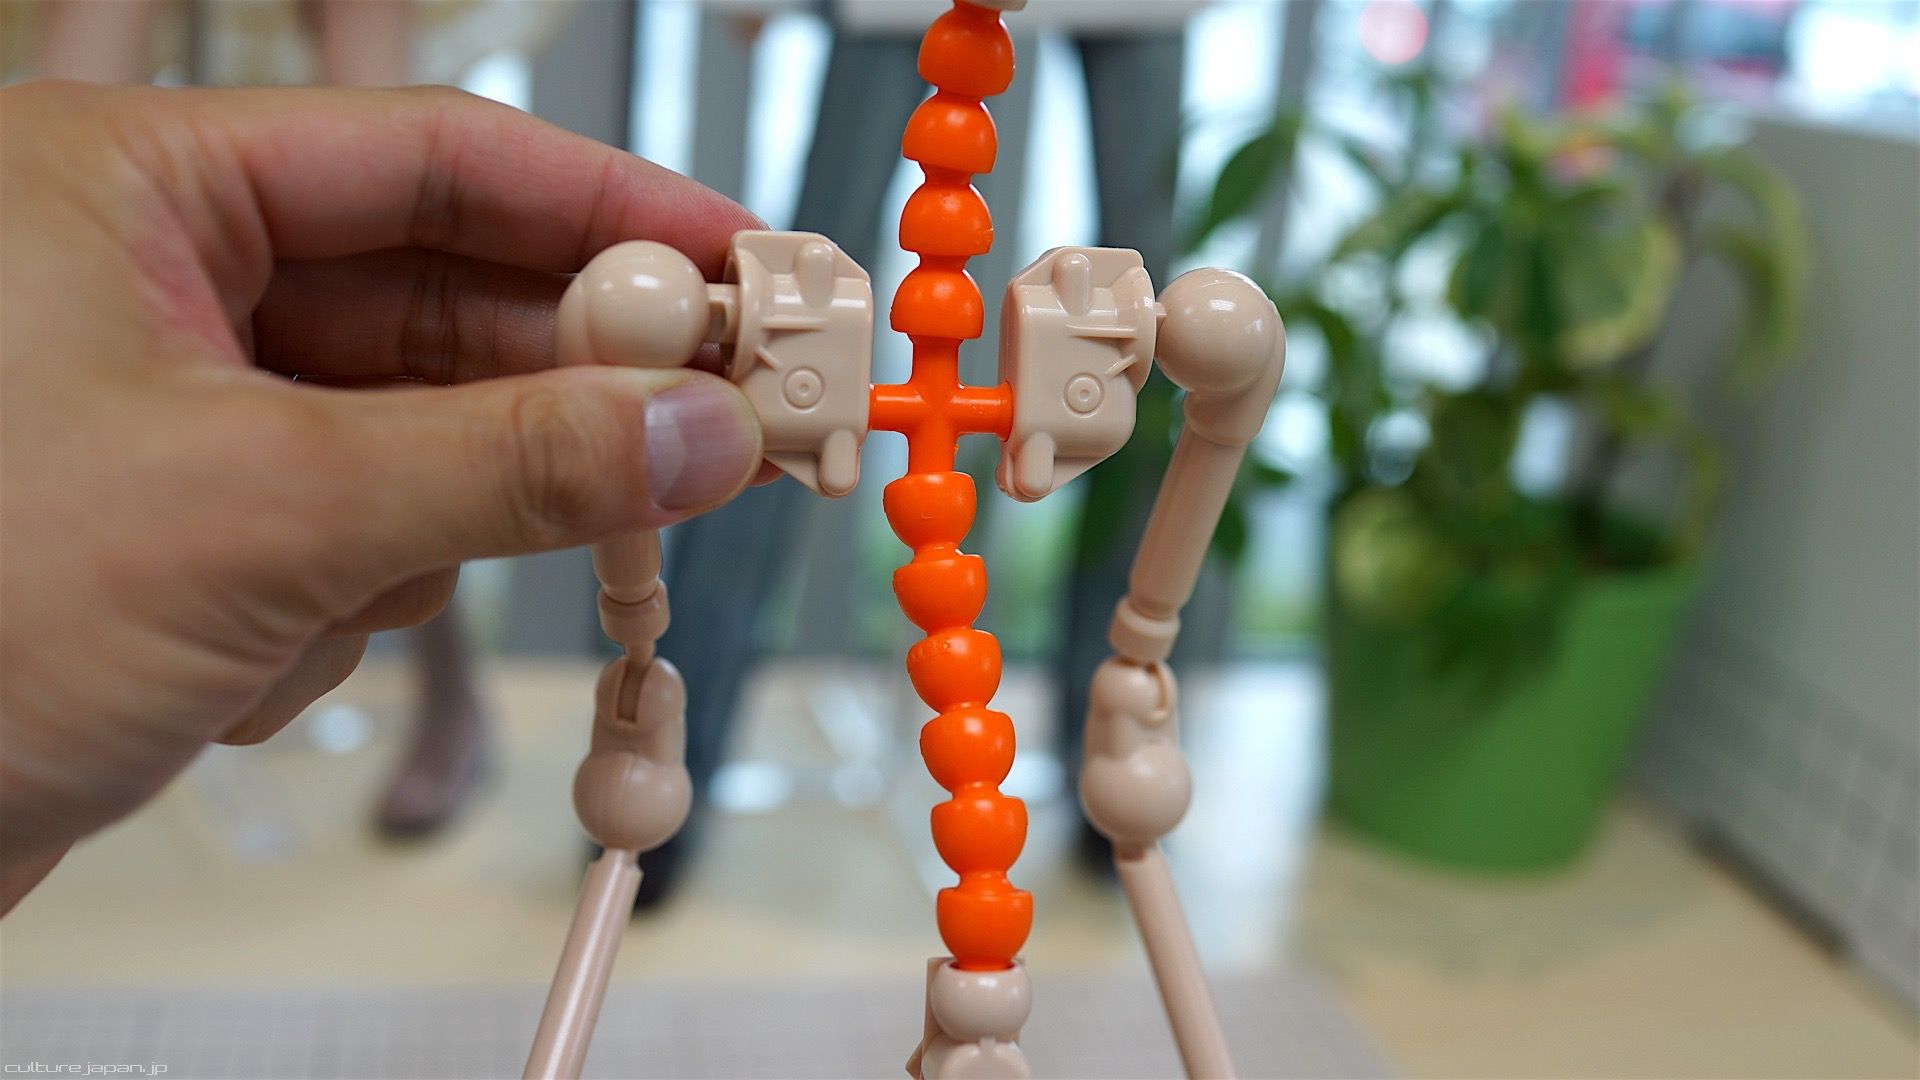
Spinning Head Of Doom
You heard of the Spinning Wheel Of Doom - well in Smart Doll Land we may sometimes get the Spinning Head Of Doom.
If your Smart Doll head spins around then its because one of the shoulder blades is not upright as it should be in the photo.
If the shoulder blades are upright and the Smart Dolls head still spins around on its own then you got other problems - its probably because you treated them bad (like left them in the car on a hot summers day) in which case you should seek a exorcist instead.
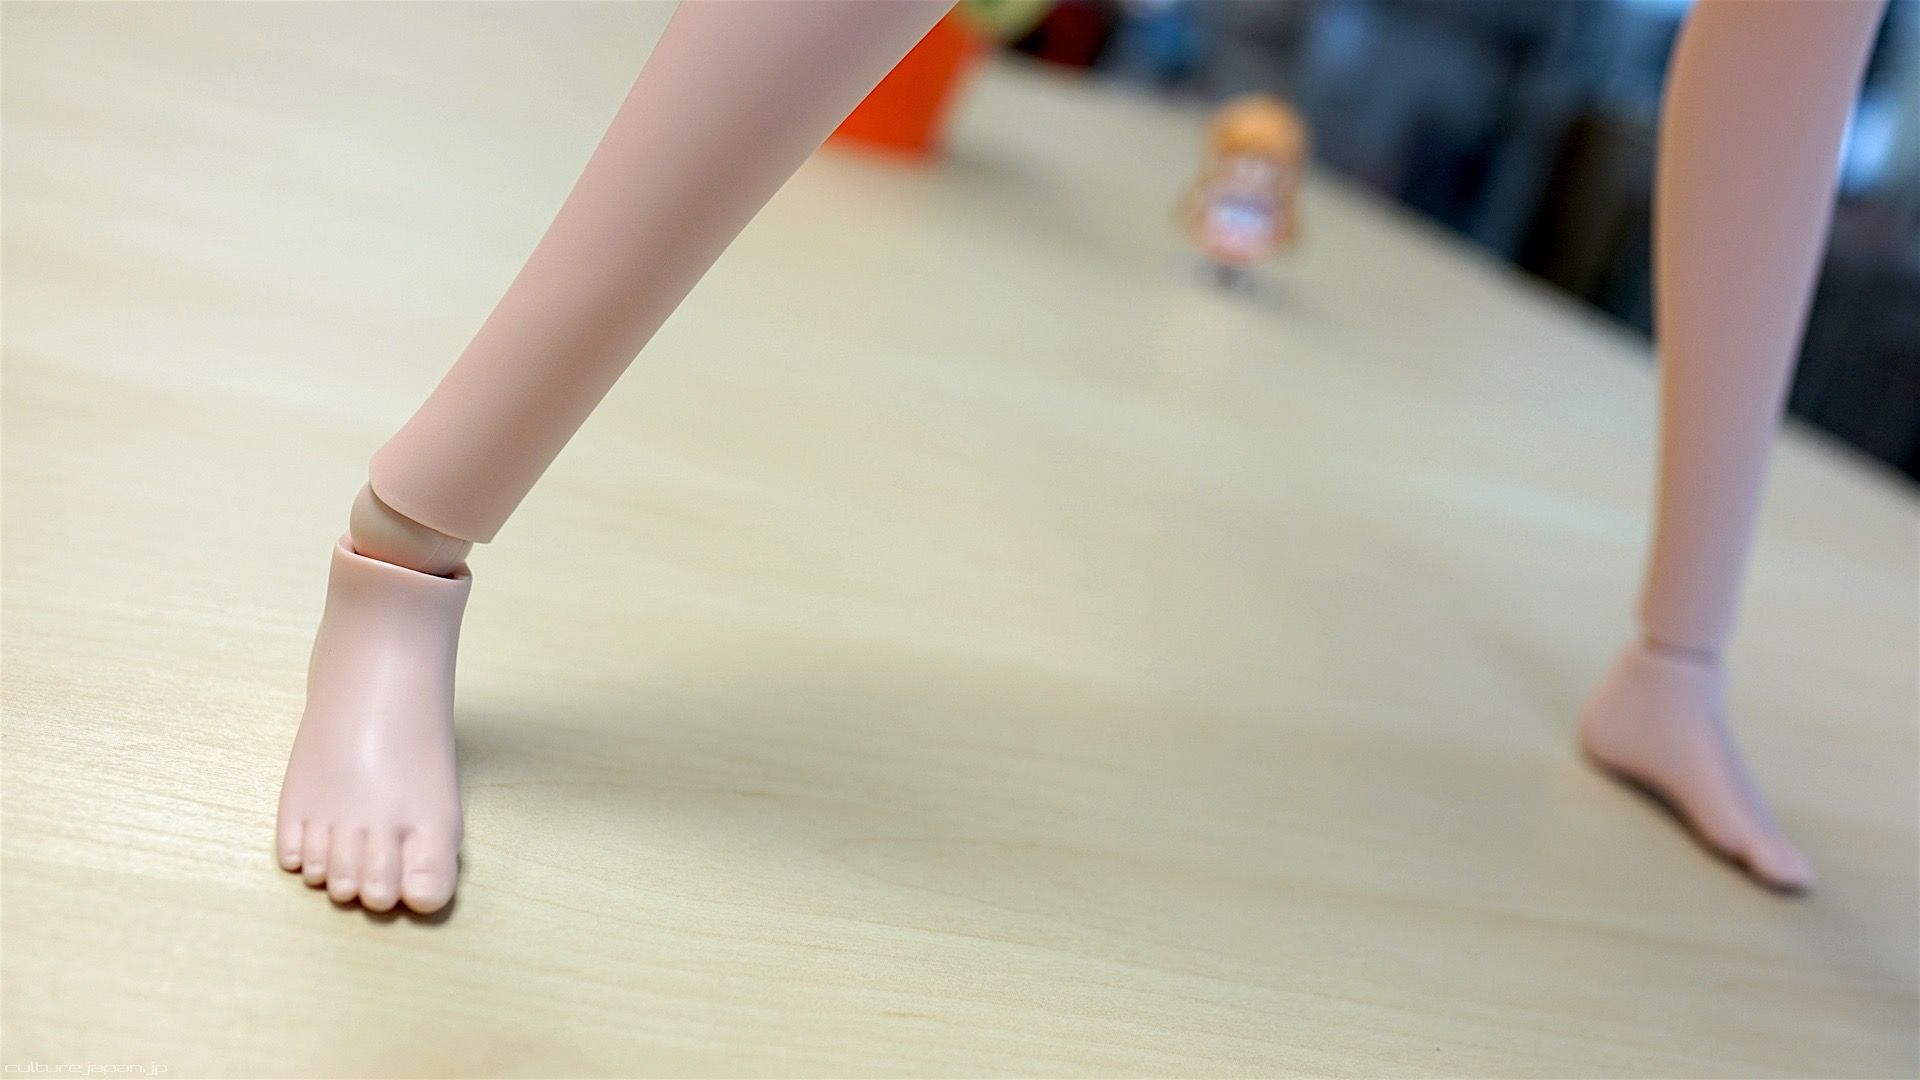
3 Axis Feet
When the legs are spread apart, you can twist the ankle so that the feet stand flat on the surface.
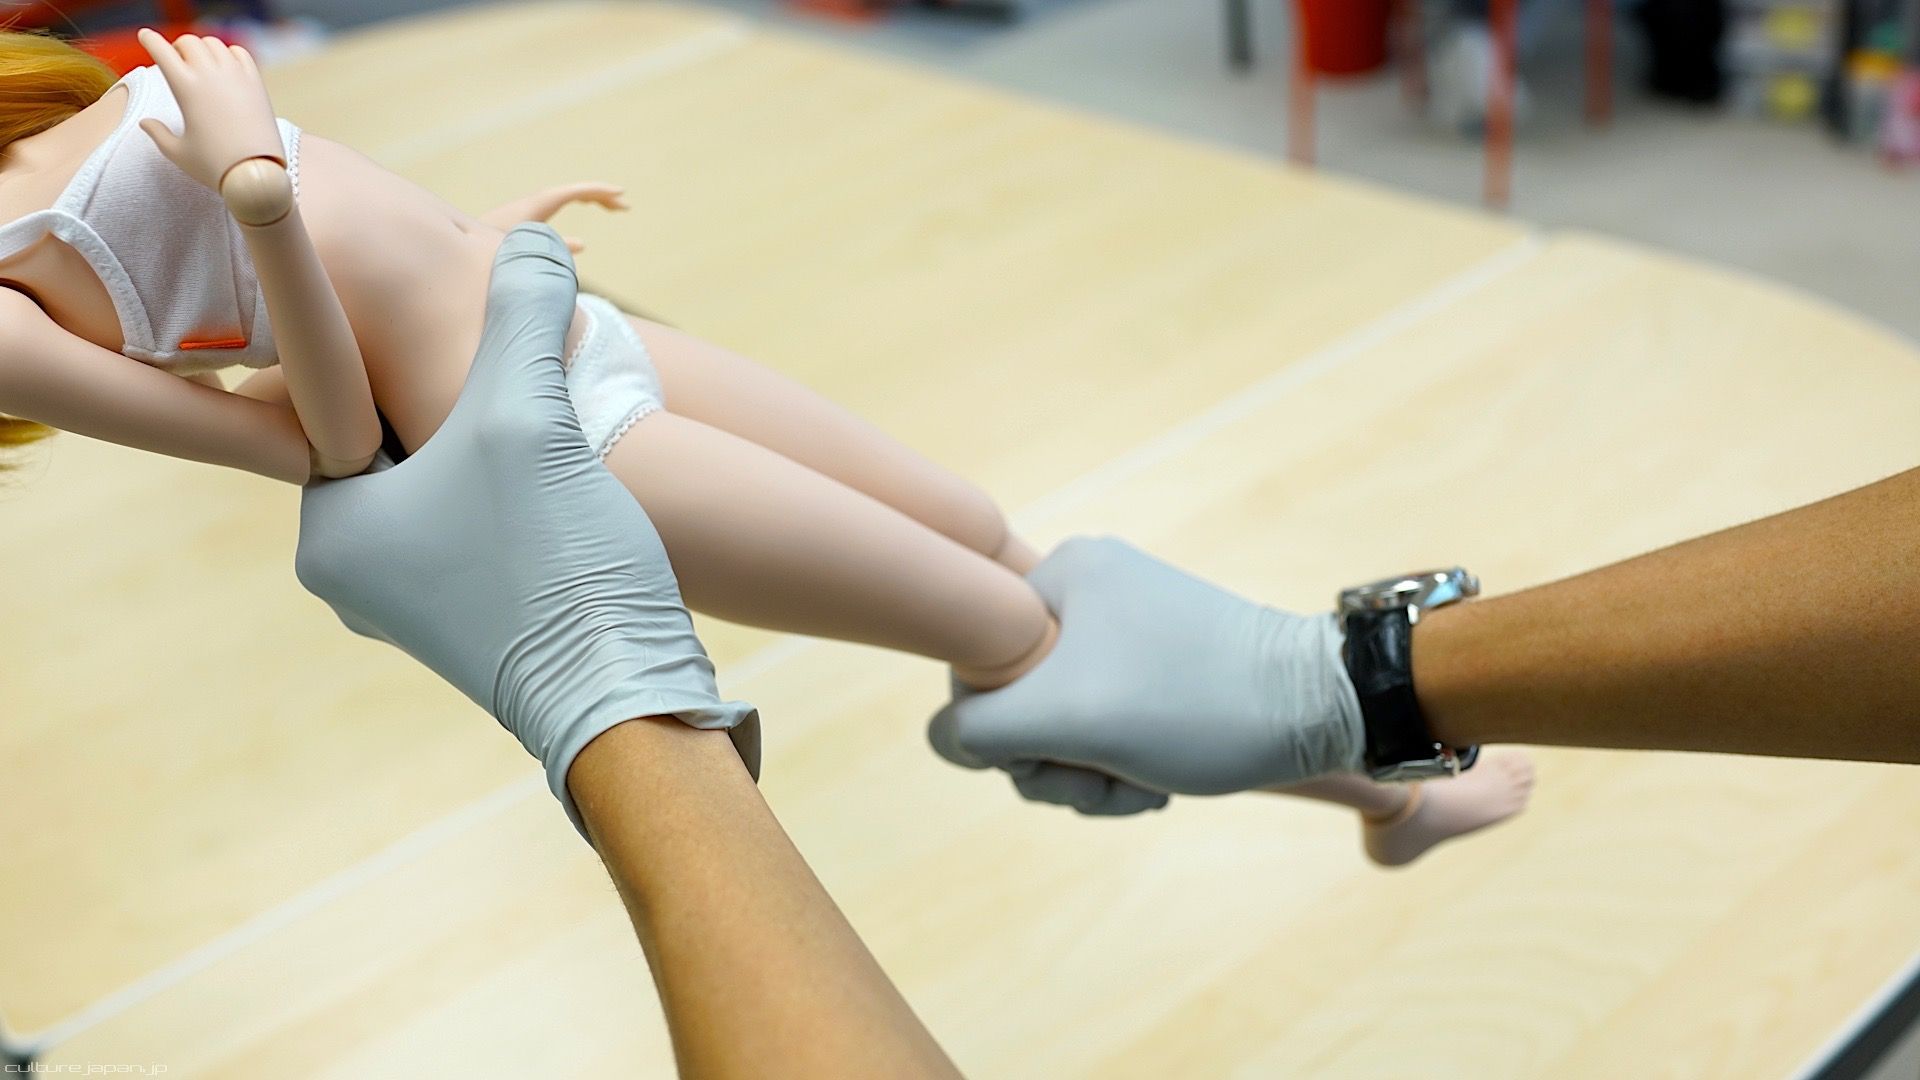
About Knees
When you are bending the knees do so by grabbing the top of the shin - don't bend the knees by grabbing the ankle because you will put too much force from the dark side on the knee joint.
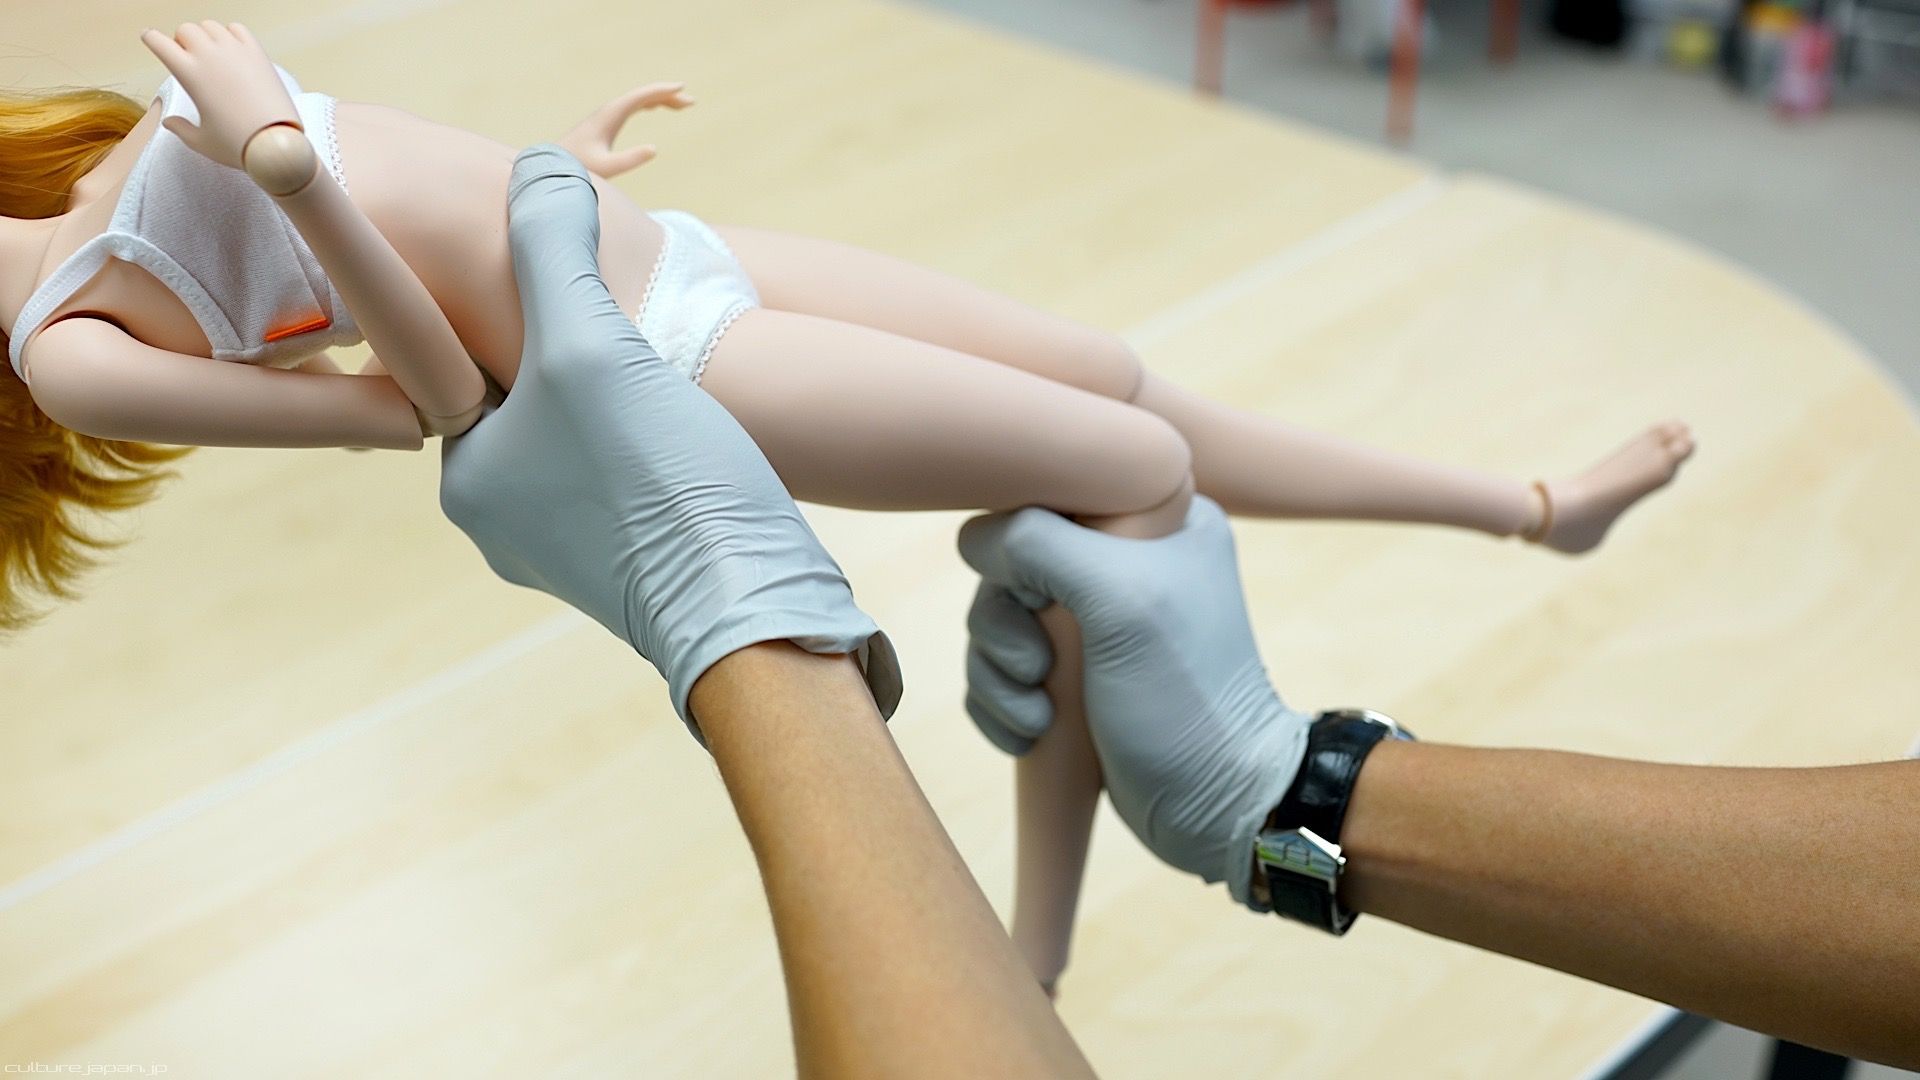
This is how knees should be bent - they were not designed to be bent further than this because knees that do bend further look absolutely terrible. Remember the knees only bend back and forth - not sideways.
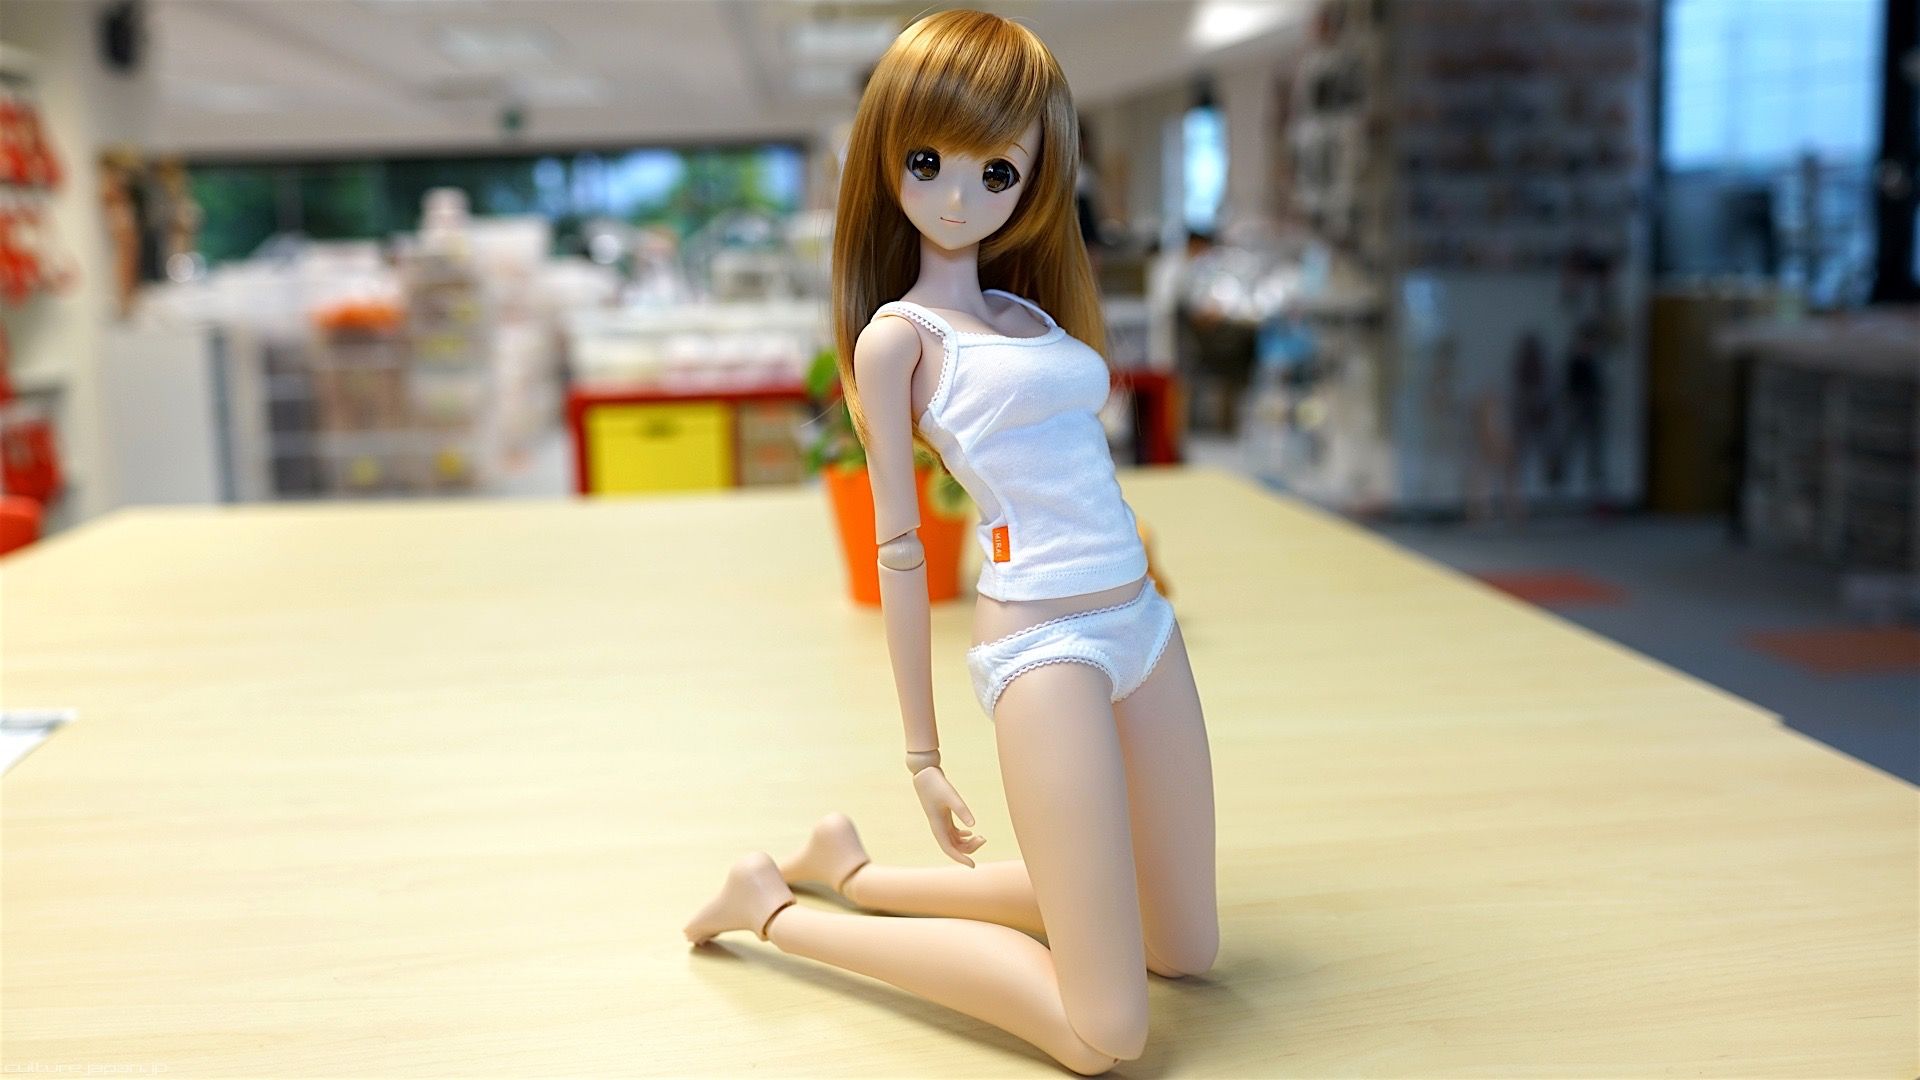
90 degrees limit at the knees is good enough to have your Smart Doll boys n girls kneel on your desk.
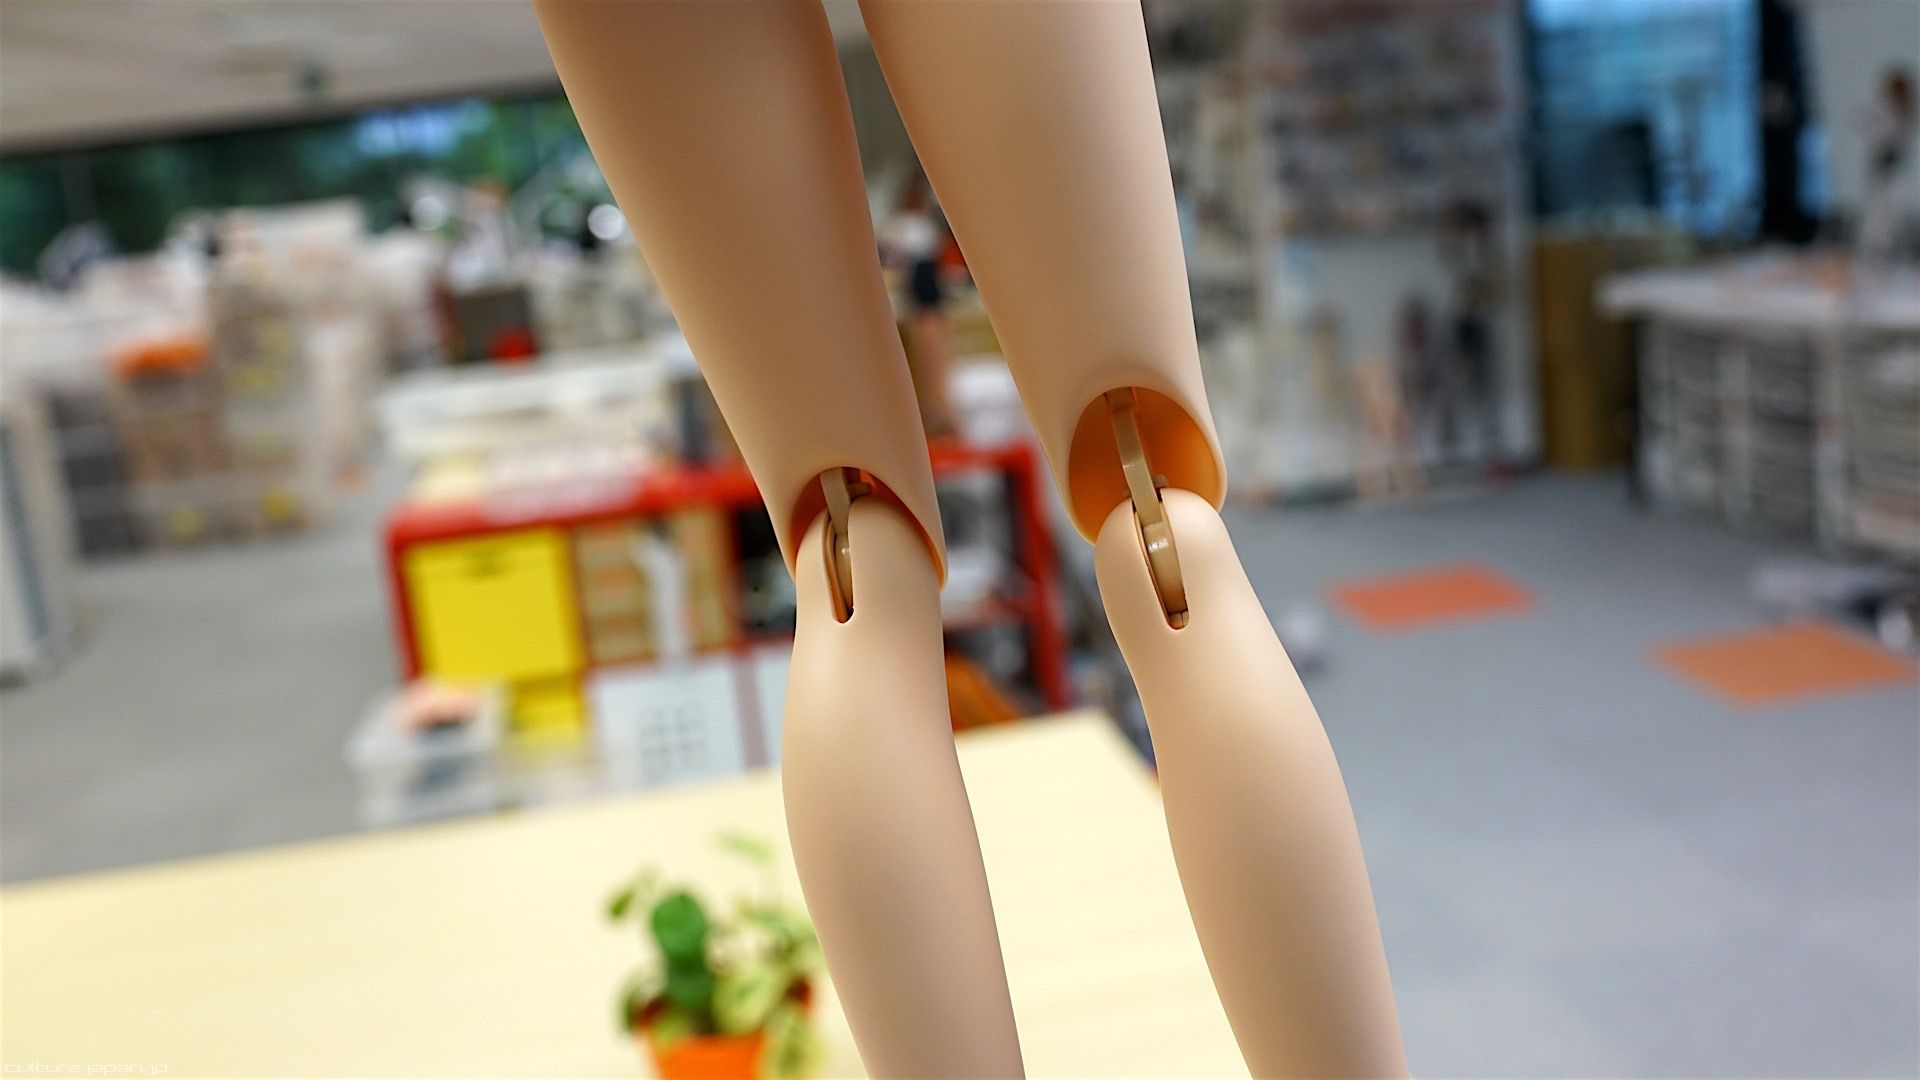
When posing the knees, the knee joints may extend like this on on the right of the photo - if they do then reset them by pushing them back in place like the one on the left of the photo.
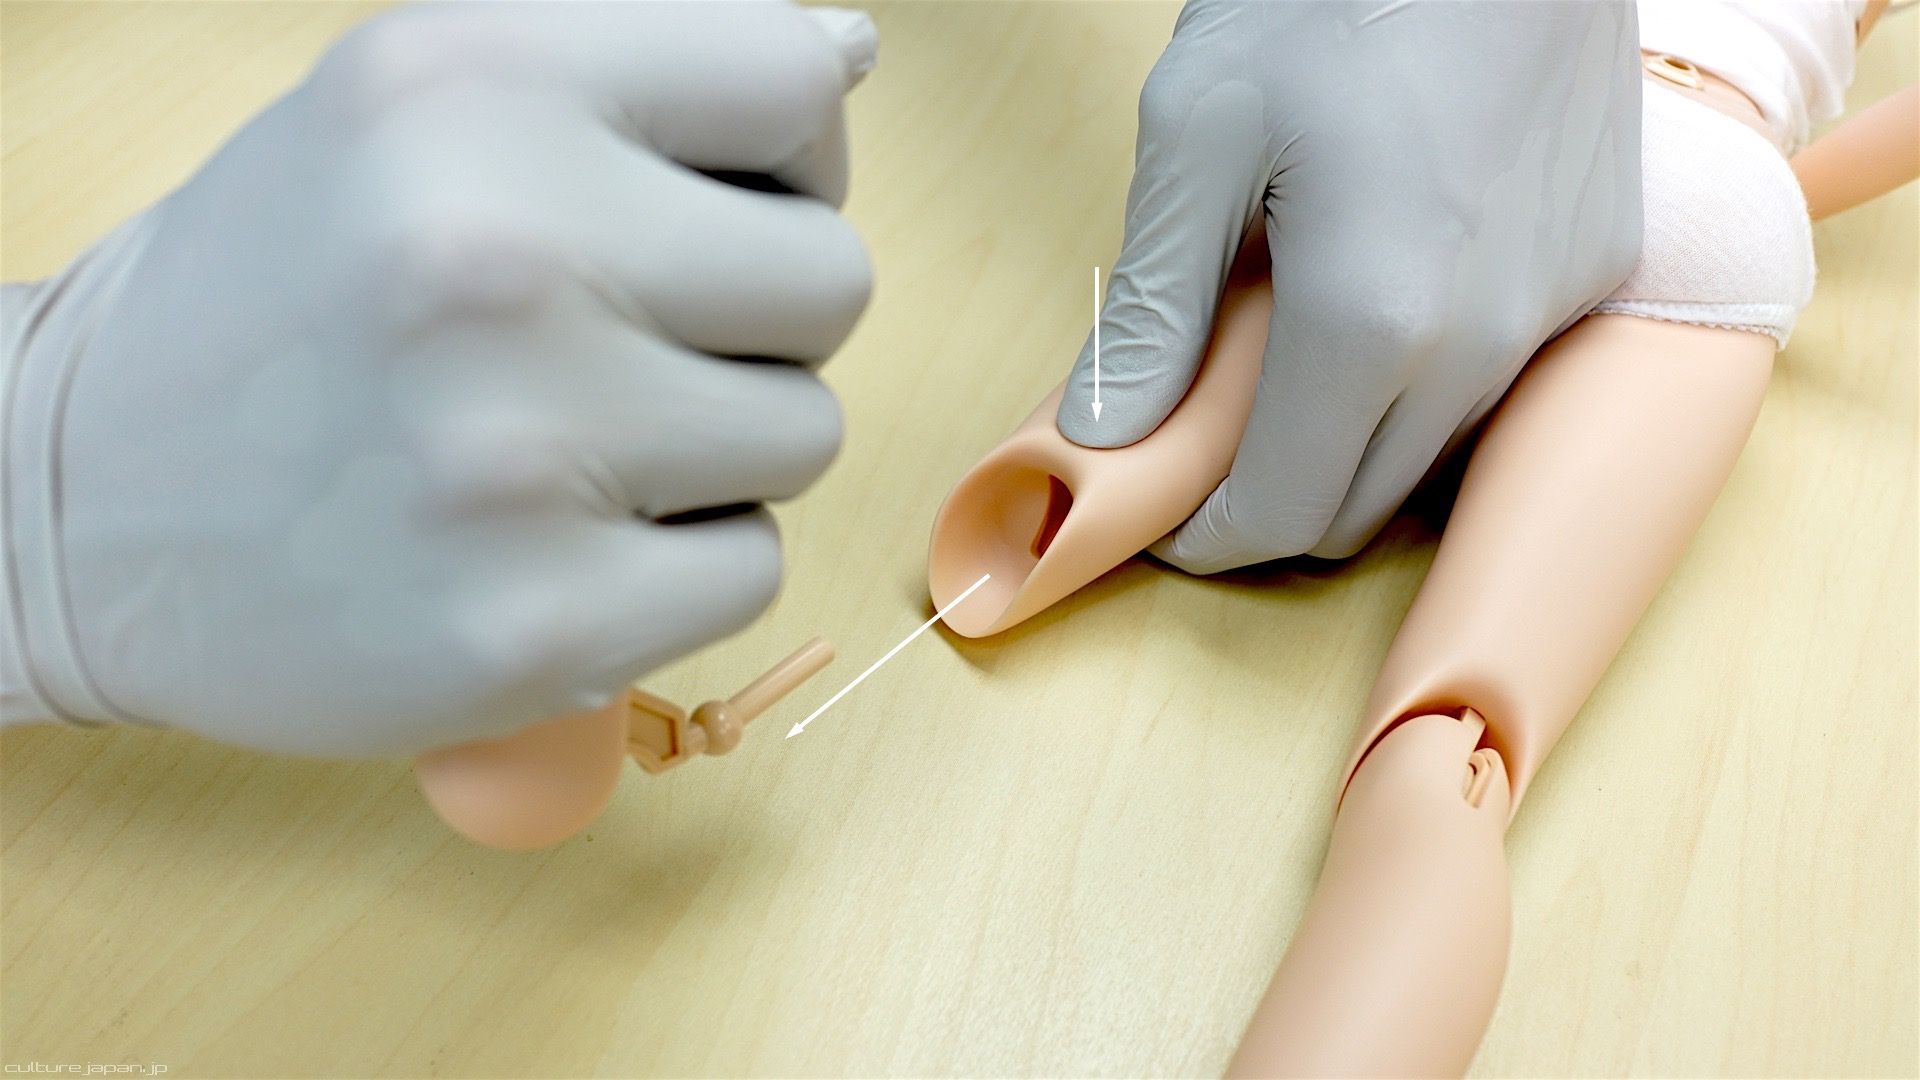
Replacing Torso
If you ordered any of the Smart Gear torso's, you will need to replace it - after removing the arms, head and bust, push down on the bottom of the thigh to open the slot slightly and pull out the shins in the direction that you see in the photo.
If you live in a cold environment then you may need to heat up the slot slightly before pulling out the knee.
If you live in a cold environment then you may need to heat up the slot slightly before pulling out the knee.
When replacing the shins, make sure they click back into position at the knee.
Trouser Button Dents
The button on trousers and shorts may leave a dent in the soft vinyl on the belly - if this happens all you need to do is to use a hairdryer to apply heat to the affected area which will restore the dent to its original shape. If there are any grease marks then they can be removed easily with some thinner as instructed in the Smart Doll Hacks article.
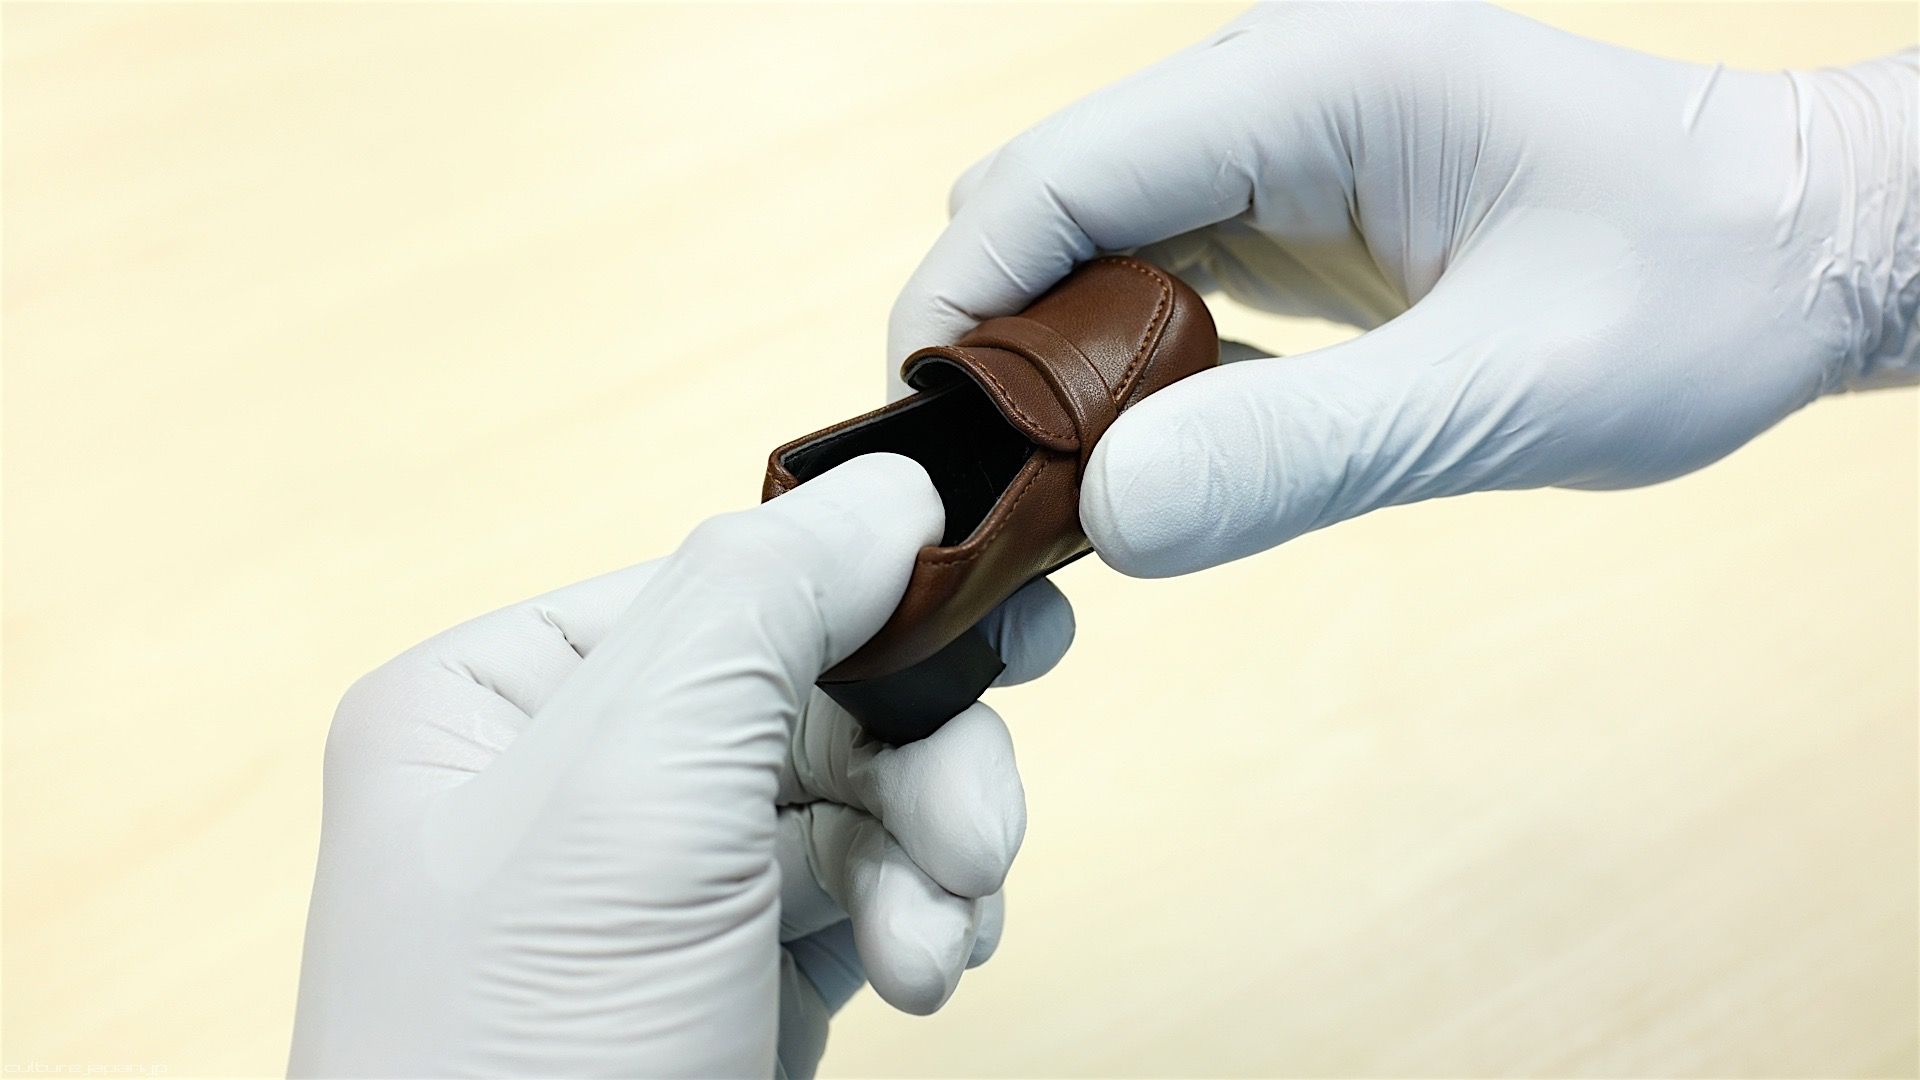
Shoes
Smart Doll shoes are tight because I didn't want them to fall off - the tightness also adds to the stability too.
Before putting them on, pushing down on the back a few times will make them softer and easier to put on.
Before putting them on, pushing down on the back a few times will make them softer and easier to put on.

Push the toes into the shoes as far as they can go and push the back of the shoe over the heel. Make sure your Smart Doll is wearing socks.
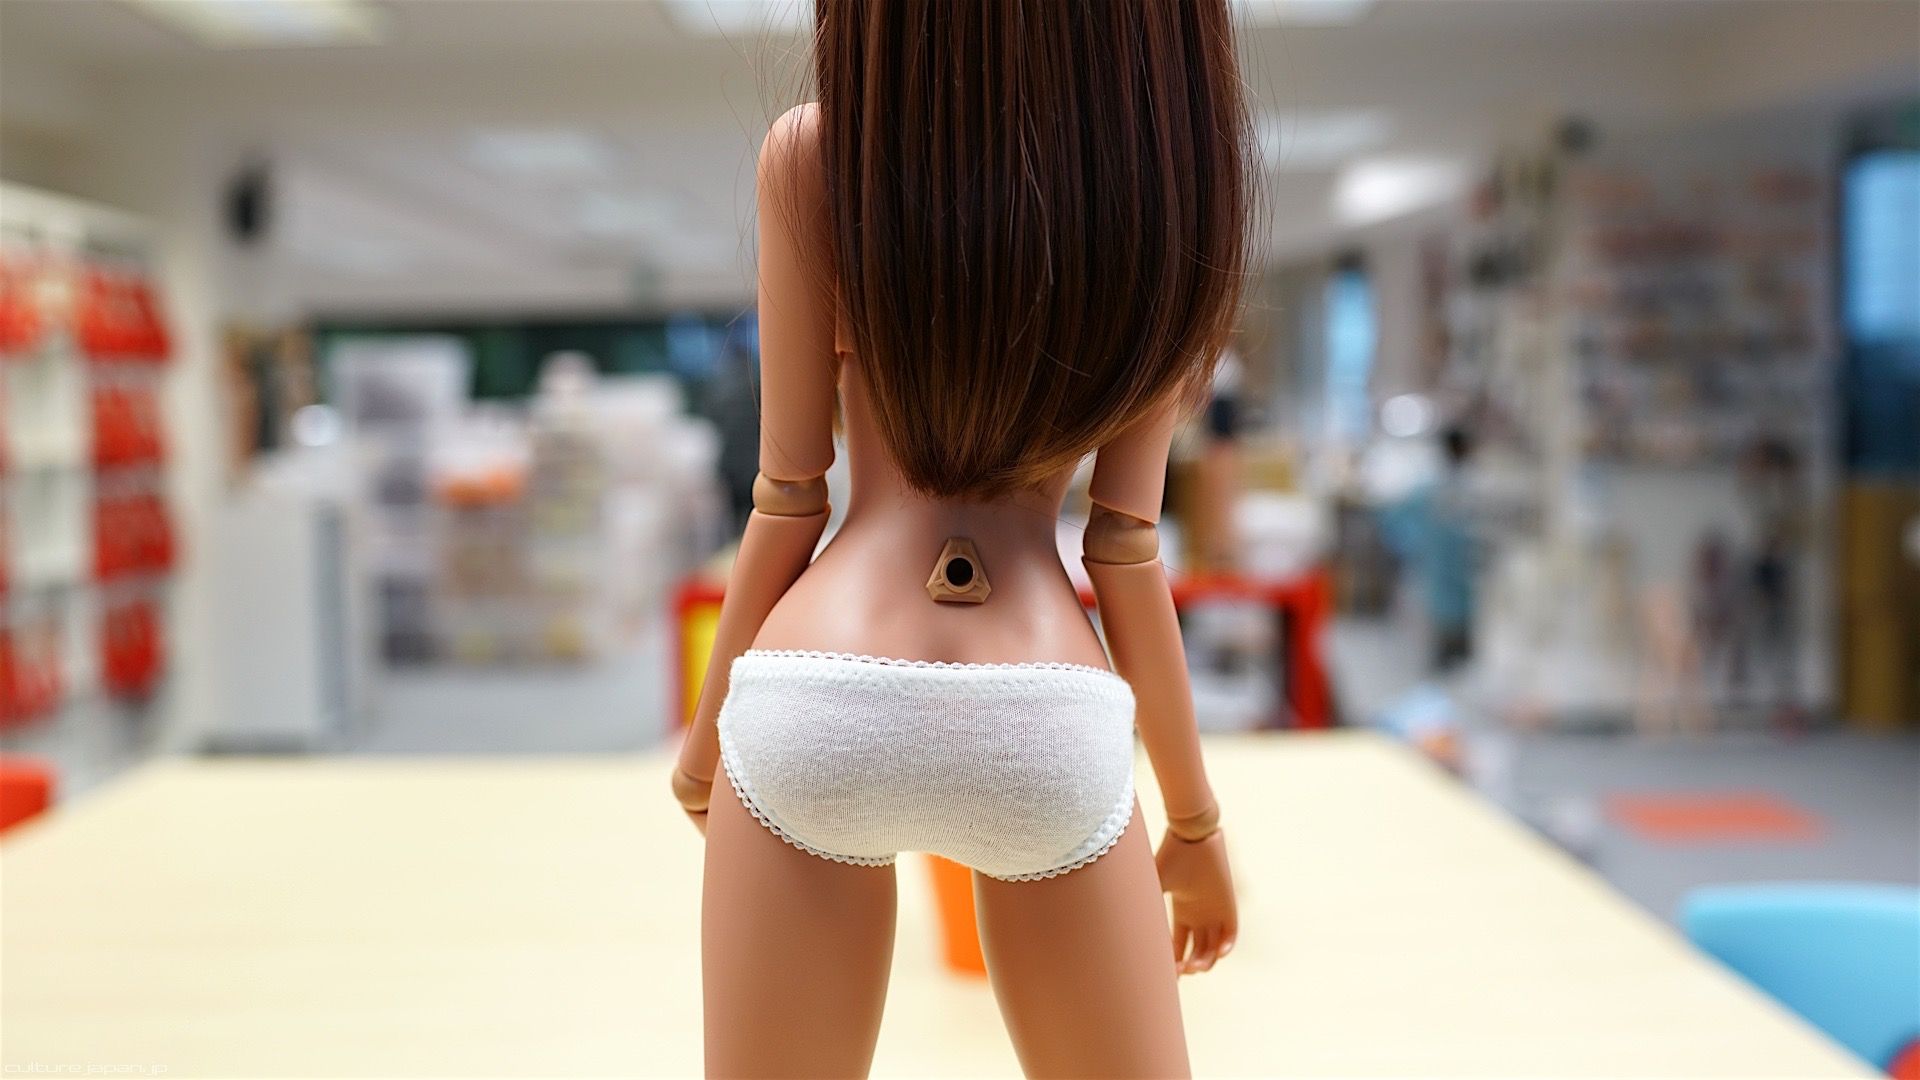
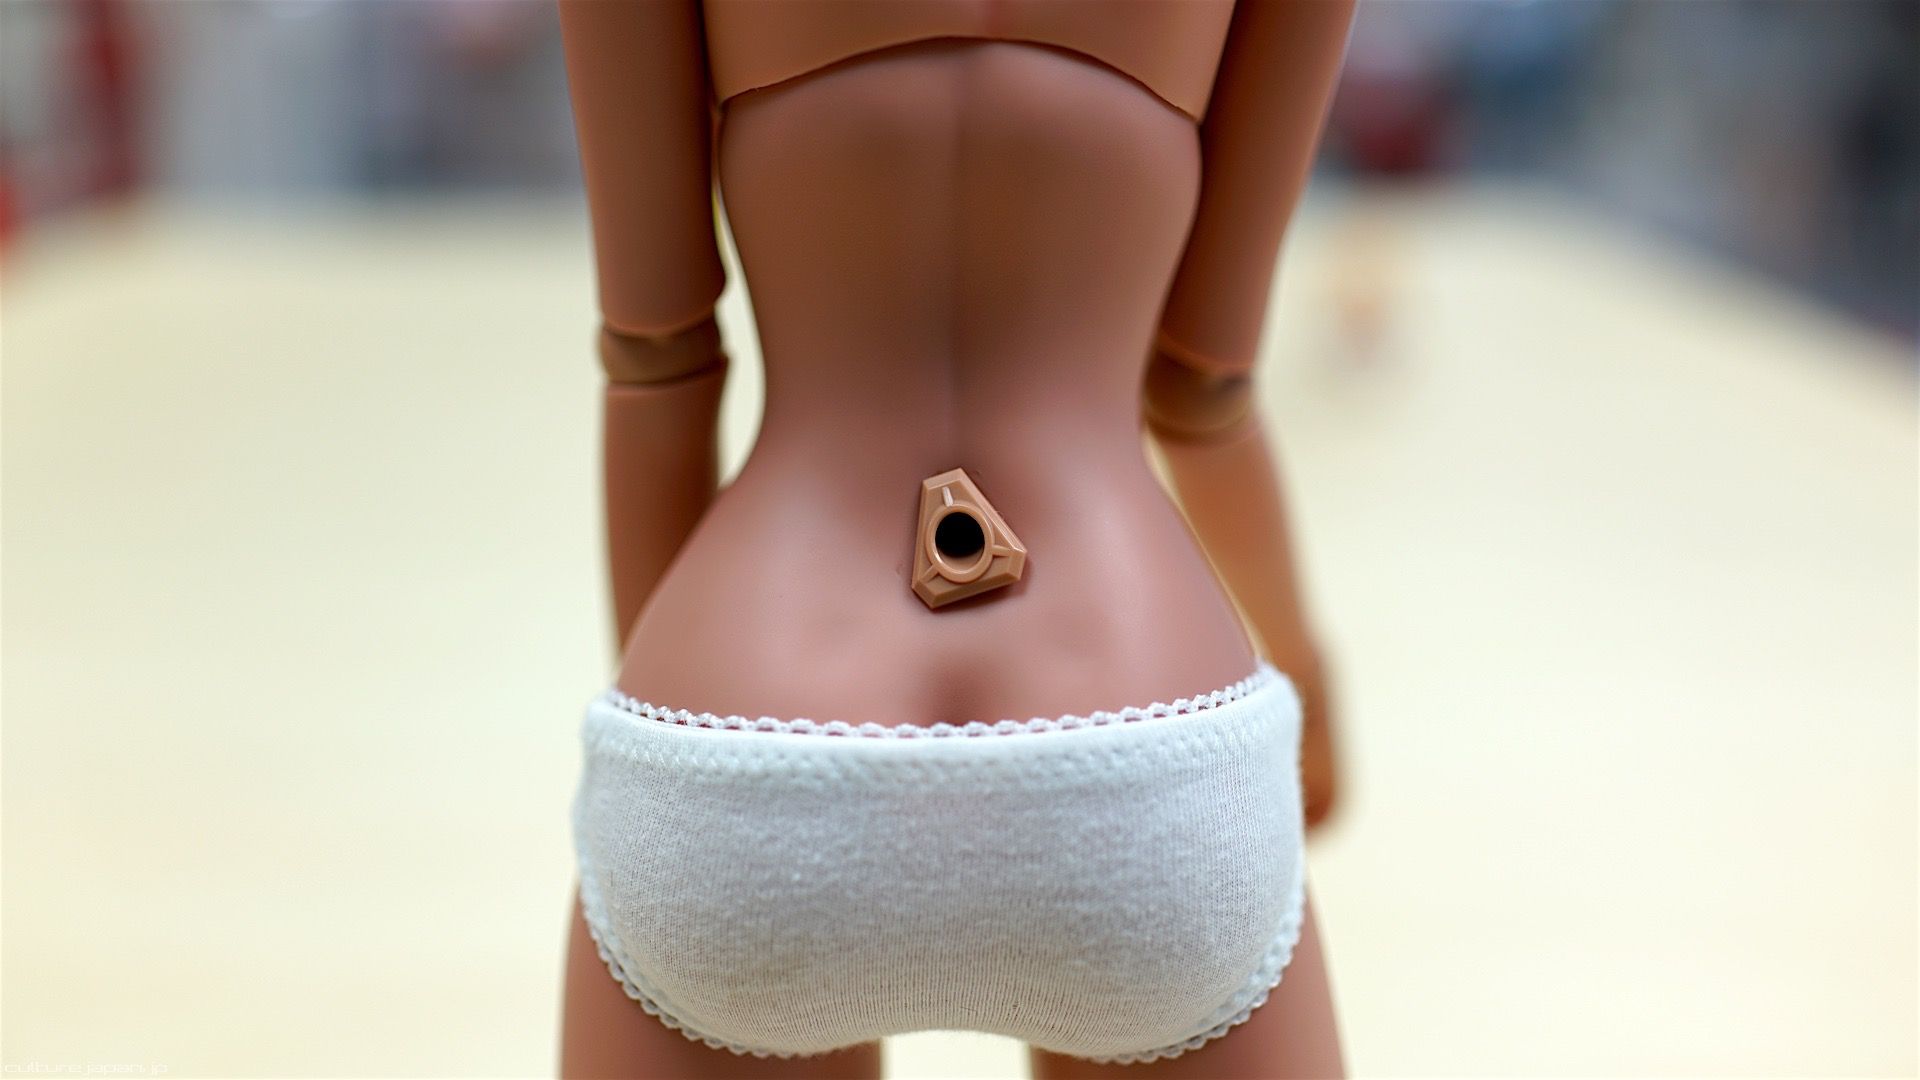
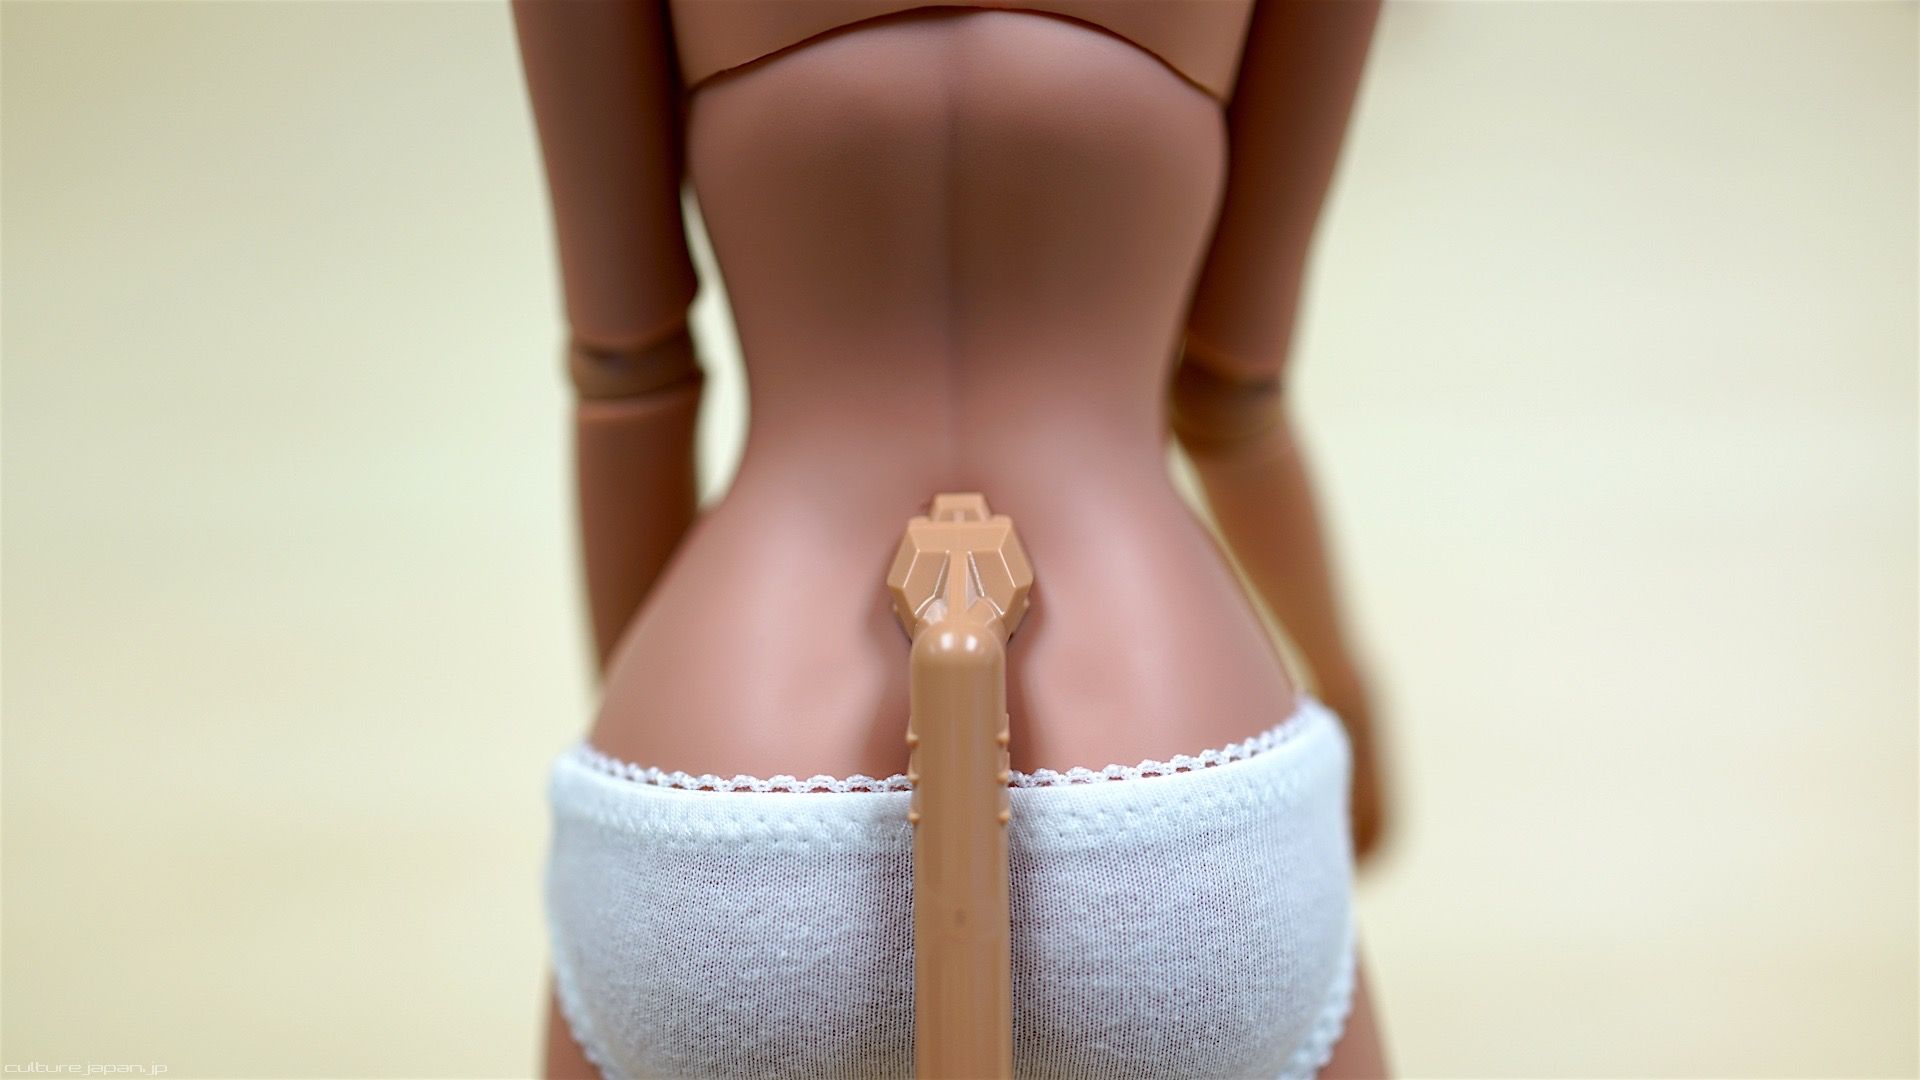
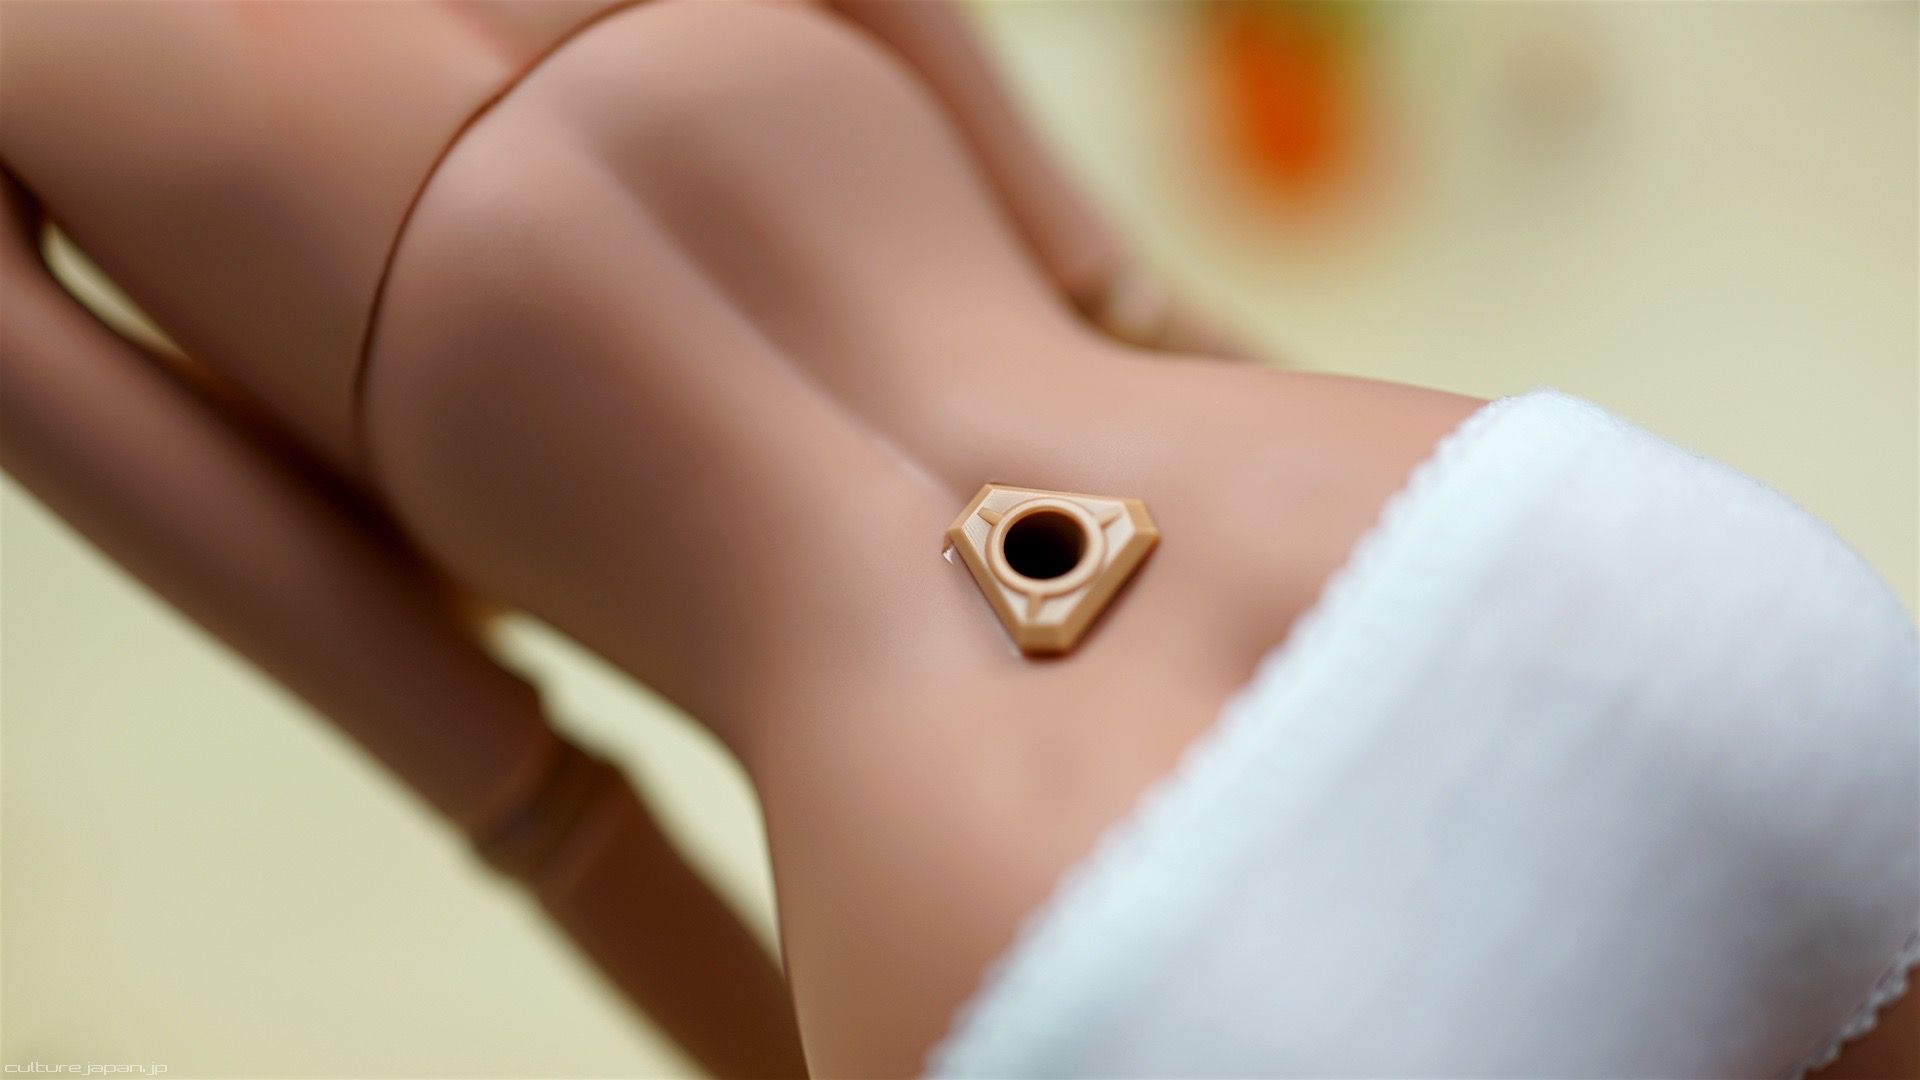
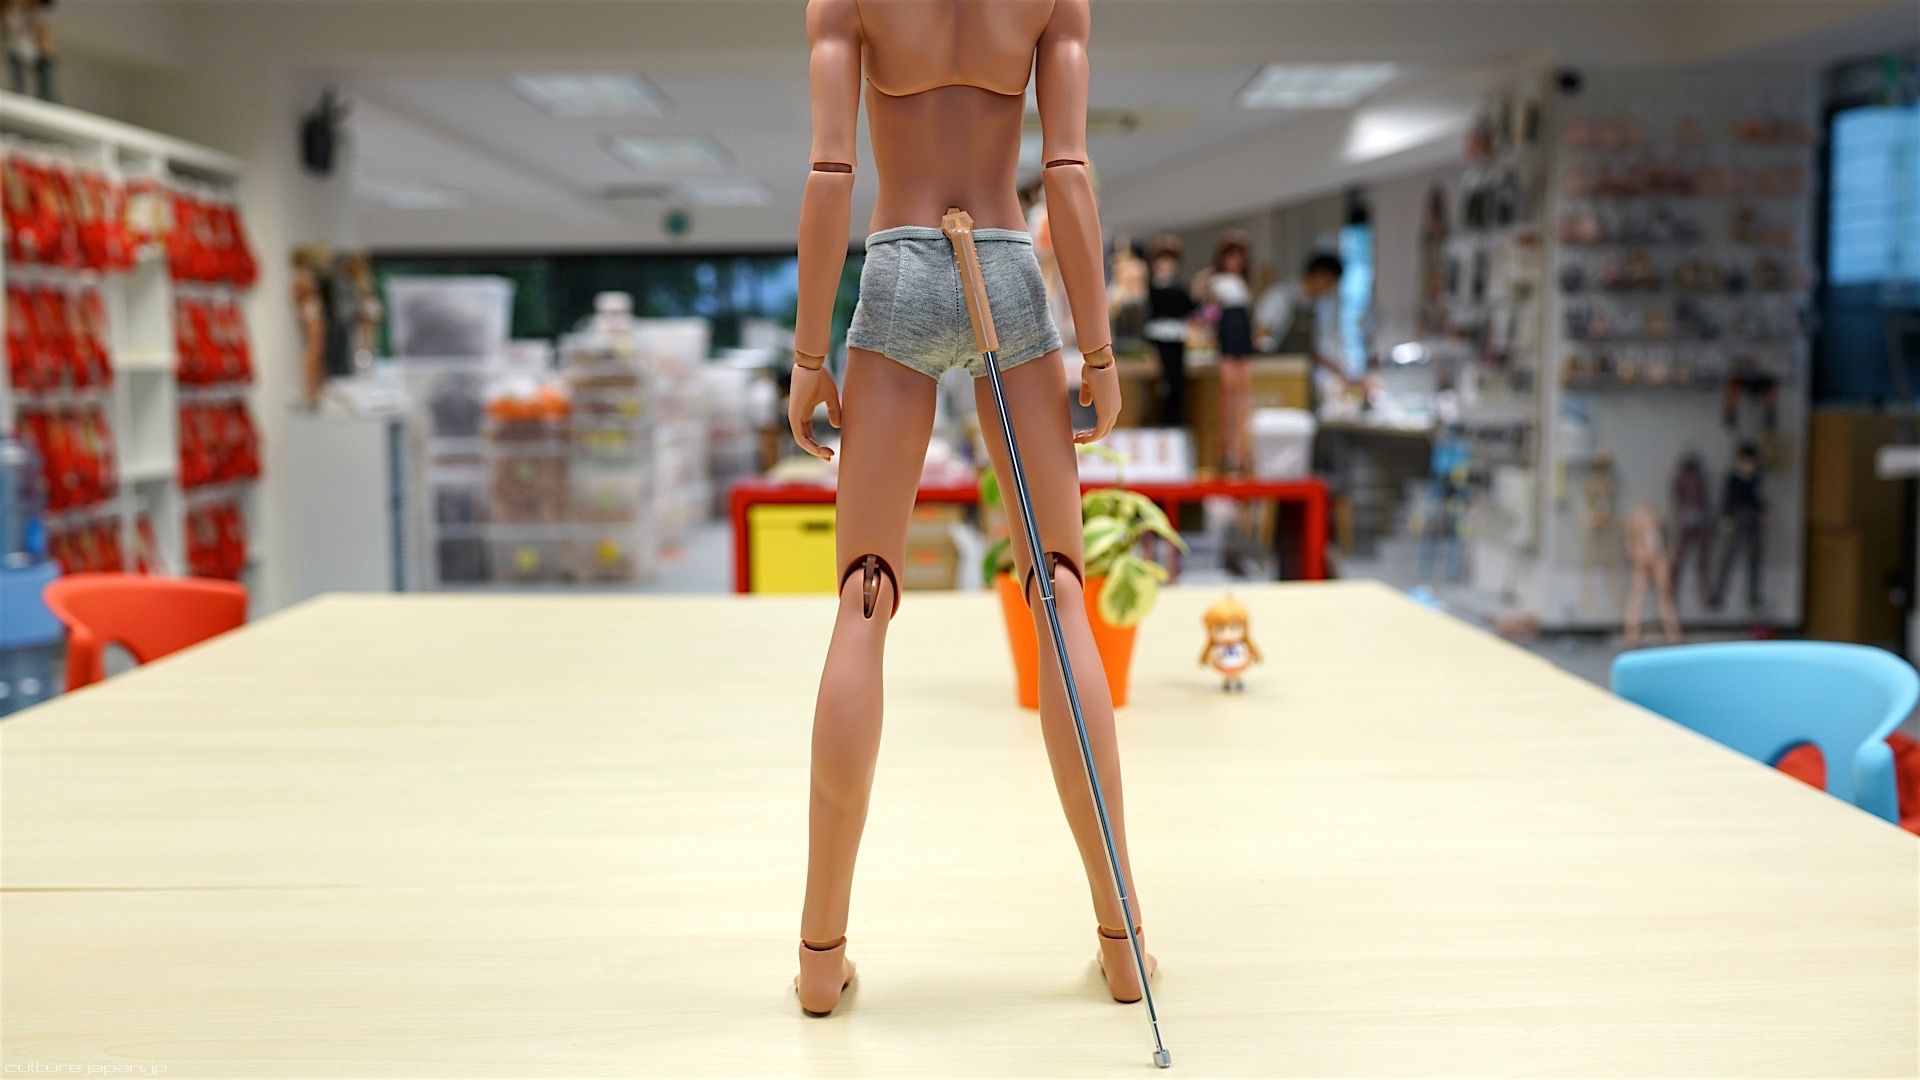
Support Socket
The back of all Smart Dolls come with a Smart Support Socket located at the back - this is where the stand is inserted.
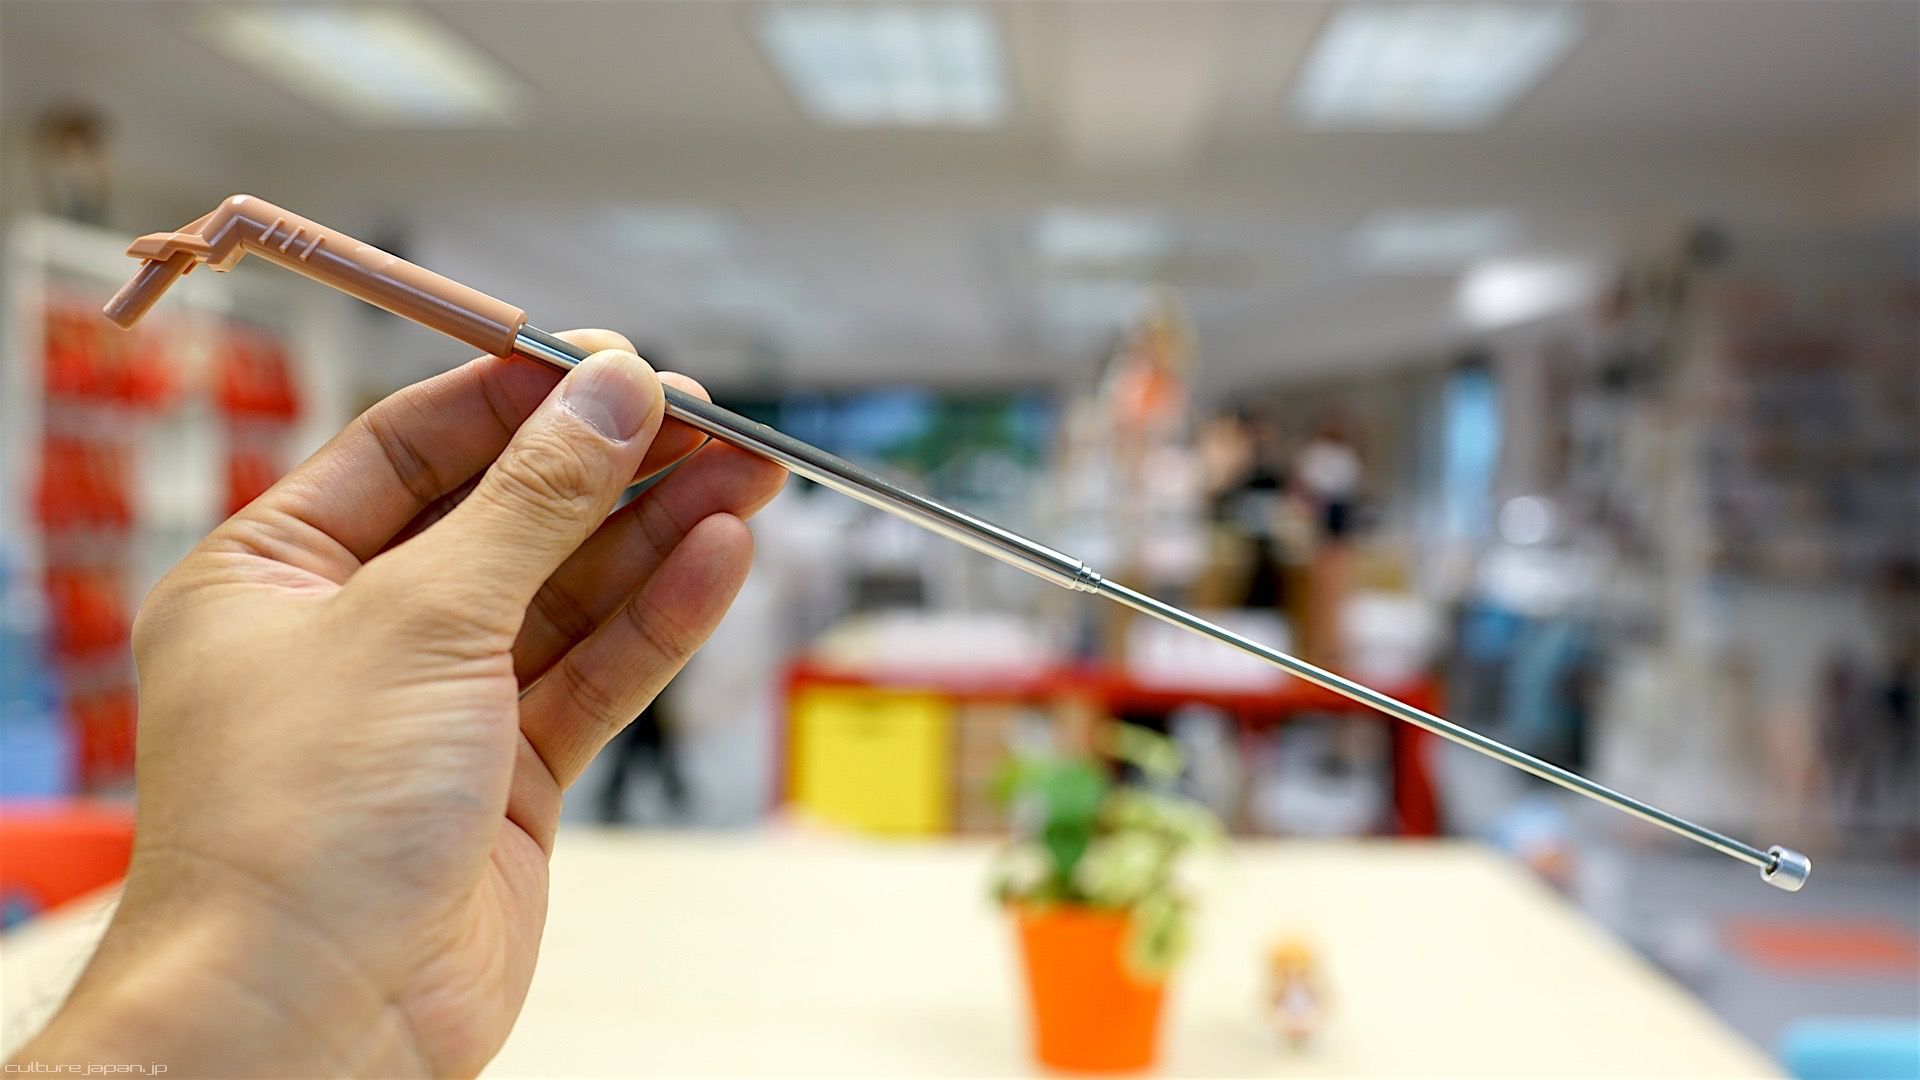
Telescopic Stand
All Smart Dolls come with a Telescopic Stand. When extending it - do it slowly. The same for when you retract it too because if you don't then it could bend in an odd manner.
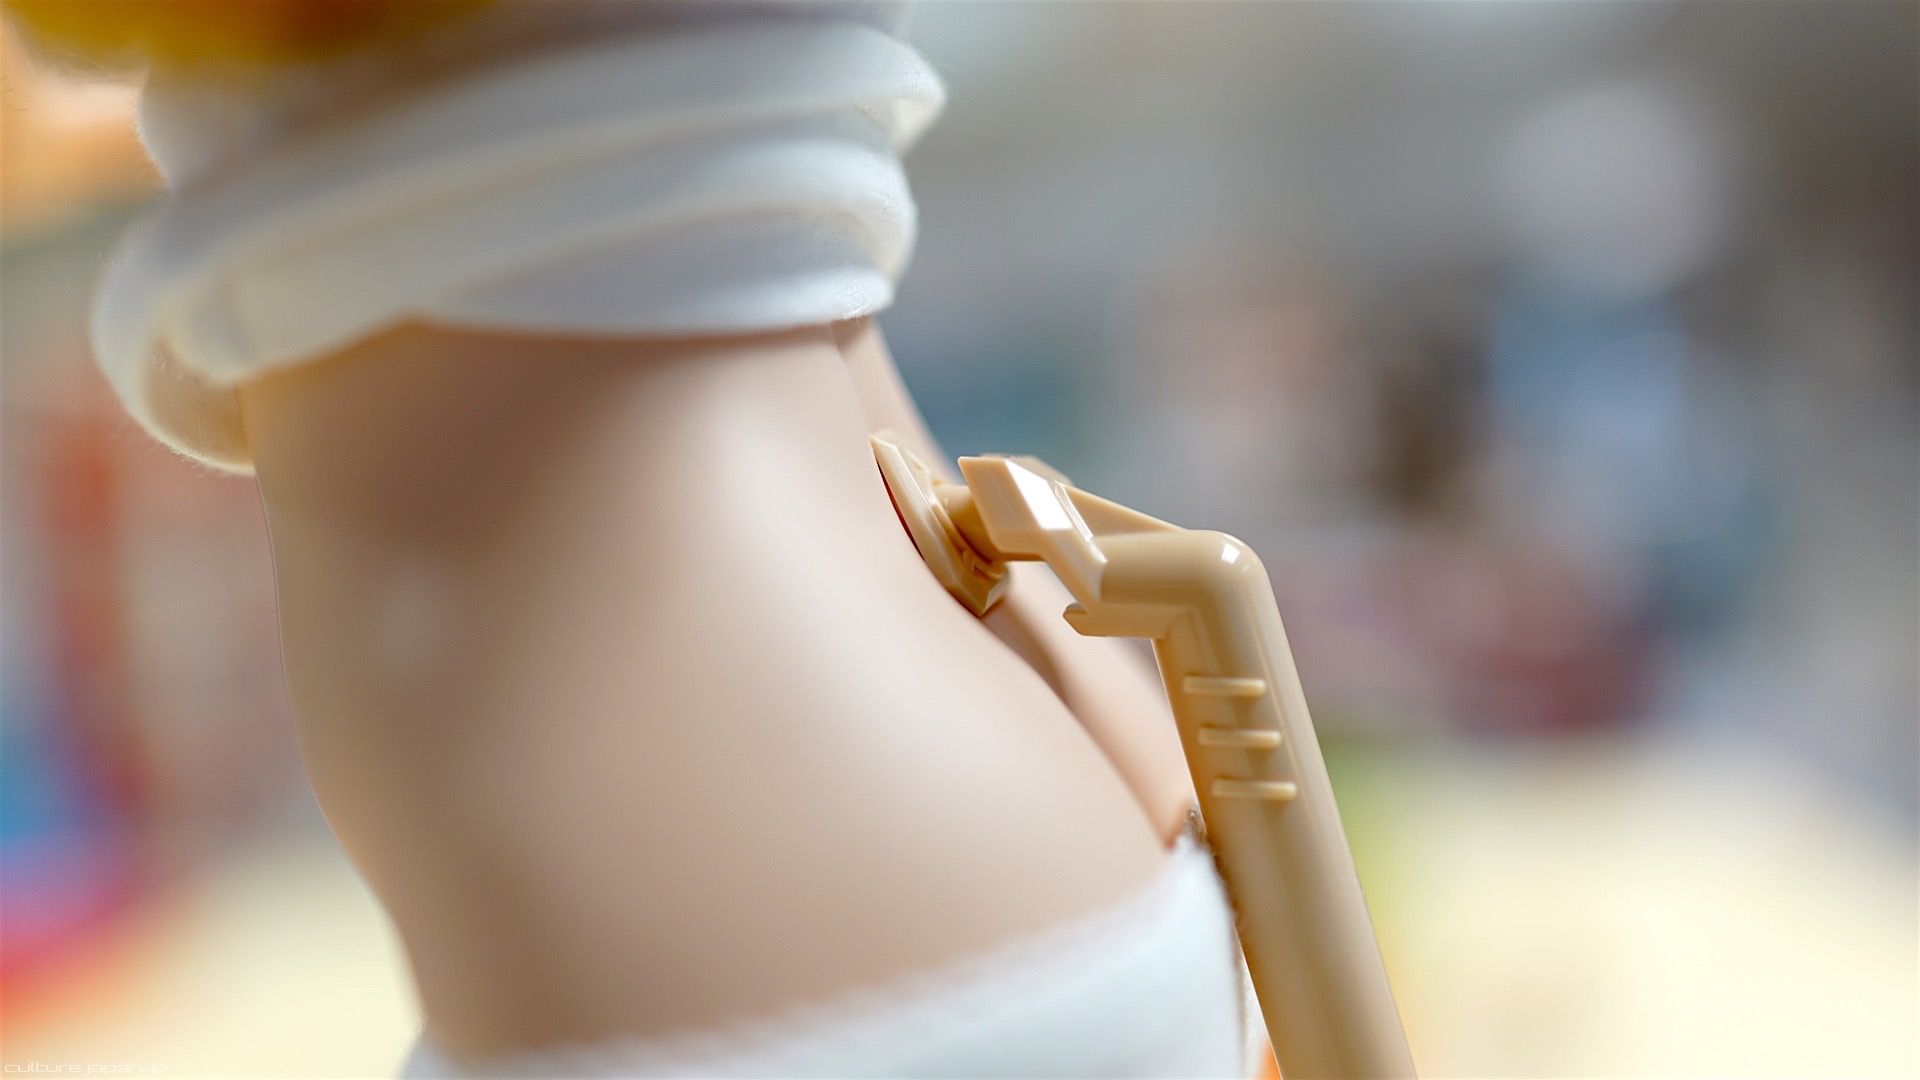
The stand can be pushed all the way into the socket but does not have to and I recommend leaving a gap like this. To remove it you need to wriggle it a bit.
If you insert the stand all the way into the socket and accidentally twist it - you should stick the stand back in and twist it back to its original position.
This is what it should look like with the stand inserted into the Support Socket.
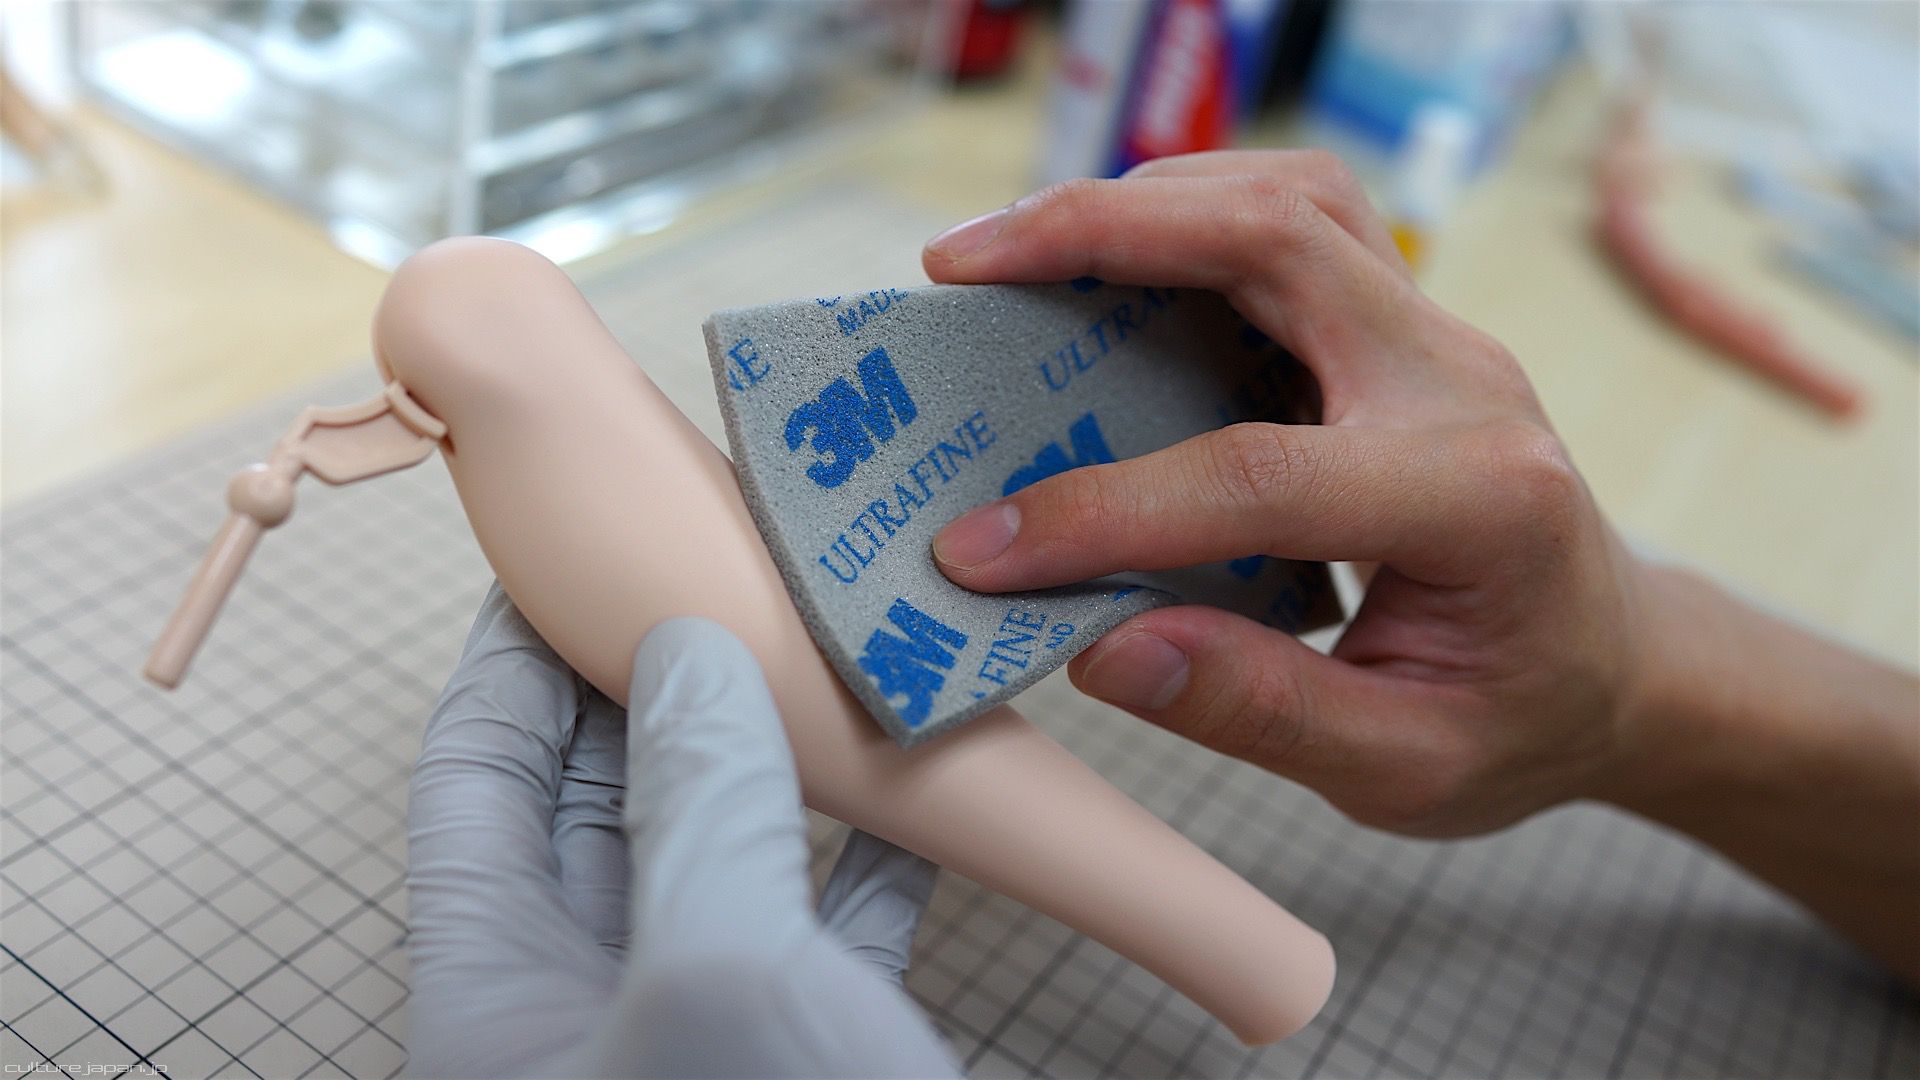
If you twist the support socket then you may leave a mark like this - some of the damage can be alleviated with a hairdryer but depending on how much you twisted it and how long you left it like that then the mark may have to be sanded down with some sponge sandpaper.
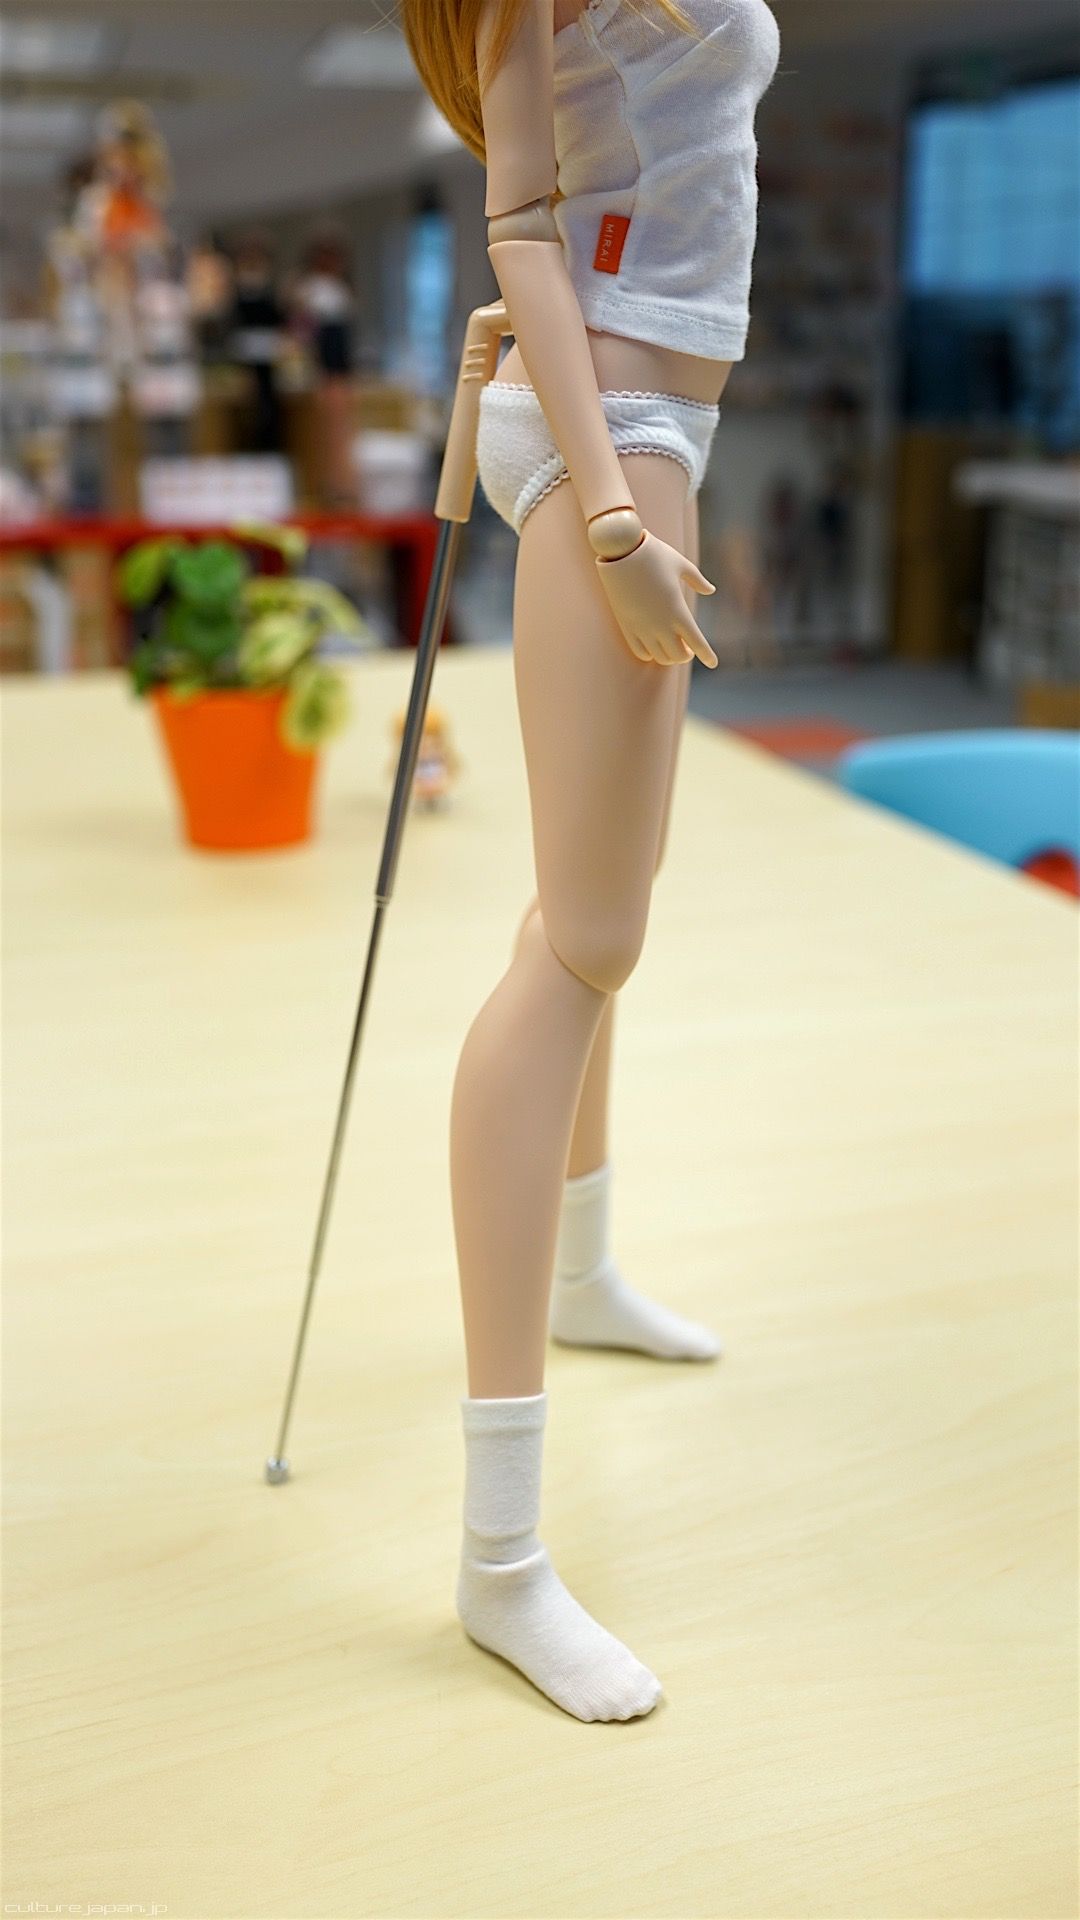
This is what it looks like with the Telescopic Stand in place - the legs are positioned ever so slightly forward and the feet are positioned to point ever so slightly downwards to create 3 points of support.
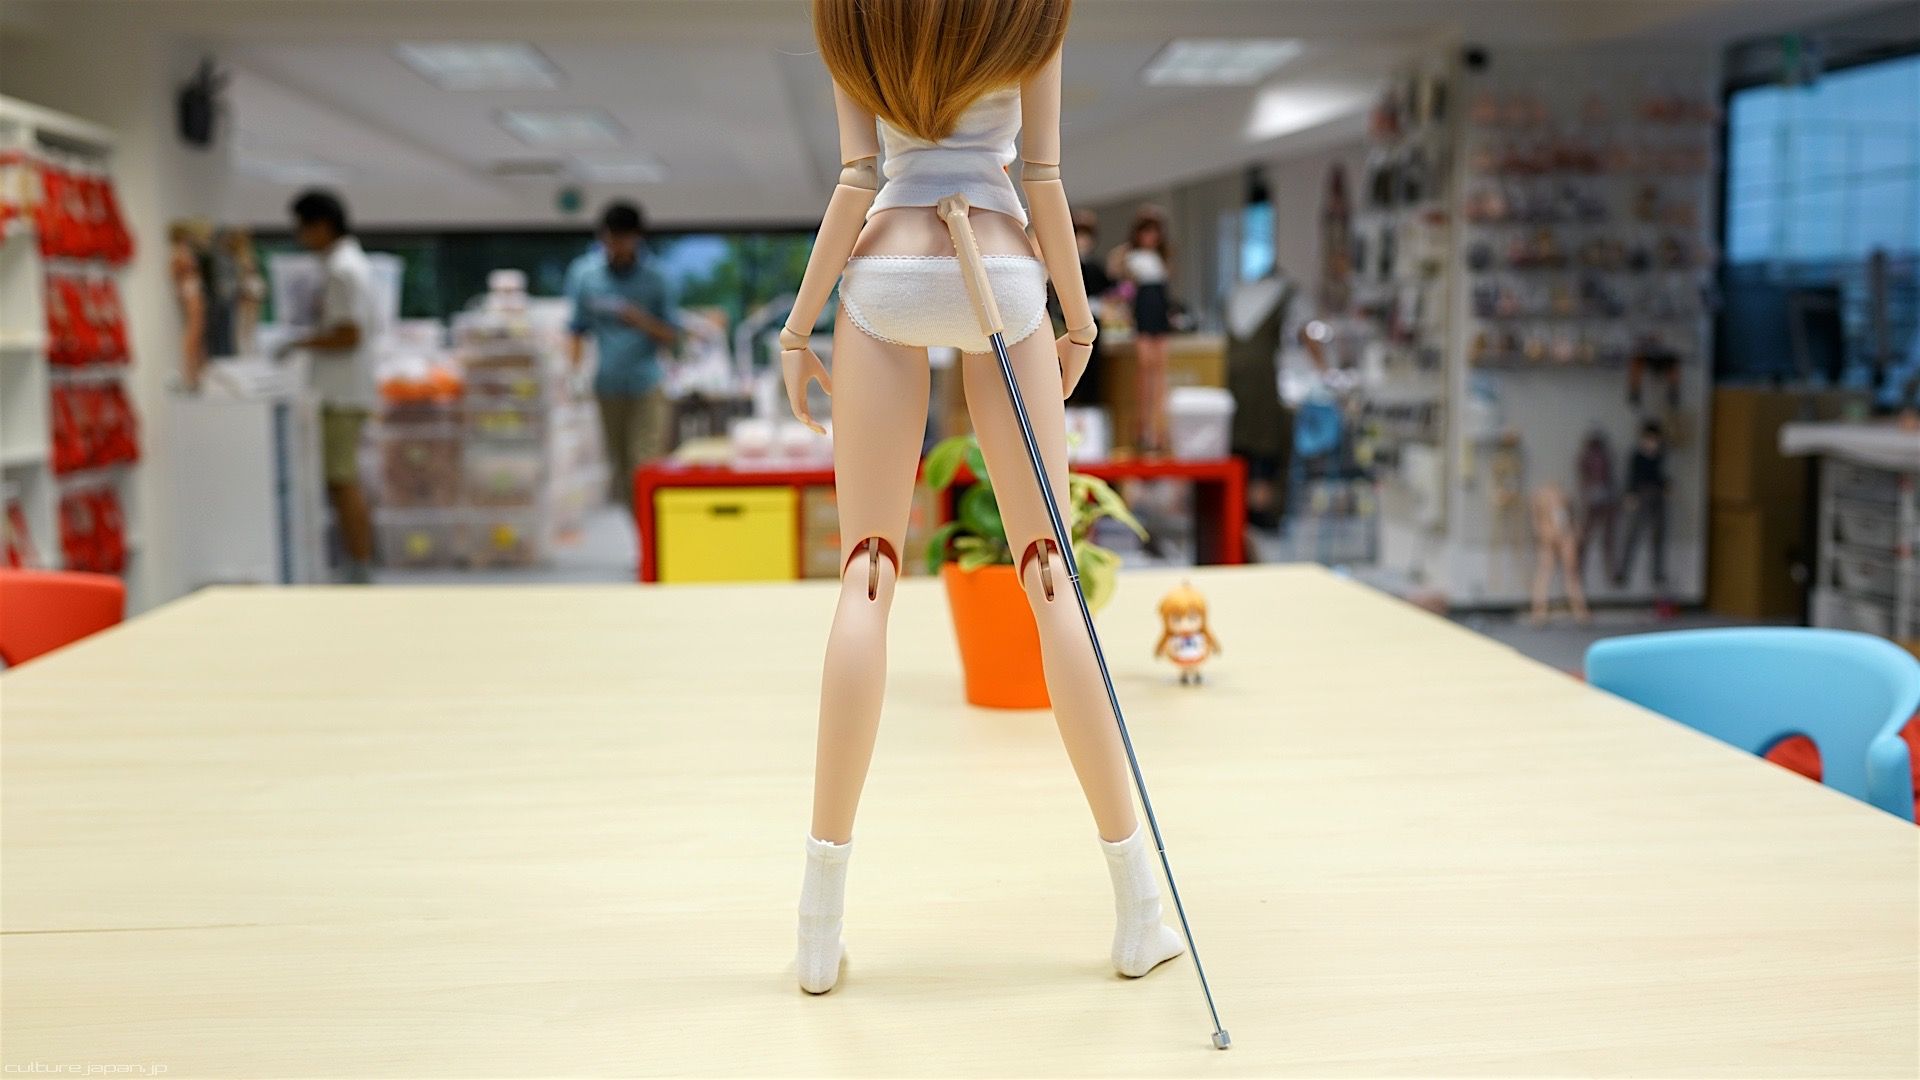
This is why you should not push the telescopic stand all the way in - so that you can swing it from side to side. This enables you to hide the stand behind the leg when taking photos.
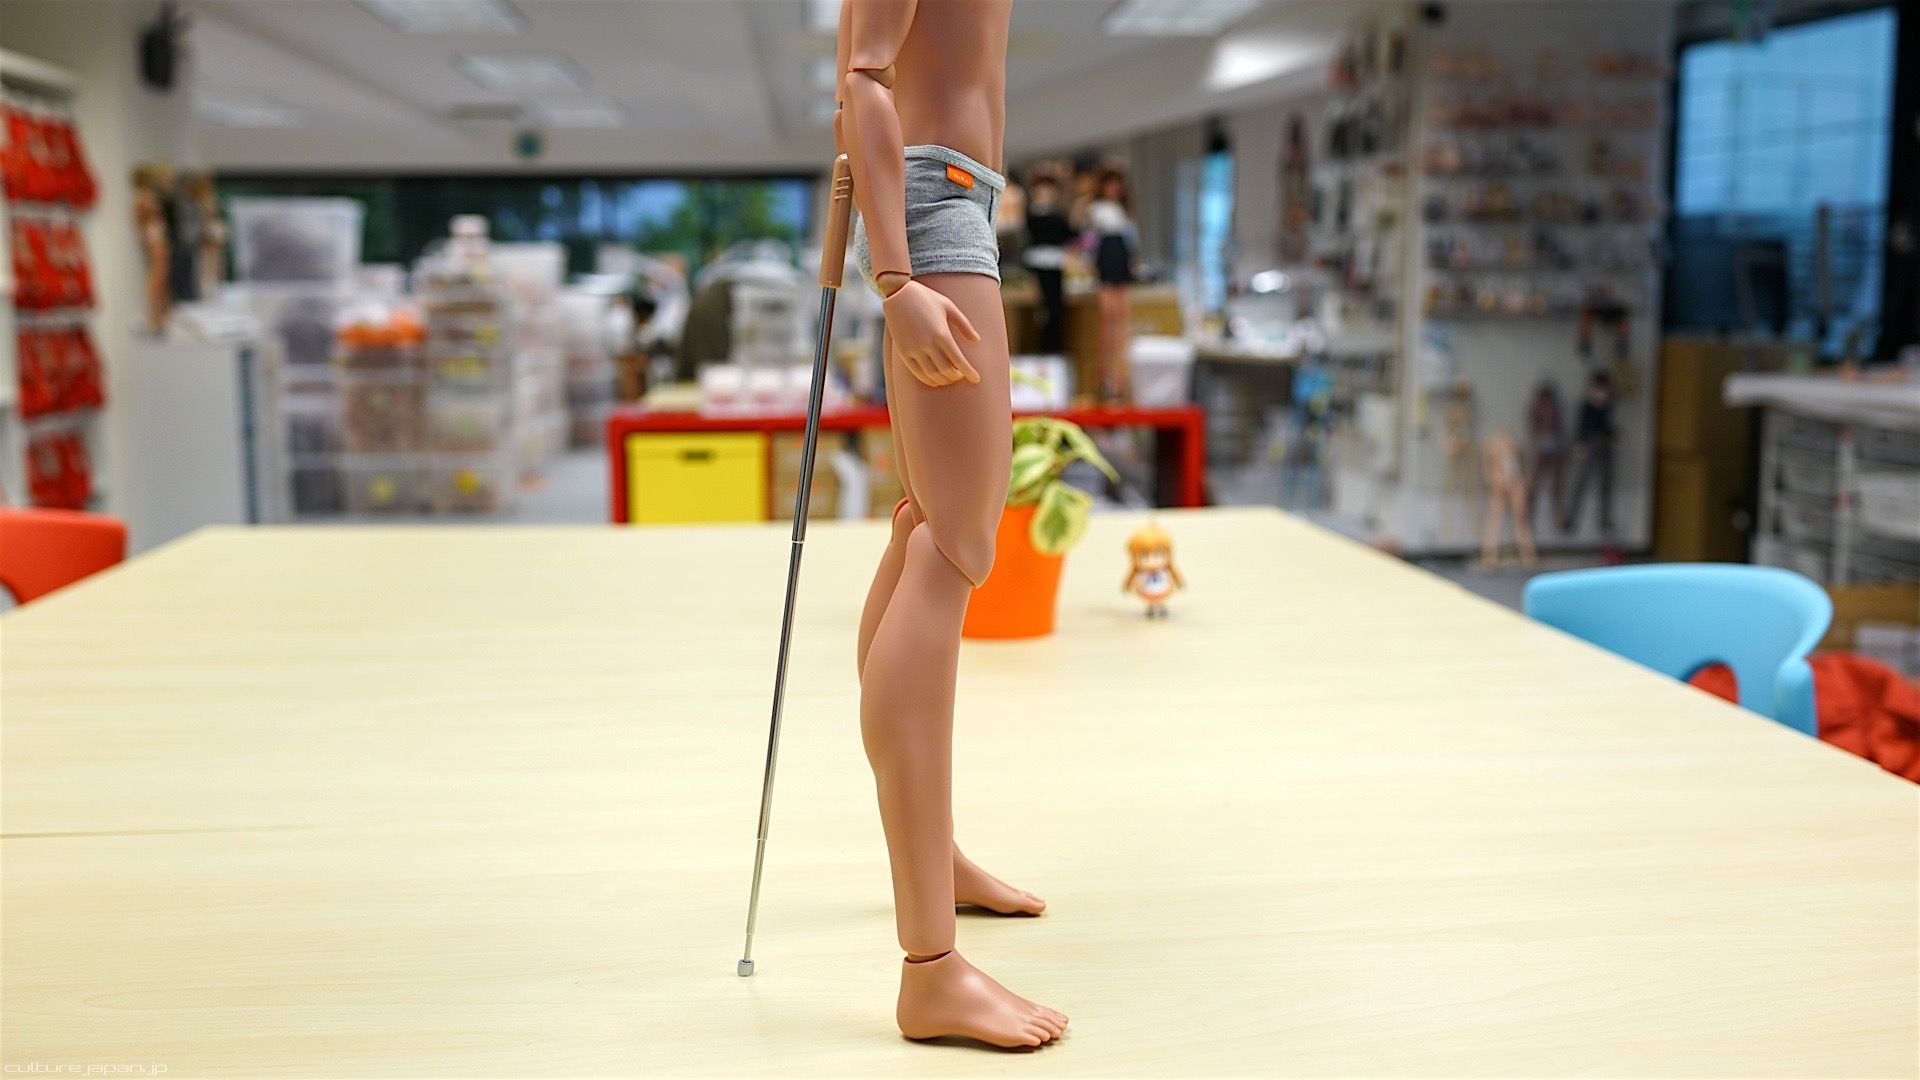
For Smart Doll guys - pose the legs positioned ever so slightly forwards and the feet pointing ever so slightly downwards to create 3 points of support.
Its common knowledge that guys swing to the right but with the telescopic stand it really does not matter.

About transporting your Smart Doll
Sooner or later you will want a bag to transport your Smart Doll - I recommend getting something similar in shape to my current FRIETAG F303 HAZZARD or the Brooks Pickwick where you can not only place Smart Doll inside kneeling down, you can also fit in a camera, laptop and a cardigan (for humans) too.
I do not recommend putting Smart Doll in a typical long "doll bag" (or tripod stand bags that some folks use) as they not only look like body bags but are cumbersome to carry and store.
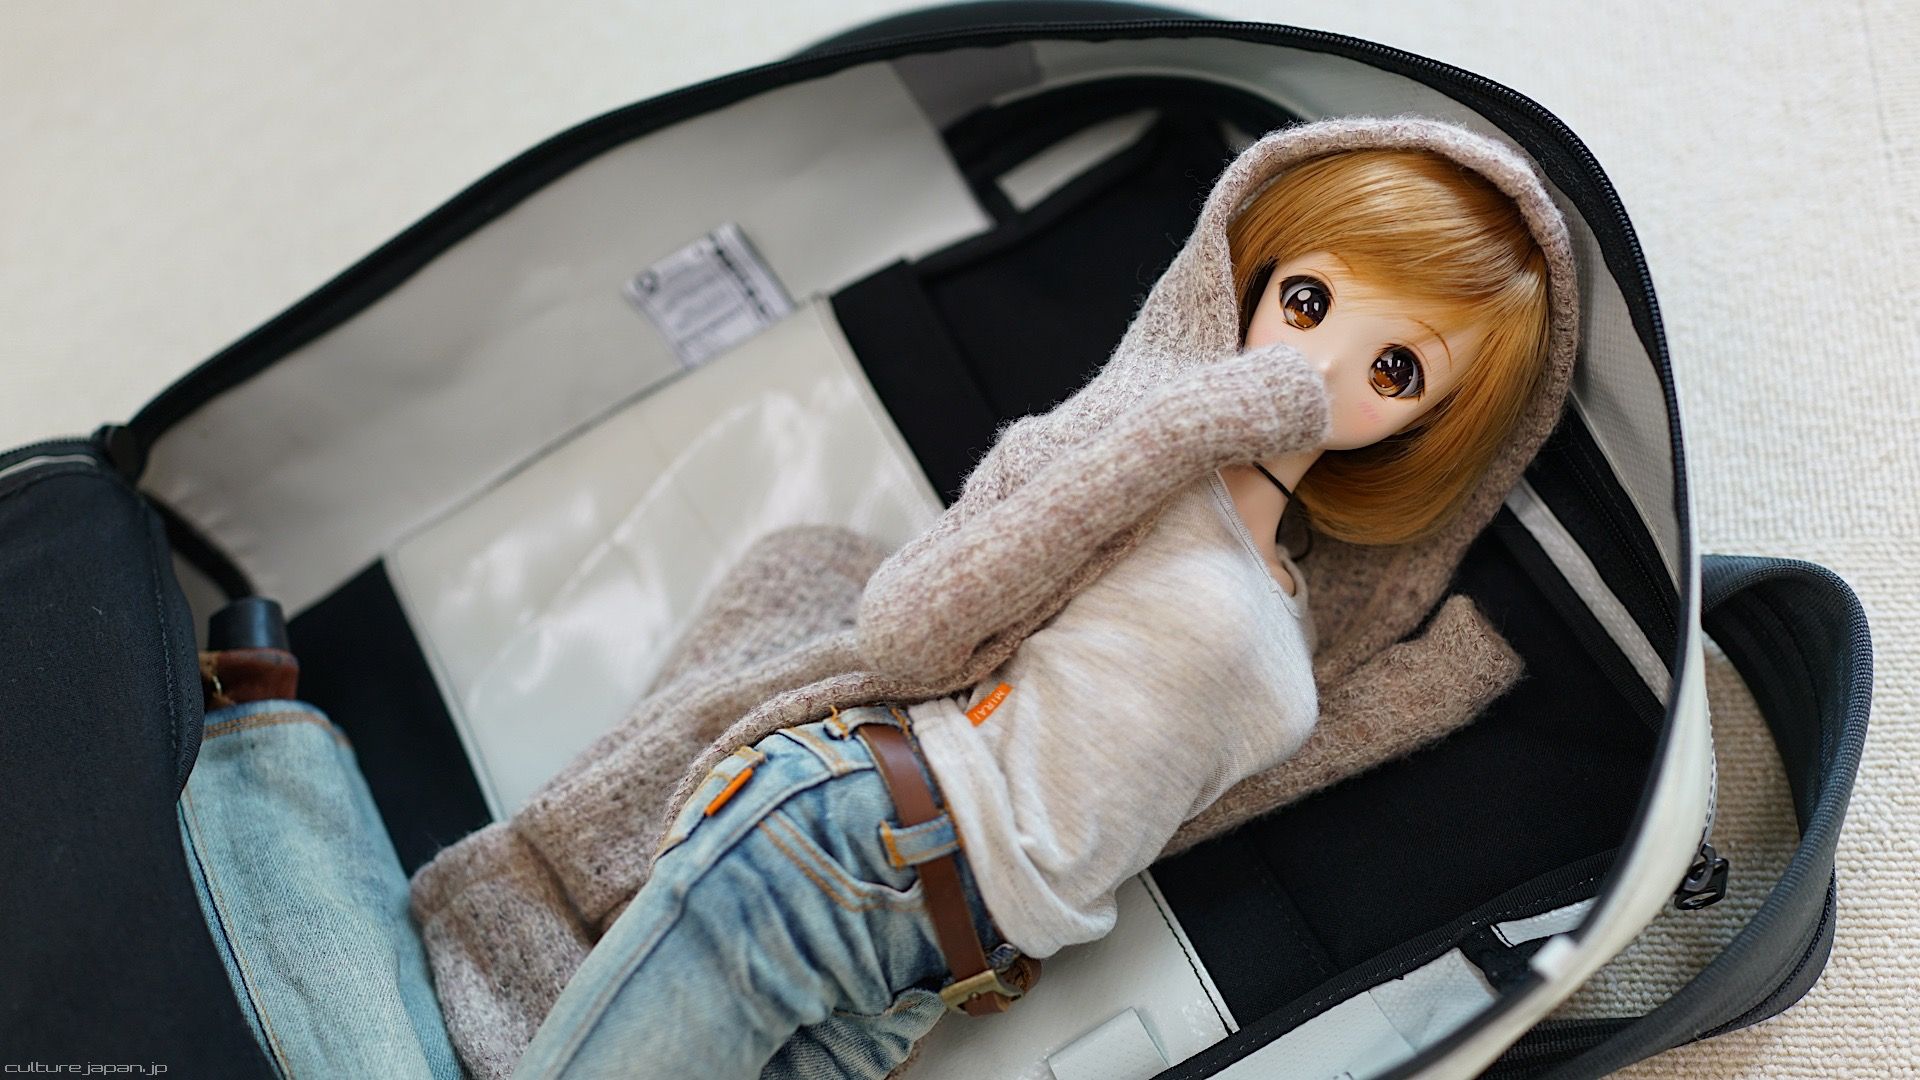
There is one thing about any bag that you need to be careful about - black lining can stain the soft vinyl skin. The FREITAG does stain so what I do is to make sure the hands are covered. The boobs prevent Mirai's face from touching the inside of the lining so I don't wrap her head in particular but depending on what your bag looks like, if its got dark colored lining then you may want to protect the head. You also need to be careful if your girls or boys are exposing their legs by wearing shorts or a skirt.
When you are comfy with your Smart Doll you can proceed to take your first photo while the bag is still handy ^^
I encourage folks to use the #smartdoll hash tag when posting on Twitter, Facebook, Instagram etc - we do out best to look for your photos and pool them into the Smart Doll Pinterest Board.
I encourage folks to use the #smartdoll hash tag when posting on Twitter, Facebook, Instagram etc - we do out best to look for your photos and pool them into the Smart Doll Pinterest Board.
And thats about it! If you want more tuning tips then check out Smart Doll Hacks.

And if you love our products just as much as I do making them then it would be an honor to have you play a part in building our brand.