A month ago, I wrote an article on how to mass produce your own products. The post was rather popular and was picked up on many sites and social networks around the world - could have been because I posted it on April the 1st and folks didn't know whether it was true or not.
Well as we say in these neck of the woods - "April Fools come true" ^o^
I also learned through the traffic that that Taiwan, China and Russia are big markets for this type of doll.
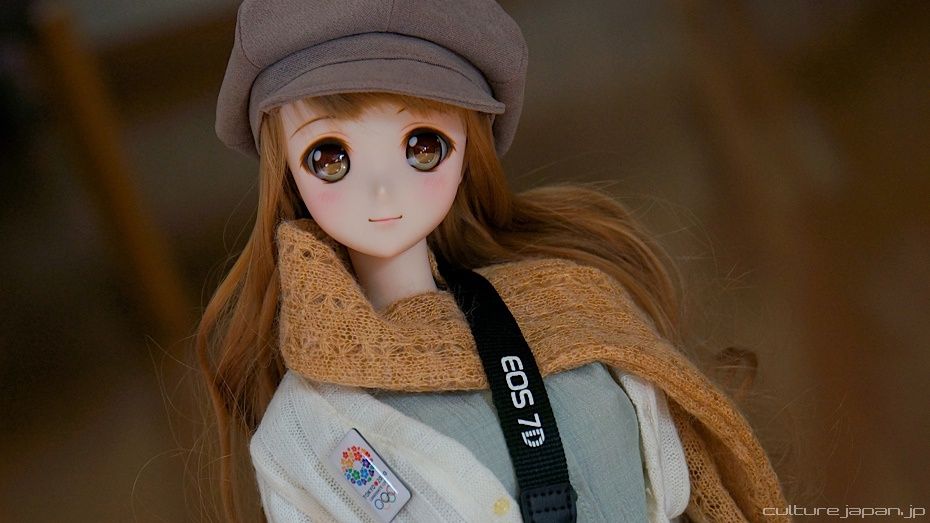
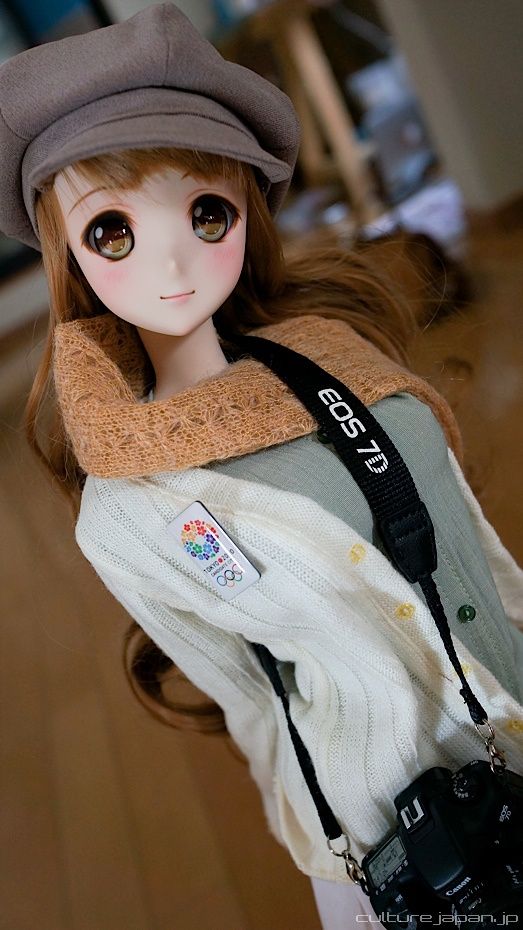
Mirai Suenaga Doll
Today I want to talk about the progress I've made on the soft vinyl doll that I'm modelling after my mascot character Mirai Suenaga and share with you my learnings in the hope that you can avoid the mistakes that I made during my first ever attempt to design and manufacture a product for the masses.
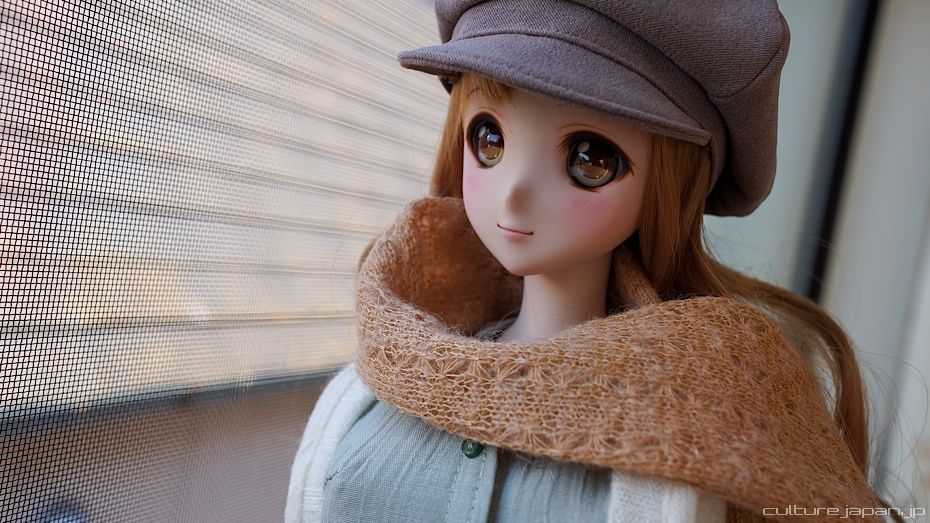
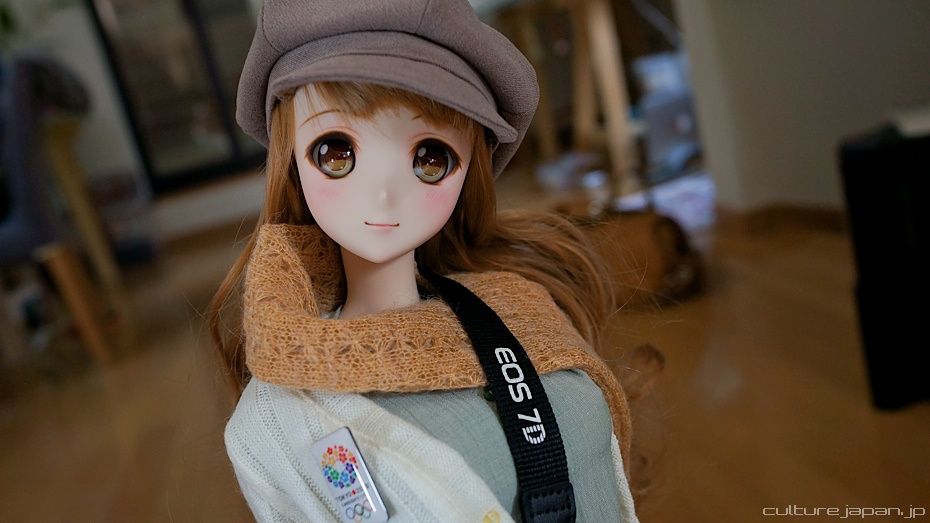
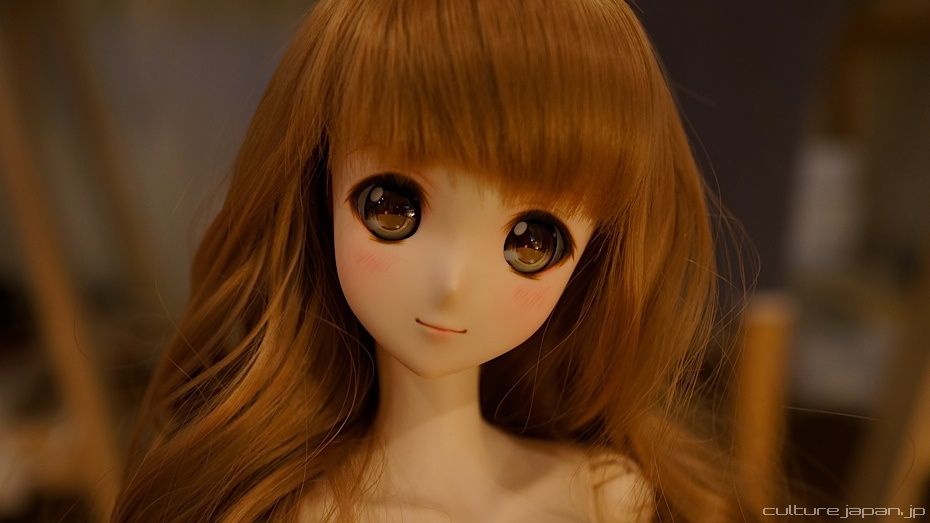
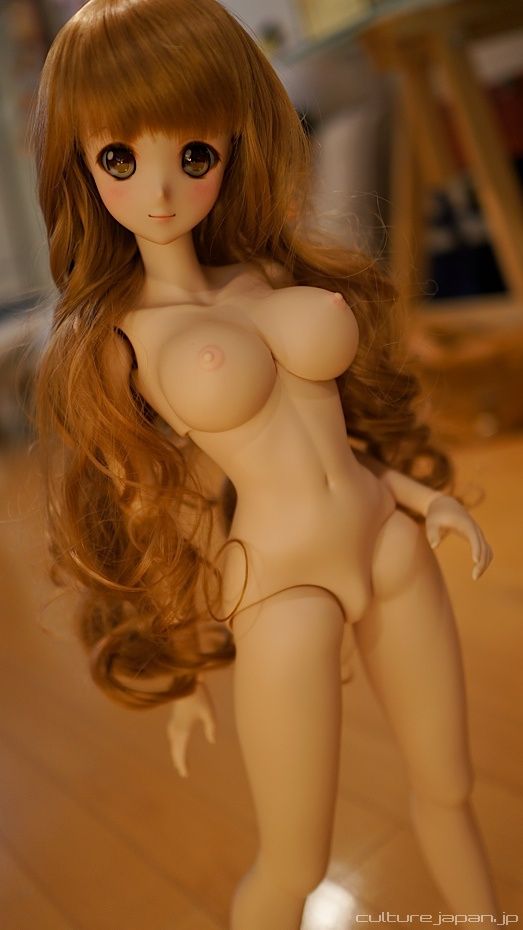
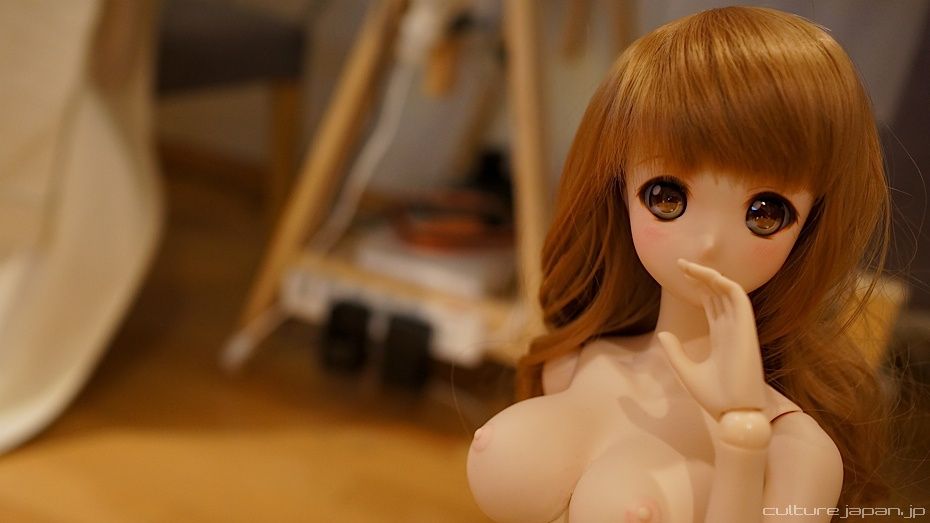
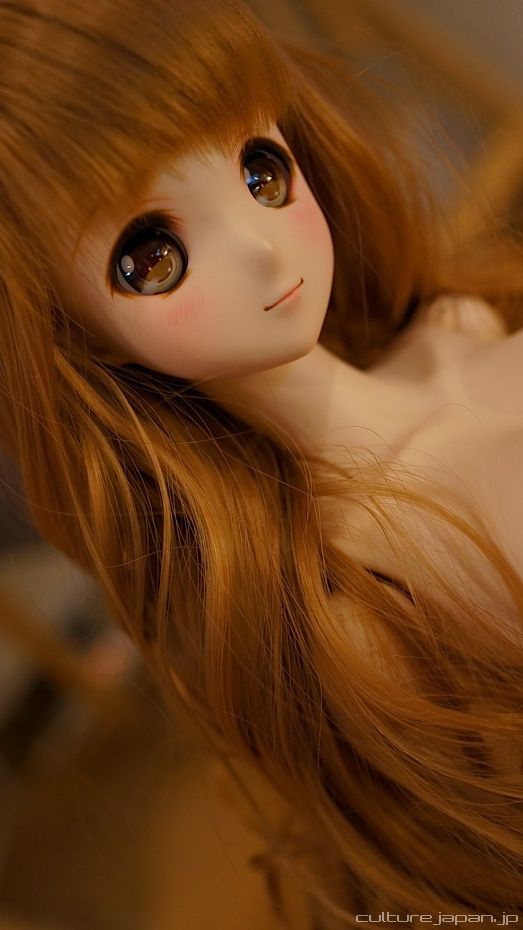
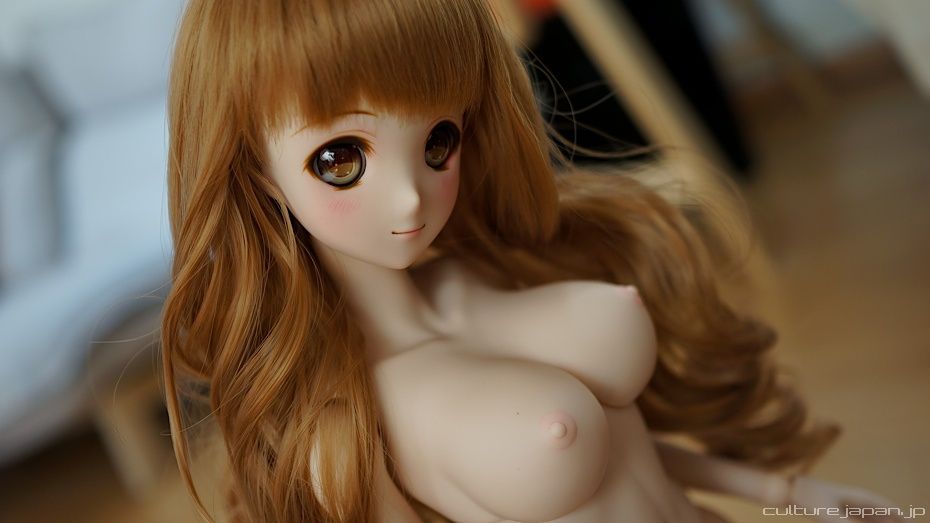
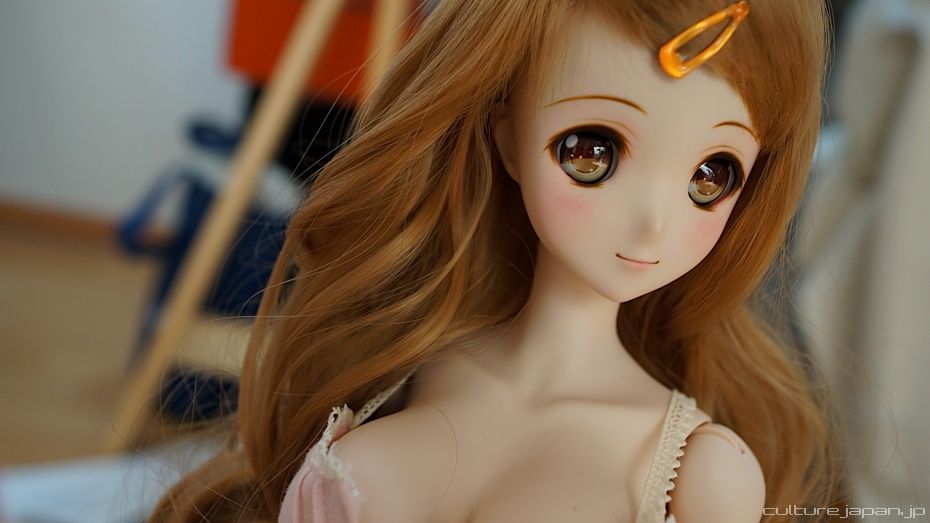
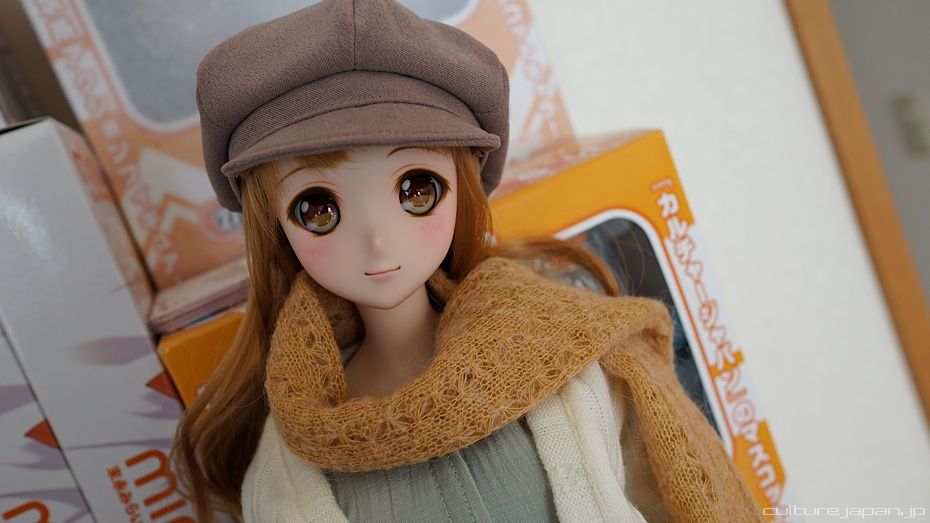
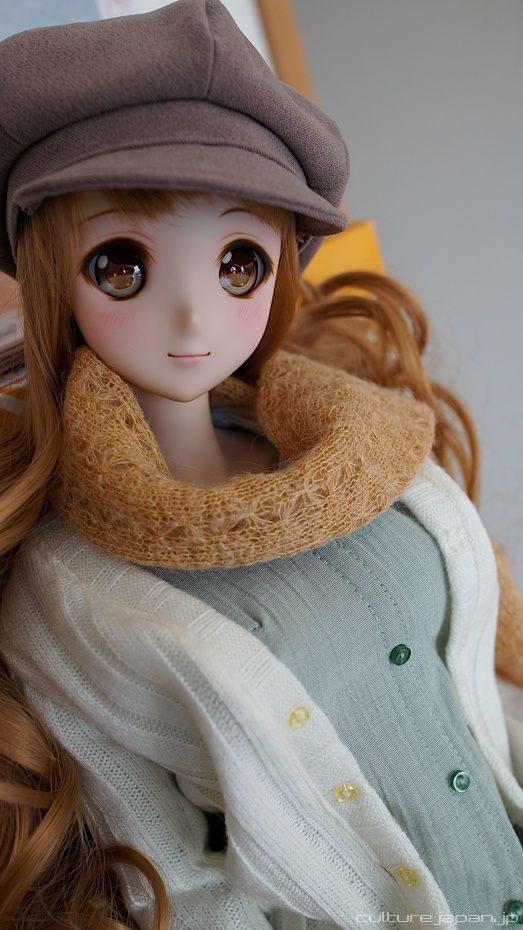
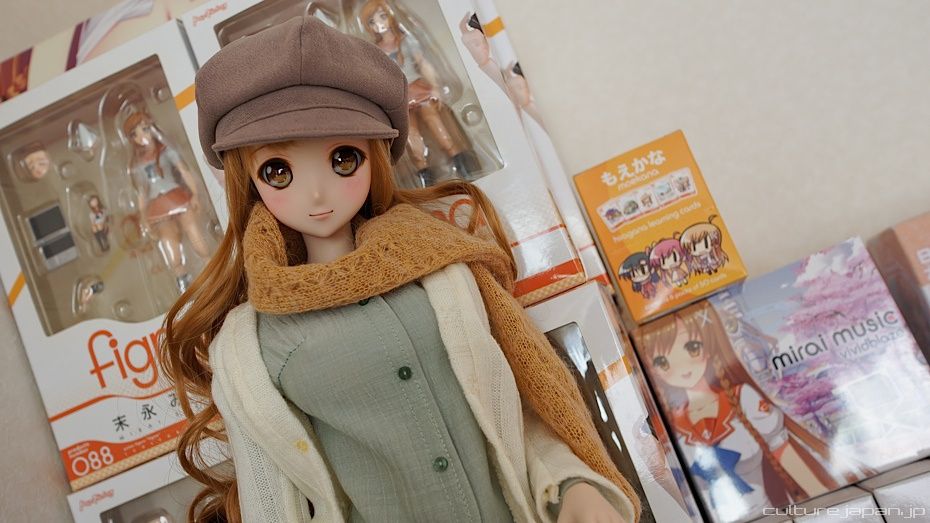
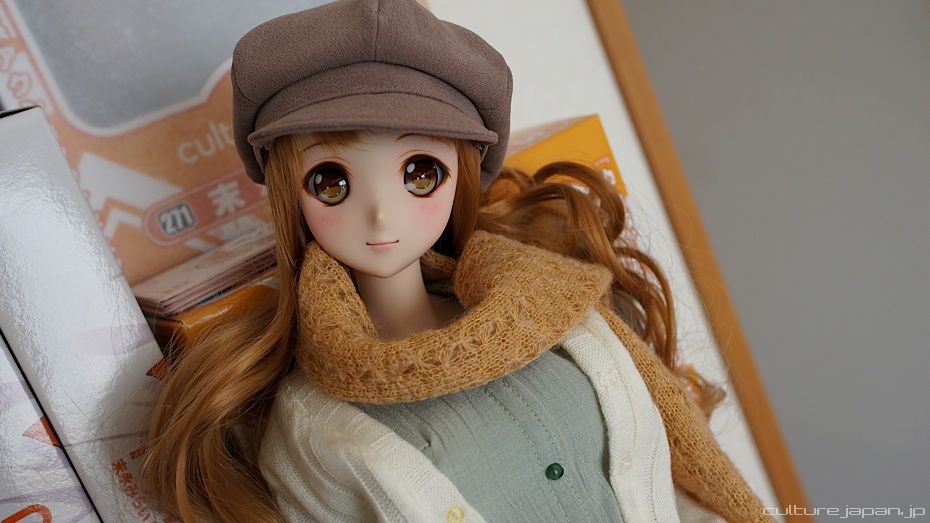
This is how Mirai looks so far ^o^
She's not perfect but for a first attempt to make a doll I would say that she's pretty cute ^^;
I love her kira kira eyes ^o^
And for those who thought that the robotics part was an April Fools - well you was right back then but you are wrong now ^^; Read on and I'll explain more about the project.
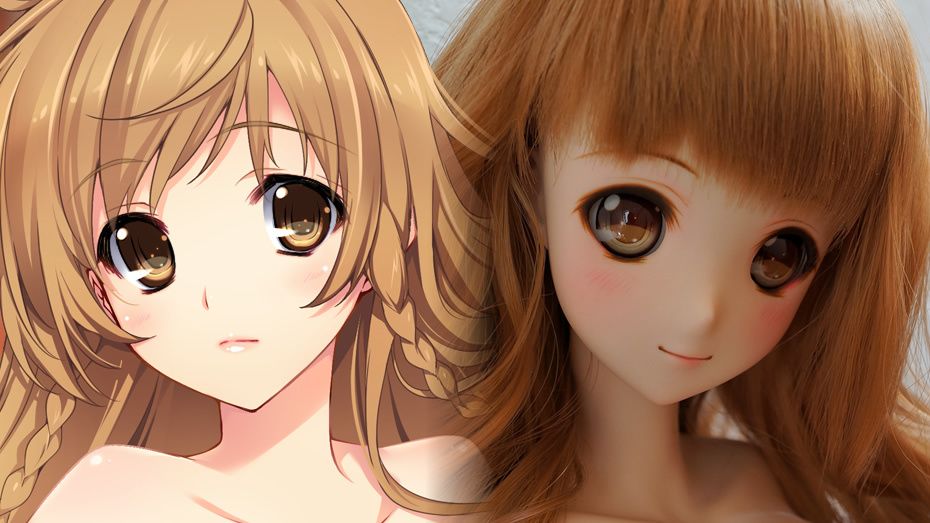
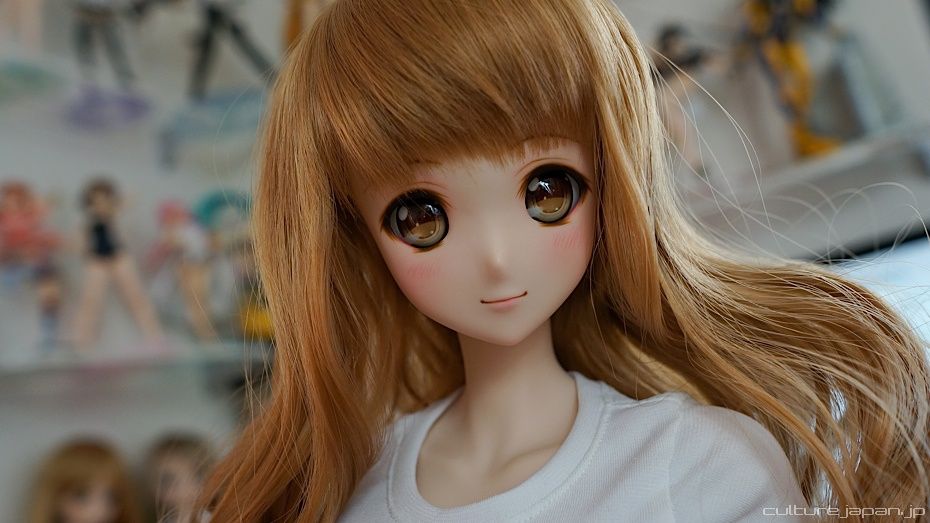
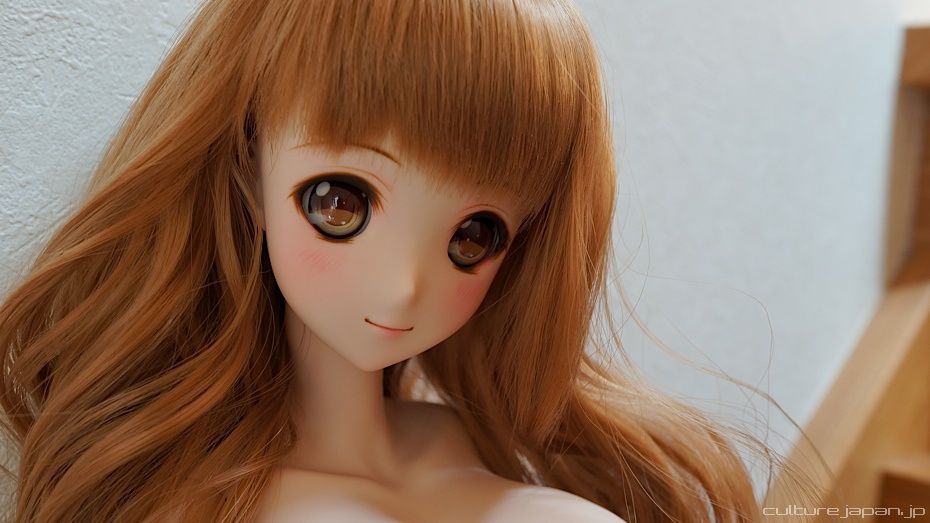
Mirai Ver 1.0 is modeled after an illustration of Mirai by Japanese illustrator Iizuki Tasuku-sensei. While some doll manufacturers go for printed eyes when creating a doll rendition of a 2D character, I decided to do my best using resin eyes. While the result is not perfect - I feel that its not bad at all.
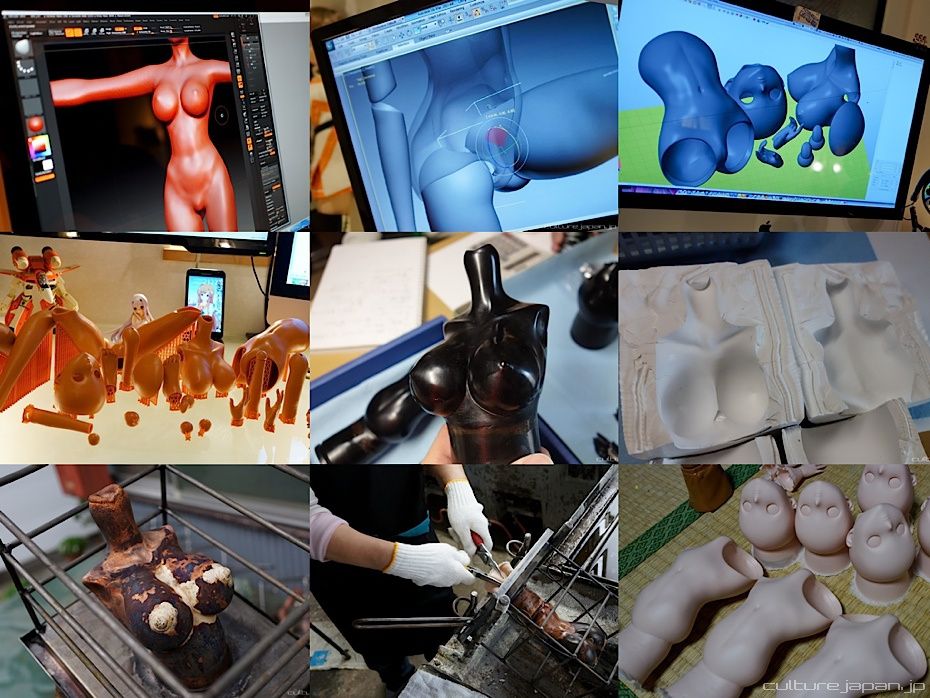
Before you read on, you may get confused if you have not read the previous post on mass production where I explain how we used 3D software to model the body and how 3D printers were used to print parts which were then duplicated to generate a wax clones. The wax clones were then copper plated using a process called electroforming.
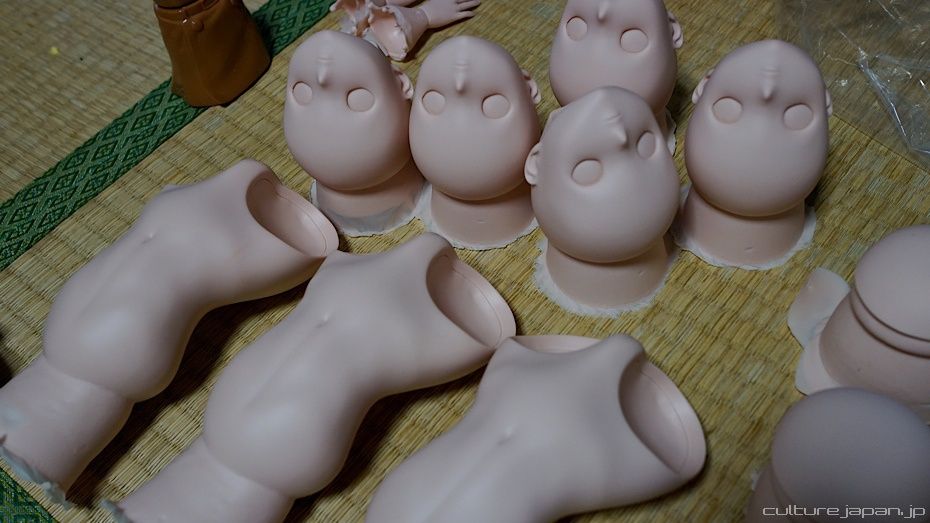
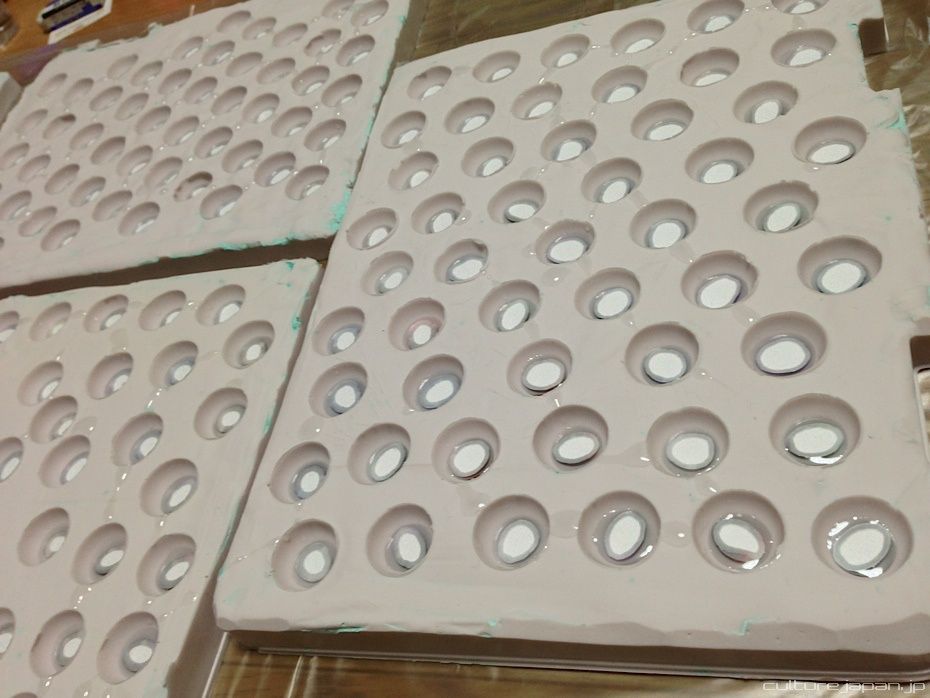
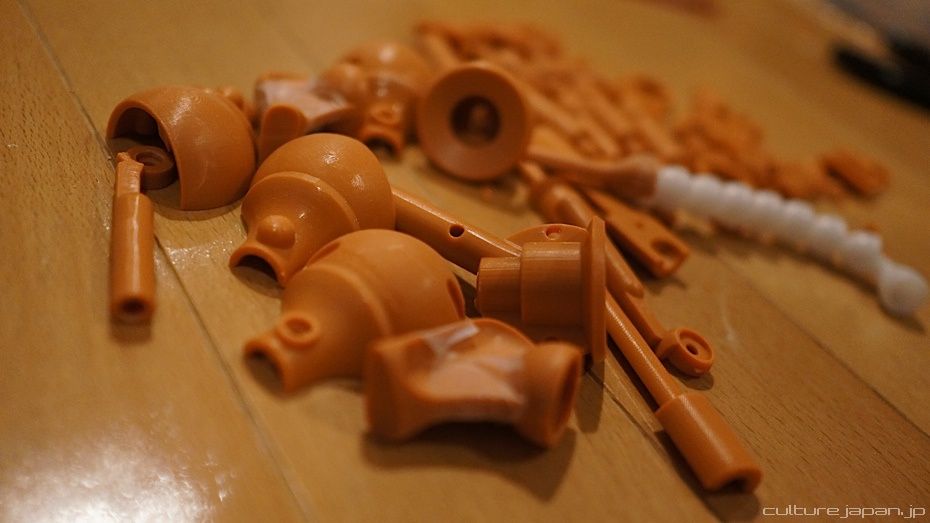
Going to start off by talking about the production of the head. Here are soft vinyl parts which have been freshly pulled from the molds.

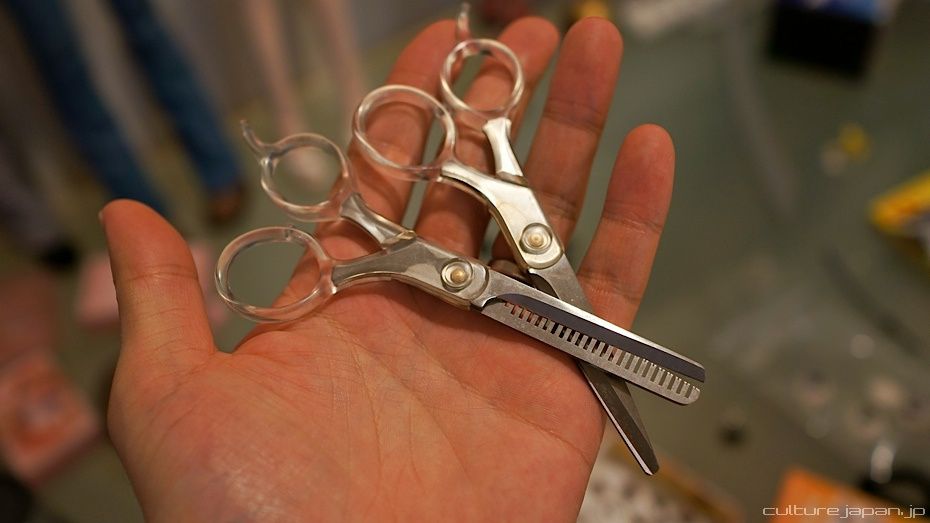
I called upon a comrade of mine who goes by the name RONRONSHUKA to help me do the make up for Mirai.
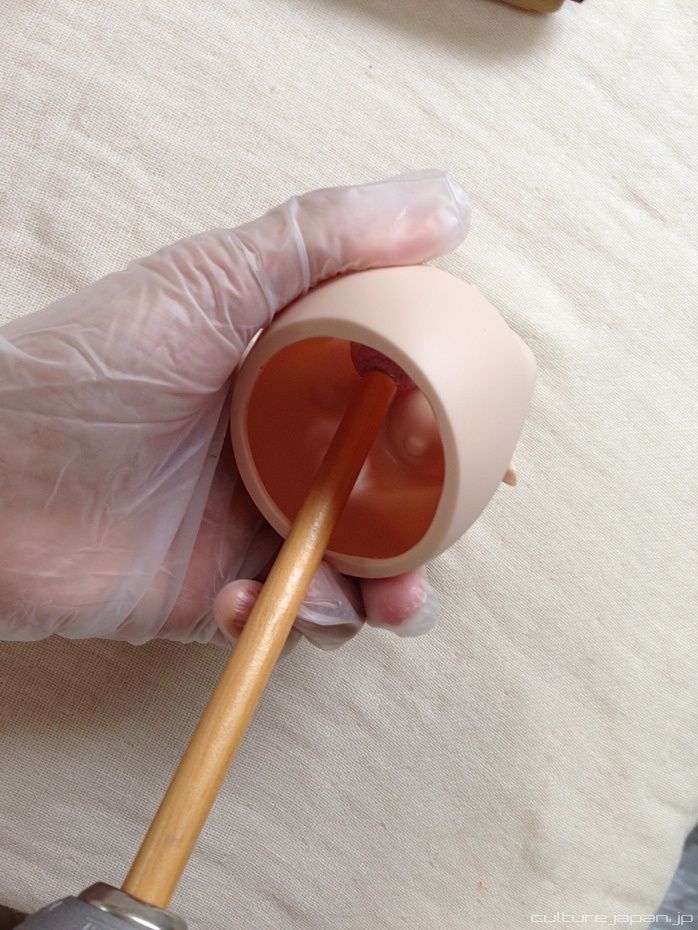
This is one of the tools that she uses to sand down the inside of the eye hole after it has been cut.
This is one of the tools that she uses to sand down the inside of the eye hole after it has been cut.
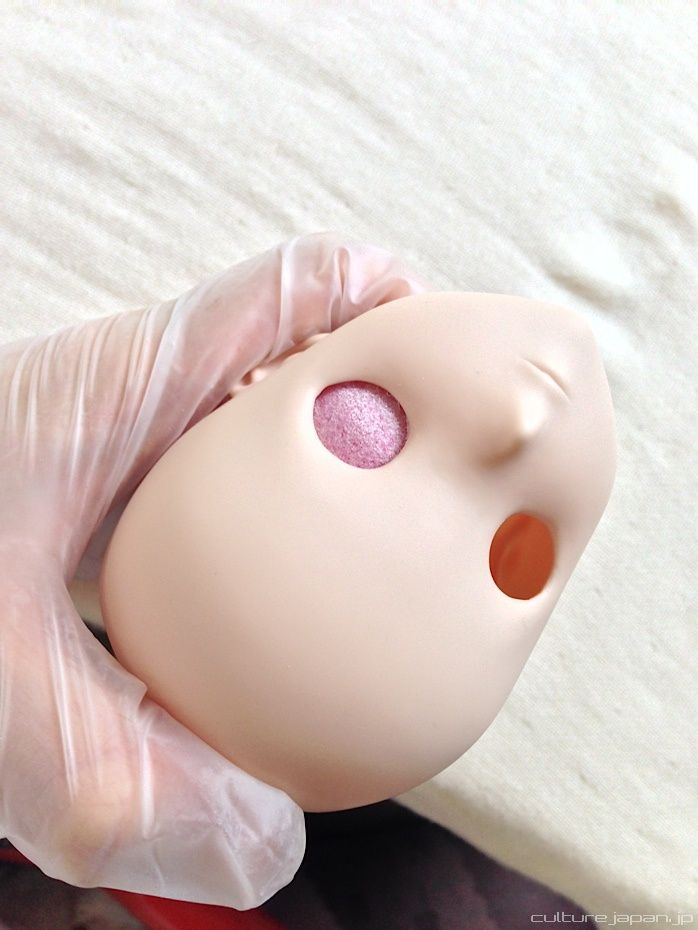
The eye holes are really difficult to cut but the handy drill bit sands down the rough edges.
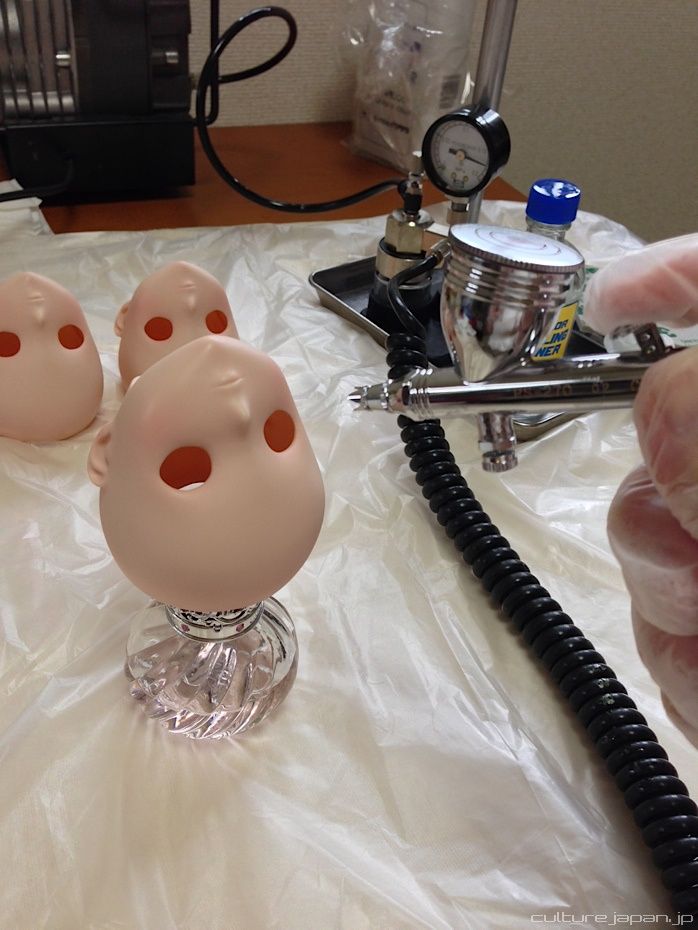
Time for the airbrush job to give Mirai cute blushing cheeks ^o^
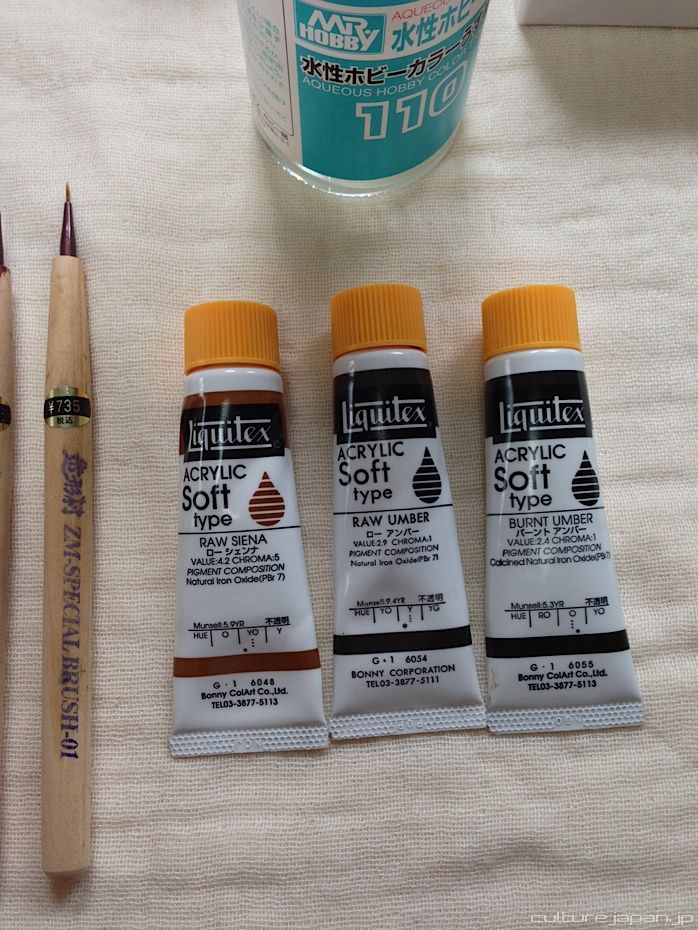
Here are some of the acrylic paints used for the makeup.
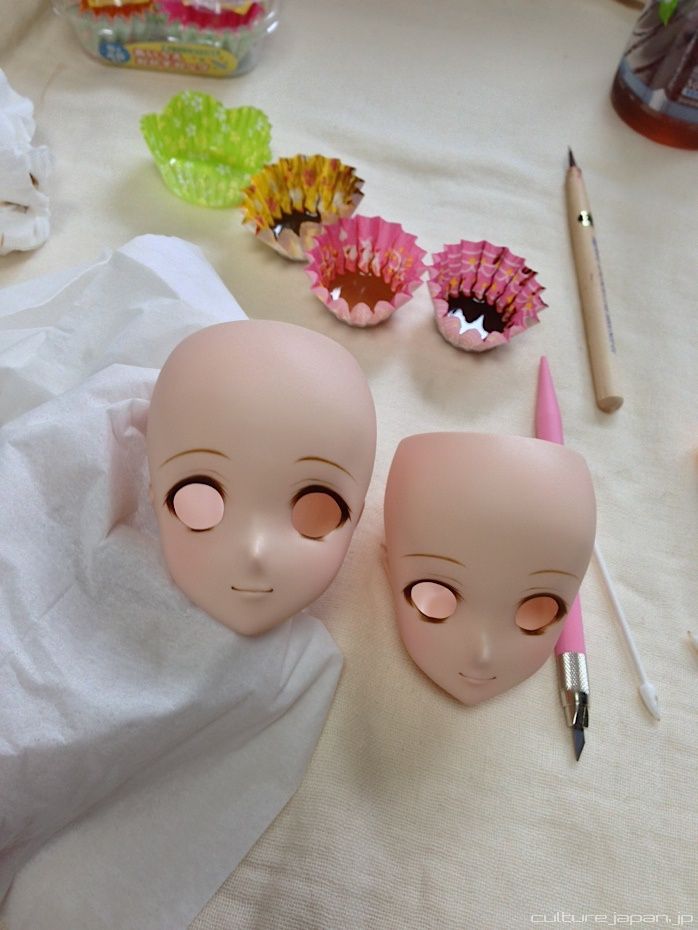
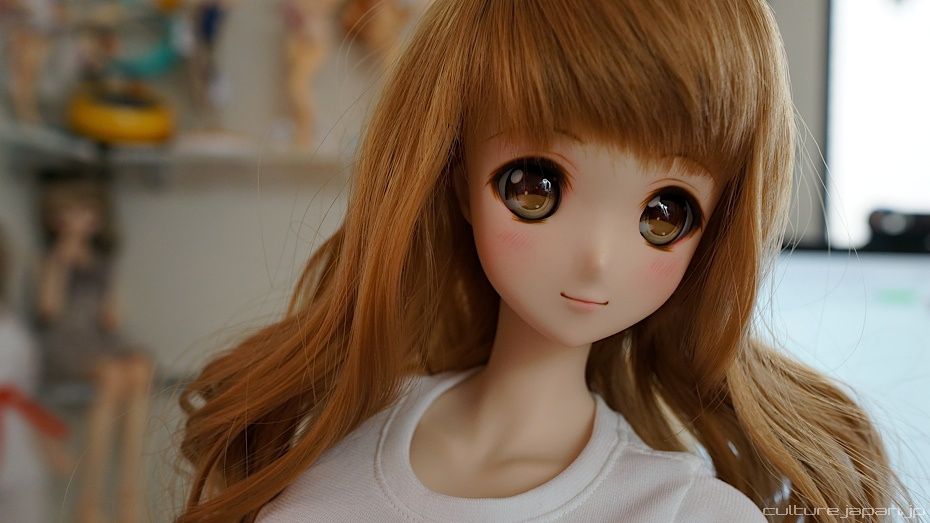
There is a science behind designing a doll face and while I have not quite worked out what it is yet, what I can share with you is that the whole expression can change due to slight variations of make up - even though the head is the same shape. Combinations of the angles of the eyebrows, design of the eye edges, amount of blush and lip color can generate completely different faces. This is why its very important to try out different combinations like we did.
And then there is the placement and size of the nose, shape of the lips, eye hole shape and position to consider too. Its important to make sure that both sides of the face are *not* the same. Many 3D modelers tend to just mirror the face - but just as a human with a mirrored face will look alien - so will a doll.
The final thing is taste - while my 3D modeler may think a face sculpt looks good - I may not necessarily feel the same. The vital thing here is to have the face match the producers taste as s/he will be the one to make everything a reality - it is key that the producer believes in the project and in order to do so, s/he needs to be 110% satisfied with the look and feel of the product.
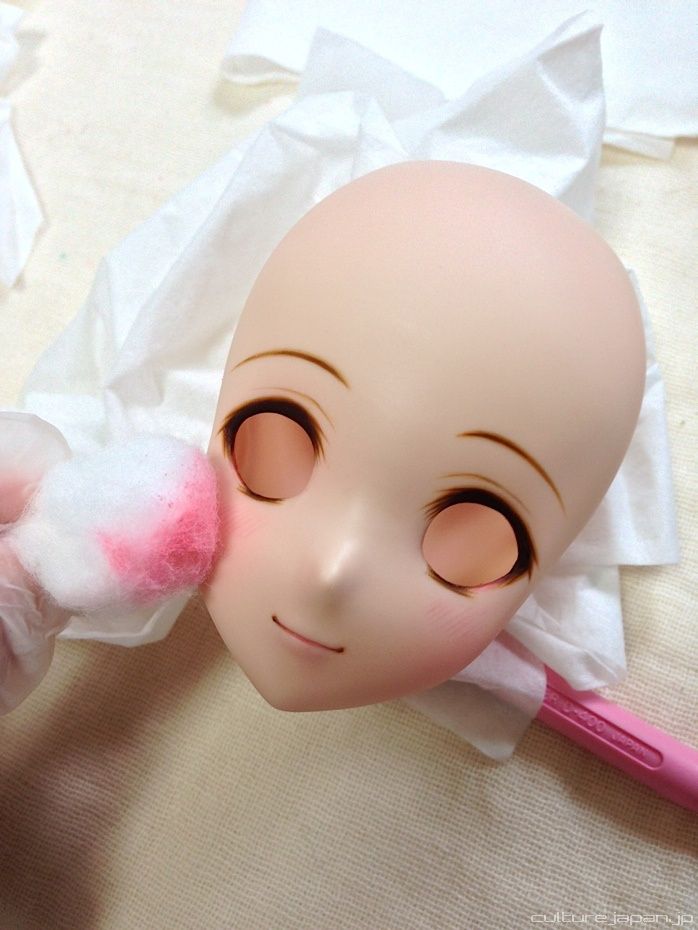
One thing I get my illustrators to do is to add the "////" lines on the cheek - no exception for the doll version.
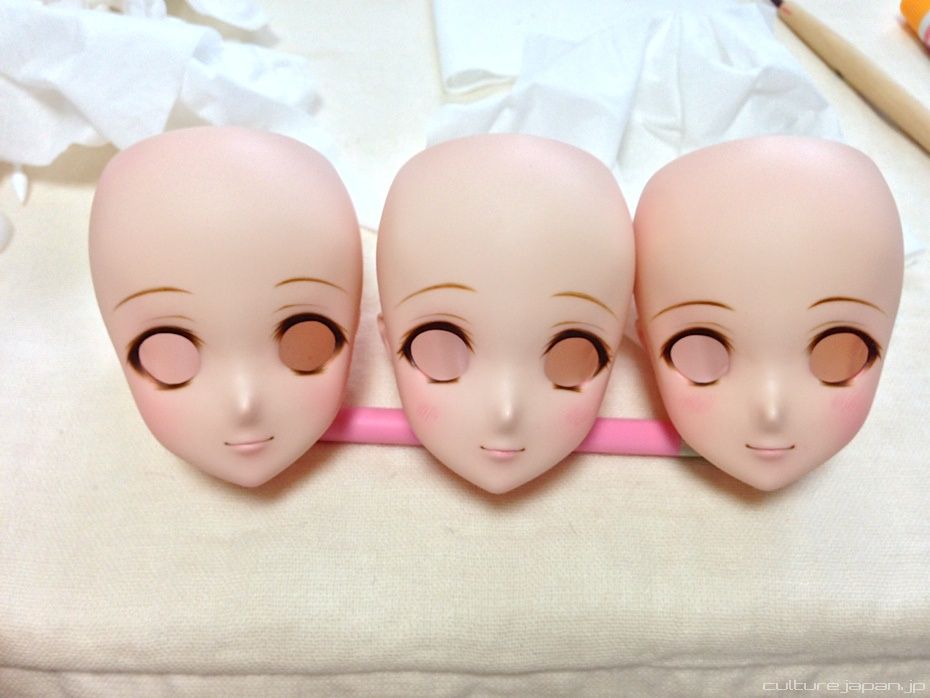
Initially we prepare 3 variations of makeup - each giving a slightly different look and feel after placed on the body with eyes and wig. Next step is to make paint masks which are like stencils - one mask for each layer of paint. Paint masks are called "Tosou Masuku" and are needed for mass production as it would not be practical to hand paint each one.
I'm visiting the mask factory this week and will take photos to show you the process.
I'm visiting the mask factory this week and will take photos to show you the process.
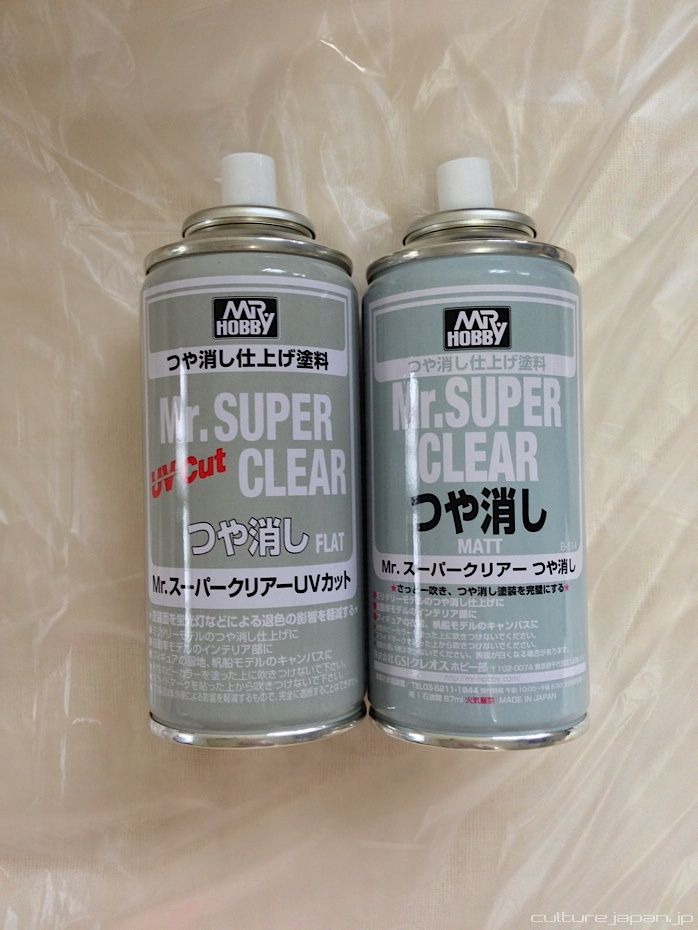
Once I'm happy with the makeup, Top Coat is sprayed over the face to protect the makeup and make sure it does not rub off. Until Top Coat is sprayed, we still got room to do alterations.
Now its time to make the eyes. I'm still thinking whether to do Acrylic or Resign eyes. Acrylic eyes are cheaper for mass production. Resin eyes cost more but are more shiny and seem to look better and more lifelike.
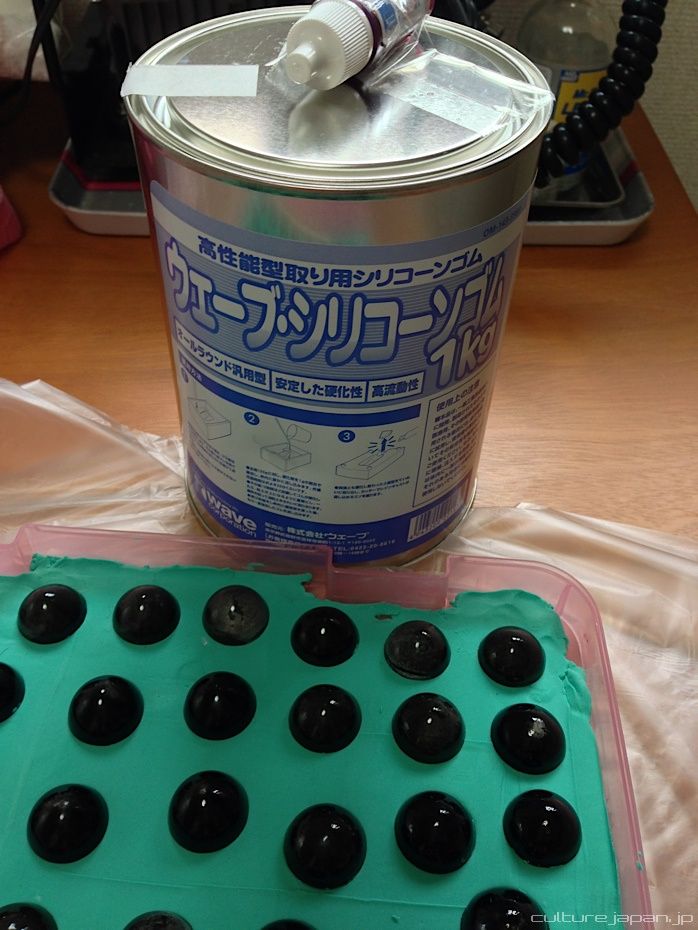
The black domes you see here are the sculpt for the eyes which are placed on some plasticine. The can pictured here is filled with silicon rubber.
The black domes you see here are the sculpt for the eyes which are placed on some plasticine. The can pictured here is filled with silicon rubber.
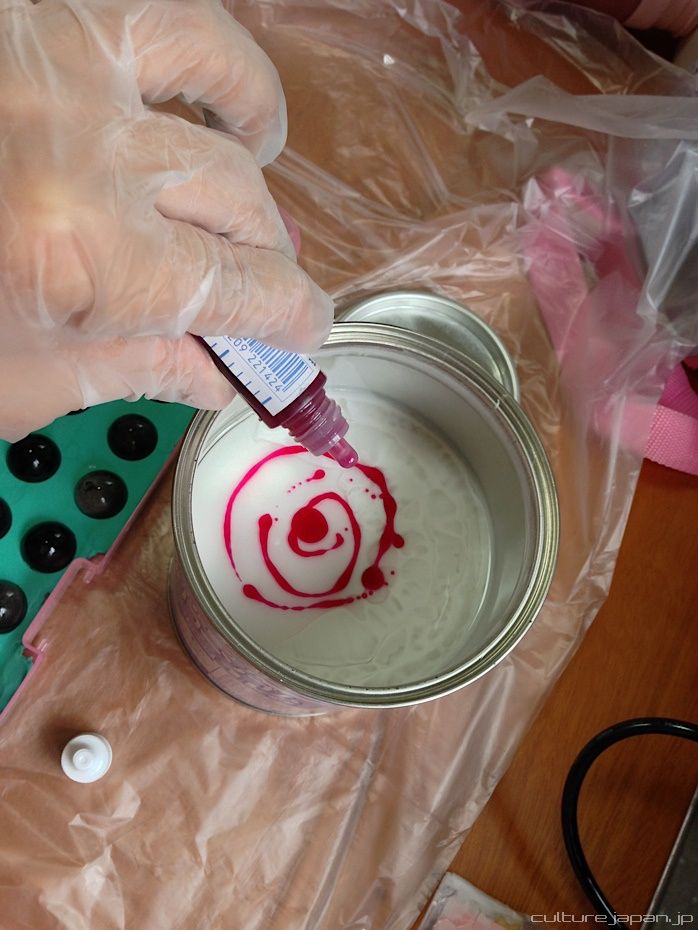
A hardening agent is poured into the silicon rubber. Its red but after mixing you hardly notice any redness at all.
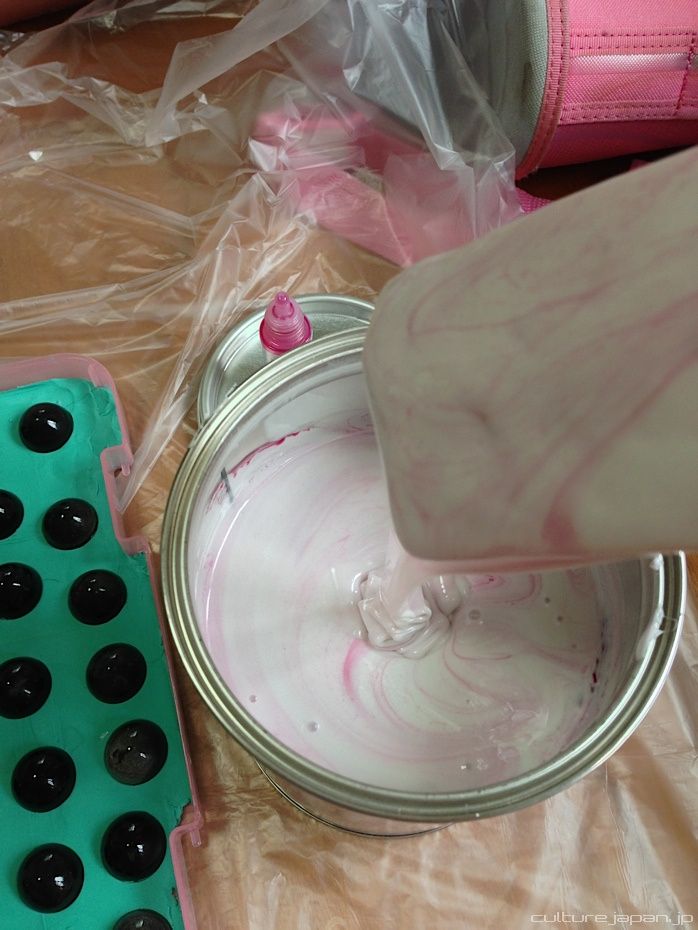
Then its time to mix the hardening agent and silicon rubber together. When thats done, its poured into the tub that contains the eye sculpt and plasticine.
Once the silicon has cured, the plasticine and eye sculpts are removed from the tub to leave behind the silicon mold. Due to the nature of silicon, it can only be used a certain number of times (5-ish) before the material starts to degrade.
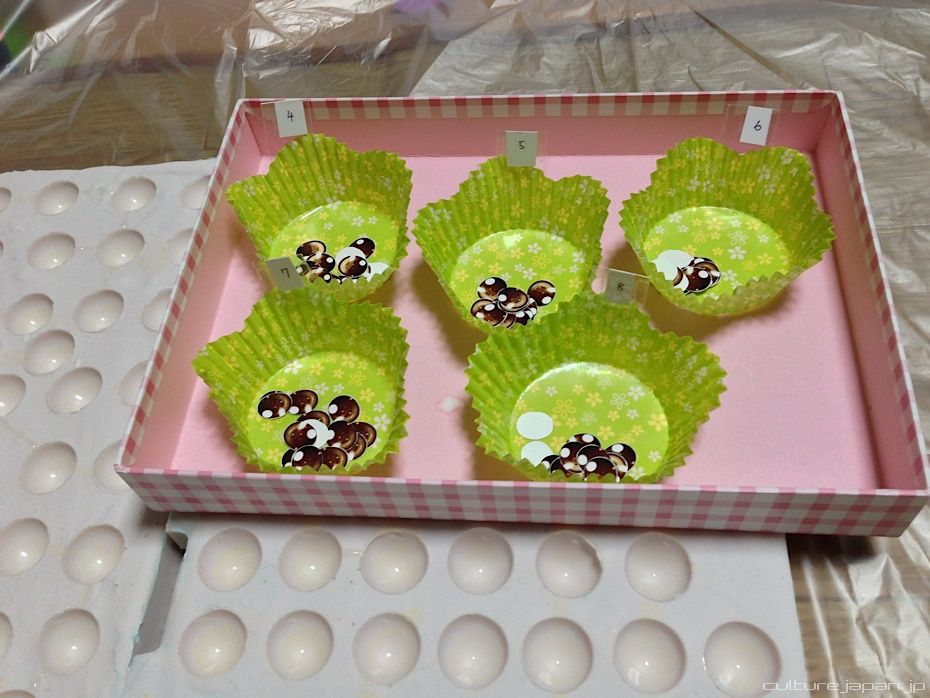
The design of doll eyes are actually printed on paper - make sure you use photo paper and print using a high DPI setting. The eye design is another important factor for a dolls face and we need to consider the darkness of the gradient and size of the highlight. Its important to have decent sized highlights or your doll eye will end up looking like a yandere - which is fine if thats what you want ^^;
Crystal Resin Super Clear is then poured in each pit and the printed eye is placed facedown on top.
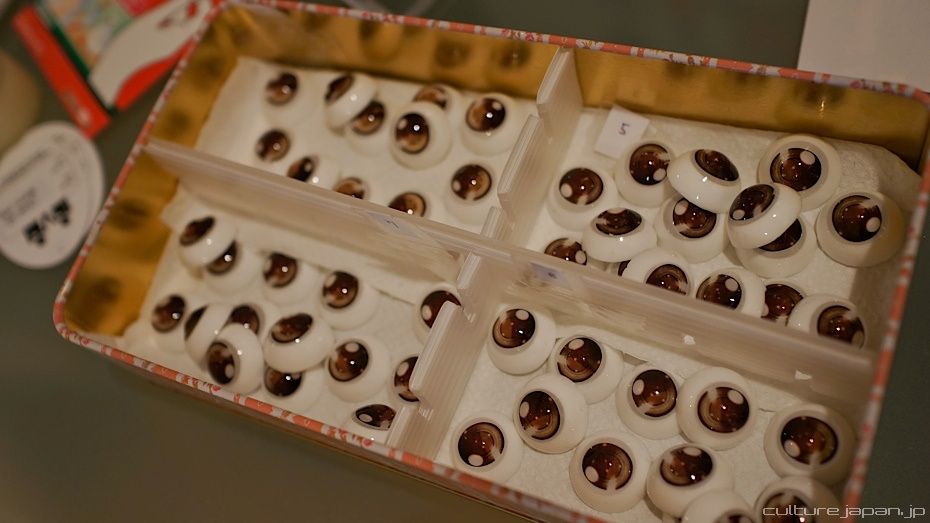
And here are the different variations of the eye design. One thing about resin eyes however is that there is a high chance that air bubbles will form in the resin as its poured from the can. The air bubbles could be removed using a deaerator but they are huge and not really practical to have around the house ^^;
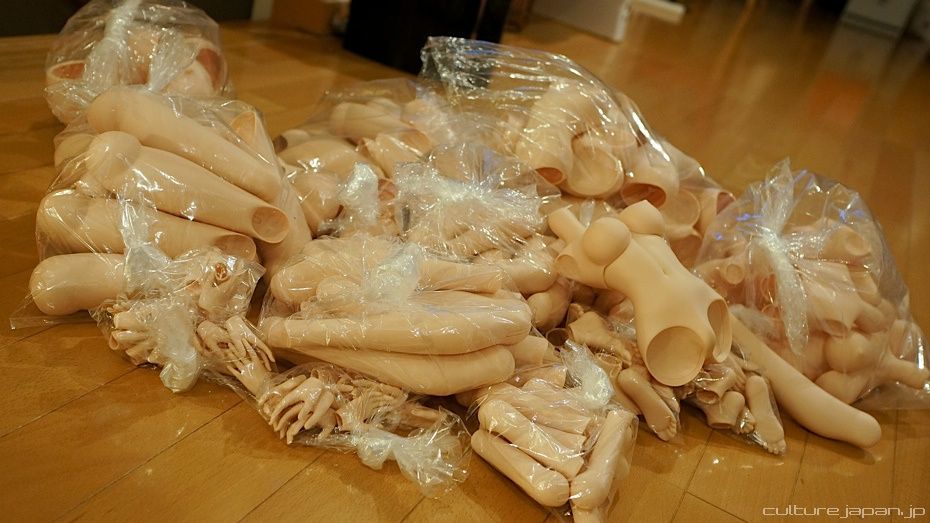
10 sets of Mirai just arrived freshly pulled from my molds.
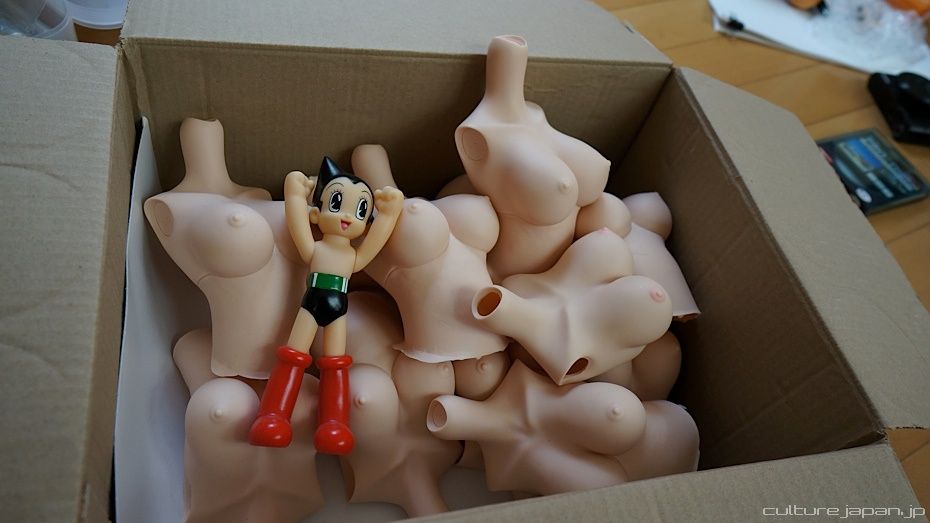
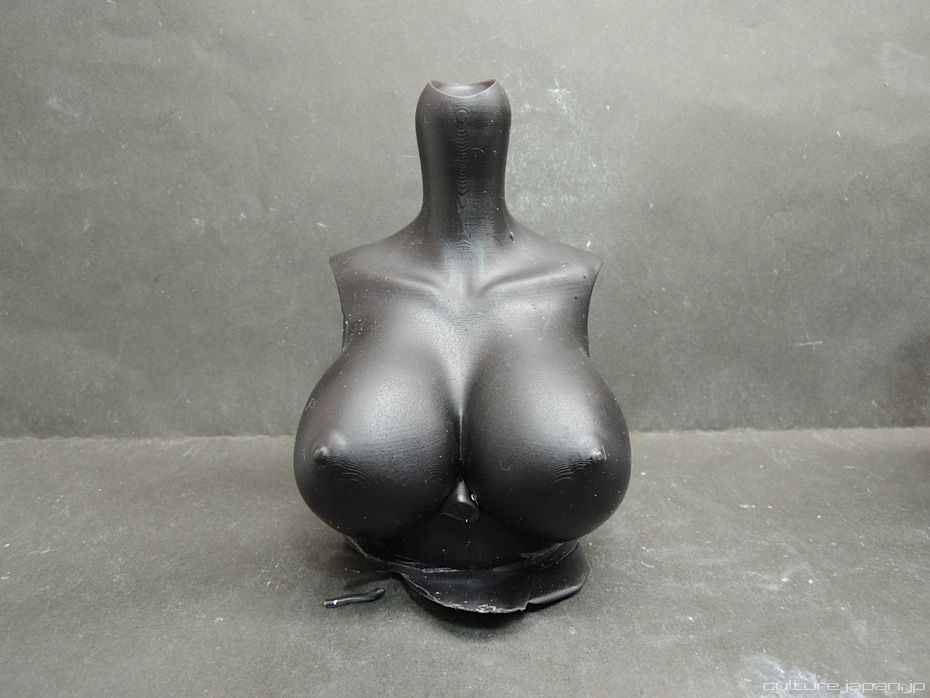
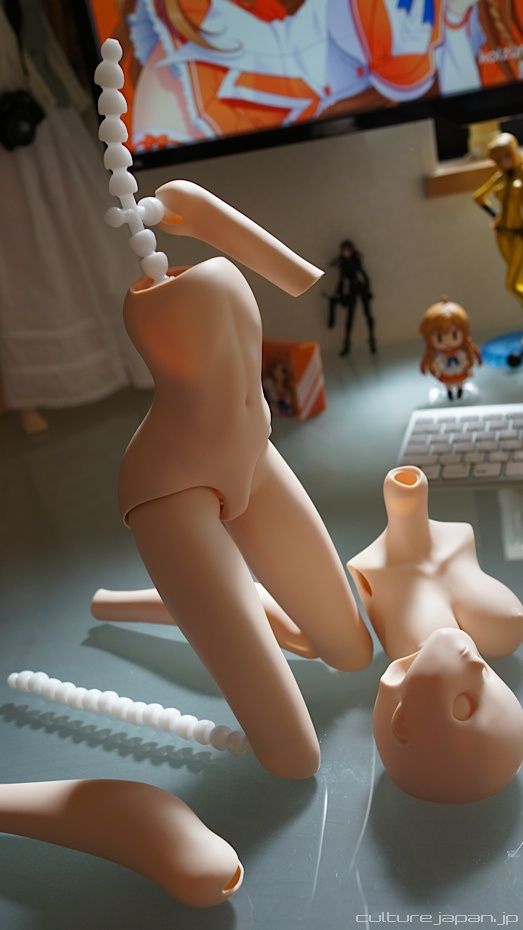
And here are some oppai parts which I need to do a lot of experimenting on ^^
Slush Molding (casting) Soft Vinyl is one of the cheapest form of toy production with costs low enough so that many individual folks can afford to make their own stuff.
Good Smile Company has been making some really detailed products of late using this form of molding and you can see the high amount of details that soft vinyl can yield.
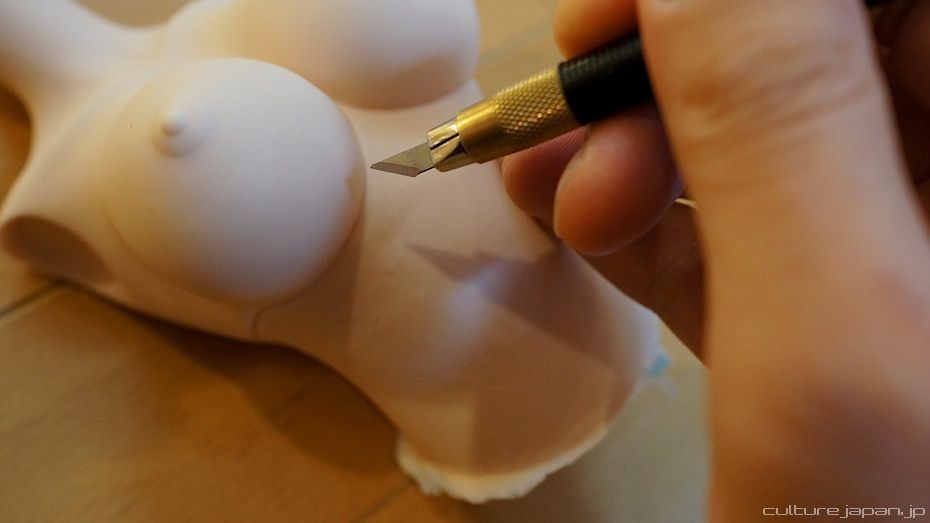
Anyway, as I mentioned previously, I didn't design the oppai to have the spout attached which is why it ended up looking like this. The problem is that no matter how you cut it...
...you are going to end up with a visible cut like this. The reason is that the cutting surface is the same as the surface of the oppai. When you are designing your own products, make sure you take into consideration the moulding method too which dictates where join lines or flash will end up - design your product so that they are hidden out of view.
I'm not happy with this mold so its back to the drawing board.
I'm not happy with this mold so its back to the drawing board.
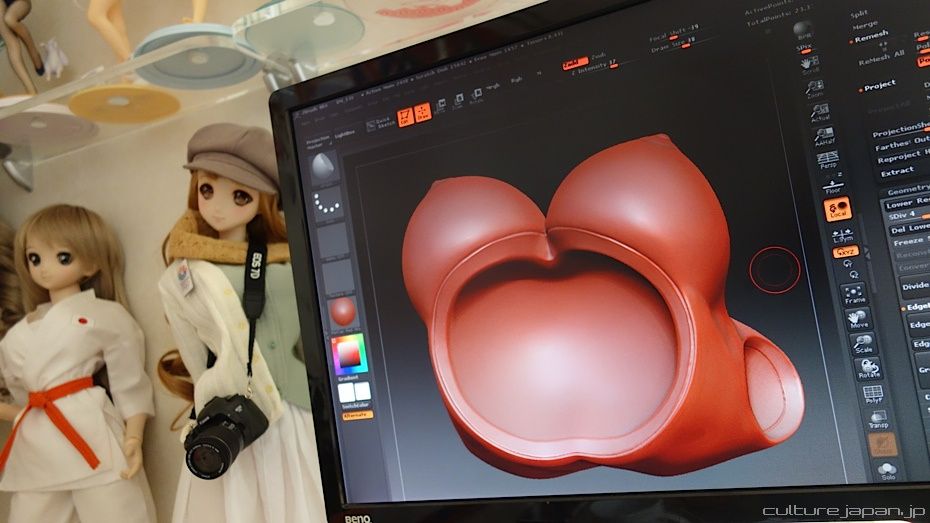
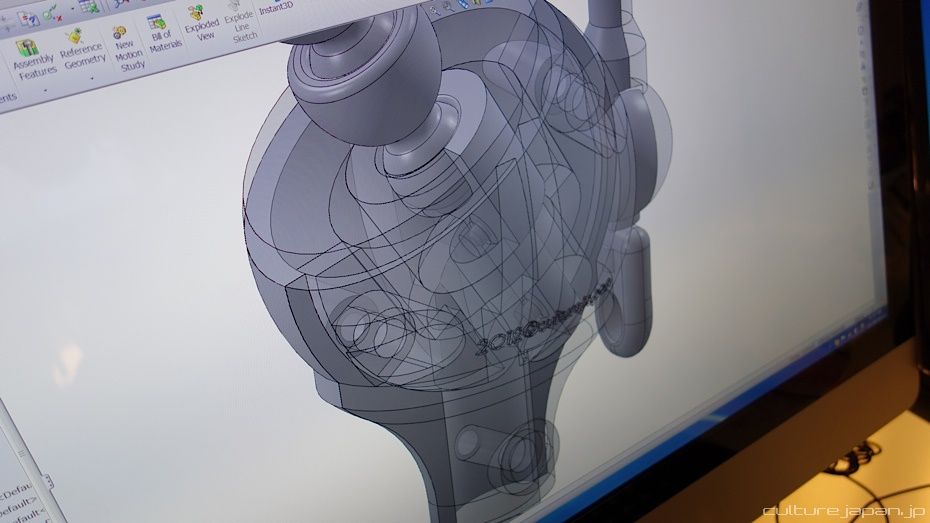
Luckily we done everything in 3D. We use ZBrush to modify the oppai part so that the edges that will be cut are behind the oppai. This is then re-printed in 3D where a wax copy of it is made via its silicon mold.
And here is the wax copy with the spout attached - next step is to polish this down. This oppai will be melted after it has been copper plated to make the final production molds.
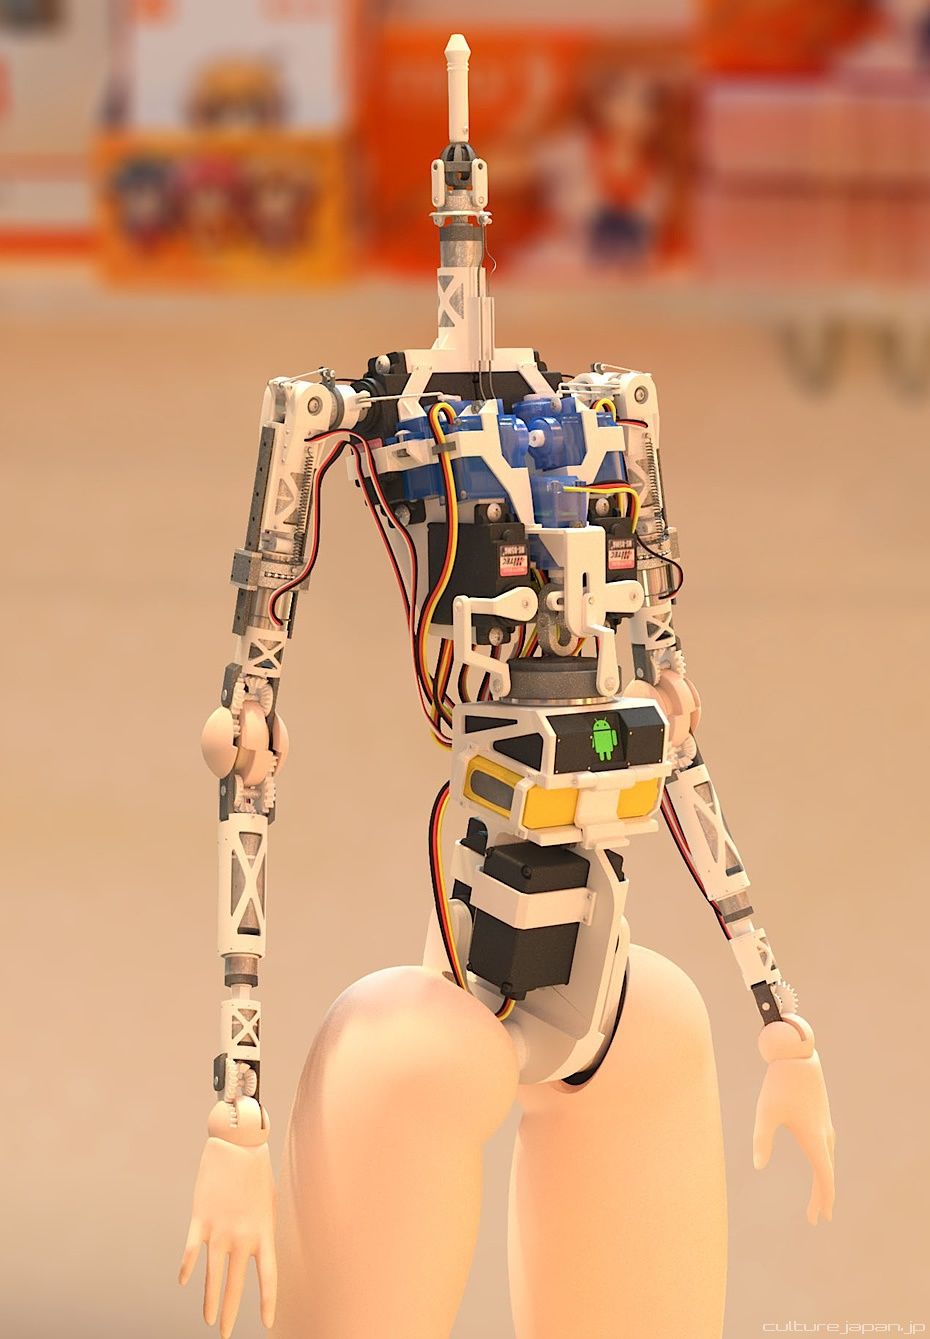
Now to talk about the Smart Doll feature. I didn't have the resources to make it in time for April the first so whipped this together in 3D - nice rendering eh? ^^
The reason why it looks so real is because we used the HDRi Light Probe technique. I had to buy two huge christmas tree balls for this project ^^;
The reason why it looks so real is because we used the HDRi Light Probe technique. I had to buy two huge christmas tree balls for this project ^^;
News of the Smart Doll generated a lot of buzz in the robotics scene in Japan and as a result I got to meet a few robotics experts who I hooked up with - we are now working to make this a reality ^o^
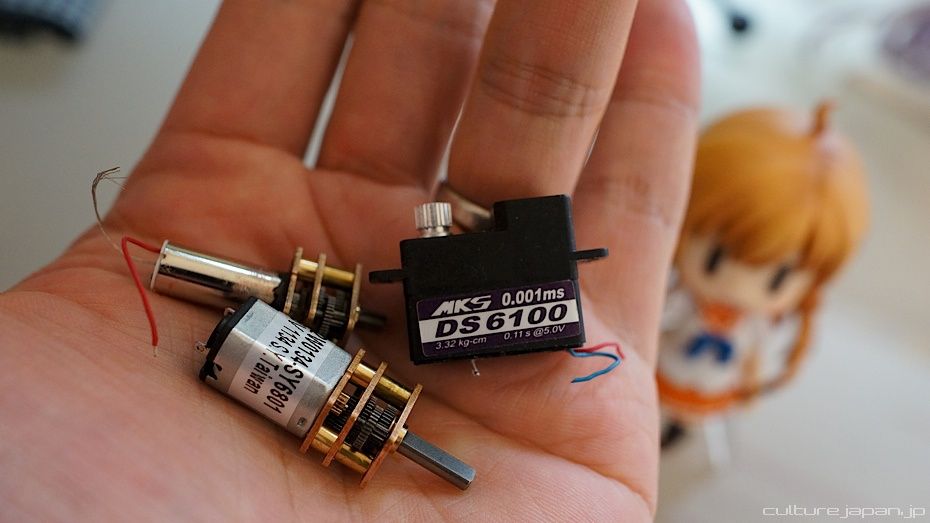
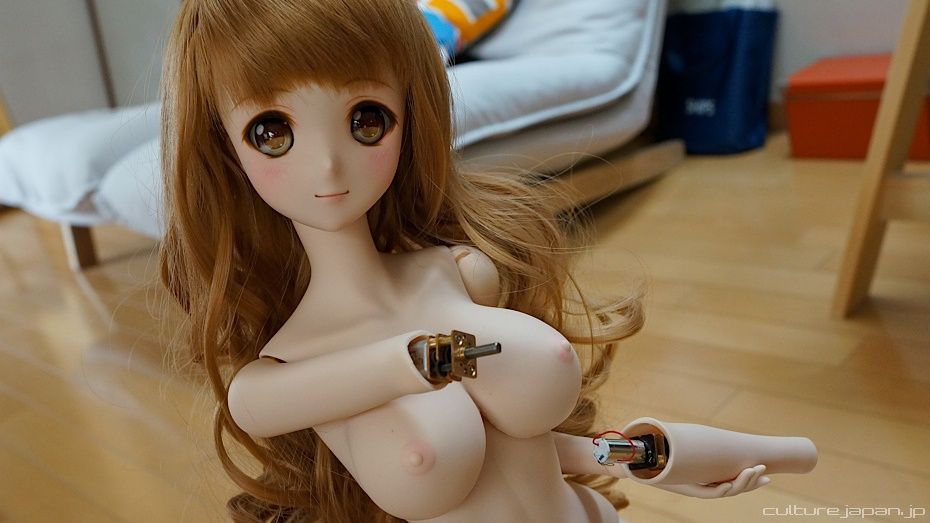
Here are some of the smallest servo motors that exist on the market. These ones fit into the limbs but what we have also been able to do is make our own hybrid servo motors by mixing and matching the gears and motors.
The Smart Doll will have about 24 servo motors, a CPU board, bluetooth and touch sensors. We are currently designing her so that she can dance to existing MMD sequences and move using Kinect - but that may not be ready in Firmware Ver 1.0.
Power source will initially be external with a Ghost-in-the-Shell-like socket that fits in the back of her neck using an L plug. There will also be touch sensors in the head so that she will give a cute reaction when she is given a pat. I'm not going to attempt to muffle the motor sounds as I kinda like the whirring sound ^^
Power source will initially be external with a Ghost-in-the-Shell-like socket that fits in the back of her neck using an L plug. There will also be touch sensors in the head so that she will give a cute reaction when she is given a pat. I'm not going to attempt to muffle the motor sounds as I kinda like the whirring sound ^^
You will be able to plug her into the mains where she will just do her own thing in Idle Mode (looking around the room, shifting body etc) keeping you company as you work - a bit like the animations in MiraiClock3.
For mobility, I want her to be able to be charged via a USB mobile battery but depending on the power consumption, she may end up having to use one of those heavy duty laptop mobile batteries.
For mobility, I want her to be able to be charged via a USB mobile battery but depending on the power consumption, she may end up having to use one of those heavy duty laptop mobile batteries.
Apart from Idle Mode where she does her own thing, there will be other presets too which she will perform at the press of a button as well as being able to control her via your Android phone (iOS comes later).
We are currently designing her so that you can remove the arms and head too. The first version should be ready during of June.
The Smart Doll version is looking to cost quite a bit but still cheaper than the price of standard dolls that can be found on auction sites.
We are also developing a much more affordable standard frame version too and we've done that using a tool called Solid Works which enables us to do collision detection.
We are also developing a much more affordable standard frame version too and we've done that using a tool called Solid Works which enables us to do collision detection.
Parts of the frame are also printed using a 3D printer. Once I'm satisfied with the frame, we need to make the parts using a process called injection molding which does end up costing a considerable amount more than slush molding ><
Most of the frame however is made up of existing parts on the market meaning that we can reduce our development costs by buying in bulk as OEM parts. The skeleton you see here is made out of Polyoxymethylene (POM) - its properties are high strength, hardness and rigidity and strong enough to maintain various poses. The final version will be the same color as the skin.
And then there is the wig - so many things to consider for one product ^^;
I've currently taken an existing wig and am cutting it to my fancy. I'll either buy wigs in bulk as OEM or work with a wig factory to develop my own depending on costs.
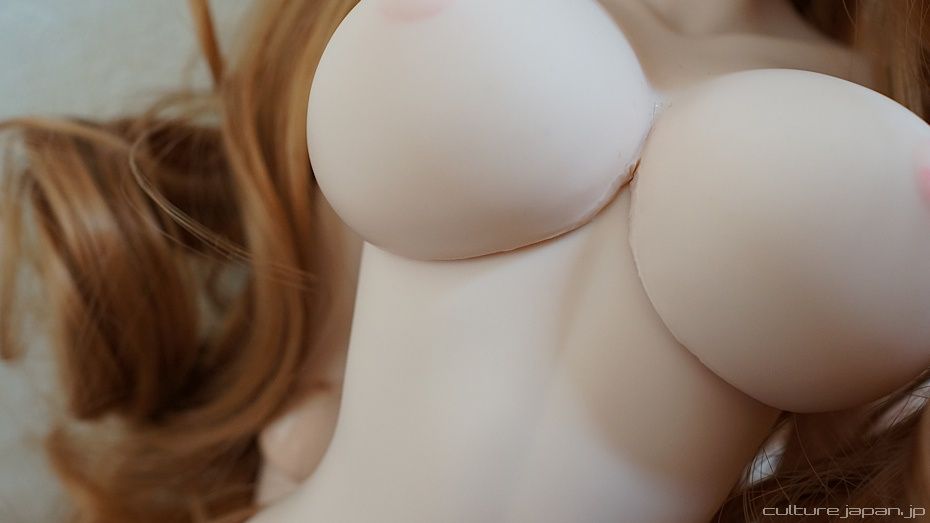
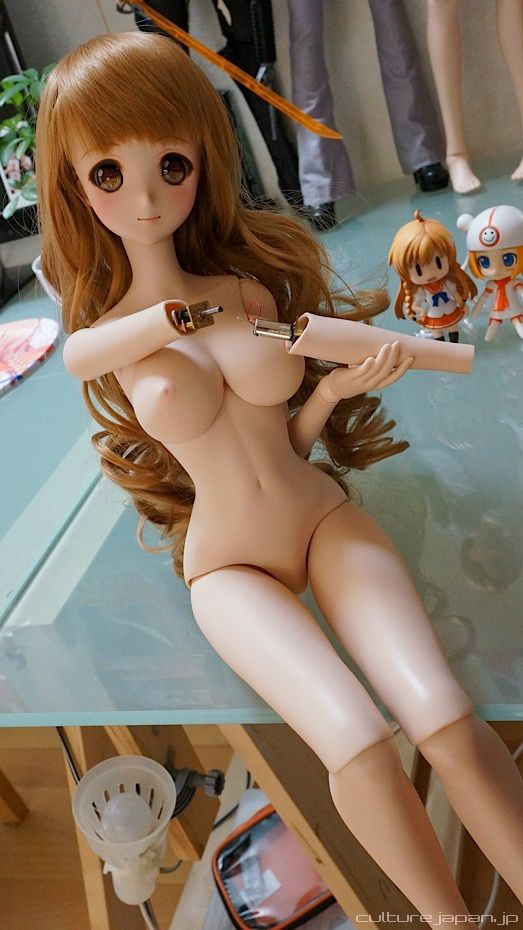
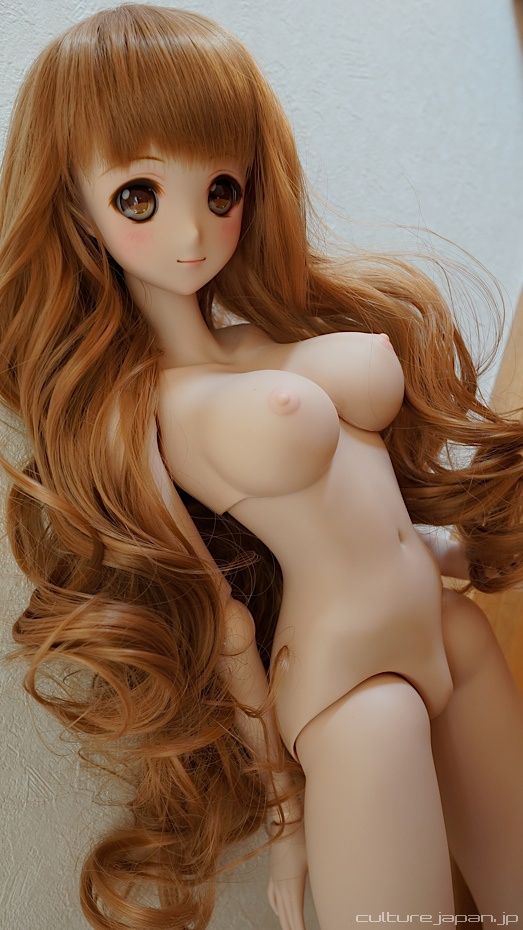
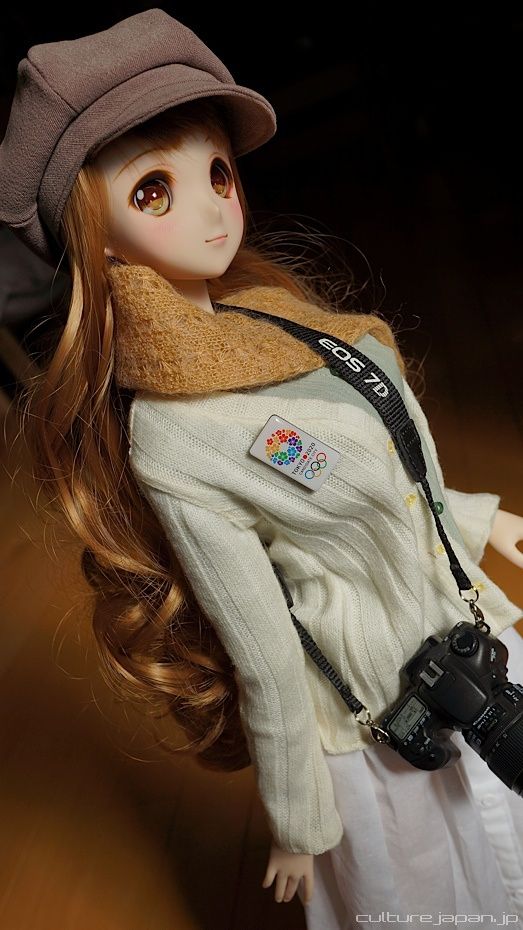
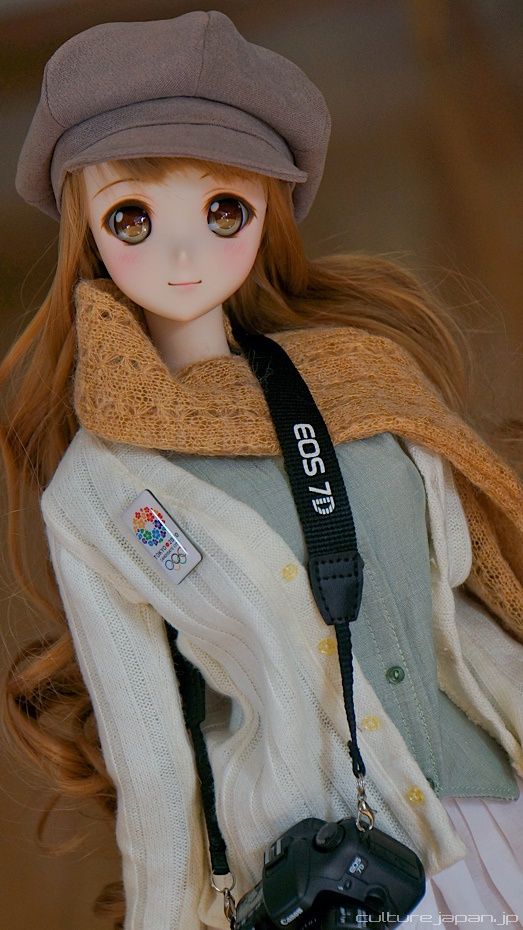
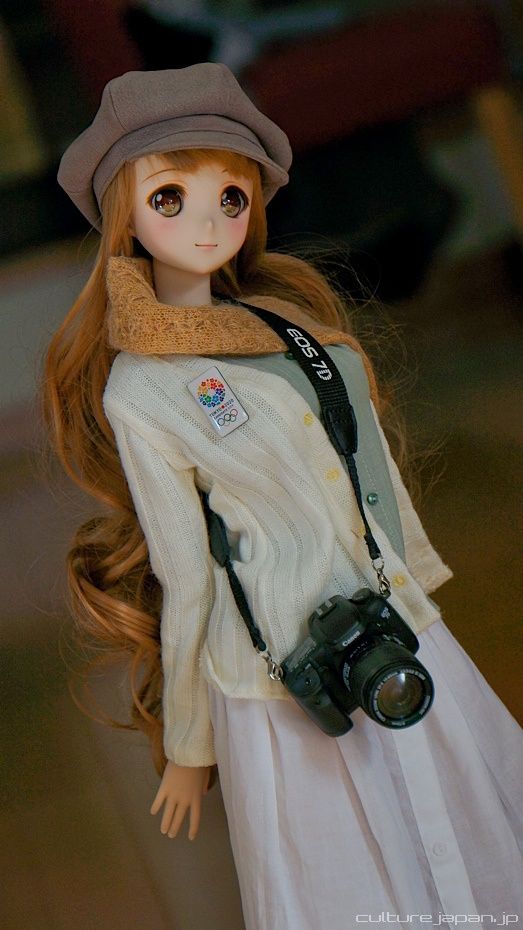
Going to take a closer look at the body now. The oppai part you see here is the old version - the new one will have toned down "rose buds" ^^;
After the production process and line is fixed for Mirai Ver 1.0 - we will make a smaller oppai part. Some folks ask me why the oppai is so big but its only just a tad bigger than the L Bust on a Dollfie ><
Clothes designed for 60cm dolls should fit Mirai well but not if they are specifically designed for a Dollfie as my Mirai has bigger oppai ^^;
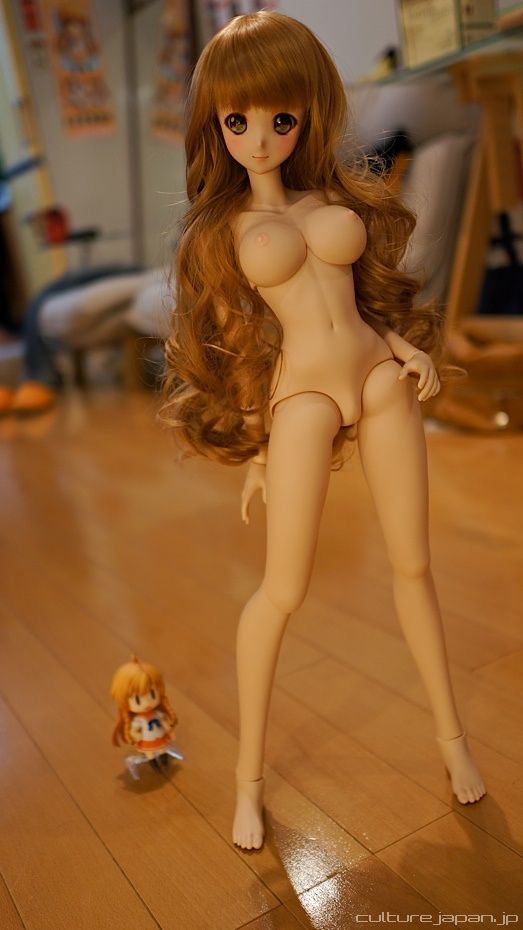
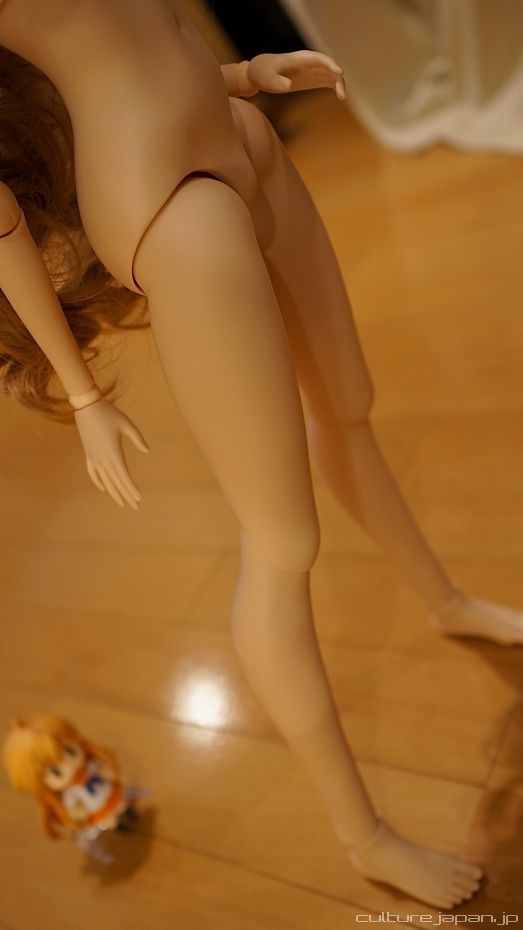
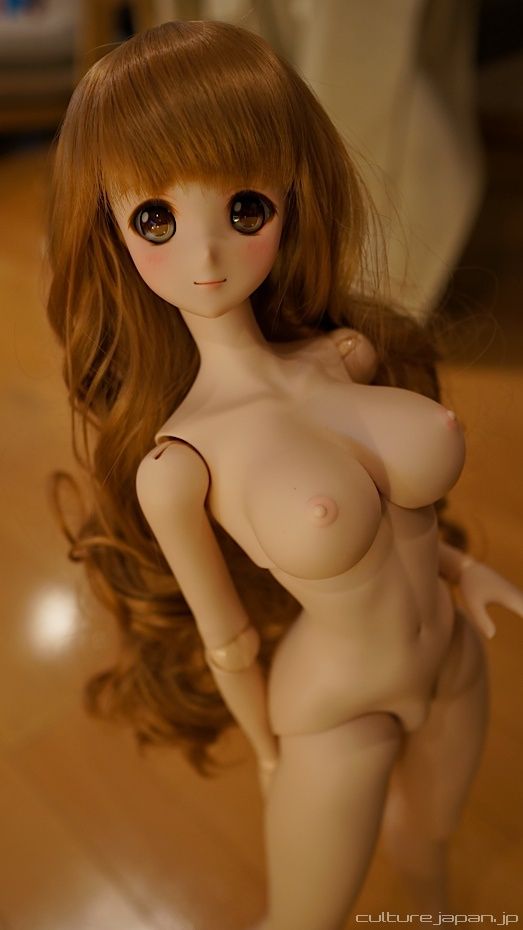
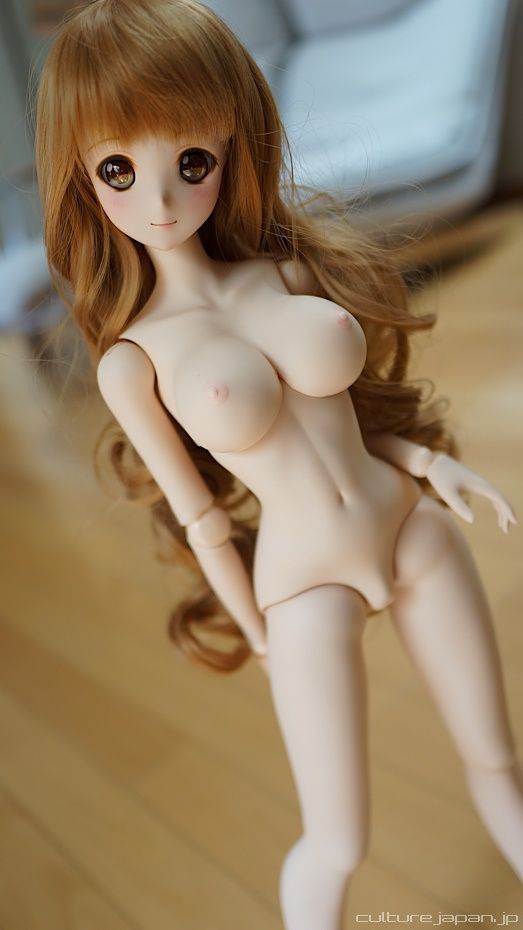
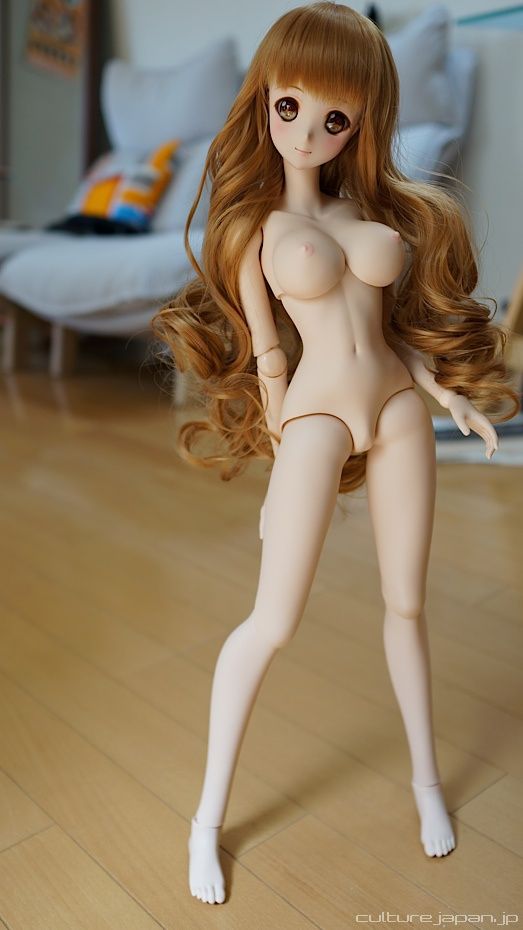
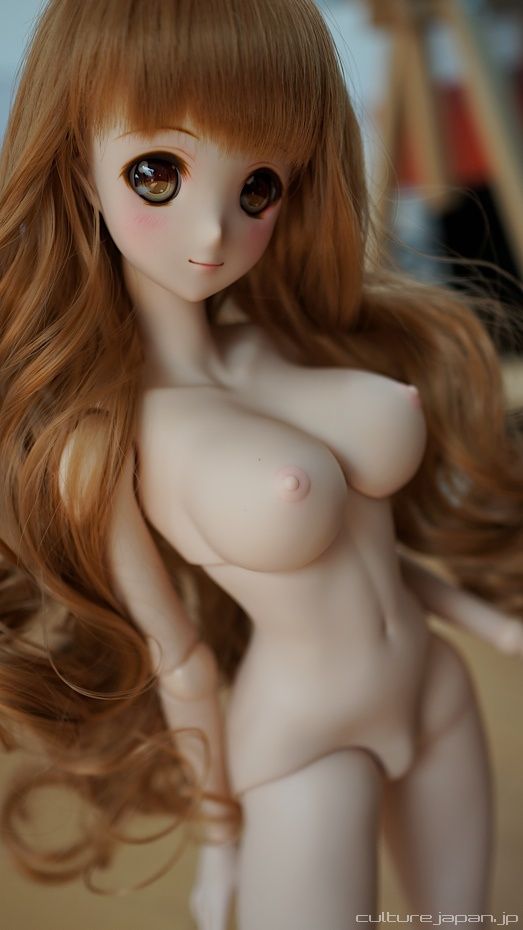
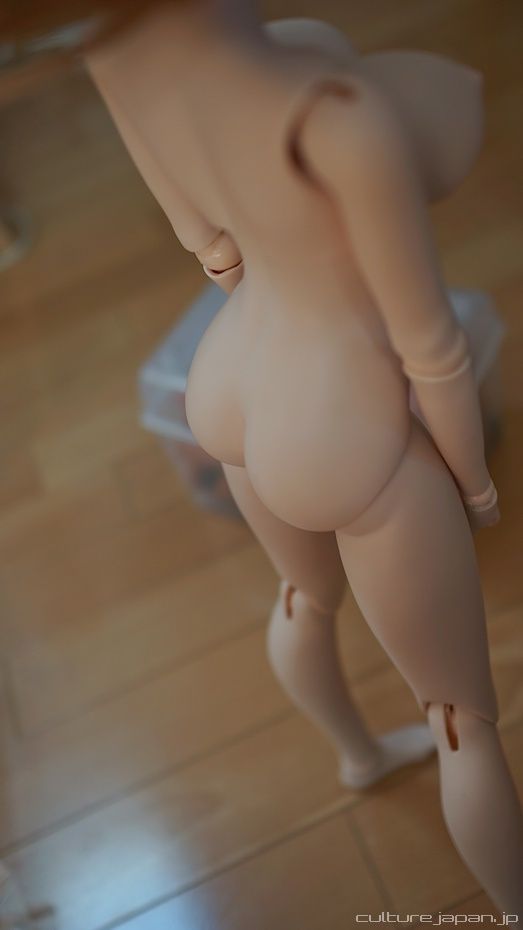
I didn't bother to censor any of the photos as its important for doll owners to check out the whole body - just as you can view them nekkid on other doll product websites.
The next few photos of Mirai in her birthday suit.
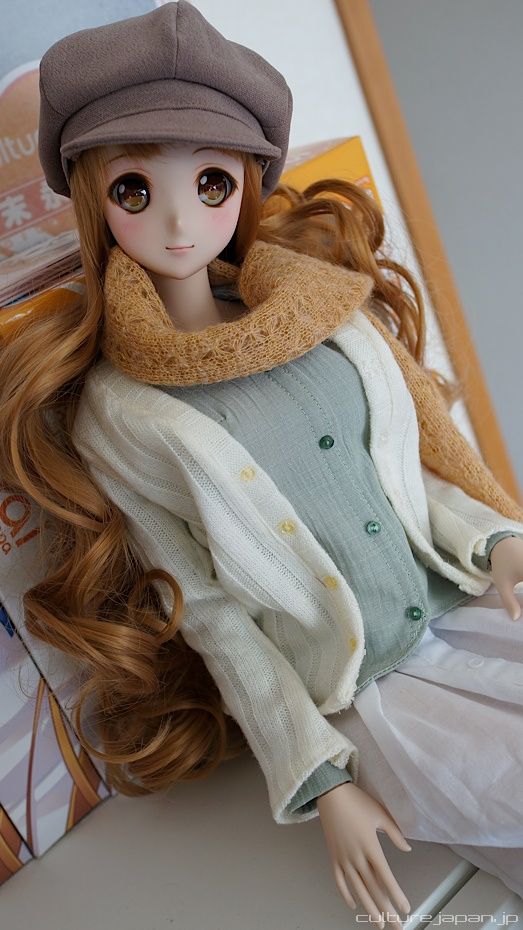
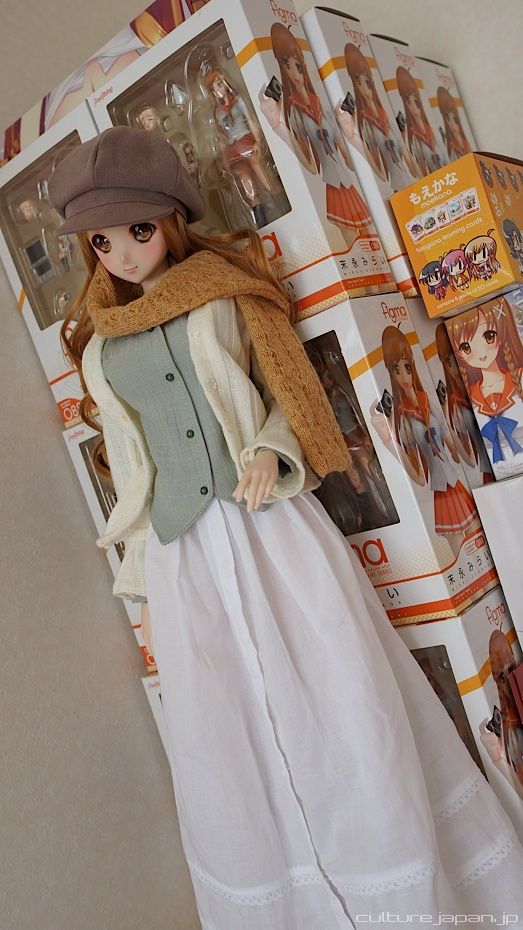
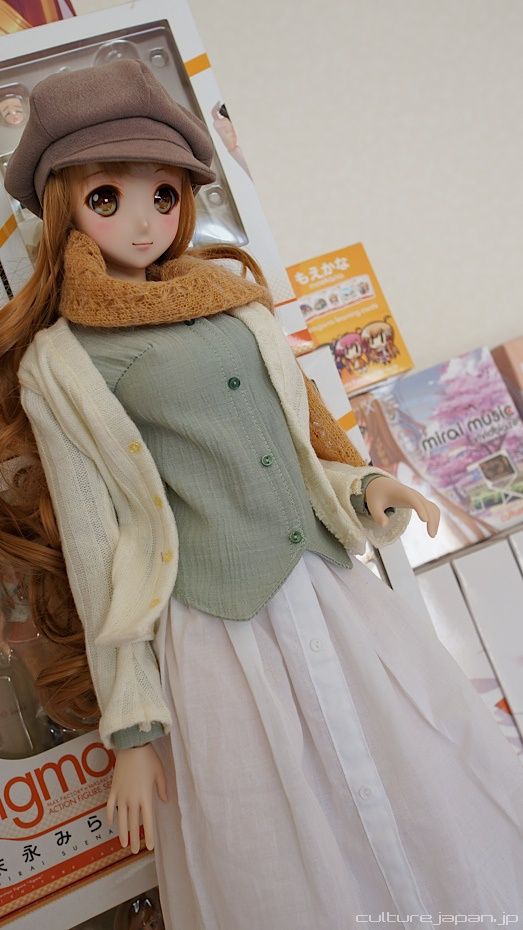
And this is what Mirai looks like with her clothes on ^^;
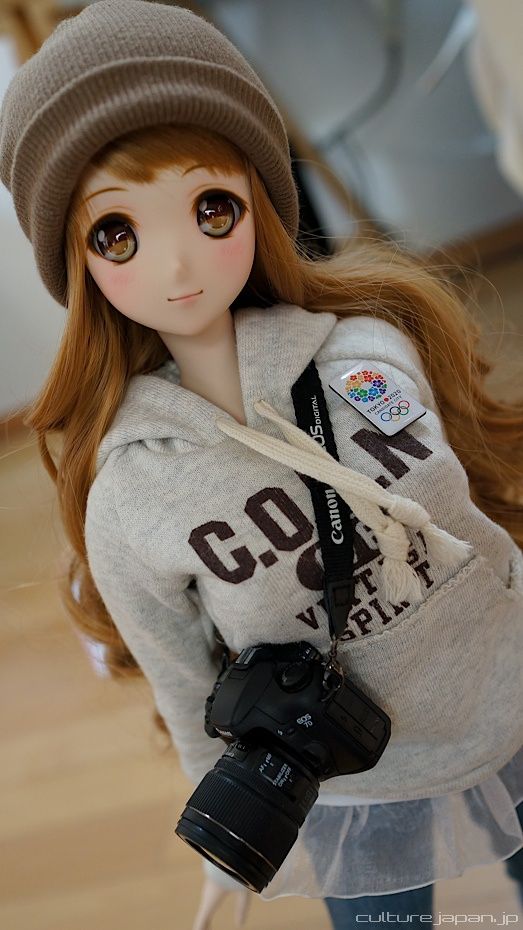

This set of clothes that fit DD Yuki fits Mirai quite well though.

I'm currently aiming to have both the Smart Doll and standard frame version up for pre-order within the year. If I had more staff then it would be quicker but I'm managing all aspects of production on my own at the moment ><
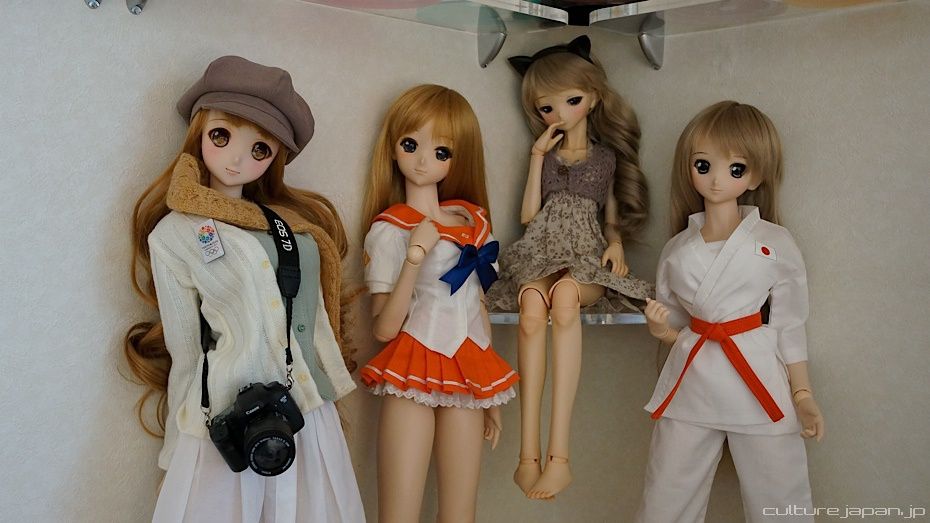
Mirai together with the other girls.
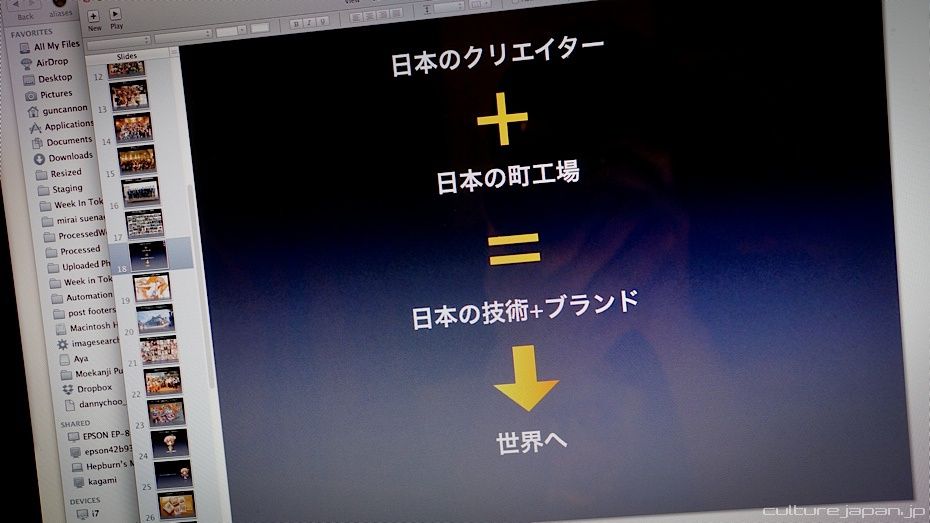
As mentioned the other day, one of my agenda items as a member of the Japanese governments Creative Industries Internationalization Committee is to revitalize the "Machikoba" ] which are small factories dotted around Japan who specialise in a certain craft or technique - it can be anything from making moulds, slush casting, making gears, leather goods and so on. In some cases, these small factories have been around for many generations where technology and know how is passed down the blood line.
In some cases however, many of these small factories have shutdown either due to lack of people to pass on the know how to or due to the lack of new orders - many of which is being channeled to factories overseas.
In some cases however, many of these small factories have shutdown either due to lack of people to pass on the know how to or due to the lack of new orders - many of which is being channeled to factories overseas.
This is a slide from one of my decks. It shows how I'm going to pair up Japanese creators and the small factories together - the work of Japanese creators can then be developed with the help of the small factories. I will showcase the resulting products to folks overseas and in doing so I meet the goal of promoting Japanese technology and creativity to the rest of the world.
There are many creators in Japan who just dont know which factories to use - many of which are not even listed on the Internets so you need to know somebody who does.
Most Japanese figures and dolls are licensed from anime or games which is one of the reason why these products are kept in Japan - because of the previously mentioned licensing issues.
If more individual creators made their own original character dolls or figures then these products should not have any of the said licensing issues and it will be easier to spread the Japanese technology and craftsmanship that goes into these products around the world.
There is the issue of shipping but I'll hook creators up with my comrades at companies such as Tenso.com who specialise in shipping overseas.
I've documented the doll production process up until now in the following posts - while they are specific to dolls, you can apply the knowledge to make your own figures and wot not.
#Rapid Prototyping and You
#How To Mass Produce Your Own Products
#Rapid Prototyping and You
#How To Mass Produce Your Own Products
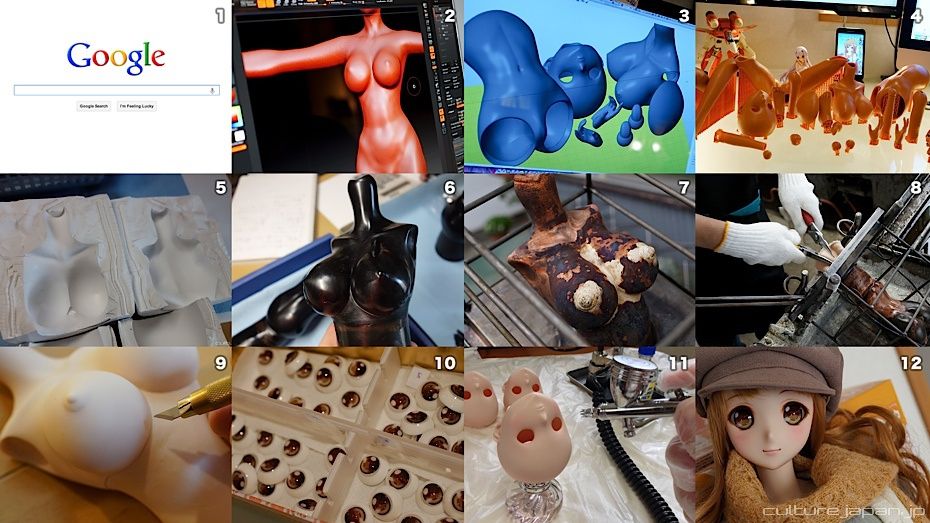
For those who cant be bothered to go through those posts, here is a very very rough breakdown (skipping a few processes) of what you need to make your own dolls (or other products).
- Use Google Sensei to learn how to use 3D software like I did - if you cant afford the price tag of 3D software then there are free decent solutions like Blender.
- In our case, we used ZBrush for the modeling and tweaking using 3D Max.
- Prep data for 3D printing.
- Print 3D Data.
- Make silicon molds from 3D printed data.
- Make wax clone from silicone mold.
- Electroform the wax clone to make the copper mold for mass production.
- Pour soft vinyl into the molds to make the doll parts.
- Cut off flash and assemble doll.
- Make optical eyes.
- Do the makeup.
- Play with Mirai.
- Goal unlocked - proceed to boss level.
If you want to make your own products then start consulting with Google Sensei - its free. Then once you are armed with knowledge, you can use that to start implementing your ideas.
If you want to produce your products in Japan then I will hook you up with the people that you need to know who can oversee the production for you. If you are confident in your language skills and know enough about the production processes then I'll introduce the factories to you.
If you dont have the cash to cover production then start off with what I did and work in a restaurant to save up. Stop giving yourself excuses and just do it.
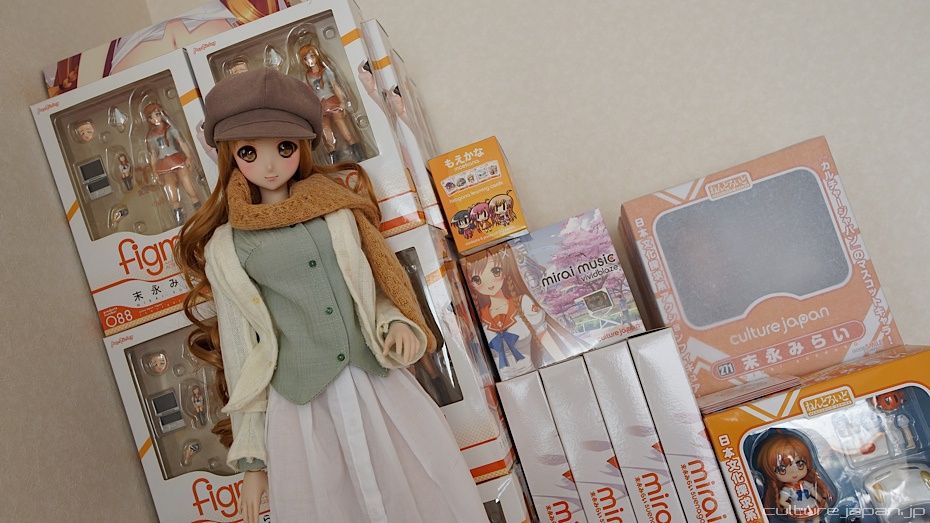
The line of Mirai Suenaga products continues to grow ^o^
Catch up with the latest at smartdoll.jp

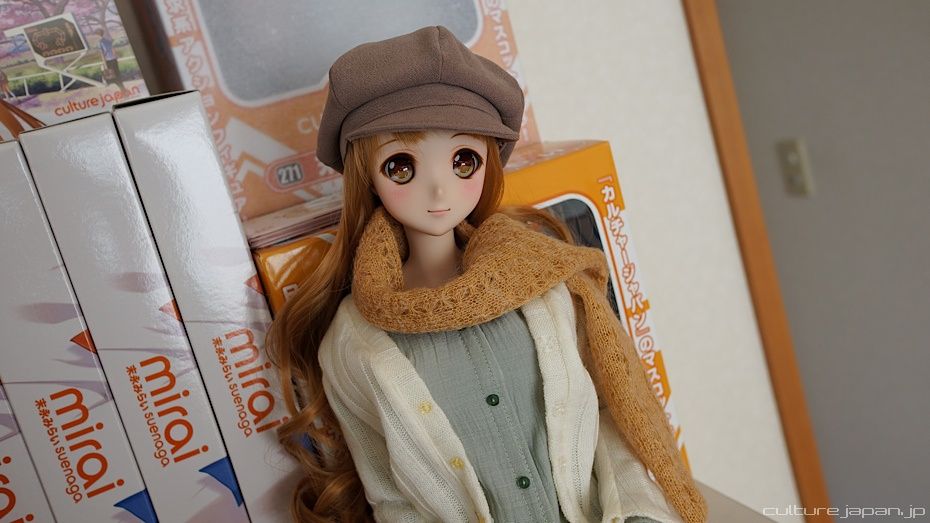
And this is Mirai in her Mori Girl gear. Read more about Mirai Suenaga >>>