How To Mass Produce Your Own Products

Back in February, I showed you how I used 3D technology to make my own doll of Mirai Suenaga. But then I thought to myself how it would be a great opportunity to learn how to mass produce dolls in soft vinyl. I spent a lot of time with Google Sensei and this is the result!
I re-printed the 3D pieces of the doll, made wax copies from a silicone mold generated from the 3D pieces then made copper molds through electroforming the wax copies - those molds are then used to mass produce my doll of Mirai ^o^
In this post I want to share my knowledge and learnings through trial and error in the hope that you can use some of this info to mass produce your own products using resources available to us all.
In this post I want to share my knowledge and learnings through trial and error in the hope that you can use some of this info to mass produce your own products using resources available to us all.
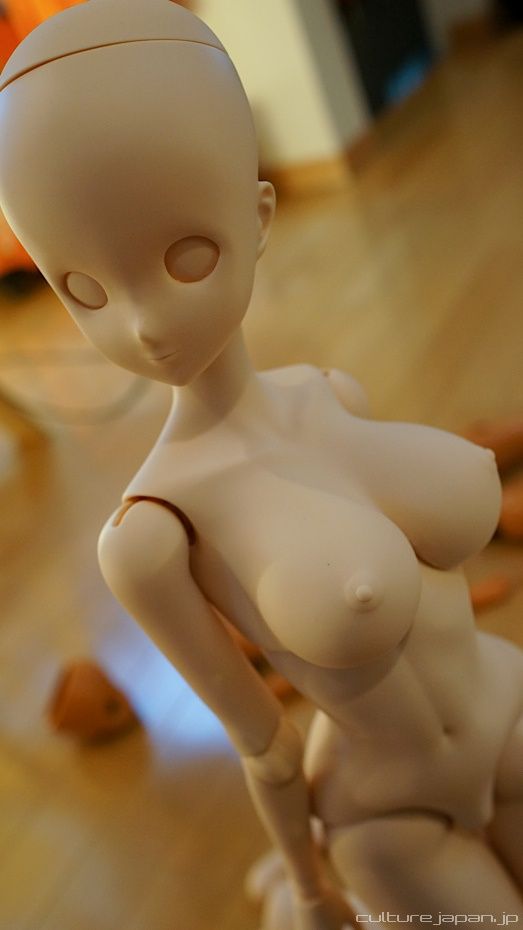
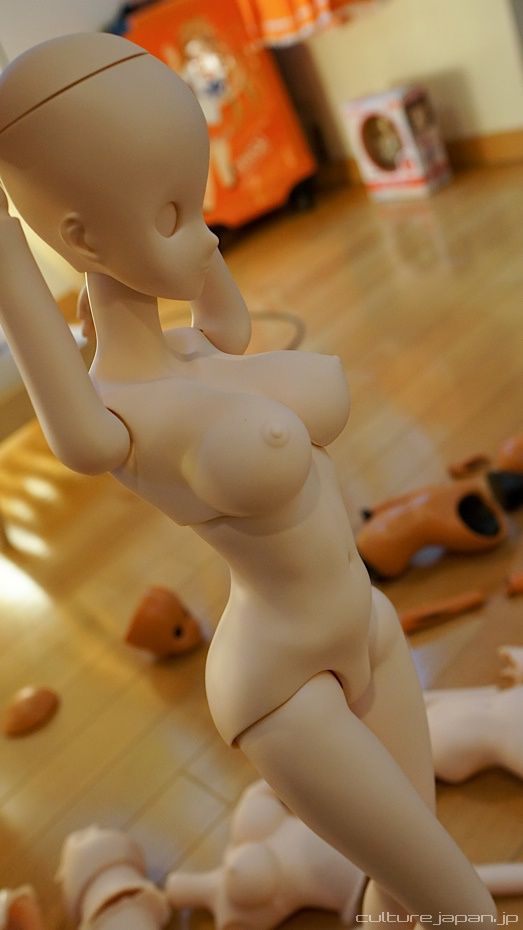
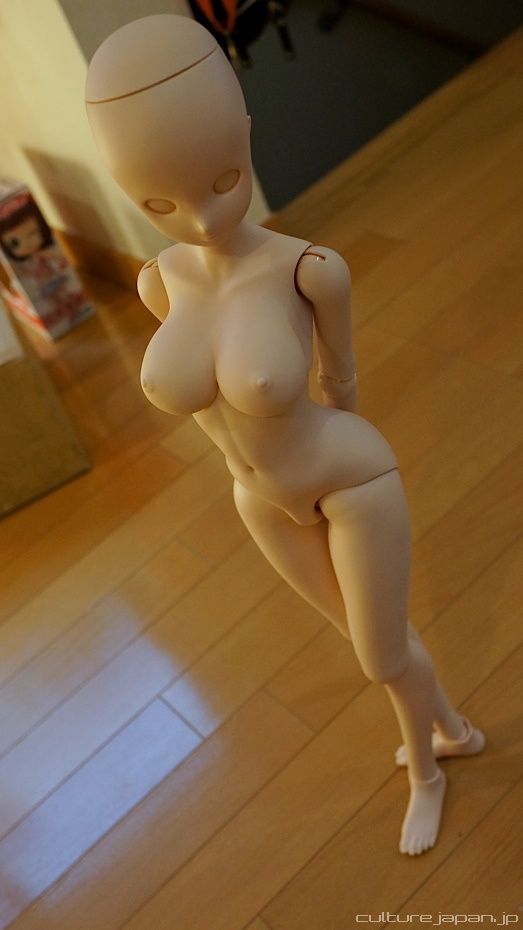
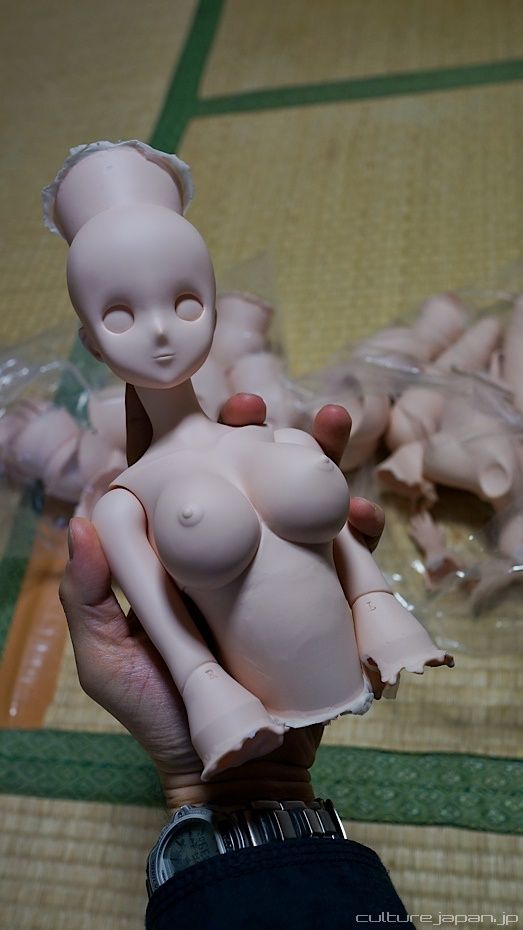
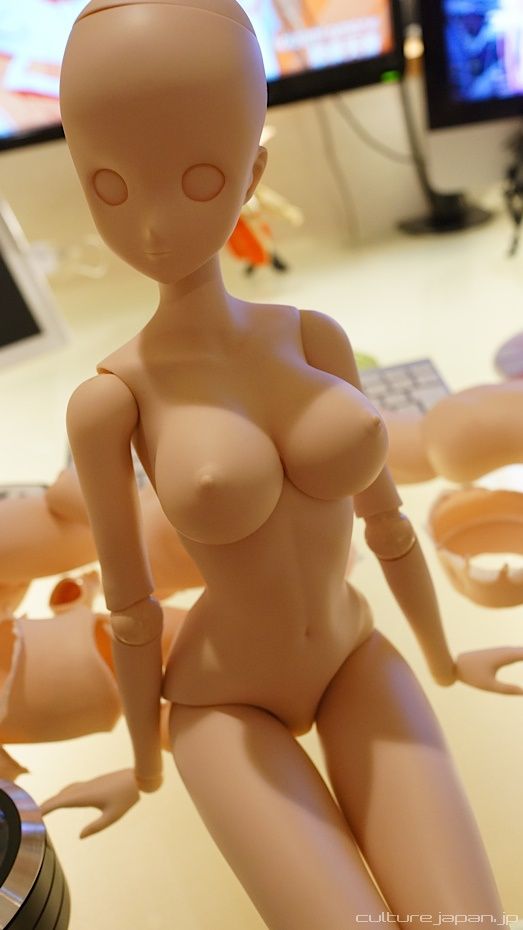
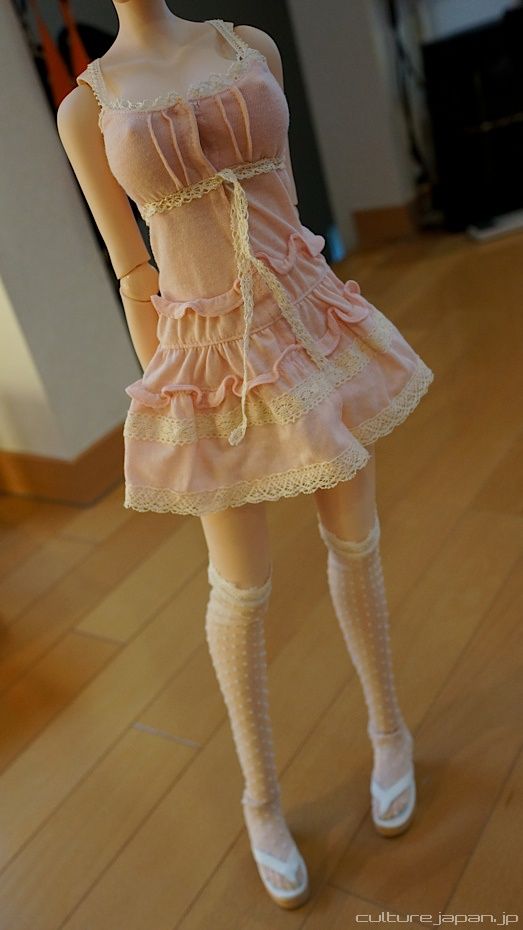
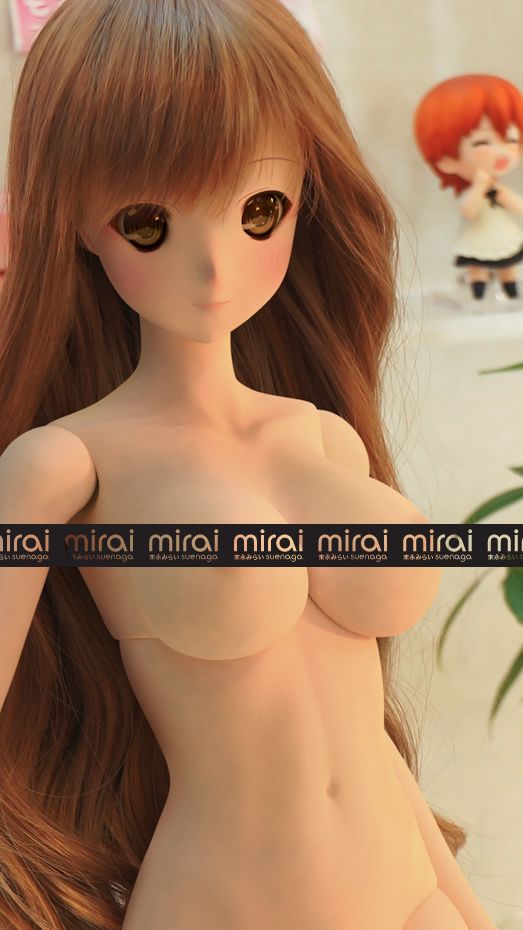
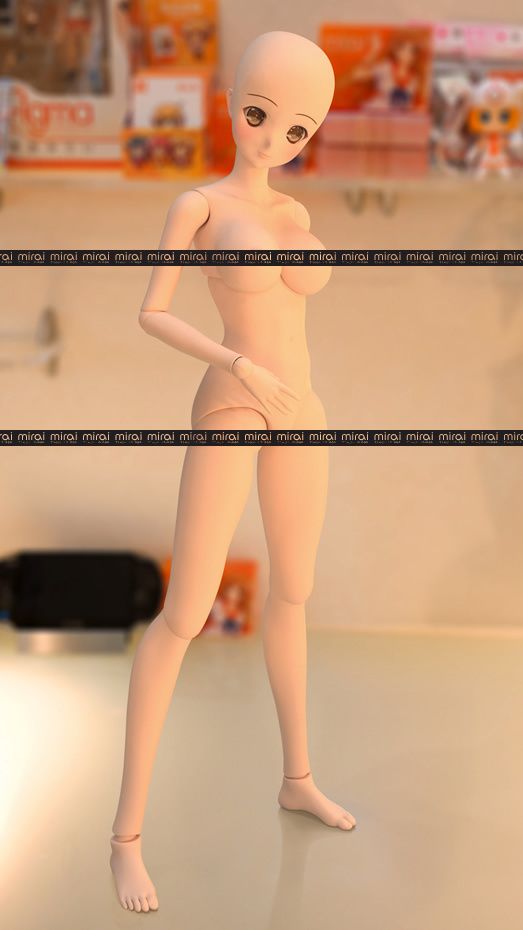
Before we take a look at the whole production process, lets take a look at Mirai. I think she's coming along nicely ^o^
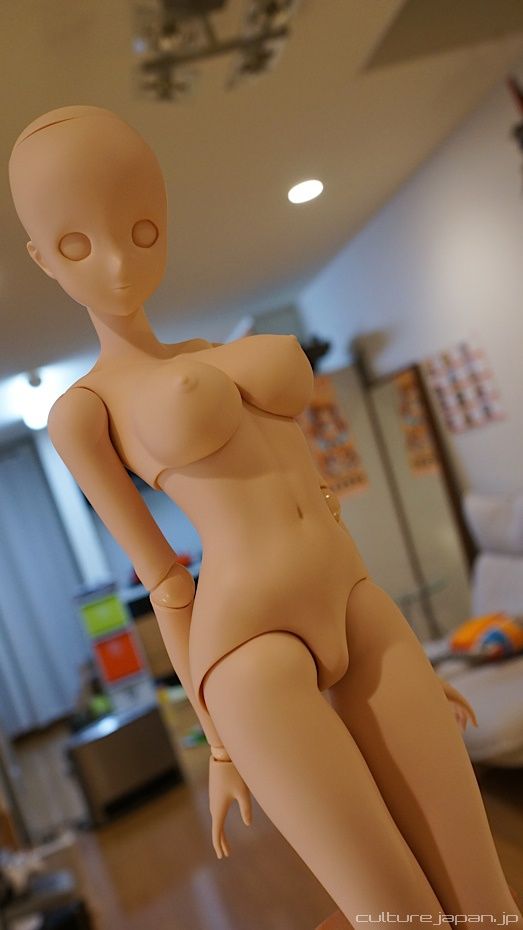
In my mind, the most important thing about a doll is the face. The next thing is a smexy body line while maintaining decent articulation.
I designed the oppai to cover up the split between the torso so that it would look good in a bikini. This type of joint also allows for dynamic poses too.
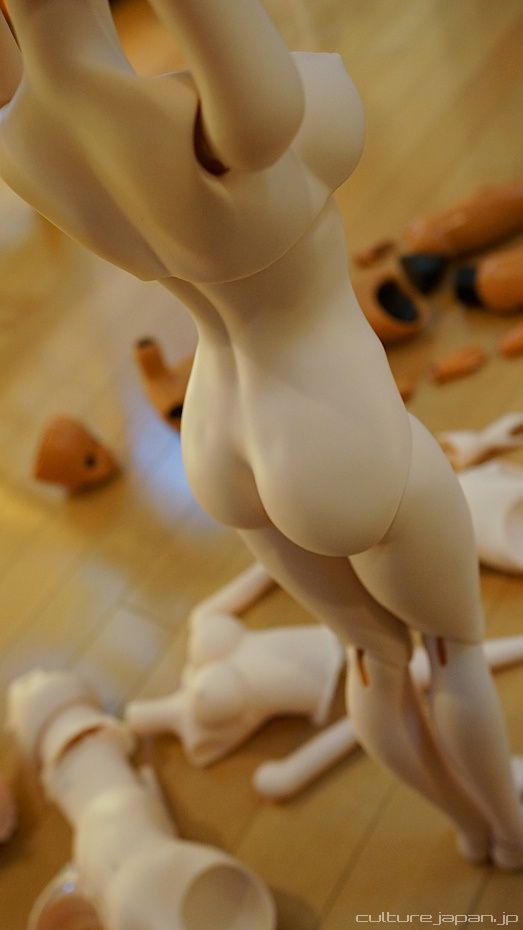
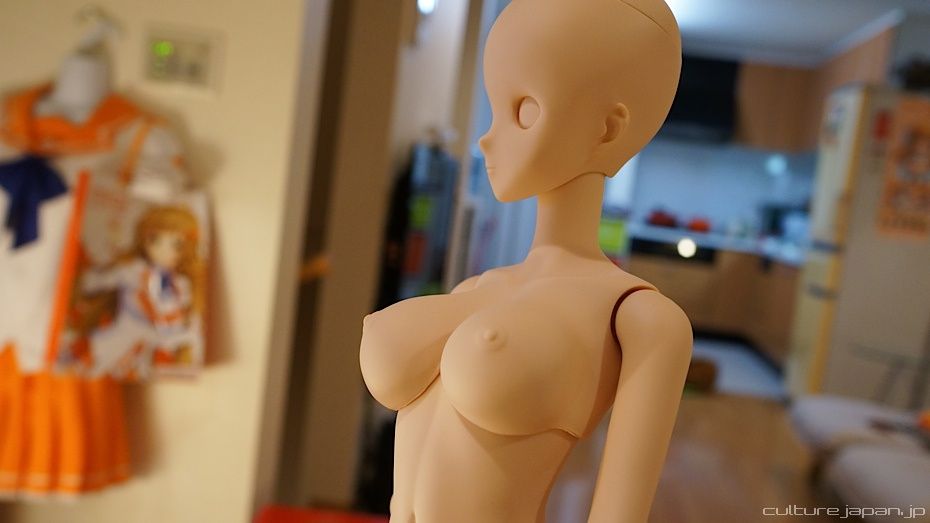
And this is how the back is looking like so far. Nice bottom ^o^
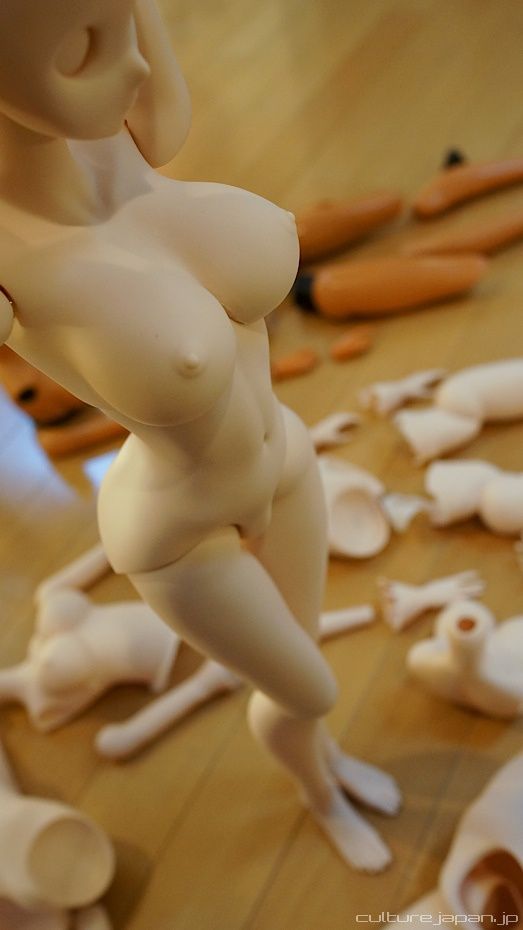
I had to sacrifice some aesthetics around the bottom of the torso to enable her to sit down properly.
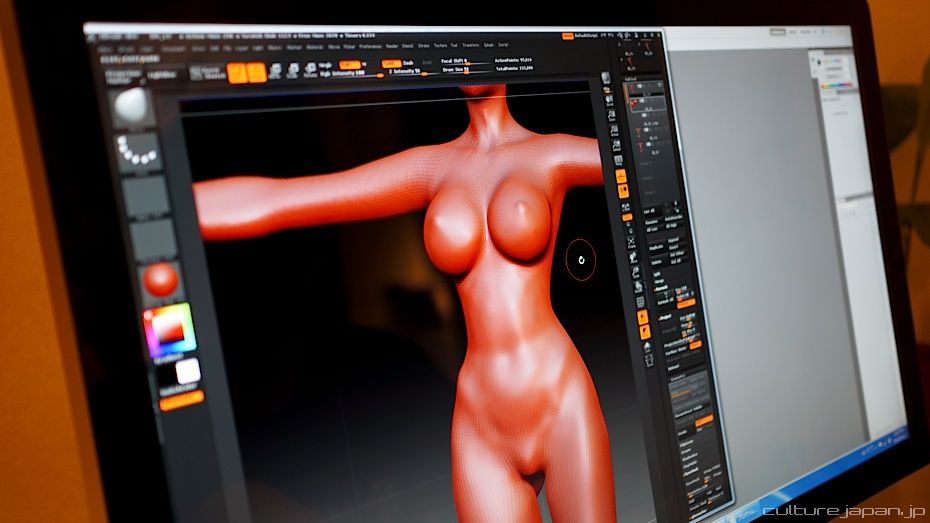
So just to recap on how we designed the doll. We designed the body in 3D. Sculpting it by hand would have taken close to a year and any changes would have been an absolute nightmare. Just imagine I wanted to shrink or expand everything by a few %!
The software we use to sculpt the body is ZBrush which is typically used for movies, games, and animations. Its a great package for sculpting and perfect for making a shapely doll body which is very very important.
See how it was used in movies such as Tron and Avatar below.

Then the data is imported into 3D Max for various tweaks and to make sure everything moves and fits together.
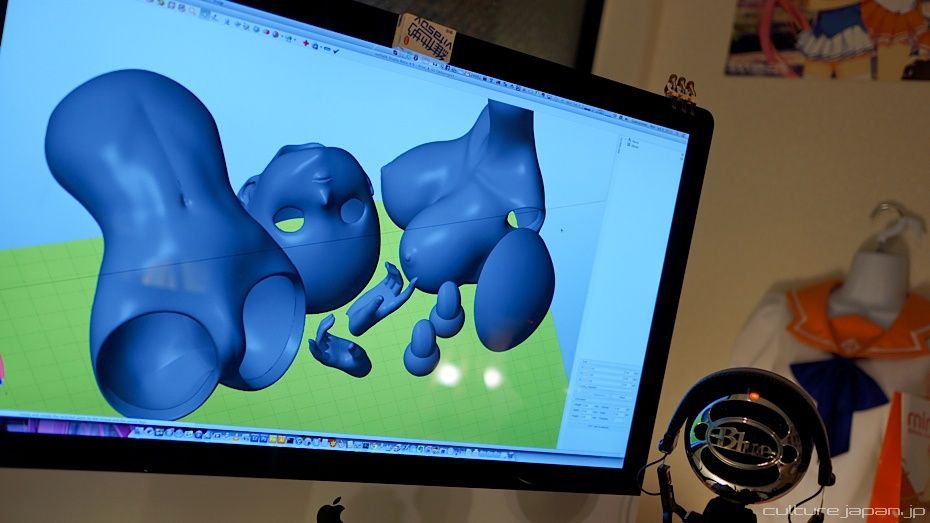
Using Netfabb to prepare the data for printing. All pieces have to fit within a certain area depending on the printer being used.
We use an Envisiontec Ultra rapid prototyping machine to print the parts. The video below introduces you to the technology.
And the following video goes into more detail as to how the parts are printed.
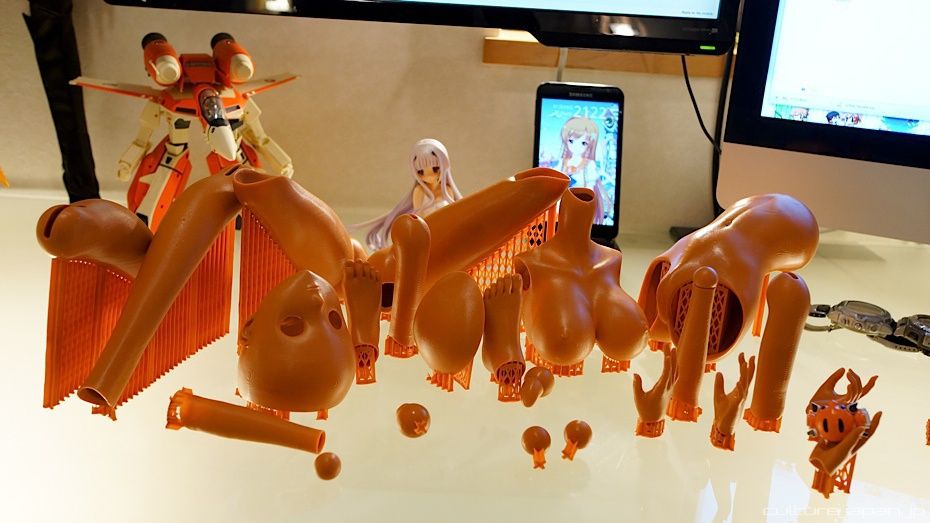
The next step is to take the 3D printed pieces to make a silicon mold which we will then use to make wax duplicates of the pieces. The 3D pieces is the original prototype and is called Genkei in Japanese.
Make sure that you have printed the 3D pieces at about 6% larger than the size of the final product - this is because there is shrinkage through making the wax copy and the copper mold. If you dont resize up then you will end up with something 6% smaller than you originally wanted.
This is one of the reasons why it makes sense to make sculpts in 3D rather than by hand - you can print a part in 3D at the actual size to see how it fits in the real world - then all you have to do is punch in some digits to resize all the pieces up by 6% and print again to make a mold. This is not practical if everything is sculpted by hand.
Of course you can sculpt the original prototype 6% larger from the start but it will still be a pain to make changes - and costly too.
Of course you can sculpt the original prototype 6% larger from the start but it will still be a pain to make changes - and costly too.
Another learning that I would like to share is that we made the 3D model so that it looks like the final product - what we should have done is design the pieces bearing in mind that it will be used to make the copper molds.
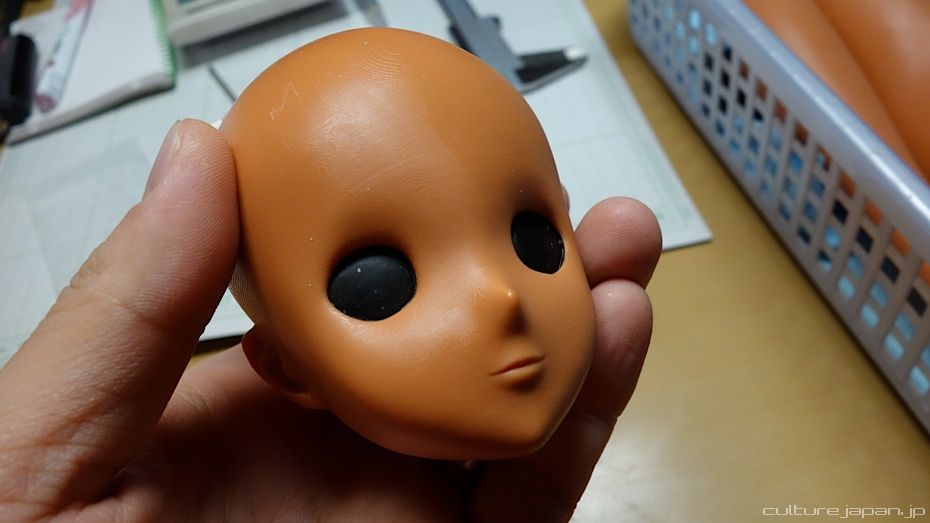
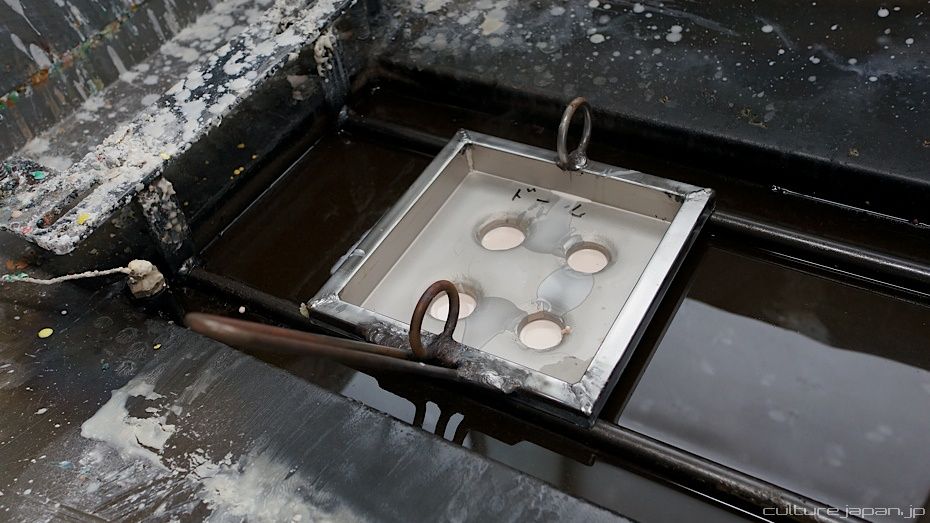
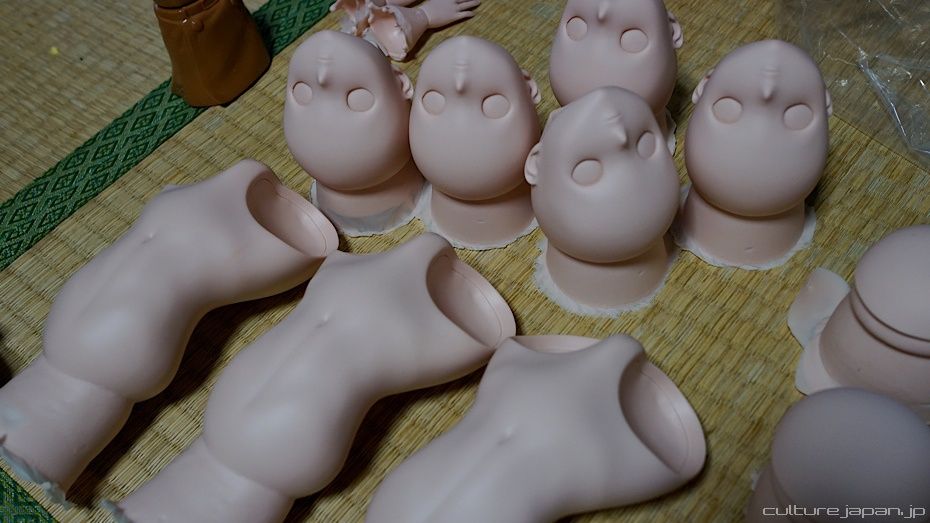
Here you see the eyes filled in with wax - we could have done that in the 3D data. We have learned and will make sure that the eyes are filled the next time we do a 3D print.
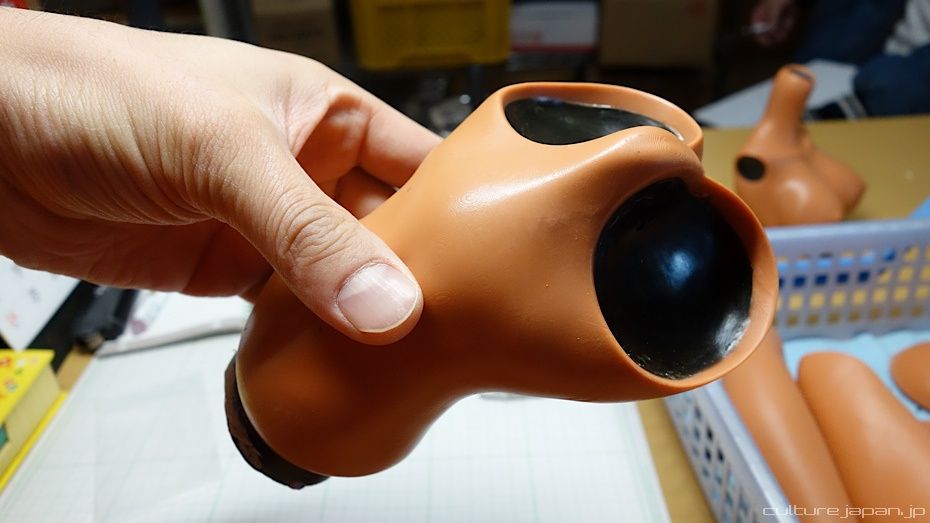
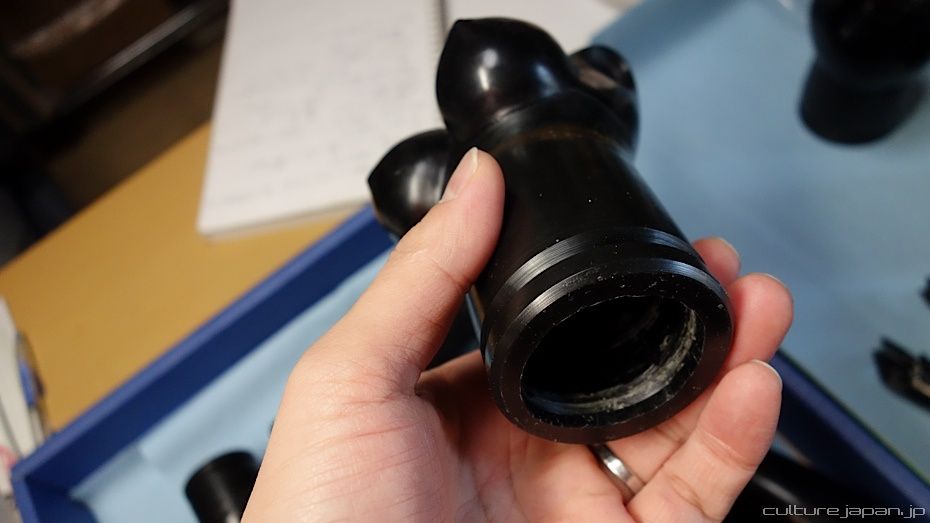
This black part is the spout (called Yuguchi in Japanese) which is used to pour the vinyl into the mold. It must be sculpted and attached at a certain angle otherwise air pockets (Kihou ) will accumulate in the mold which will leave small dots over the vinyl when it is pulled from the mold.
This spout could have also been added in the 3D sculpting stage if we knew what angle it should be attached to avoid those air pockets.
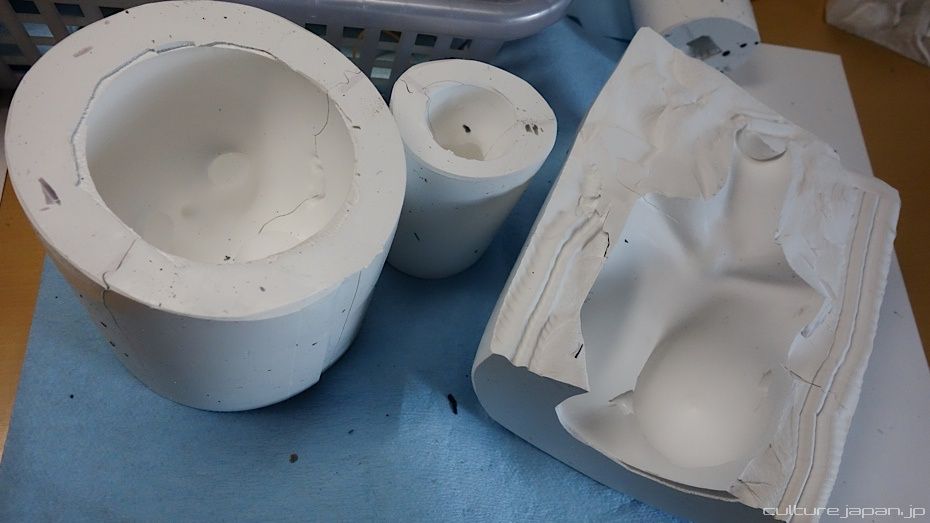
Once the 3D printed prototypes are ready - we make a silicon mold - silicon is poured into a small container with the 3D piece inside. After the silicon has cured, we cut open the silicon to remove the 3D prototype parts.
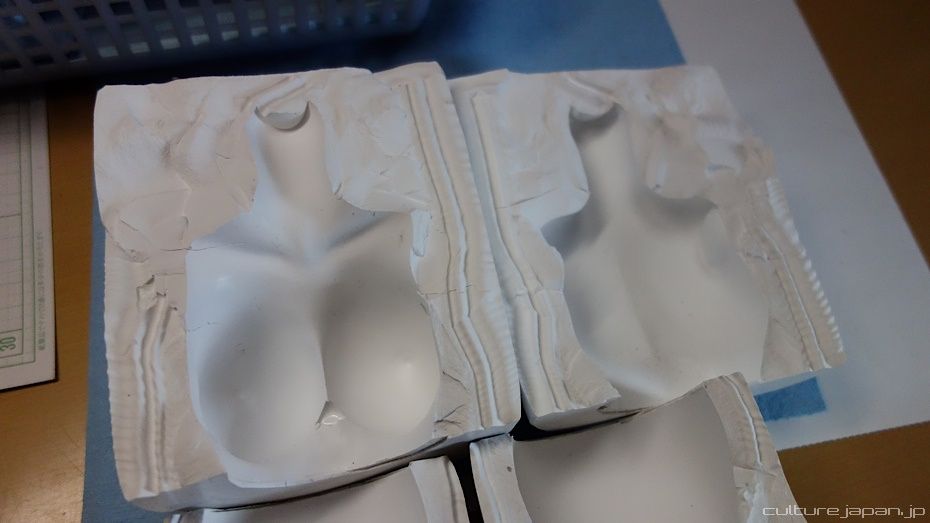
And here is the silicon mold for the oppai.
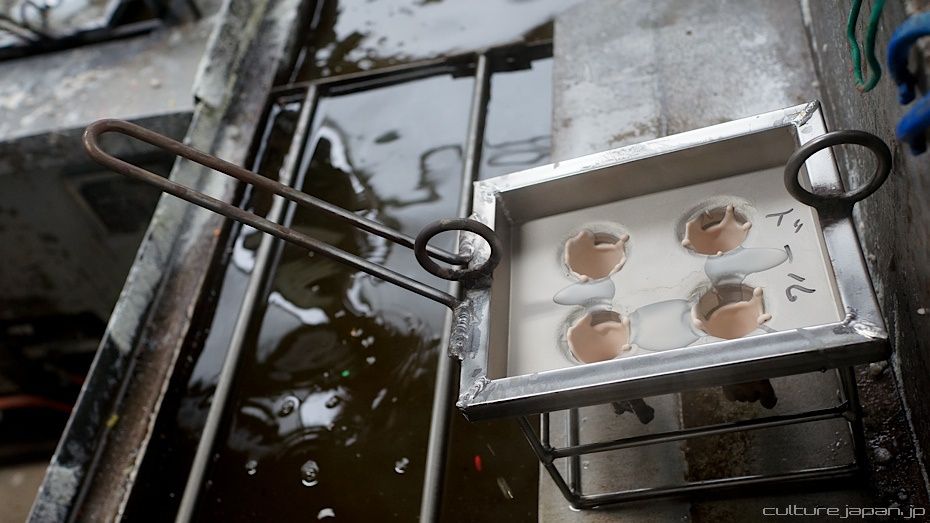
We tie the two pieces of mold back together again and then pour in some hot wax.
Once the wax has cured, we can remove it from the silicon mold. At this point in time, the wax copy has rough surfaces which has to be polished down.
Silicon molds are good to make up to 5 wax copies before they start to degrade in quality. All resin dolls on the market are made using silicon molds - good for small batches but not for large quantities.
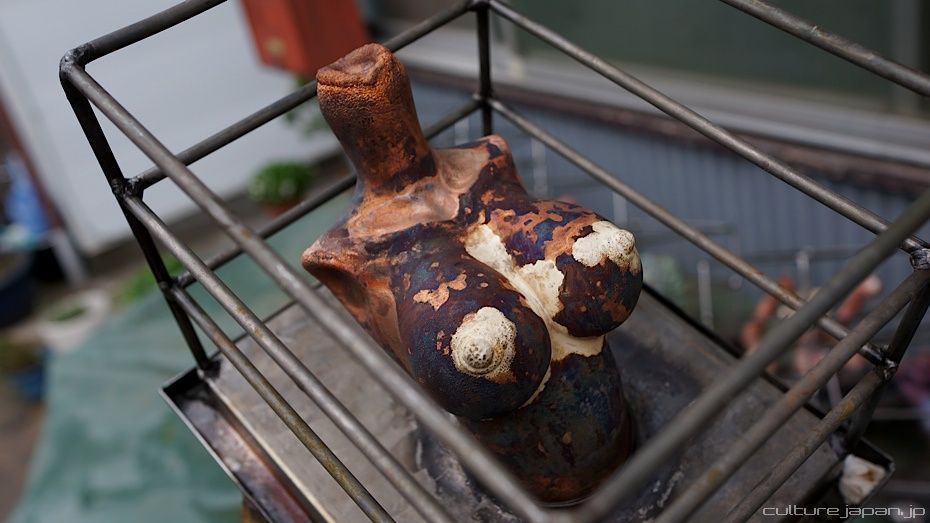
After the oppai has been rubbed (?!) and polished, the surface is smooth enough to make a copper mold. My learning here is that I should have designed the oppai prototype to take into consideration where the spout is going to be. In this case, I need to cut right underneath the oppai when the vinyl part is done which takes a lot of time.
I'm going to redesign and re-print the oppai part so that the excess vinyl can be cut off more easily. Its not money wasted though - its a learning I would have not gained unless I went through with the process.
Remember - in life there is no such thing as failure - only learnings. Being afraid of failure is being afraid to learn.
Remember - in life there is no such thing as failure - only learnings. Being afraid of failure is being afraid to learn.
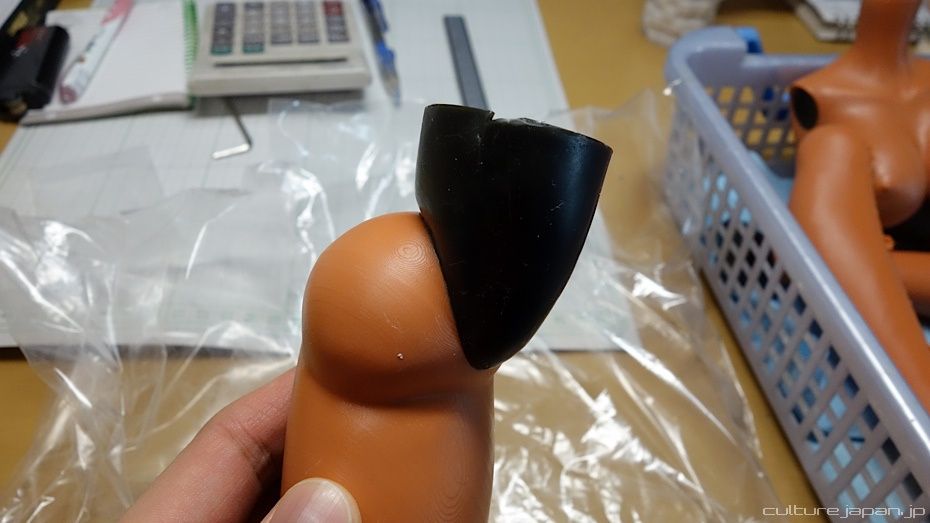
And this is the spout where the vinyl will be poured into the mold. If everything seems confusing now - just carry on reading while looking at the up n coming photos and everything will become clear once you read the whole post again from the top.
When I first started to make dolls, I was completely confused but am now familiar with the process as I have been through it. Now I can apply my new found knowledge to not only make dolls but much more too.
Here is the wax copy of the original 3D prototype. Another learning I want to share is that wax actually shrinks and stretches. When you are making long parts - it will stretch a small amount lengthways. The face may have stretched slightly but I cant be sure until the mask for painting is ready - I'll talk about the mask towards the end of this post.
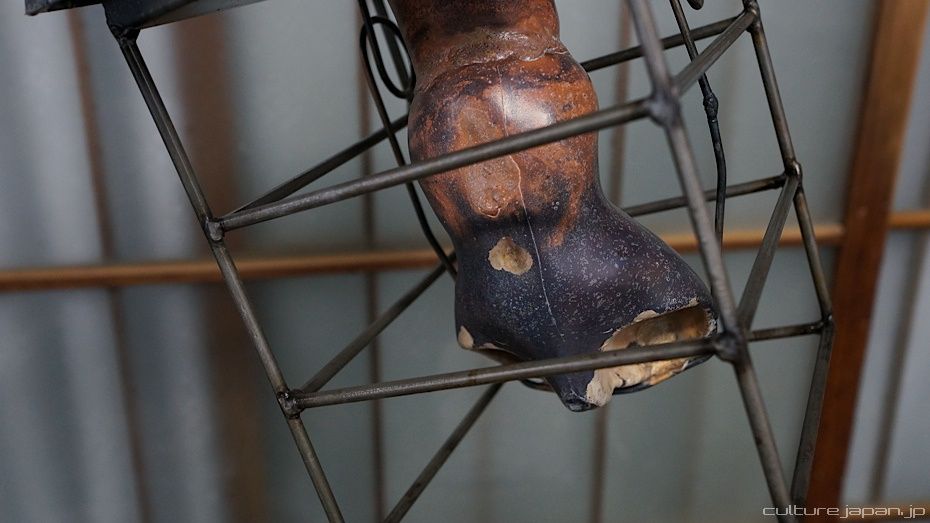
All pieces of the original 3D prototype have been cloned with spouts attached. Now we start to make the molds using a process called Electroforming known as "Denchu" in Japanese.
In Electroforming, all these wax pieces are known as mandrels. You notice a groove where the spouts are - this is where a copper wire is attached to each mandrel. Each mandrel is then sprayed with graphite-based ink that makes it electrically conductive. After each piece has dried, all pieces are then dipped into an electrolytic bath. Deposits of copper then build up on the conductive surface of the mandrel to replicate the surface atom by atom.
This is why it is crucial to ensure that the wax mandrels are perfect with absolutely no scratches or damage as it will show up in the molds - meaning that it will show up in the final vinyl product too.
Once the deposits of copper have reached a desirable thickness, our once wax mandrels have now become our copper molds. The wax inside is melted and poured away. A frame is then welded onto the copper molds ready for use in mass production.
Copper molds can typically last for about 10,000 pulls of vinyl before they start to degrade. Each time vinyl is pulled from the copper molds, atoms from the mold come away with the vinyl.
I wanted to show you photos of the electroforming process but the factory I'm using didn't want to me to take photos as they have proprietary processes ><
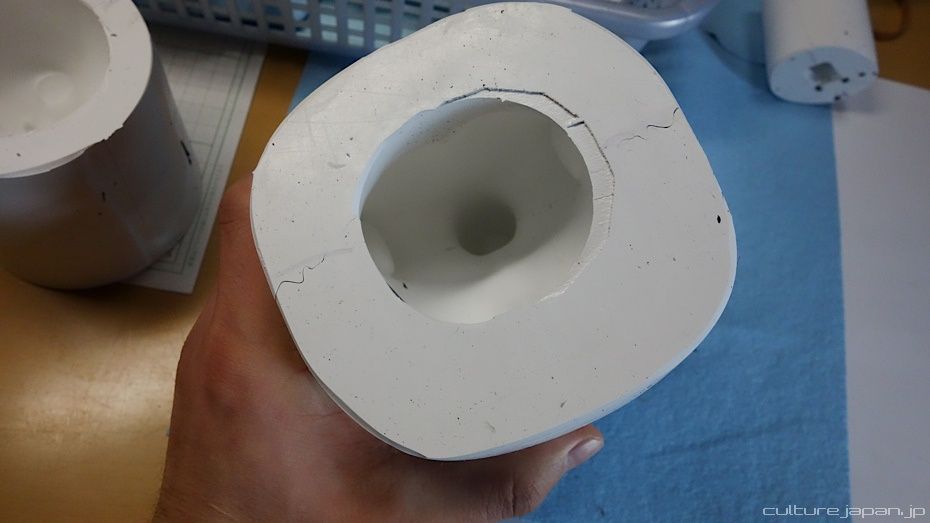
This is the copper mold for the torso. Copper molds are called Kanagata .
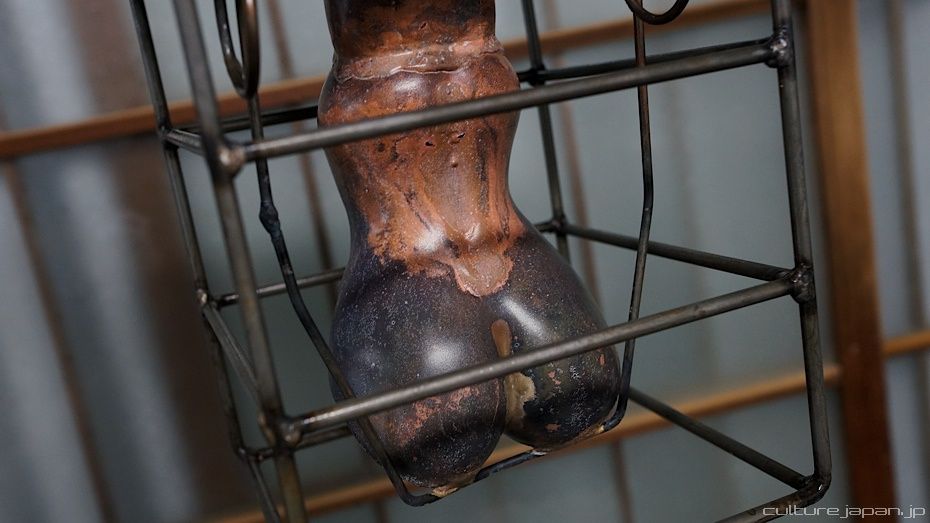
There is so much to write about electromolding which I could write a book about but would rather spend that time working on the doll production ^^;
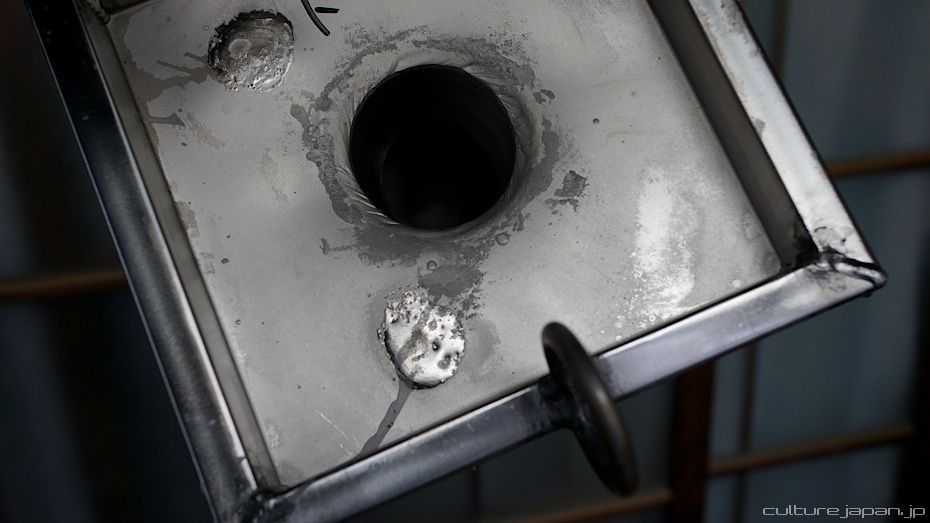
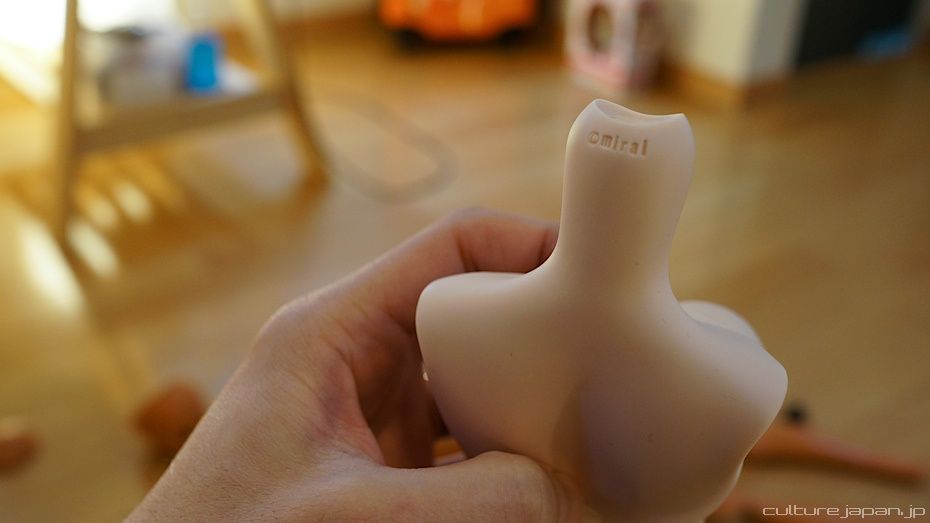
And this is the top of the copper mold. The vinyl is poured into the hole while the tray catches any excess vinyl.
The most important part of the doll body after the head ^^; It may not look nice but all copper molds used to make soft vinyl parts look like this - you would have seen more like this if you watched my visit to the Obitsu factory in Season 1 of Culture Japan.
This is the cap for the head. Dolls need a removable cap on the head to replace the eyes inside.

We can put more than one doll part on a single mold - not only does this save money but makes sense too - but only if the thickness of each part is the same. It does not make sense to put a head and oppai on the same mold because the thickness and softness of these parts are different.
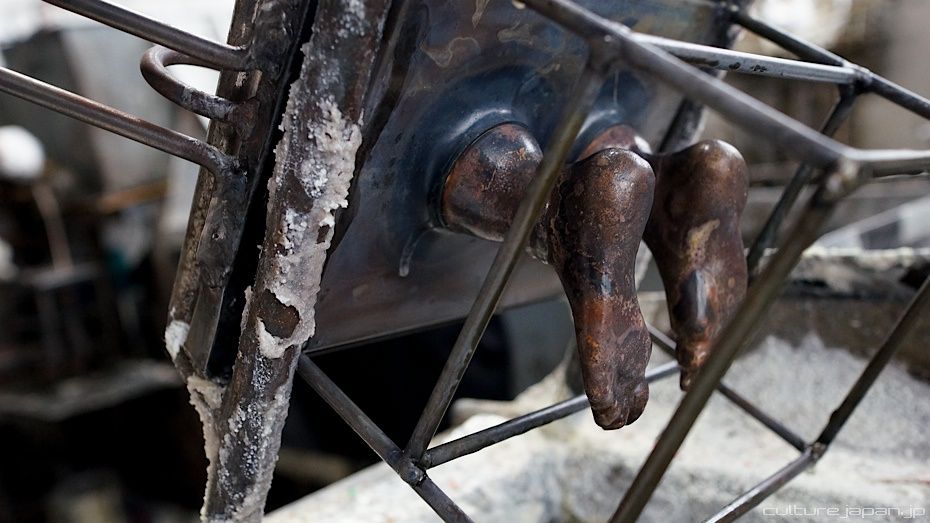
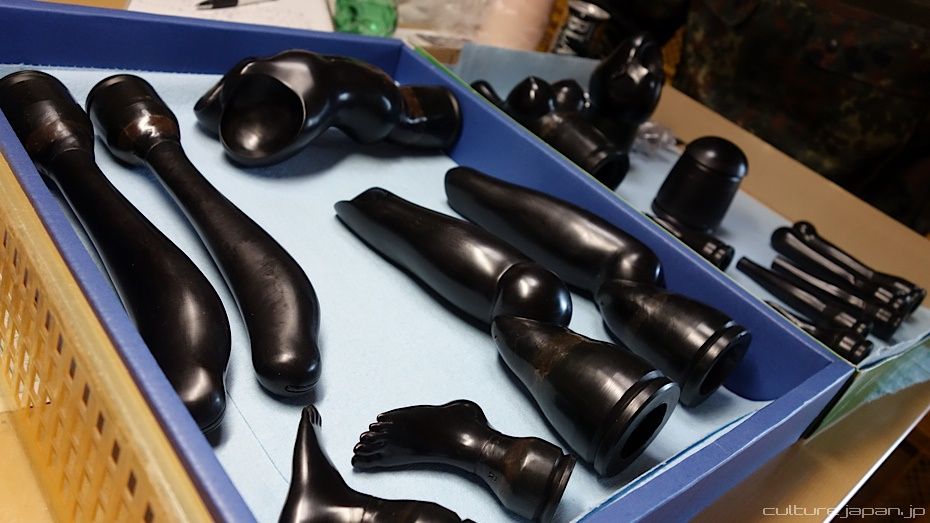
And here are her cute feet ^o^
Alrightly, now comes the exciting part - seeing the birth of my Mirai-chan! The following process to make the parts is called slush casting .
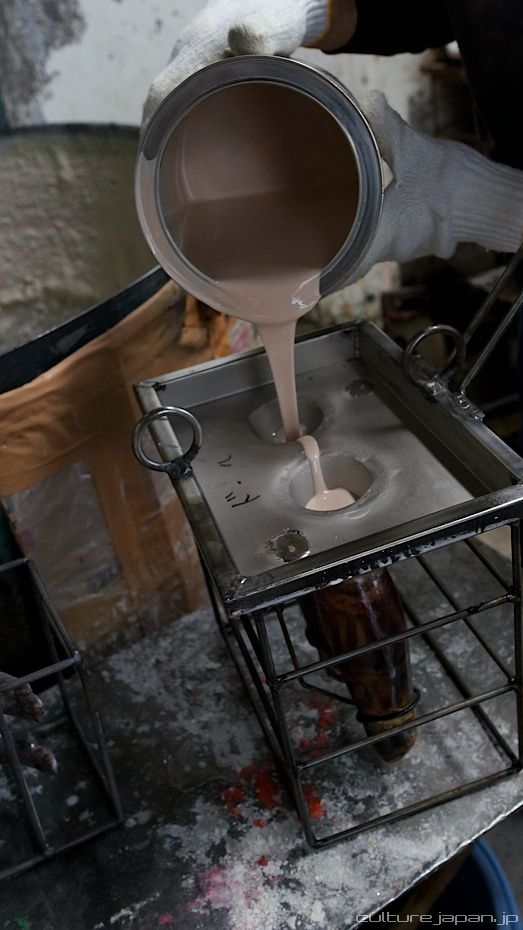
Liquid vinyl is poured into one of the molds. The vinyl we use is the same material as other soft vinyl dolls on the market and does not pose any general risk to human health.
Liquid vinyl is poured into one of the molds. The vinyl we use is the same material as other soft vinyl dolls on the market and does not pose any general risk to human health.
When the liquid vinyl is poured into the copper molds, air pockets get trapped in the liquid which must be removed - we do that by using a centrifugal separator which spins round for 30 seconds or so.
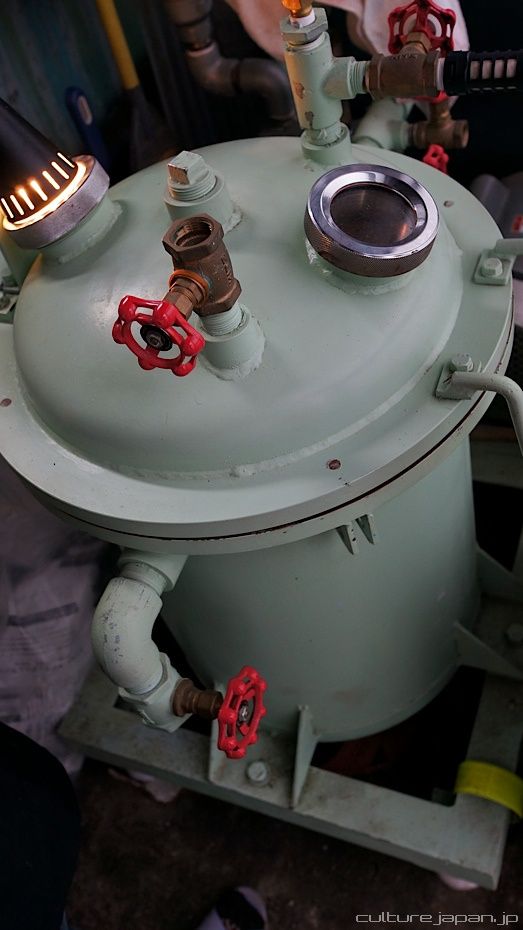
Even still, air pockets may be stubborn so they need to be removed using brute force - introducing a deaerator - the copper mold together with the liquid vinyl inside is placed inside this machine which removes all trace of oxygen from inside. There is a little window which you can look inside where you will see the vinyl bubbling until there is no motion meaning that all oxygen has been removed.
You do not want your cat or dog to accidentally fall into it and have somebody accidentally press the on switch ><
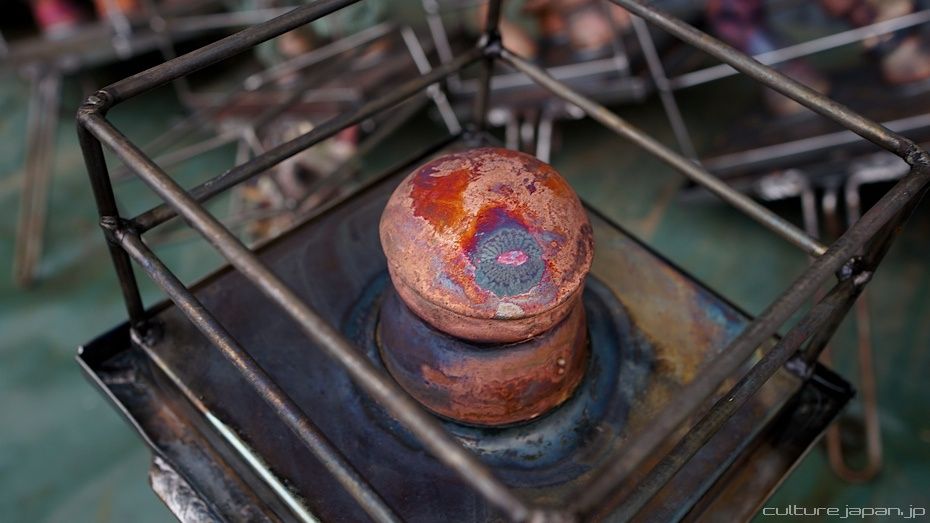
The mold is the placed in a bath of oil which has been heated up to about 180 - 190 Celsius. The thickness of the doll piece is determined by how long you leave the mold in the oil. The heat penetrates through the mold and heats up the vinyl closest to the inner wall of the mold.
Once the desired thickness has been reached (which is initially achieved through trial, error and a timer) the remainder of the liquid vinyl is poured back into the vinyl vat to be used on other parts.
The copper mold is then placed into a cold water bath to cool down.

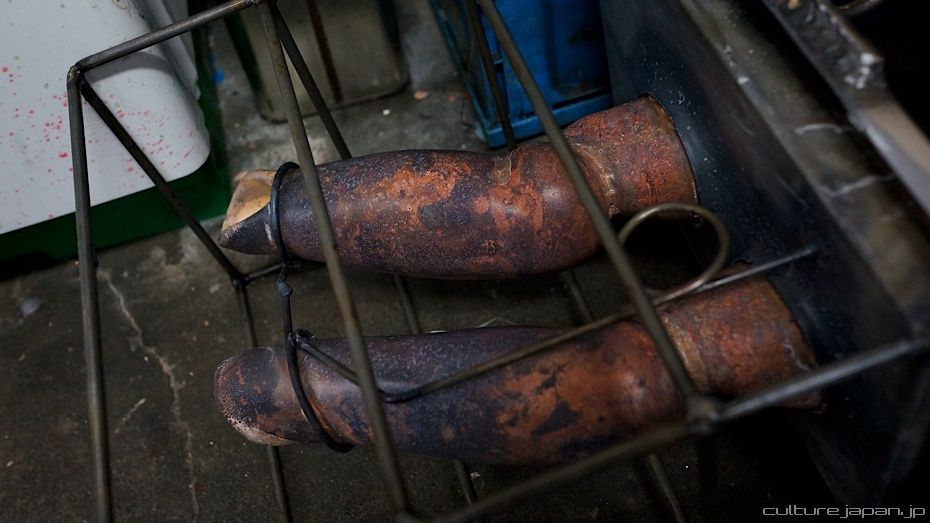
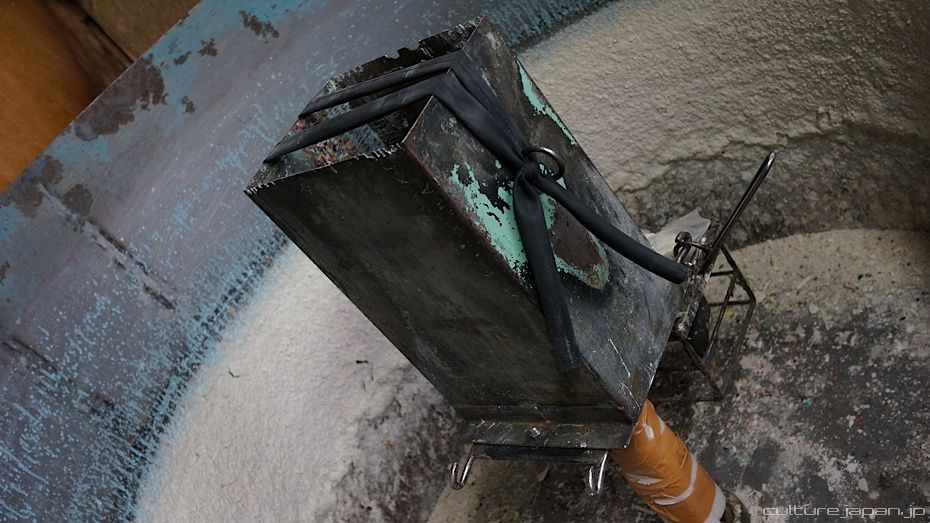
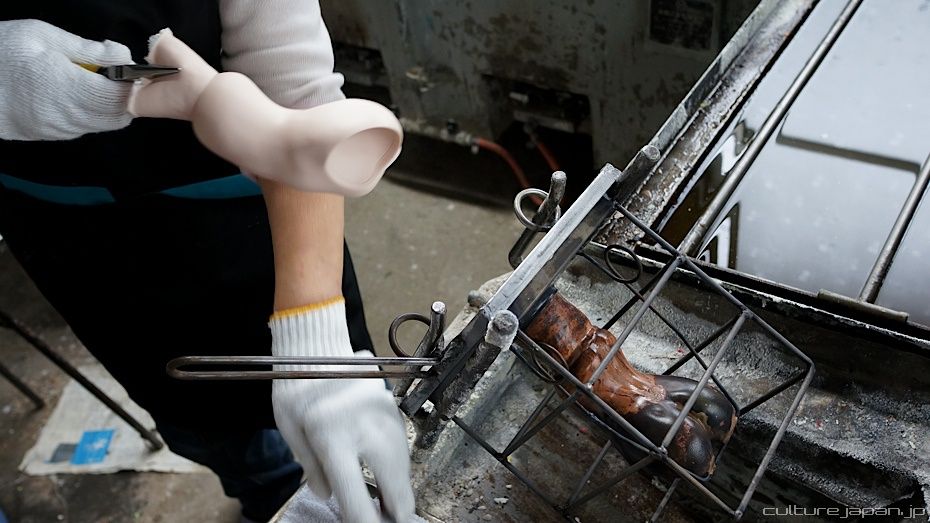
We are going to take a look at the torso as an example for the remainder of the process from now. The mold is then placed on a rig ready for a process called Seikei or "pulling."

The person pulling the part has been doing this for years and know the right time to pull the part. Pull to early and the part could end up being stretched - pull too late and it could be too hard to pull out or end up being damaged.
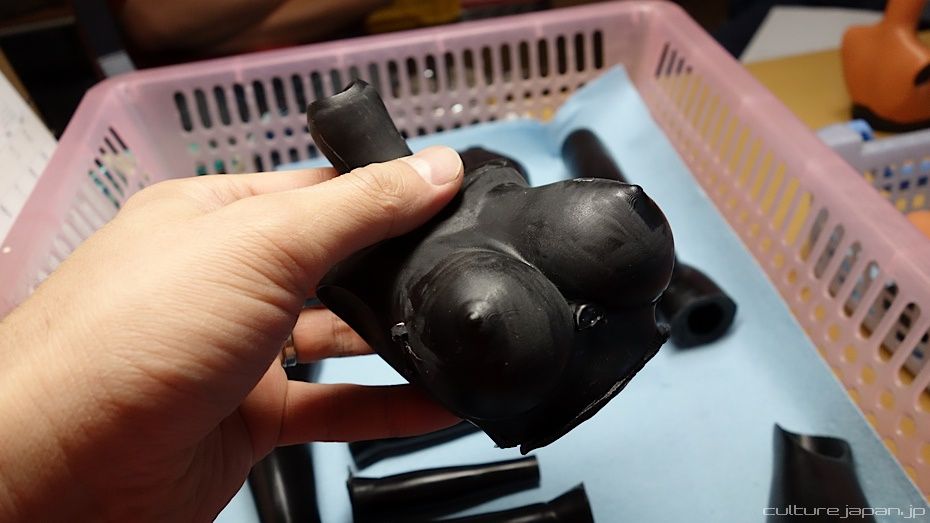
The birth of Mirai!
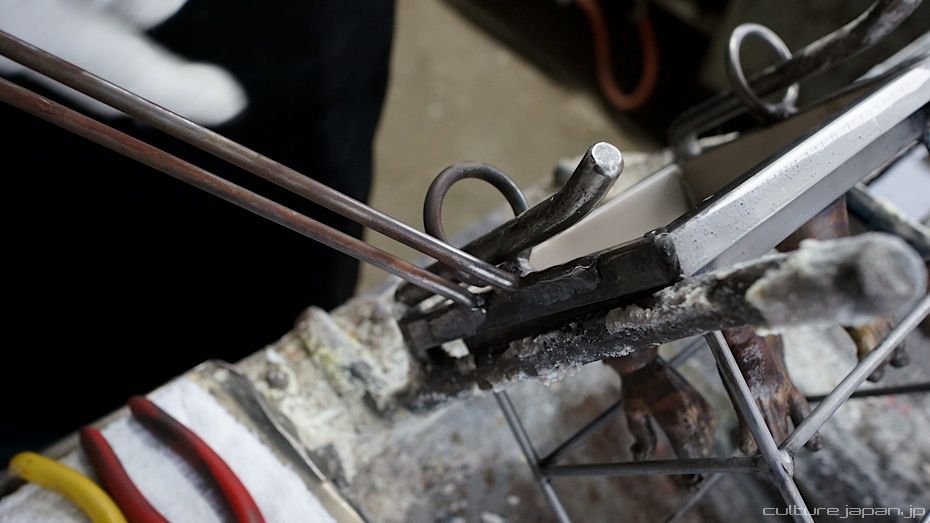
The mold has hoops attached - a slight change in the angle of the hoops affect the quality of the pull.
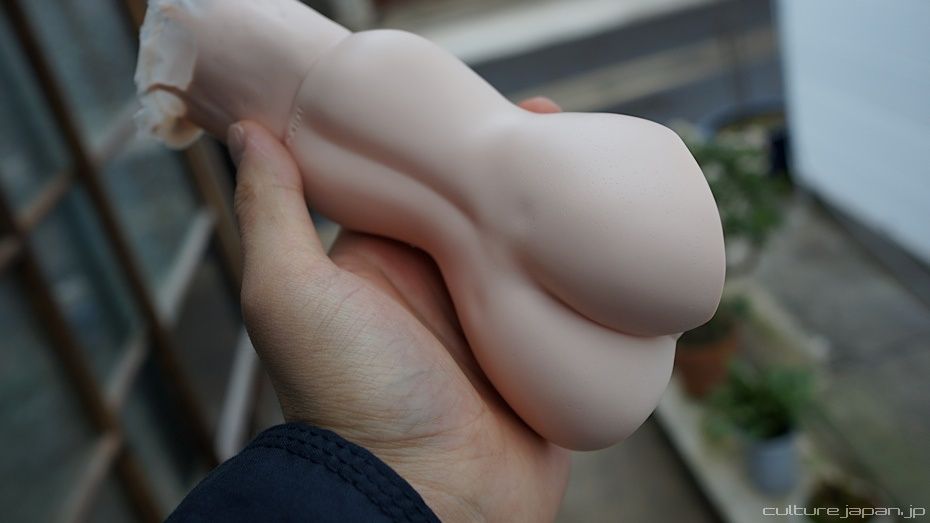
The parts feel really nice straight after a pull - very soft and very warm.
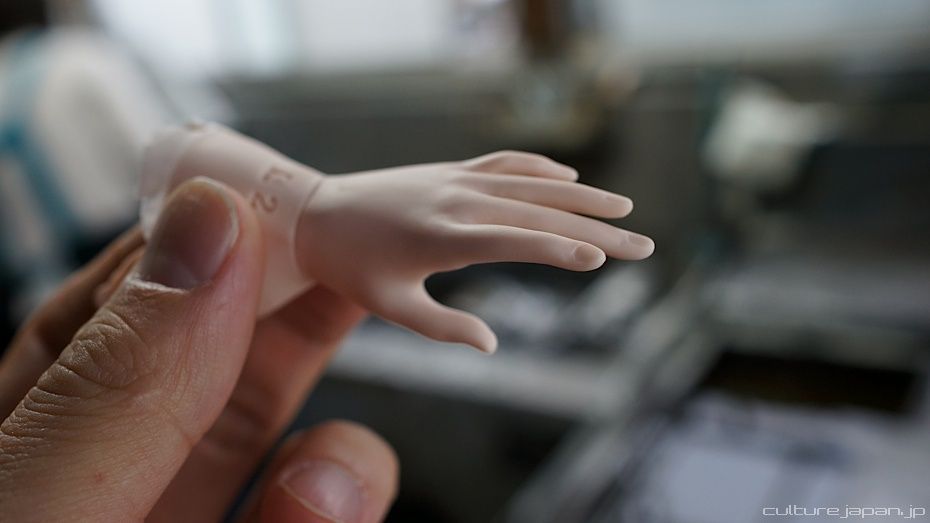
And here is one of the hands - I'm going to have a few sets of hands with my Mirai - just like the way figma comes with many hand parts.
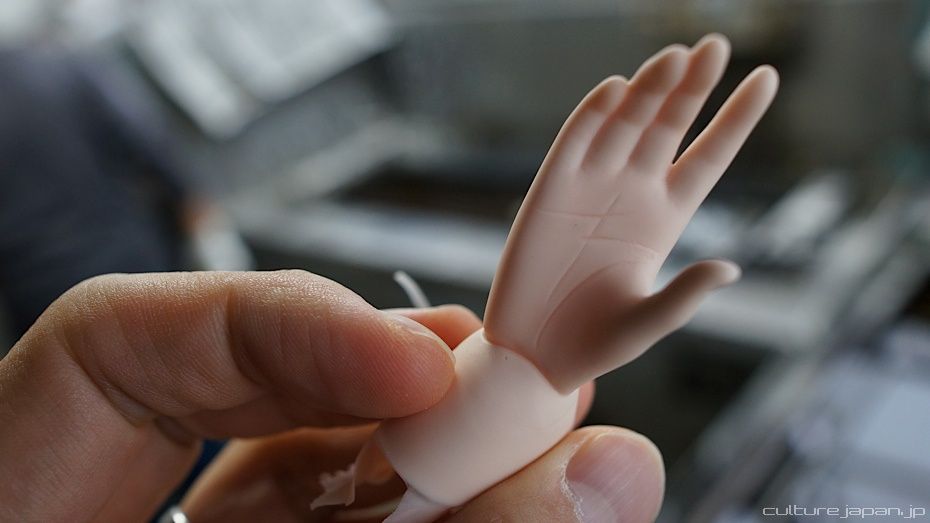
I made Mirai's palms making sure that she had nice lines for long life, good health and fortune ^o^
These are the first pulls from the molds and are typically called Test Shots. They are done to see if there are any problems with the molds and to remove any dirt that may be in the molds too.
The thickness of the parts have to be determined based on how long they are left in the oil too. The hoops on the molds have to be adjusted as well.
The thickness of the parts have to be determined based on how long they are left in the oil too. The hoops on the molds have to be adjusted as well.
For the first run however, most of the parts came out really nice - some of them turned out bad which had air pockets but we fixed that by adjusting the hoops and using the deaerator.
I have been looking forward to this day for a very long time ^o^
There is an article on MyNavi which takes a look at another factory that does Slush casting - having a look will further expand your knowledge on this subject.
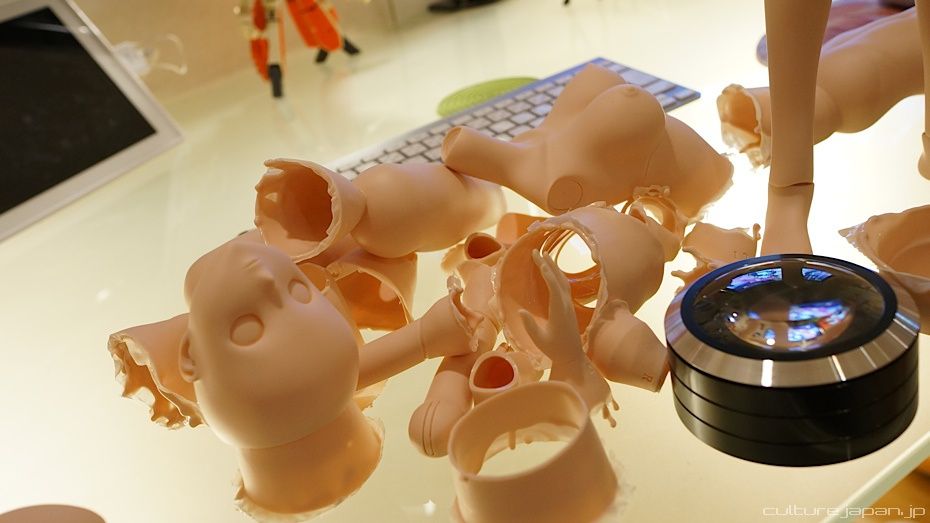
OK, I'm back in the office with a few sets of my Mirai but there is still a lot of work to do. The metal round thing you see in the photo is a magnifying glass which lights up - need that to check the surfaces of the parts.
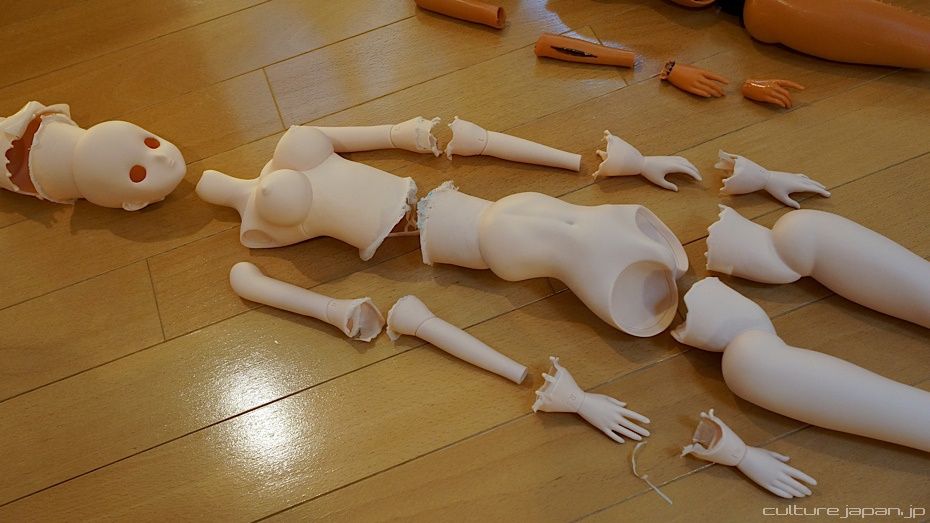
The soft vinyl parts of a doll are called Gaihi or literally translated as "Outer Skin."
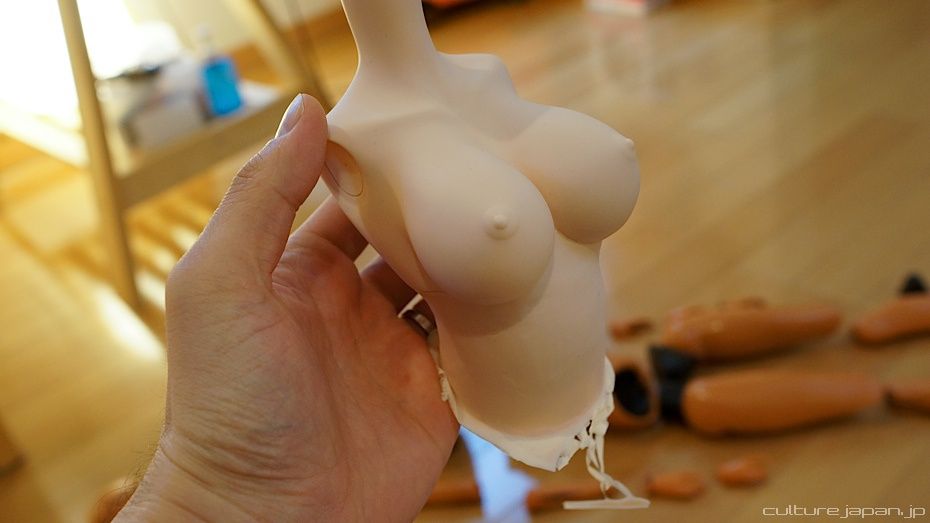
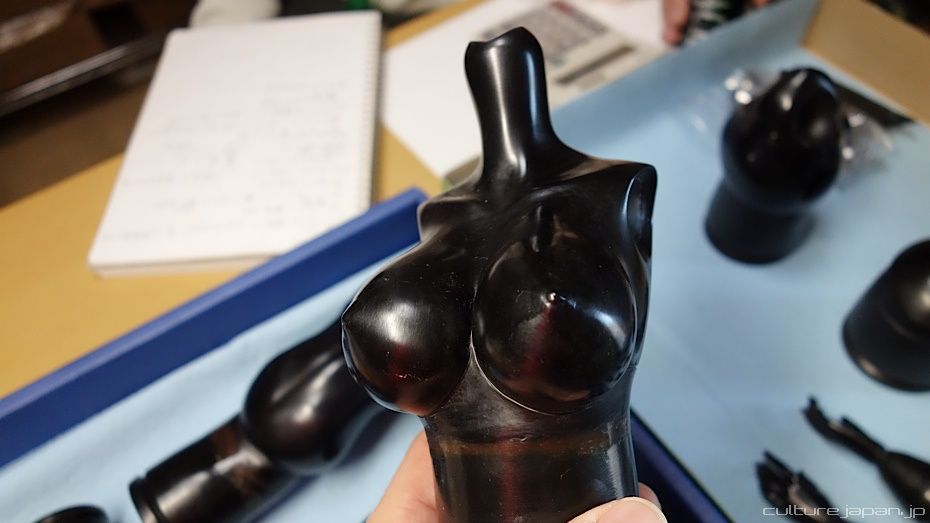
Before we start work, lets take a closer look at some of the pieces starting with one of my favorite parts ^^;
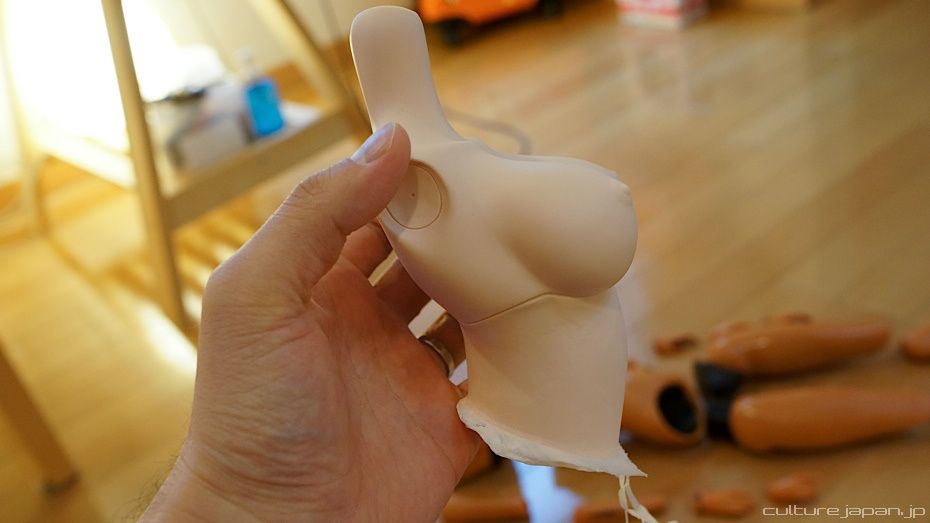
I designed this part in a way that it hides the joint underneath the oppai.
Torso part turned out quite nice too.
Many folks wonder why doll necks are long - the main reason is so that they dont look neckless when they wear collared garments.
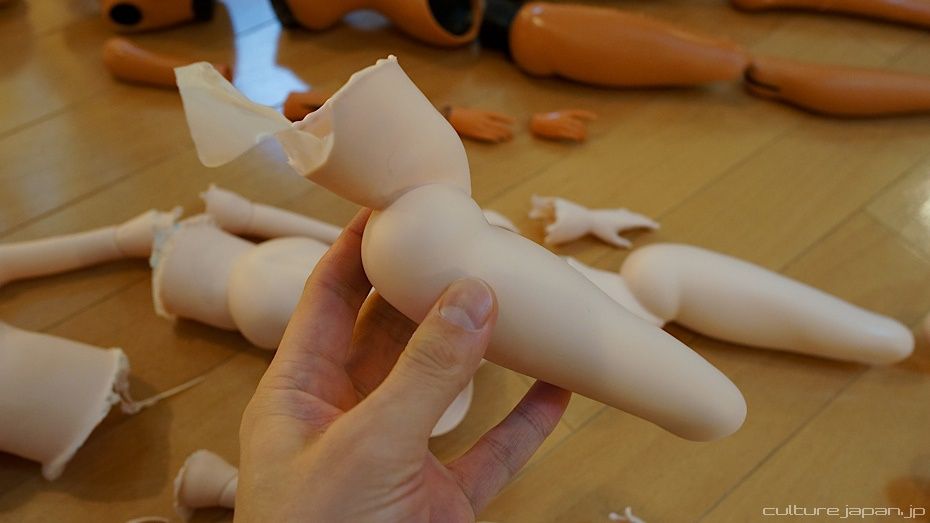
And here is the thigh.
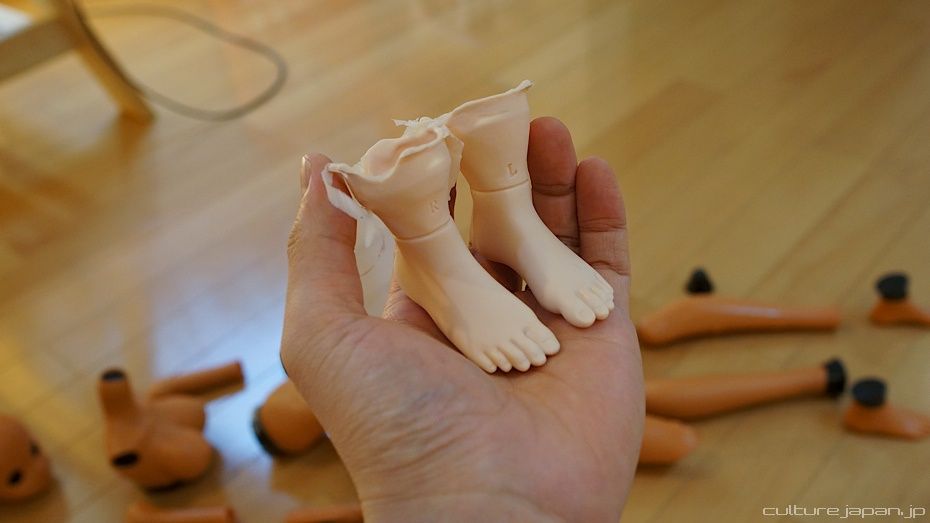
Mirai's cute pair of feet.
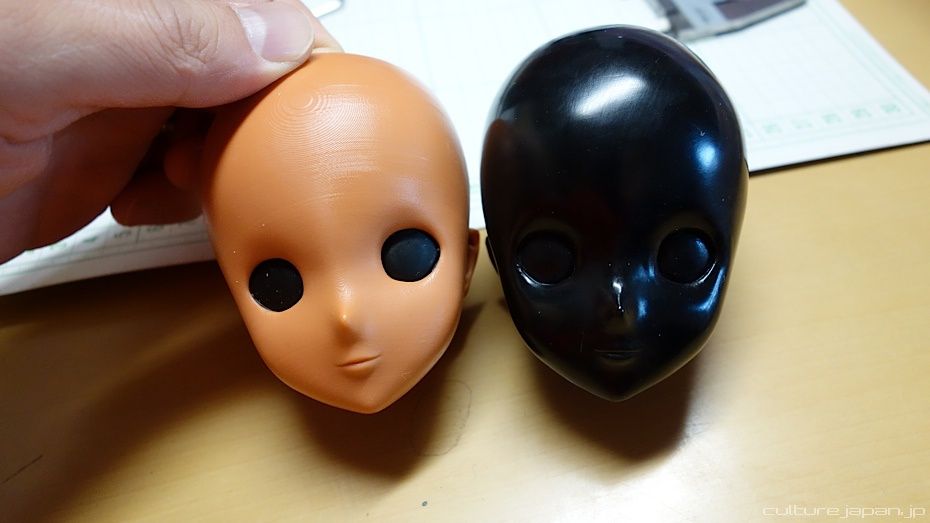
And here is a comparison with the original 3D prototype .
The unwanted bits that need to be cut away from each part is called "Flash."
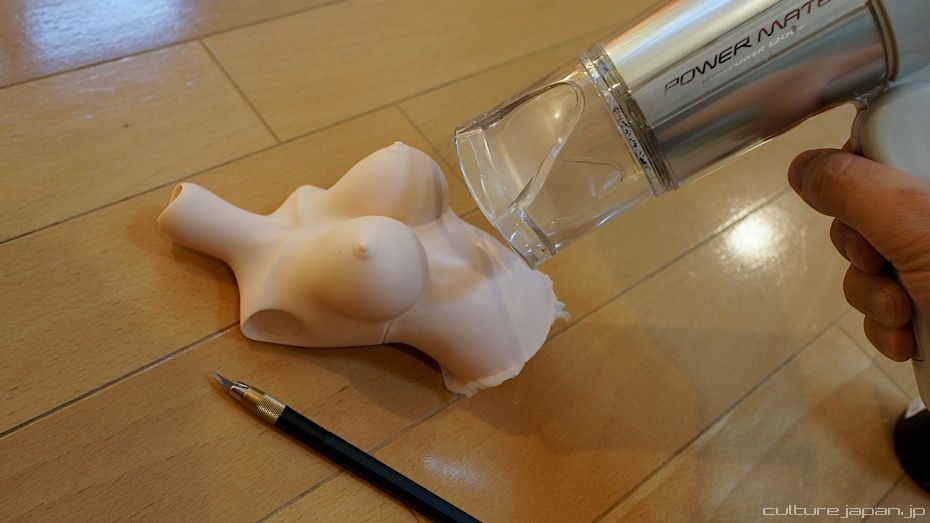
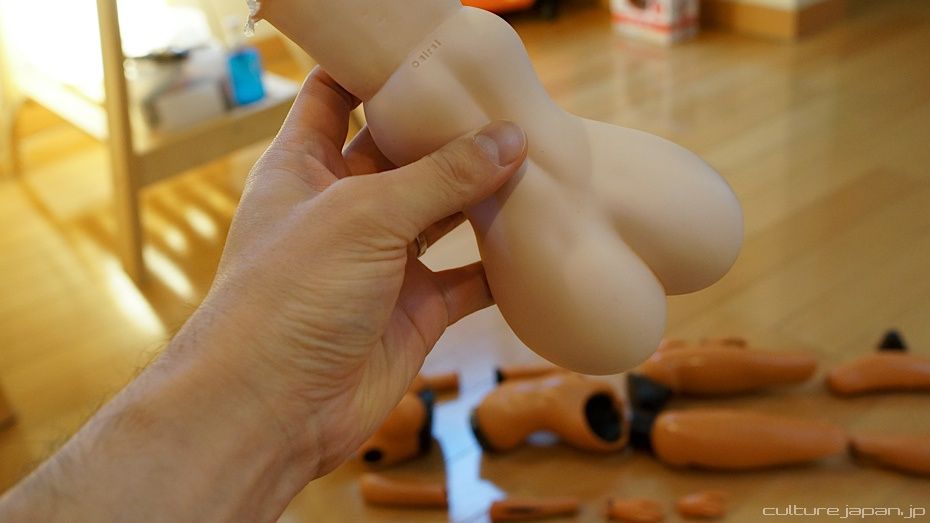
The hairdryer becomes your best friend when you start to work on vinyl dolls. I made the oppai using a softer type of vinyl but it still needs to be heated up a bit so that I can cut it properly.
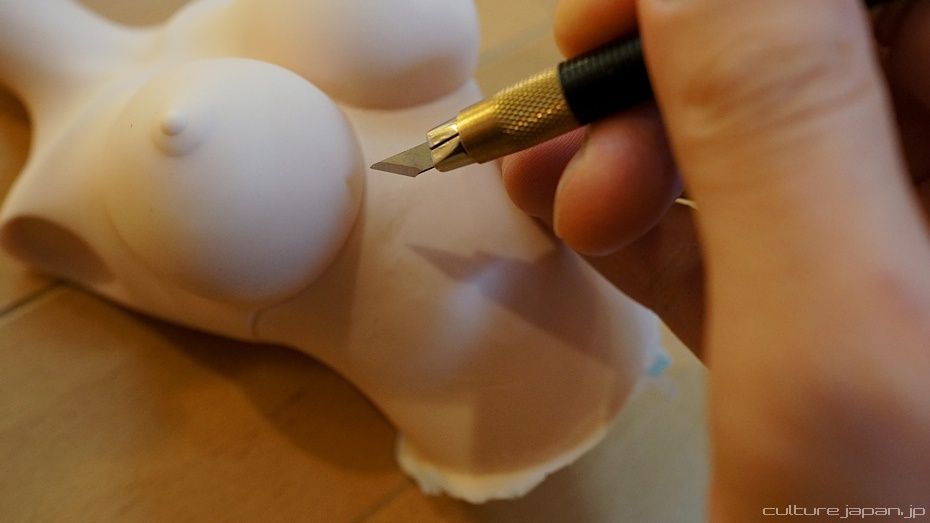
The original 3D prototype of the oppai was not designed to be made into a mold (it will be next time) so cutting away the flash is extremely difficult.
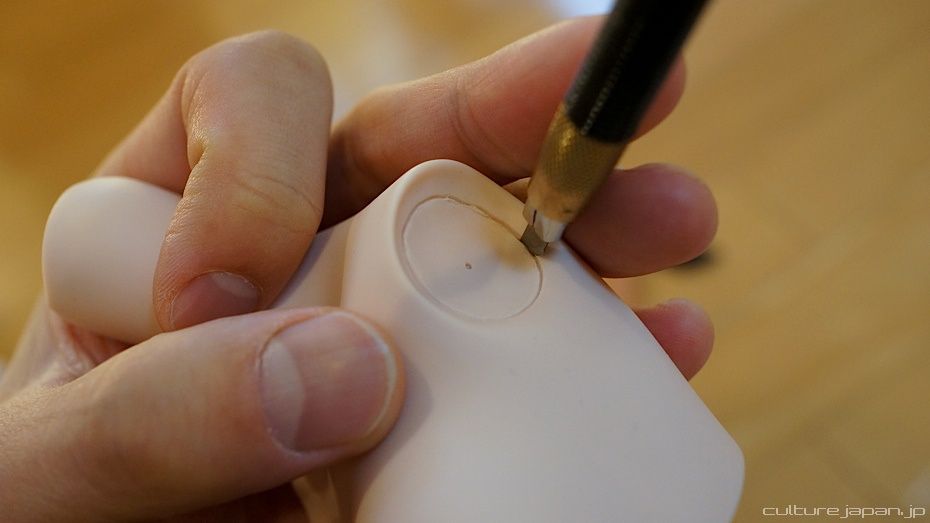
Cutting away flash from parts like this is easy - a groove was made in the wax copy which now makes it easier to cut. Its also hidden from view so a few rough edges are more forgivable.
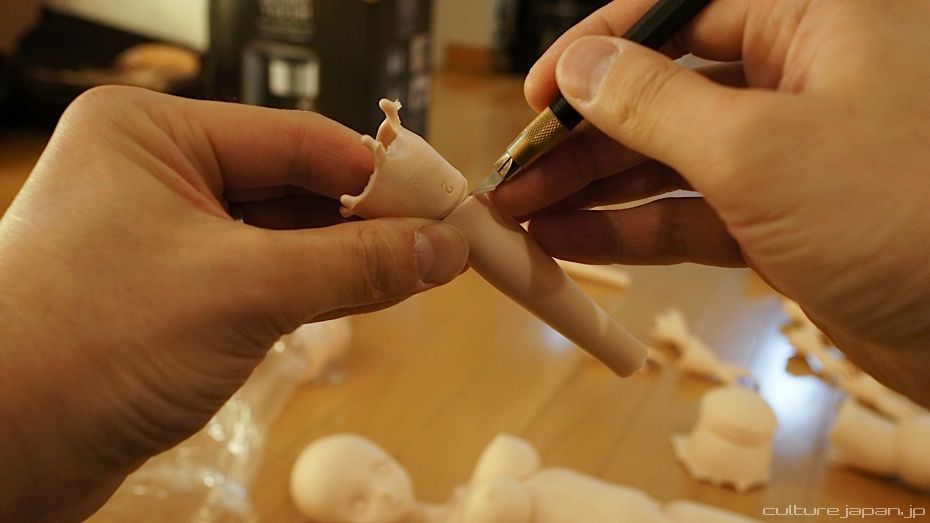
For some other brand of dolls, the spout was attached to the front of the forearm - this means that when the flash is cut away, the cuts are more visible as it faces the person looking at the doll.
I decided to put the spout on the back of the arm which means the cuts are not so visible because its hidden behind the elbow ball joint.
I decided to put the spout on the back of the arm which means the cuts are not so visible because its hidden behind the elbow ball joint.
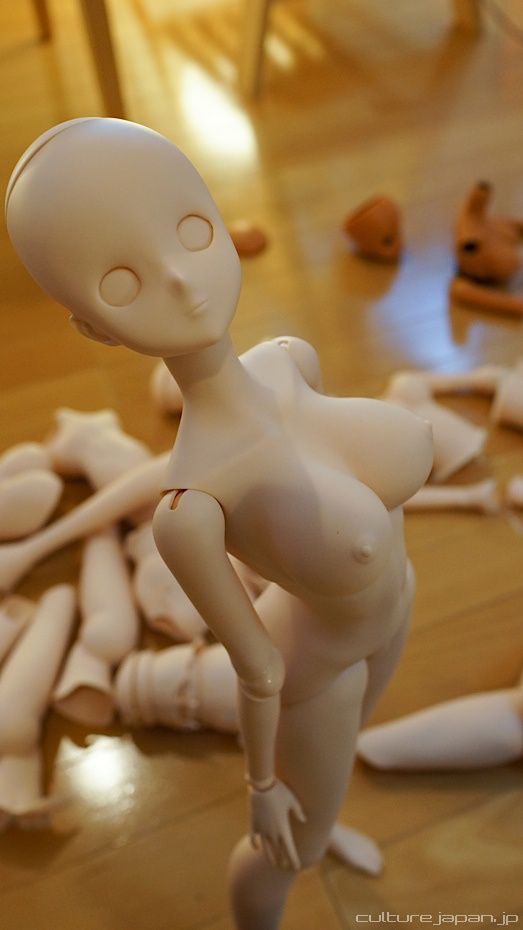
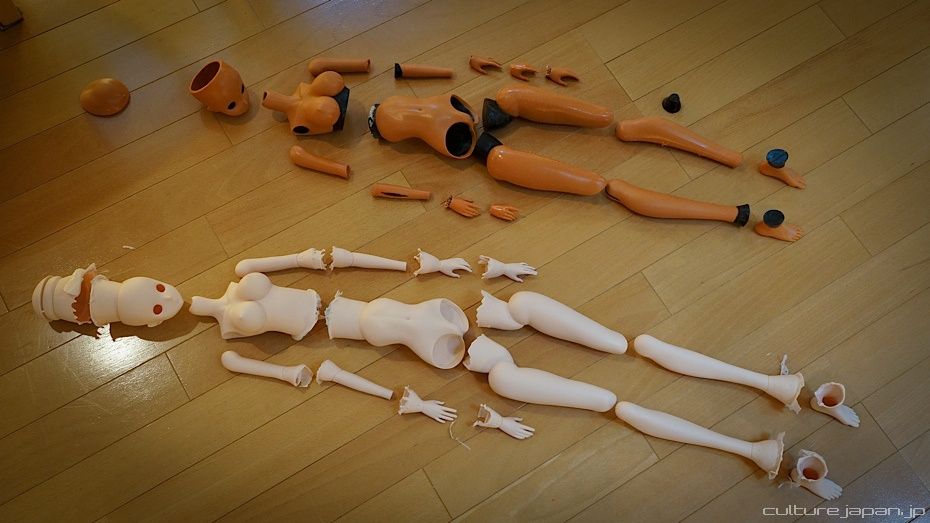
All flash has been cut off and Mirai-chan is all assembled! This is the first time I get to have a good look at her in soft vinyl form. For folks who are still not familiar with what soft vinyl is - its the same material as the soft parts of dolls such as Dollfie Dream, Obitsu, Azone and Yamato VMF series.
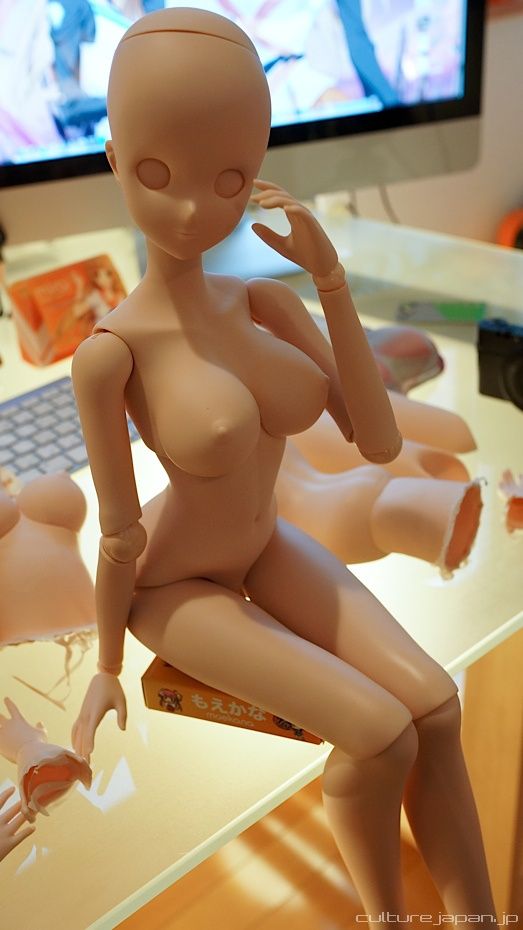
I mentioned that I had to sacrifice the design of the bottom of the torso and this is why - so that she can look good sitting down too.
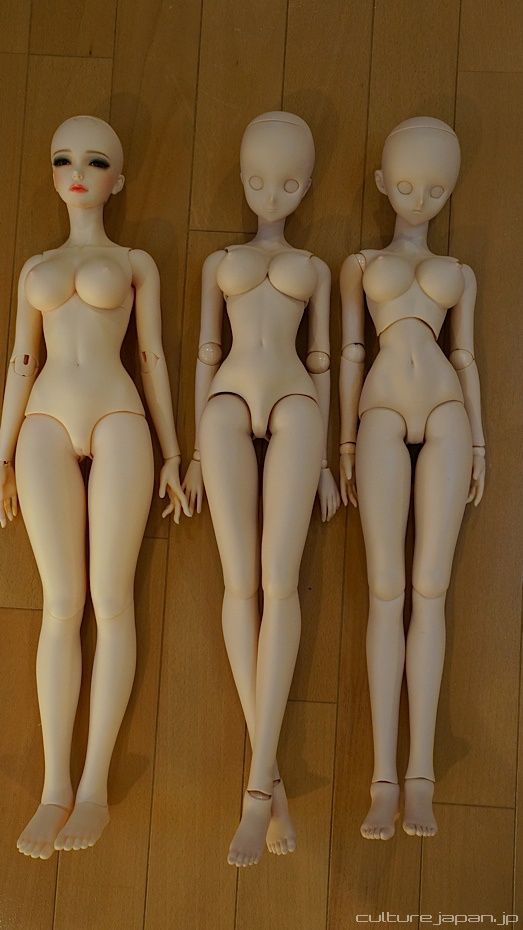
Comparison with an Iplehouse doll on the left and a Dollfie Dream on the right. My Mirai is slightly taller than both.
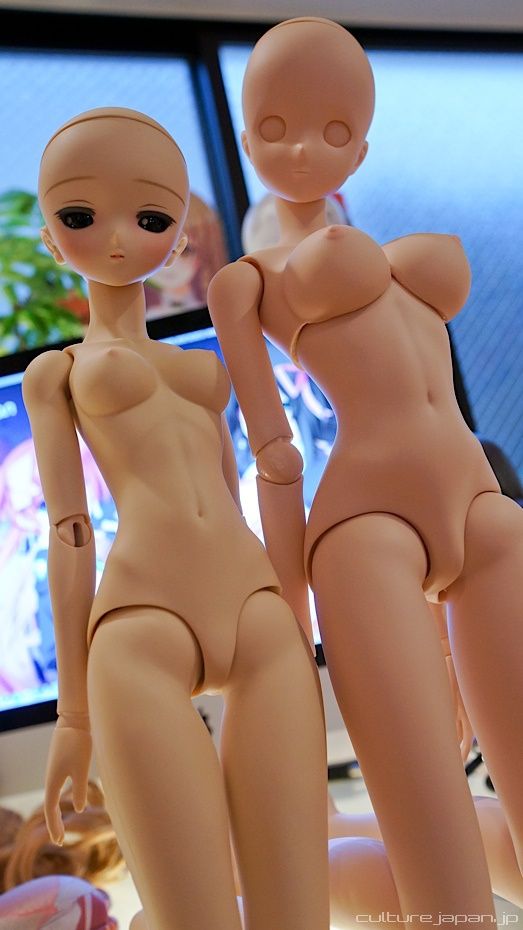
Comparison with an SQ Labs doll.
I do plan on making a smaller bust size in the future ^^;
The bust can rotate and tilt left and right to create dynamic poses.

Am rather pleased with the way she turned out - especially with only 5 months development time ><
But why am I in such a rush? Because I dont have much time left in this world.
But why am I in such a rush? Because I dont have much time left in this world.
There are still many improvements that I would like to make - some of which dont really concern the consumer but are important for improving the manufacture process which help improve efficiencies.

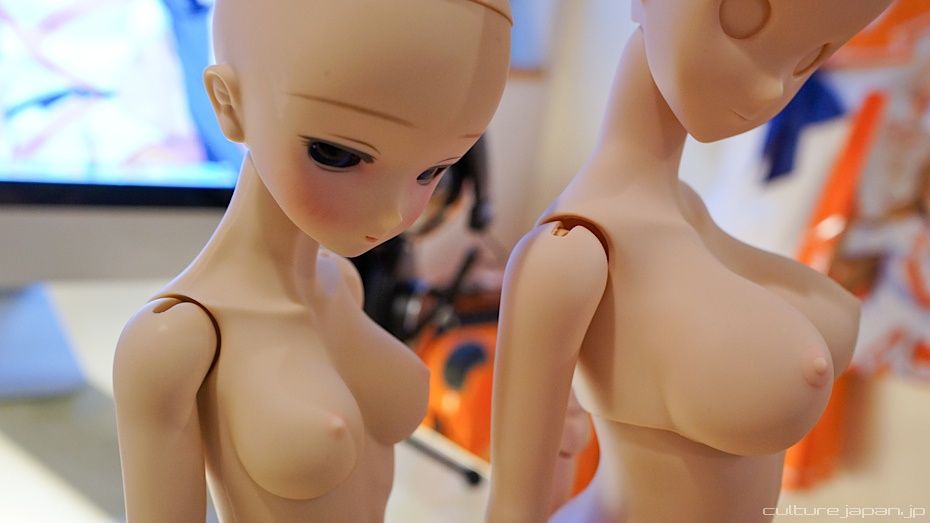
The oppai is soft while the torso is slightly harder. I tried making the torso and thighs the same softness as the oppai but the whole body lost stability.
Just like a human, both sides of the doll are designed to be non symmetrical. If you take a photo of yourself and mirror one side of it, you will notice that you look like an alien as both sides of our face are different. This rule applies to dolls too which is why many computer generated dolls look odd. When faces are sculpted in 3D, in most cases, one side is sculpted and then just mirrored.
Even Mirai's left and right oppai are different ^^;
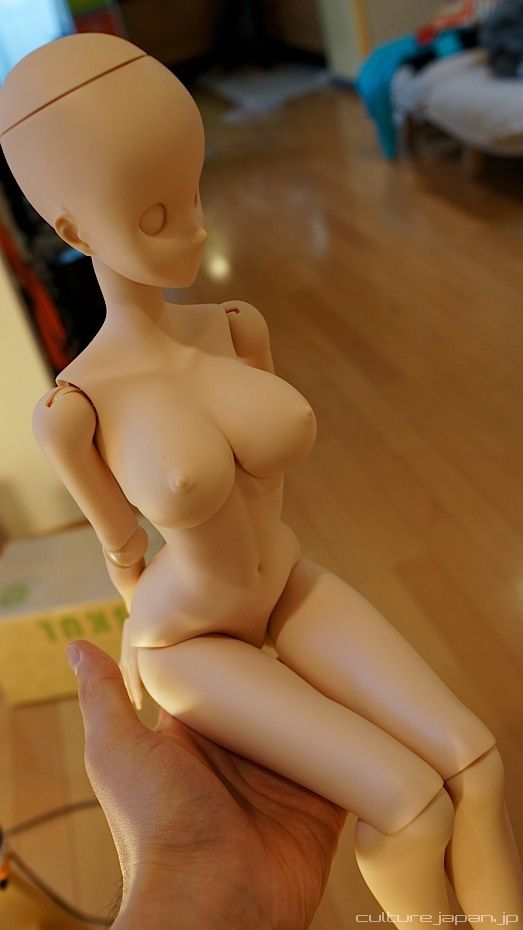
Mirai has a nice form when she sits down.

And this is what the body looks like with some clothes on. The oppai are quite big but not as big as a DDY. Tight fitting DD clothes dont quite fit.
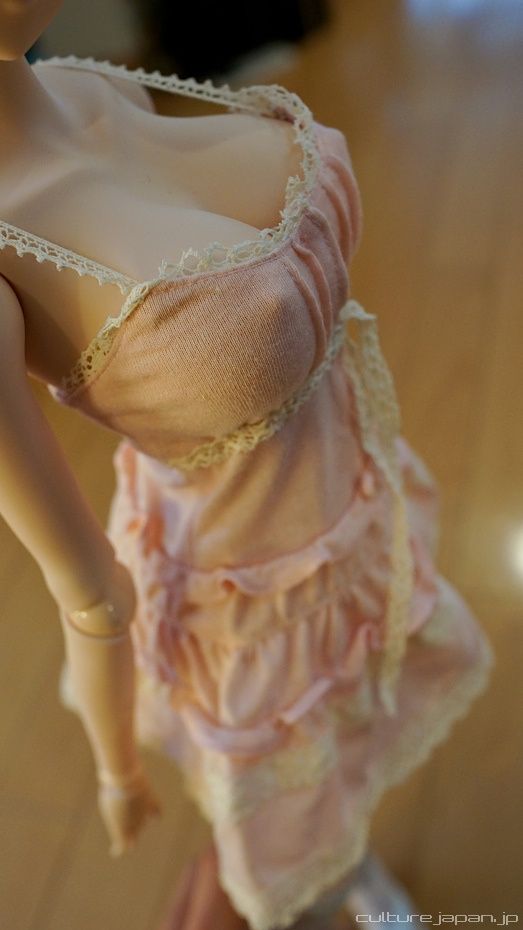
The nice thing about the way we designed the oppai is that you only need to put something tight on to squish the oppai together and form a cleavage ^^;
But as for this dress from Valkyrie Gate - it does look a bit tight around the oppai ><
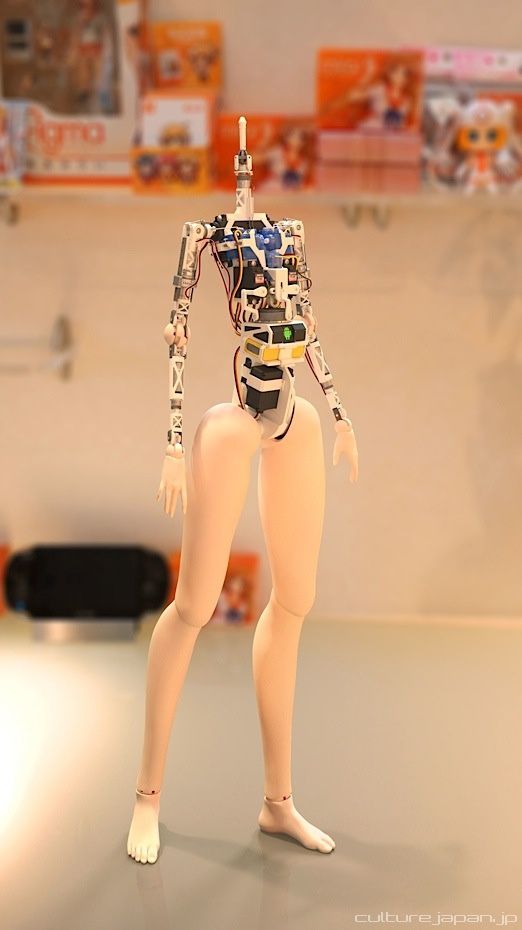
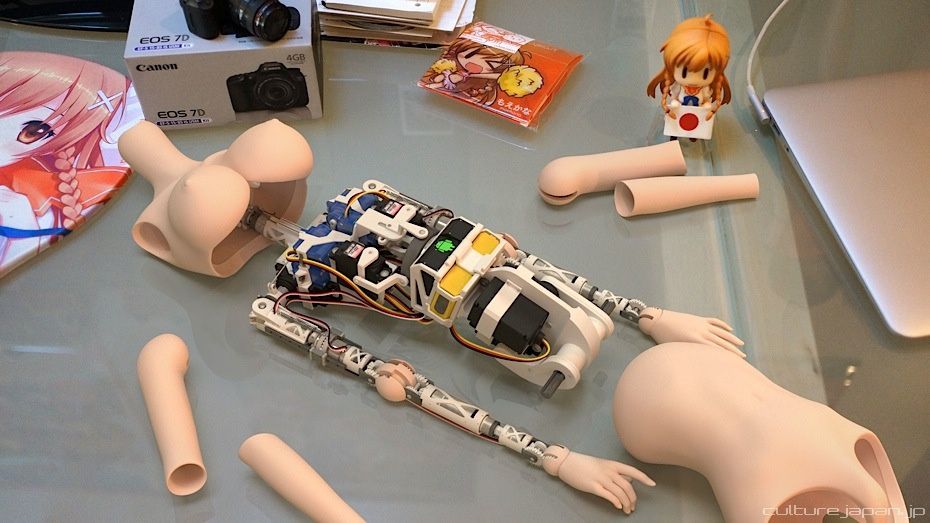
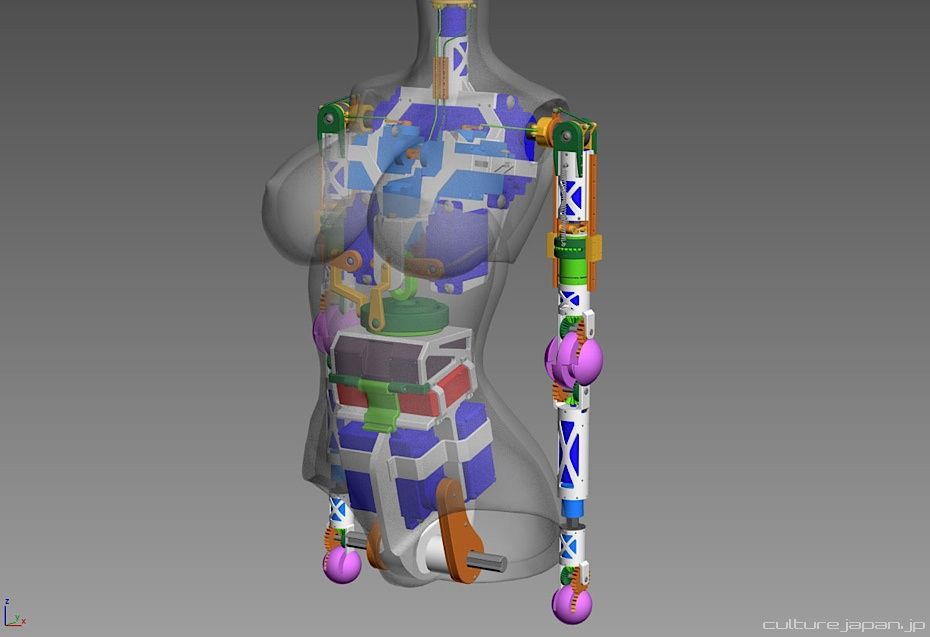
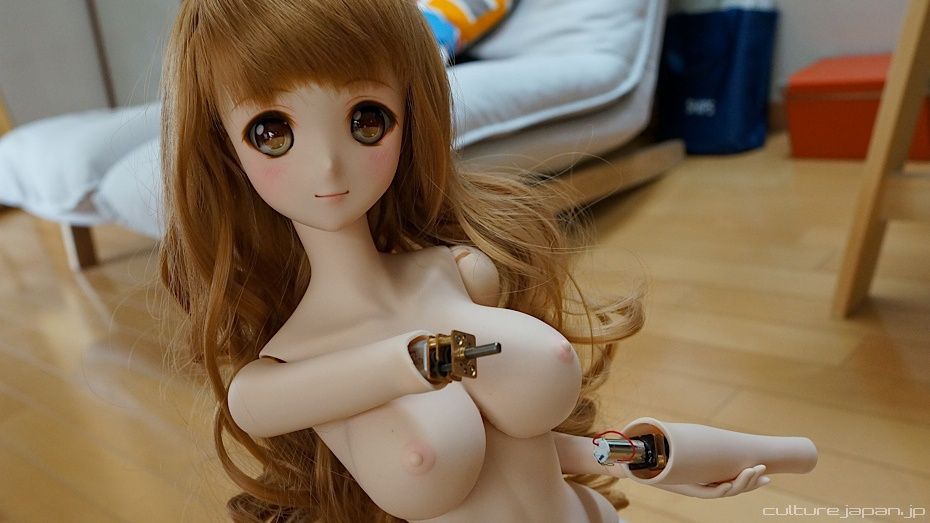
And I'm guessing that you were wondering what she looks like inside ^o^

I love dolls and think they are great but thought they could be even greater if you could interact with them. I took a hint from people interacting with their smartphones and then recently inspired by the Android based Ouya game console.
Android is a great open source platform that anybody can use (my reasons for sticking with Android listed in this post) and thought to myself if somebody can take that platform and use it for a gaming console - why cant I take it and use it in an interactive doll?
And thus the Smart Doll Operating System Skeleton V1.0 (SDOSS) was born.
As many of you know from reading my profile or resume, you will know that I worked at the Scientific journal called Nature. During my work at Nature, I met with many researchers when I spent time at Carnegie Mellon University's Robotics Institute covering their research on robotic prosthetic limbs.
I've been working with them on SDOSS for the last 5 months and am pleased to say that the first prototype is finally complete! The great thing is that most of these parts are available from Akihabara!
There is one problem though which may sound obvious but SDOSS moves like a robot and not like a human. I took a video of Mirai moving but she looked too robotic - I didn't want to post it as I didn't want to give the wrong impression of the product. We are currently working on channeling different voltages through the servo motors and adding a few cogs to make the movement more natural.
I'll be back at the Robotics Institute on my next trip to the US in July and hopefully we will have solved this problem by then.
As most of the parts for the SDOSS are readily available on the market, I've been able to buy parts in bulk from OEM manufacturers. Using existing parts on the market enables us to save on costs to develop our own parts.
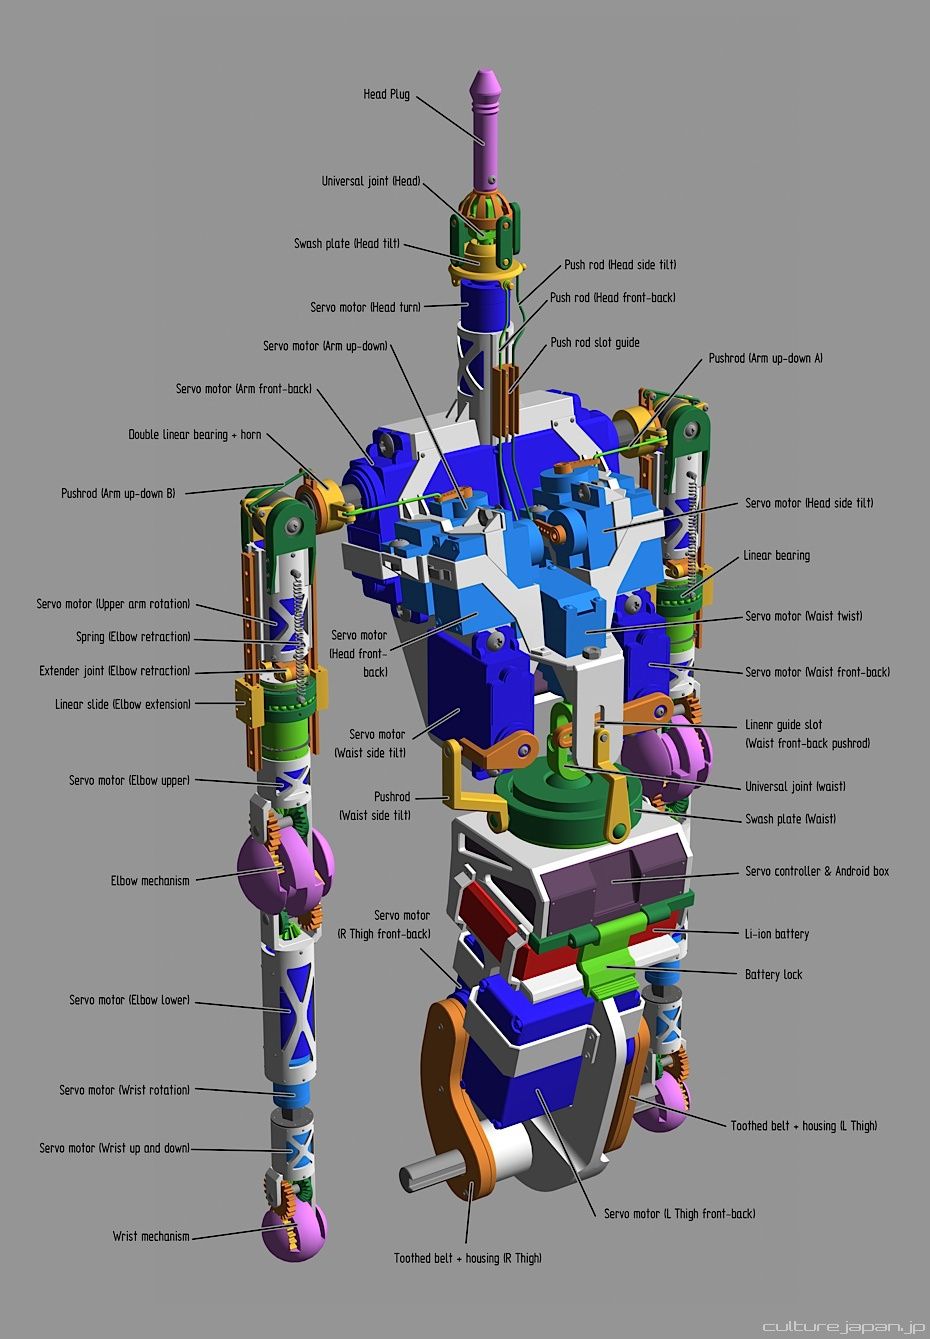
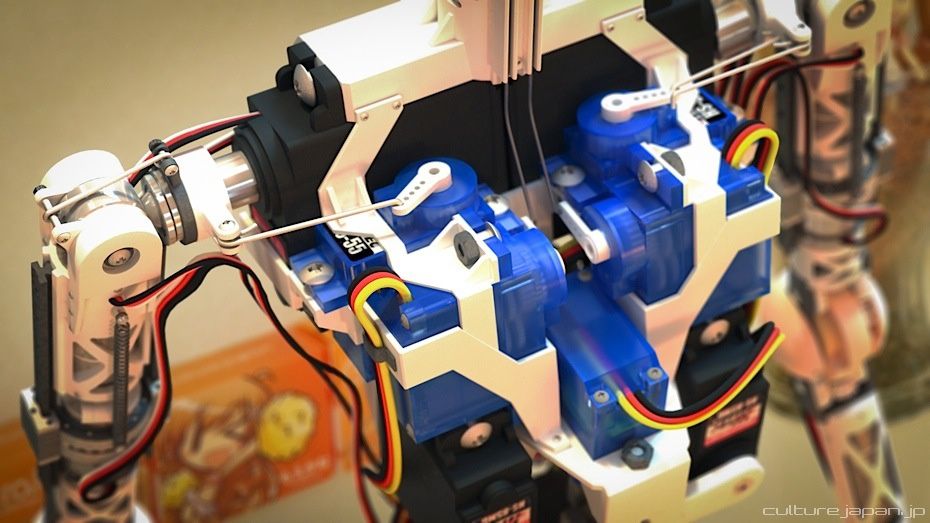
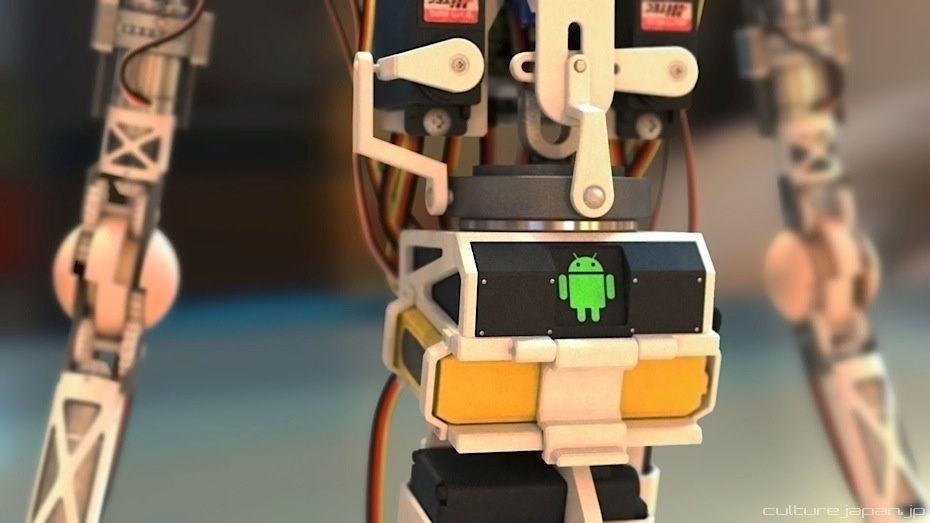
And here is a closer look at the parts and how it functions. The whole unit is based on a series of servo motors and push rods which are controlled by the Servo Controller and Android Box.
We have included a 1.5 GHz Quad-Core processor with 16 GB of internal memory which is mostly used to store the vast amount of speech patterns that we are currently recording with UTACO.
We have included a 1.5 GHz Quad-Core processor with 16 GB of internal memory which is mostly used to store the vast amount of speech patterns that we are currently recording with UTACO.
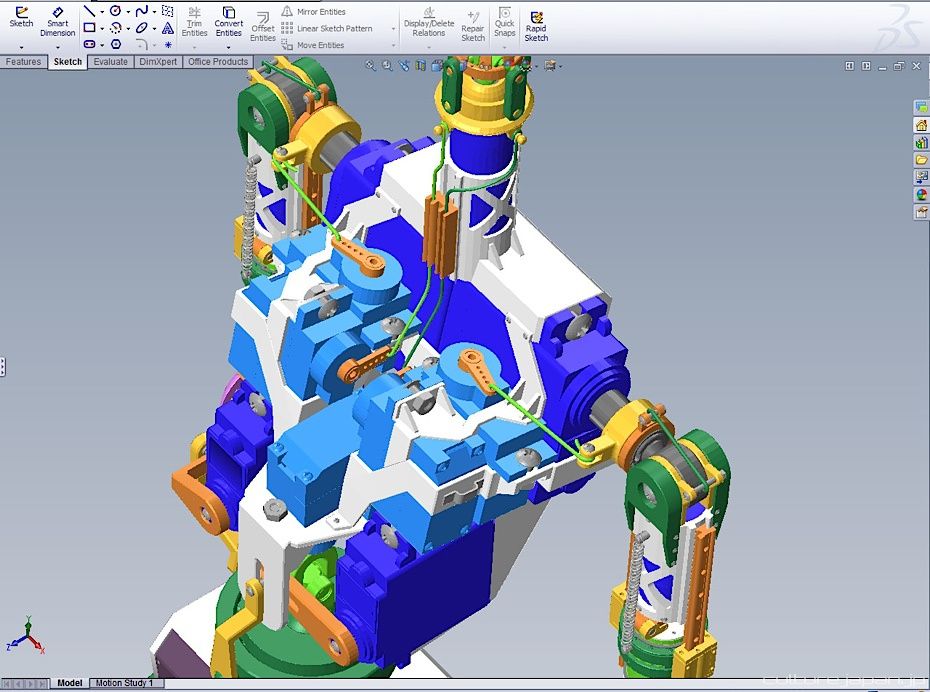
We used a CAD software called SolidWorks to design the structure of the SDOSS which has features that we need for a complex design like this. Features in SolidWorks include collision, clearance and interference detection.
SolidWorks also comes with CircuitWorks too which we used inside the Android Box. You can see some of CircuitWorks in action below.
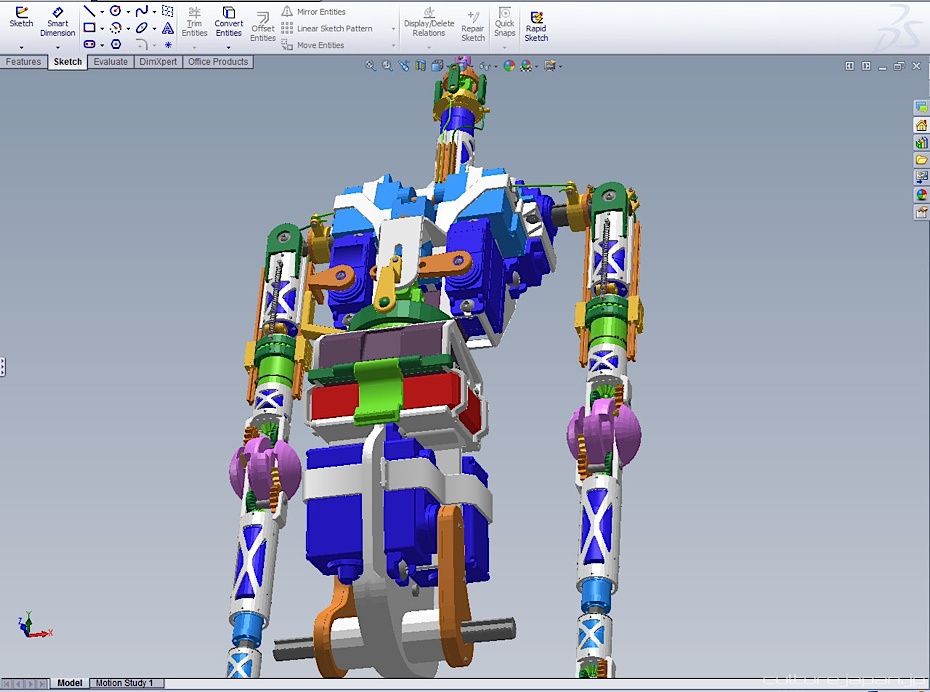
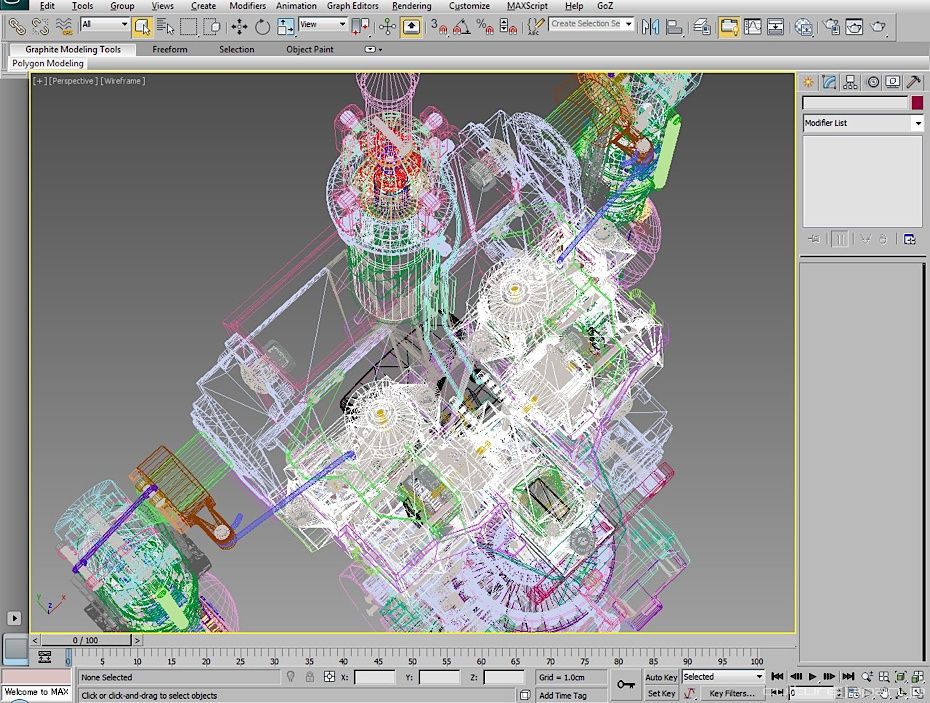
Using all the detection features in SolidWorks, we make sure that all the parts move as they should and then...
...we import into 3D Max to make sure everything fits into the doll parts. As we were developing the inner structure at the same time as the outer skin, we made some mistakes along the way. The shoulder mechanism turned out to be larger than anticipated. While it still fits in the doll parts, we had to punch out a hole in the shoulder joints for everything to fit ><
I cant wait to iron out those robotic movements and show you mirai in action!
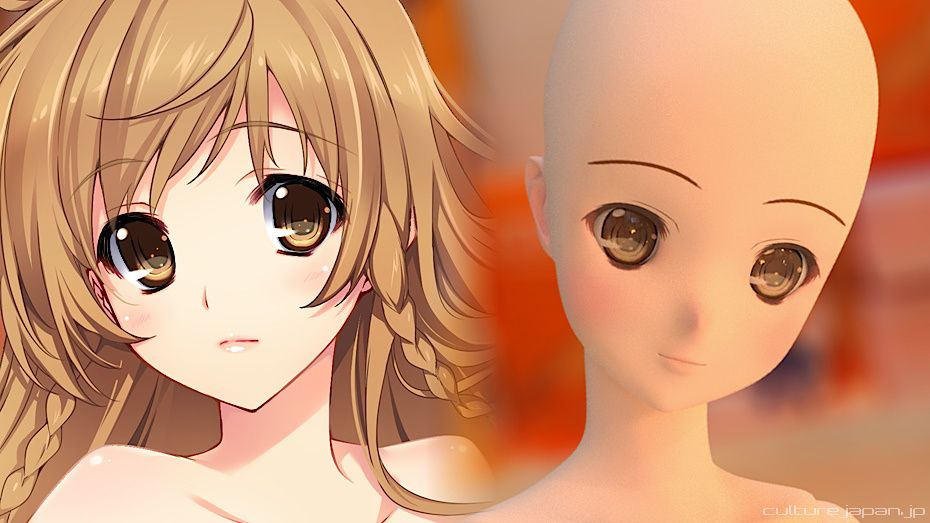
This is the sanded and painted version of the 3D printed Mirai that I showed you earlier on. I had to send the head off to get the paint masks created for mass production - they should be ready in about 3 weeks time.
Paint masks are like stencils - they are placed over the doll face and sprayed with paint. If a face has 6 layers of paint - 6 masks will be needed.
Paint masks are like stencils - they are placed over the doll face and sprayed with paint. If a face has 6 layers of paint - 6 masks will be needed.
Mirai's Summer Uniform will be the default garment and will be manufactured in Thailand. The wigs are manufactured in Korea. The doll body however will be manufactured in Japan.
I dont think I've mentioned this but one of the things I want my dolls to do is to help elderly folks through a method of treatment called Doll Therapy which is also practiced in Japan too. My plan is to donate some to homes for the elderly where Doll Therapy is practiced.

And this is what the box for "Mini Mirai" will look like with the illustration of Mirai by Iizuki Tasuku sensei on the front.
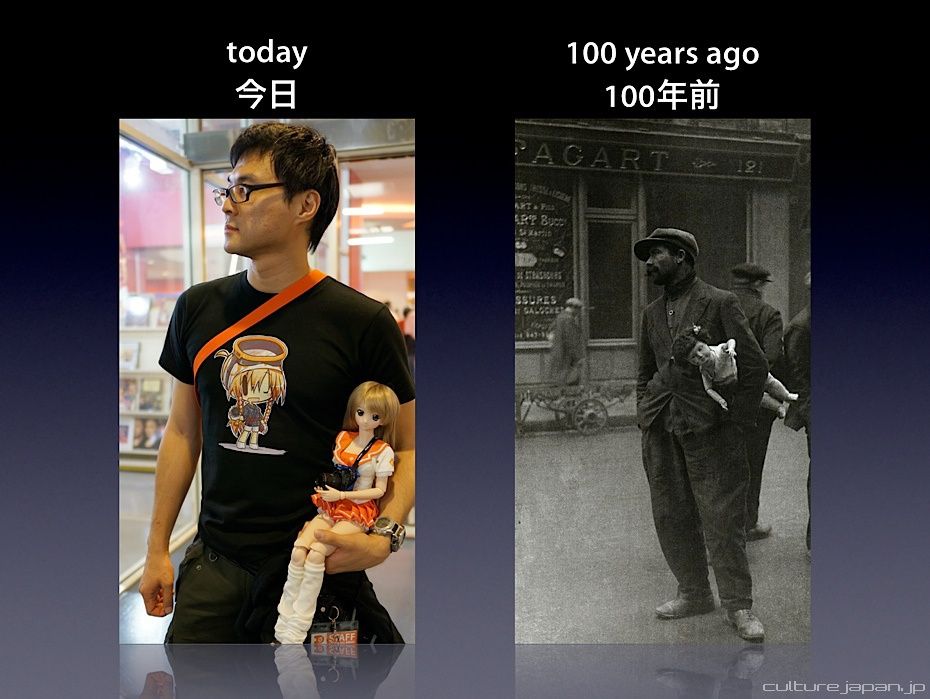
You have seen this slide before of a chap with his doll 100 years ago - may seem like a long time ago but dolls have been with us since prehistoric times - fragments of a doll with movable limbs have been recovered from the Babylonian period.
Pottery dolls have been found in Egyptian graves and date back to 2000 BC. The earliest recovered dolls were made of materials such as clay, wood, cloth and bone with some of the more distinct ones being made of ivory or wax.
In 600 BC, dolls with movable limbs and clothes were discovered. It wasn't until the 16th and 17th century when Europe started to flourish in doll manufacturing. The first example of mass production of dolls started in the 1800's where they moulded pulp wood and paper to make doll parts.
Wax doll modelling became popular from about 1850 while porcelain dolls started its production swing in 1900's. It wasn't until after World War II when doll manufacturers started to experiment with making dolls in plastic.

Even though dolls have been around for all this time, I only became interested in them back in 2008 when I discovered Dollfie Dreams and got hold of Dollfie Saber. Thanks to Volks, I have discovered a whole new world which has enabled me to connect with people from all over the world.
I think dolls are great - in particular the Japanese branded 50 - 60CM dolls made by companies such as Volks, Obitsu and Azone. I want to continue to expose Japanese branded dolls to the world in the hopes that they will one day be global brands just like Barbie and Blythe.
Unfortunately I have some very bad news. I've run out of capital which means my plans of mass production of my Mini Mirai have to come to and end for now. I will still complete the 3 sets of vinyl pulls I have made so far though.
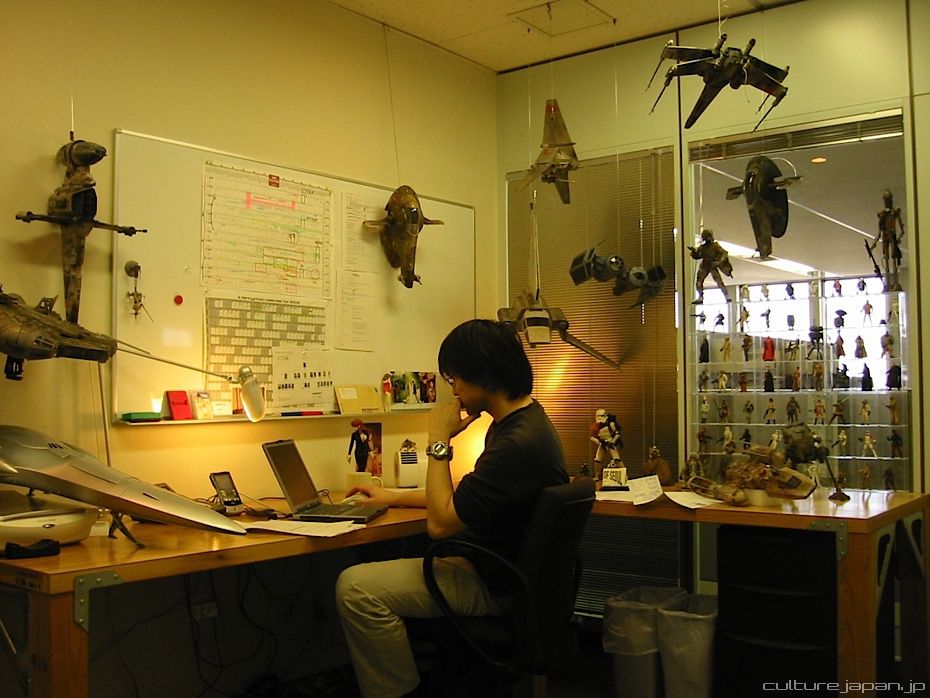
This photo is of me in my office when I was Website Manager at Amazon. As I was an early member at Amazon, I received many stock options which I have been using to run my company but its all pretty much all gone now. I never took investment from any party and have been running operations with cashflow from sales of Moekana and production of my TV show Culture Japan.
I did speak to a few potential investors but they all told me the same thing - that I have no real exit strategy. When an investor considers to invest money, they want to know when they are going to get it back and how much they are going to get on top.
But they are right - I really dont have an exit strategy because I'm not running this company so that I can sell it and cash out in the future - I run this company because I love Japan and want to continue to spread Japanese culture throughout the world until the day I die.

Many folks ask me why I just dont ask my parents for money - I say to these folks "Just because you would ask your parents for cash - it does not mean we all would."
Life is all about choosing the hard route. If there is a choice of sailing through either calm seas or rough seas then the obvious decision will be "rough seas."
Choosing the tough route will throw unseen challenges at you which you will give you learnings that you would have never gained if you took the easy route. Absolutely nothing cam be learned by choosing the easy way out.
Life will present challenges to you when you least expect them and if you are not armed with knowledge or learnings then its going to be more difficult for you to cope when shite hits the fan.
This photo is of me when I was back in the UK. I could have chose the easy way out and be spoon fed by my parents but I decided to chose a route which would give me greater learnings in life which eventually lead me to living and working in Japan in a field that I love.
I worked as a waiter in a Japanese restaurant for many years making my own keep while learning the hard way how difficult it is to make a few bob. The experience and learnings however was priceless.
I worked as a waiter in a Japanese restaurant for many years making my own keep while learning the hard way how difficult it is to make a few bob. The experience and learnings however was priceless.
My Mini Mirai based on the looks of the illustration of Mirai by Japanese illustrator Iizuki Tasuku-sensei.
As I mentioned above, I'll still complete the few vinyl pulls I've made and finish of the paint masks too but unfortunately thats it for the mass production of Mini Mirai until I can make a bob or two to make my dream into a reality.
Its unfortunate that I've run out of cashflow at such a critical time but through my life journey, I have learned that things happen for a very good reason - reasons that we dont understand now but always become clear in the future.
Its unfortunate that I've run out of cashflow at such a critical time but through my life journey, I have learned that things happen for a very good reason - reasons that we dont understand now but always become clear in the future.
Update! Looks like many of you thought this was an April Fools! Just as Keikaku ^^; Sorry to disappoint though - check out this post to read how production is coming along so far!