Since yesterdays post, I have had some death threats threatening that I would have my spleen ripped out and my brain urinated on if I didn't release the "Gundam Modeling Tutorial for Busy People" *now* - so here it is. As usual, I have used the Gallery template to hold the tutorial and the modified the blogg template which pulls everything from the Galleries automatically which is why you see the "Taken with IXY DIGITAL 400. The above image is archived in the Gundam Modeling Tutorial for Busy People gallery. (Click to enlarge)" everywhere - just ignore it while I think of what the UI should look like.
I will be adding more stuff as I build more Gundams - keep those mince pies peeled.
This guide is not meant to show you how to build a model step by step but should provide enough tips to make some groovesome stuff.
You can also go directly to the galleries to see this tutorial too.
Gundam Modeling Tutorial
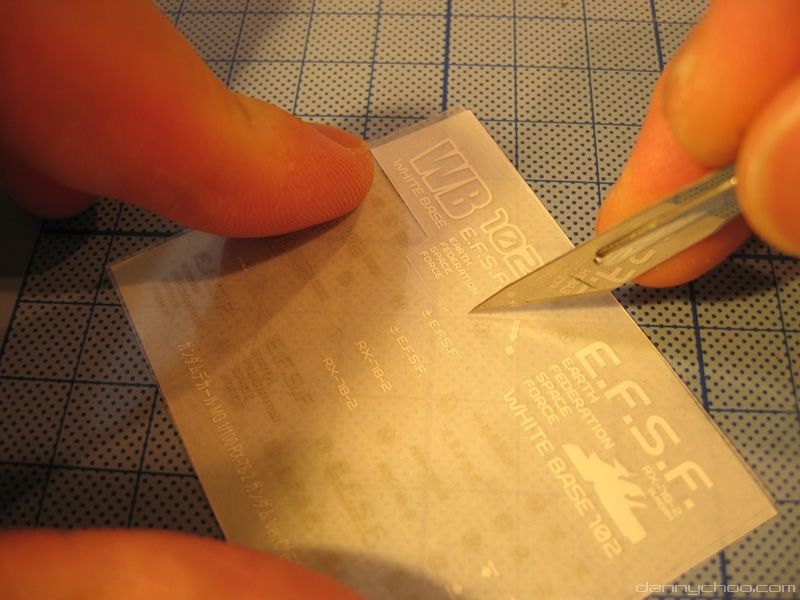
This is an etching decal which comes with some Gundam kits - but many just come with stickers. If you dont want to spoil your Gundam with the normal stickers - you can always try to get hold of some third party etching decals.
Anyway, here is a shot of some decals which came with the One Year War Gundam. Cut out the bit that you want to etch with a scalpel before proceeding.
Then use some of that clear scotch tape to hold the decal in place.
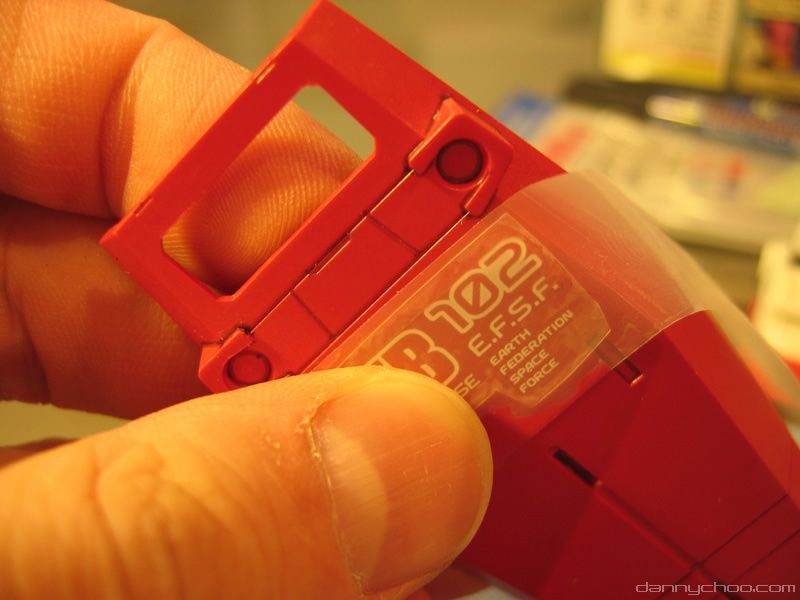
Next off is to use a hard object (the back of the scalpel is ideal) and then etch away. As you etch, you will notice the decal coming away from the plastic sheet. Be-careful not to move the decal or you will end up with a mess and start to cry. Also, try to etch from one side of the decal to the other otherwise you may get air bubbles under the decal (and cry).
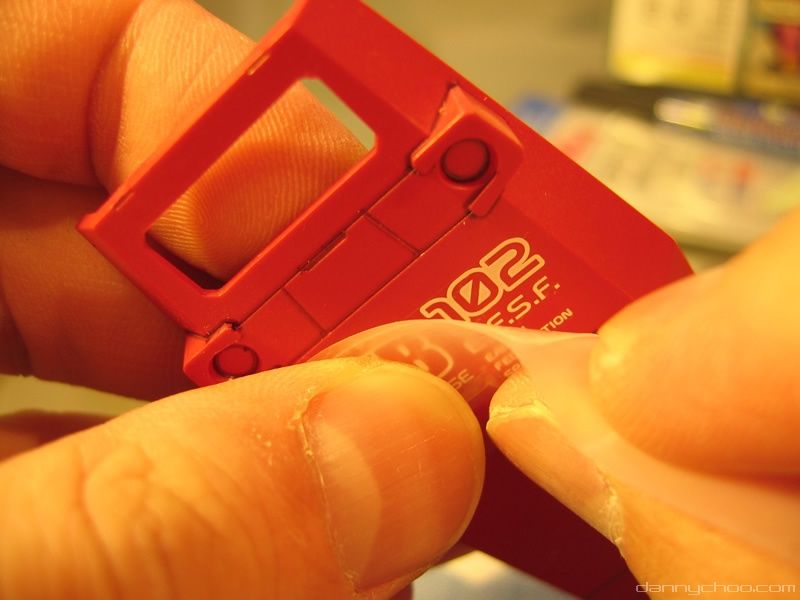
Once you think you have etched the decal on to the piece in question, carefully and slowly peel away the plastic sheet - sometimes the decal has not been etched on properly - in which case you can slowly put back the plastic sheet in the original position and re-etch.
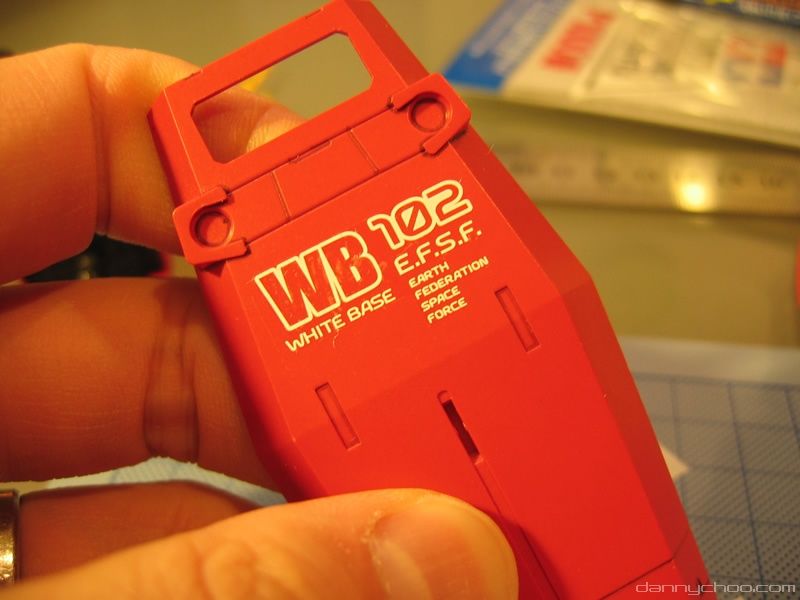
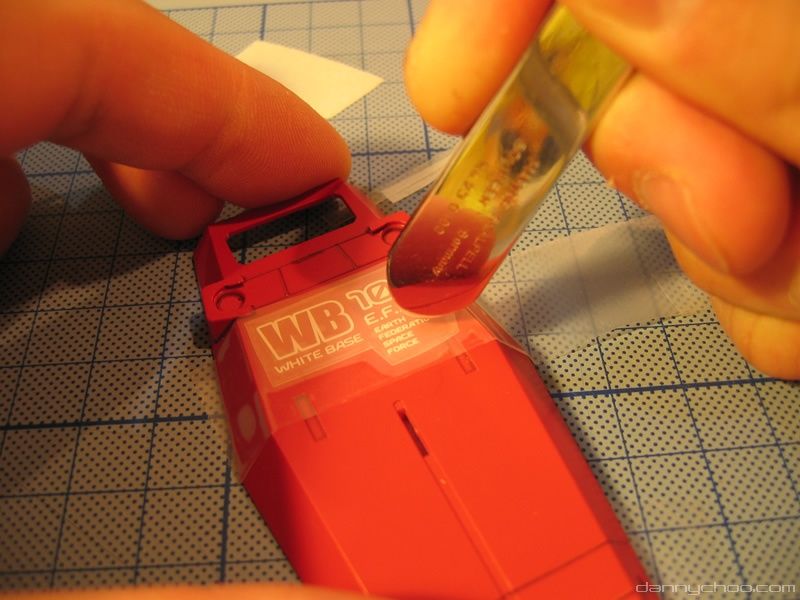
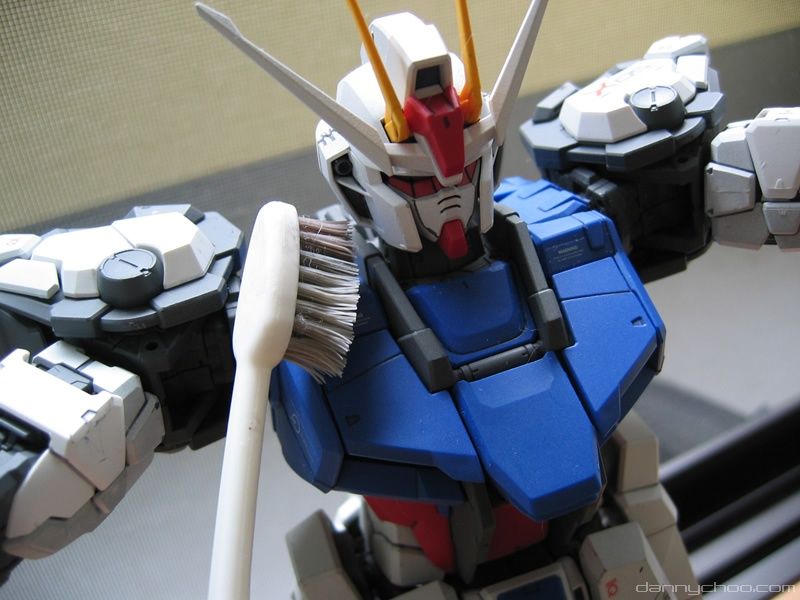
This is the decal in place - as you can see I didn't get the air bubbles out. After crying for 10 seconds, I got a cotton bud to push out the bubbles. Whether its a decal or a sticker, you can use the scalpel to slice an air bubble just a bit before wiping the decal/sticker down.
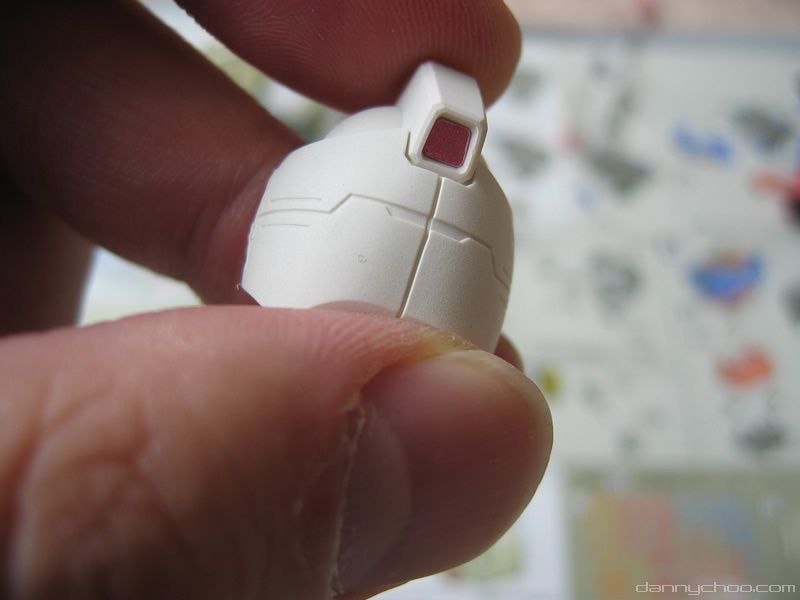
"Sumi ire" is the Japanese word used to describe where you use either a special marker or paint to paint along grooves in the kit. These grooves are usually maintenance hatches or where pieces of metal join etc. I call it Inking but I am not sure if that is the right term but I will use it anyway.
This is the back of Gundams head un-inked. As you can see it looks quite sad so inking is the order of the day...
This is the back of Gundams head un-inked. As you can see it looks quite sad so inking is the order of the day...
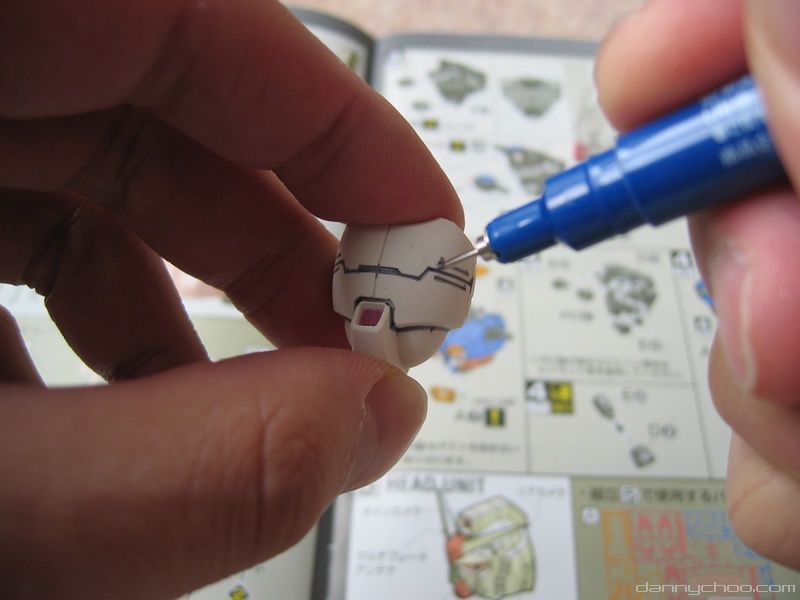
Go to your nearest modeling store and grab yourself some Gundam markers (and don't forget to pay for them). Then draw along the grooves on the head. If you are inking on a white surface, grey, purple or brown is recommended as the color to use. Do this when you are at home and not on the train as you will have ink going over the edges - you will probably get strange looks and maybe even arrested for being a nuisance in public.
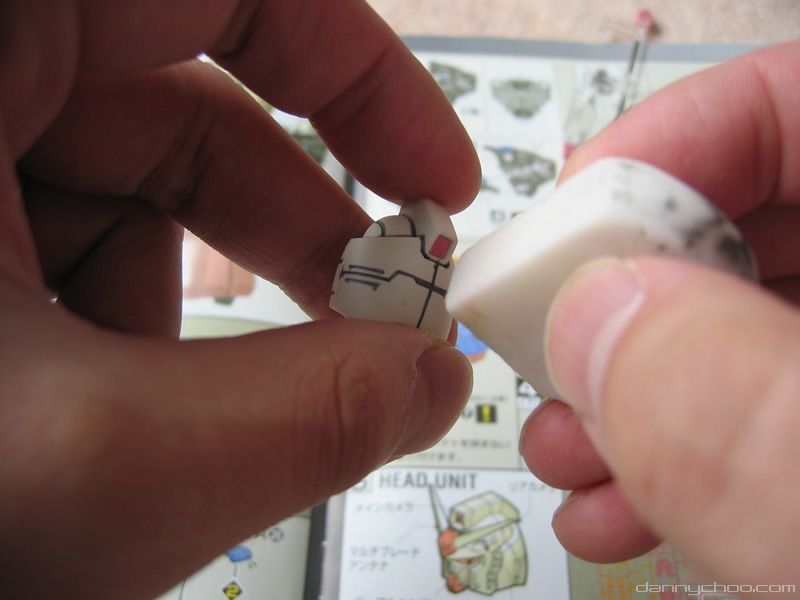
Now this may not be common knowledge, but you can use a pencil rubber to clean up after inking. I didn't know this when I started modeling and used thinner to rub out excess ink which was bad because I ended up melting a few parts by laying on too much thinner.
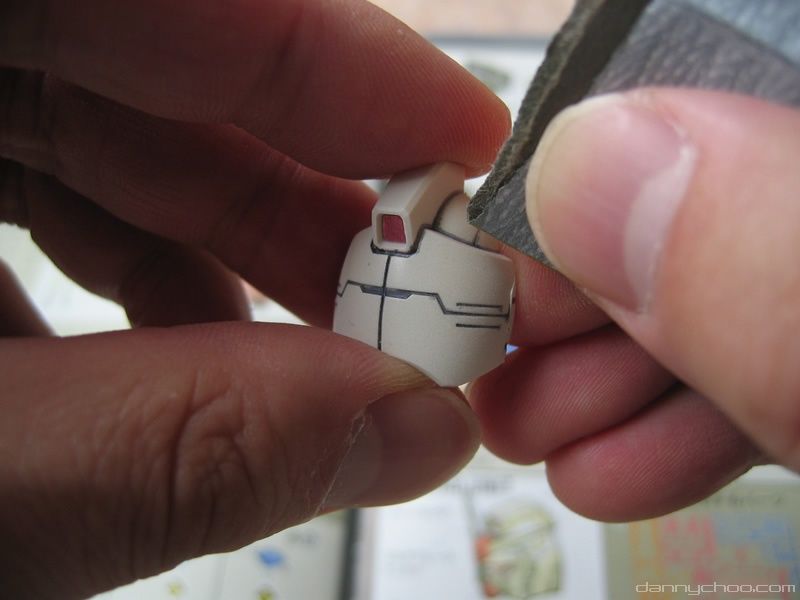
You can also use fine sandpaper to remove any offensive overflowing ink too.
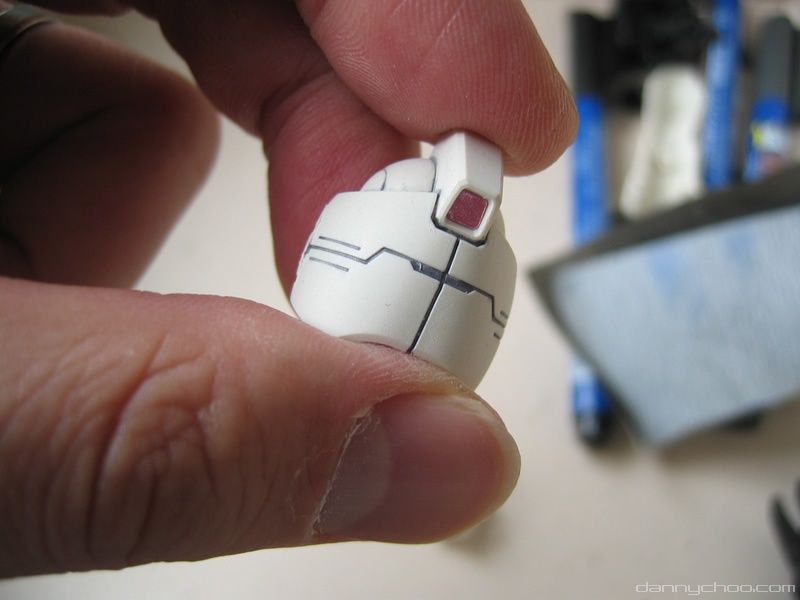
This is the back of Gundams head after inking - and cool does it look too.
This is the PG GP01 just after completion - as you can see it is un-inked. I didn't ink at the time as I was worried that I was not going to do a good job and spoil it (after all - they are expensive and I spent a few days making it).
After looking at other people models however, I realized the importance of inking and that you have to use the "just do it" attitude - if you screw up then use a rubber or sand paper and before you know it you will have a mean looking Gundam - check the next slide...
After looking at other people models however, I realized the importance of inking and that you have to use the "just do it" attitude - if you screw up then use a rubber or sand paper and before you know it you will have a mean looking Gundam - check the next slide...
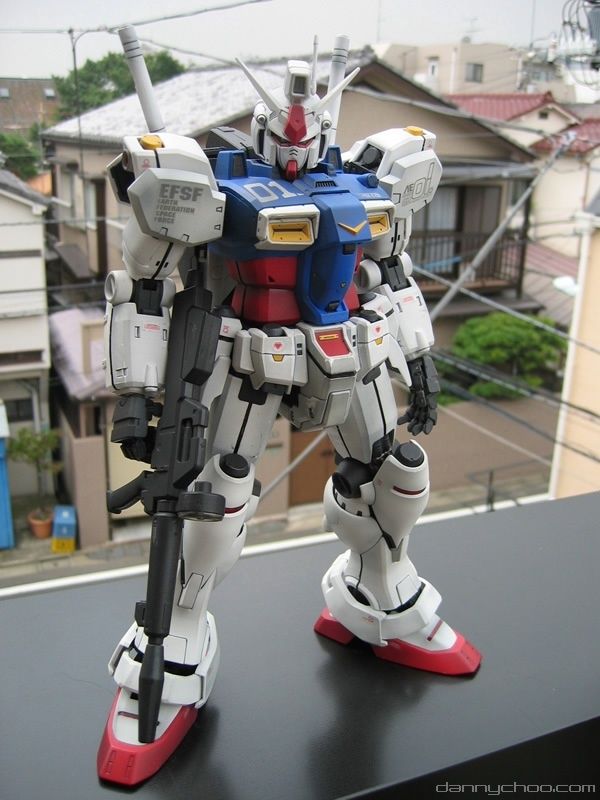
This is the PG GP-01 after inking - as you can see it looks very different to the pre-inked state and closer to how it looked like in the series.
I actually did not ink this model until a year after I completed it!
I actually did not ink this model until a year after I completed it!

So this is the Gundam tutorial for *busy people* - you can tell by the way I spray the pieces. The plastic frame which holds the pieces is called the Runner - the bit of the runner which attaches directly to the piece is called the Gate.
What many people do is cut out all the pieces, sand down, go over with primer, sand down again and then paint - but that would mean that I would need a million years just to complete one model!
Not having a million years to spare, what I do is use a method which some people may call the "darn-right-lazy" method which is to spray the whole runner.
Not having a million years to spare, what I do is use a method which some people may call the "darn-right-lazy" method which is to spray the whole runner.
What I do then is to cut out the pieces as I build the model and then spray over any visible nip (snip?) marks. Nip marks are the marks left over in the piece after nipping out from the runner.
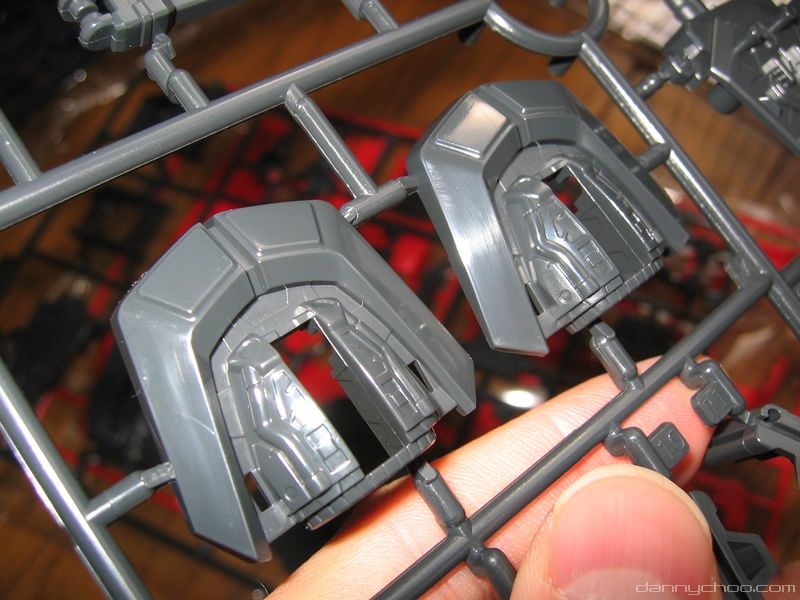
What I do is spray directly onto the Runner without any primer. This is a Runner out of the box. Constructing a Gundam model without painting means that you will end up with an icky wimpy Gundam who would have a tough time frightening off a house mite.
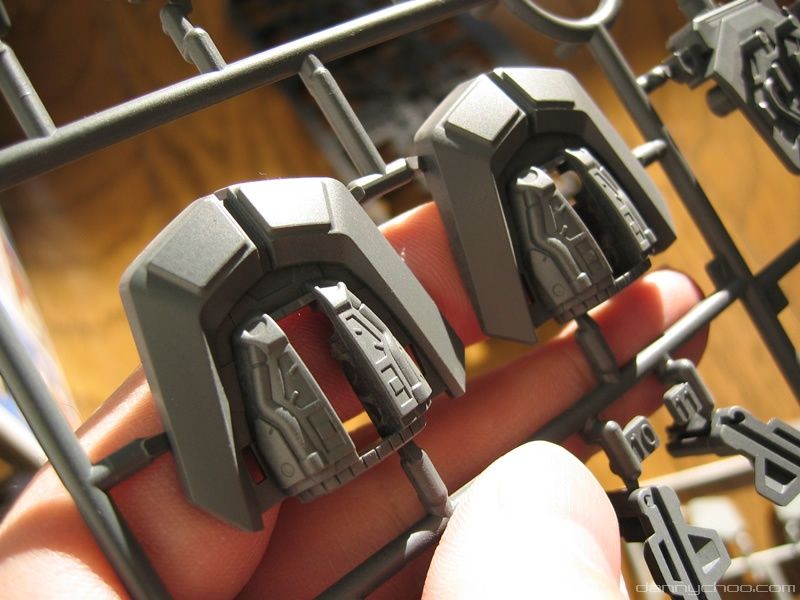
This is the same Runner after spraying. As you can see the texture is totally different.
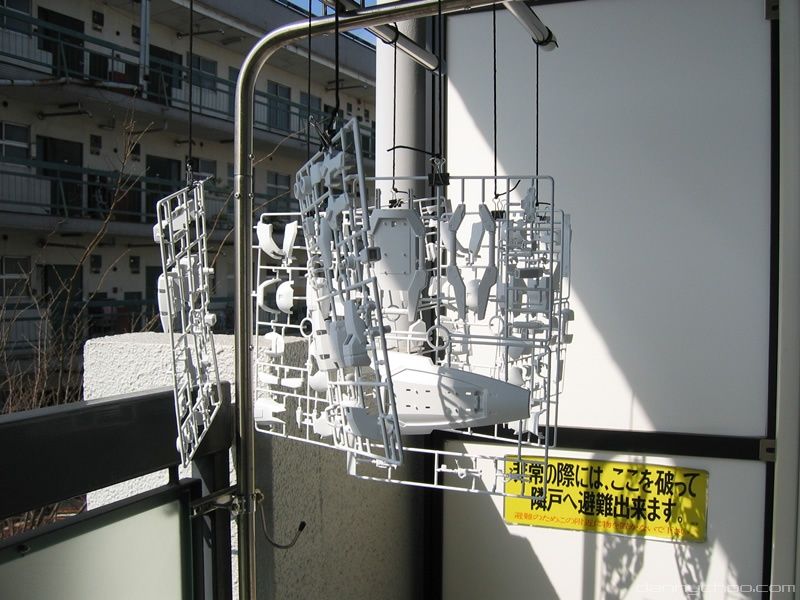
Here are some Runners hanging out to dry outside. Hanging Runners outside to dry is good because you wont choke and die from the fumes from the paint as you might if you hanged the Runners out to dry indoors. But, you will get dust falling on the Runners.
What a lot of professionals do is to do the spraying indoors and build a vacuum booth which sucks out the fumes and smell.
Being the "Gundam modeling tutorial for busy people" I just dont have time for all that. If dust does settle down on the Runners while the paint dries - I just smooth down the pieces with fine sand paper.
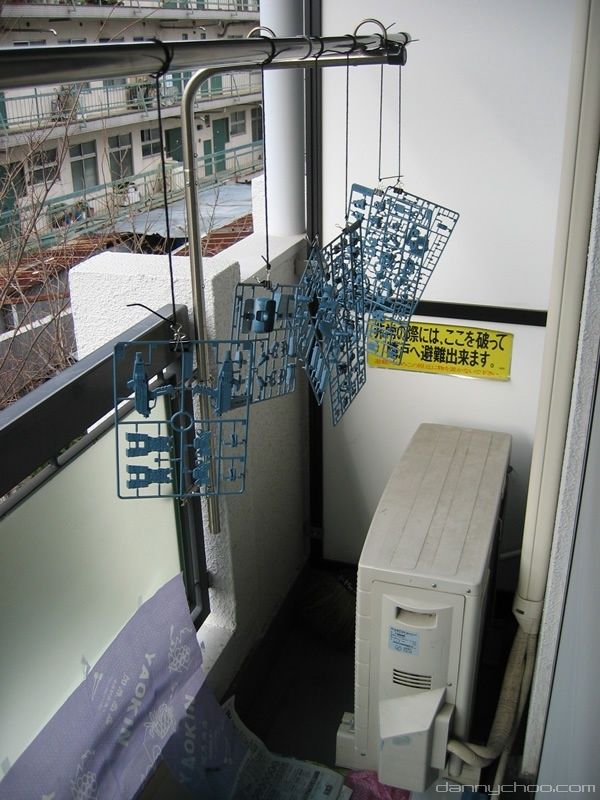
More Runners hanging out to dry outside. The Runners dry very quickly and you can leave them there for about 20 mins.
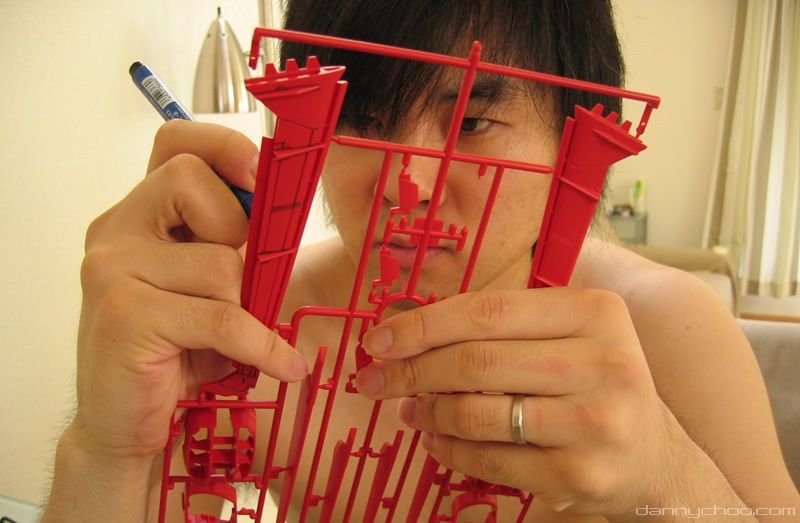
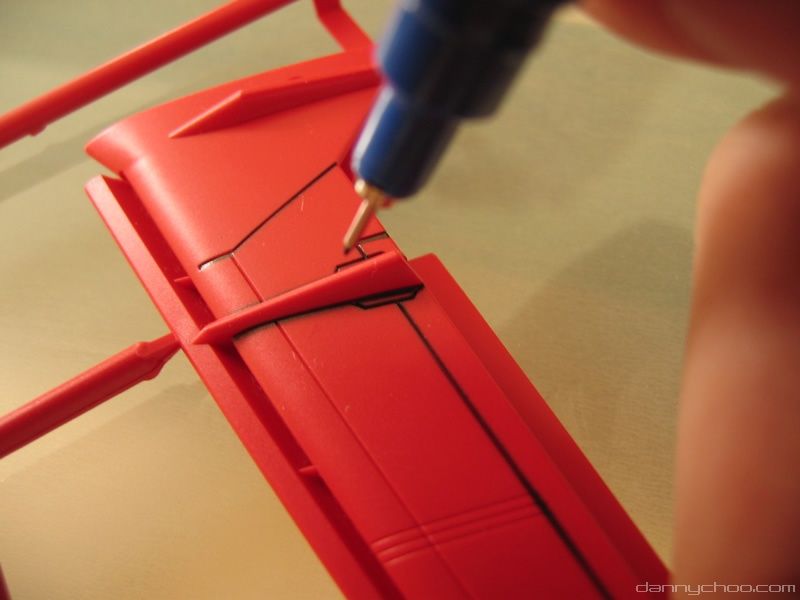
This is me inking the wings on the Aile Striker. This Runner has been given its red coat of spray and now I am doing the inking with the usual Gundam markers.
It really depends on the type of piece that you are inking but I find that I can ink long pieces easier when they are still attached to the runner.
After nipping out the pieces, the nip marks will be visible - so what I do is to spray over whilst being careful not to spray over the grooves which I have spent the last hour inking. If you do spray over the inking - just re-ink.

This is Gundam MkII after completion.
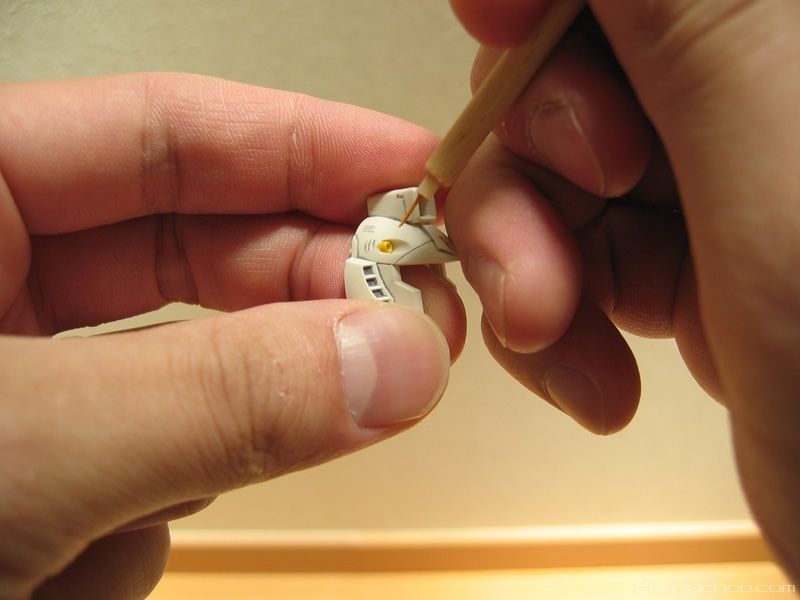
The smaller kits such as the Master Grade series are much cheaper than the PG series and this is probably why there are less parts which are colored. The vulcan cannons on the side of Gundams head for example in this kit are not separate pieces which means you have to paint them.
get yourself a fine brush to do the painting.
get yourself a fine brush to do the painting.
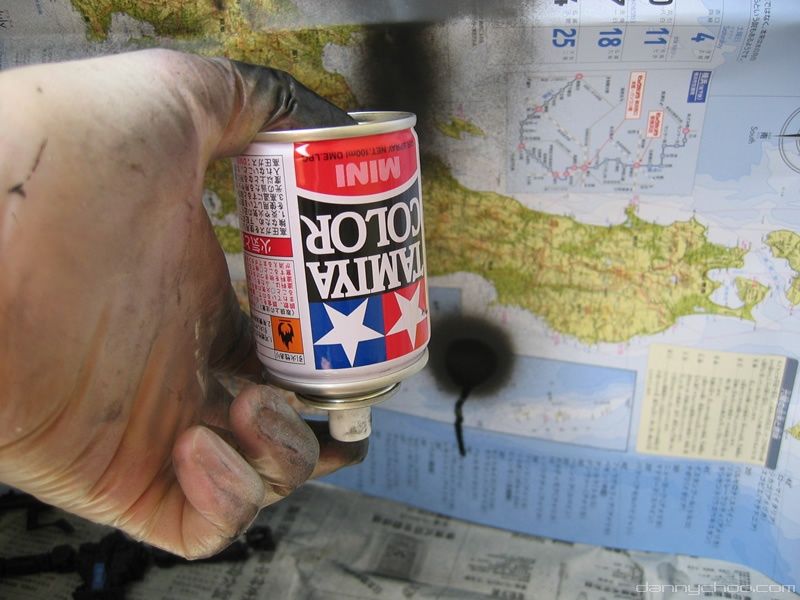
It really depends on the size of the kit but a can of spray like this one will be enough for one Master Grade kit. If you are making a Perfect grade then you probably need two cans (again depends on the size of the pieces etc).
After spraying, turn the can upside down and spray for a split second - this prevents the nozzle from clogging up. A can of spray typically costs about 500 yen (5 USD).
After spraying, turn the can upside down and spray for a split second - this prevents the nozzle from clogging up. A can of spray typically costs about 500 yen (5 USD).

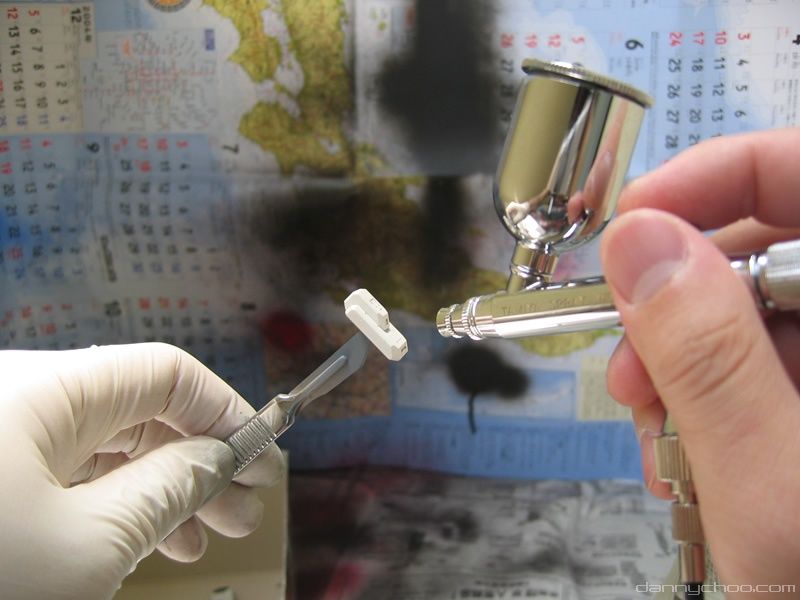
This is my airbrush filled with just enough ink for the shadowing that I am going to do on my MG Gundam. Shadowing is the technique where one sprays the edges of the pieces to make the whole model stand out. Shadowing is different from weathering where weathering is done to make the model look like its had its butt kicked 20 times.
You should be able to see that the ink is very thin - I use about 70% thinner and the rest paint. What I do is to mix a bottle of paint and thinner prior to spraying - the bottle of paint usually lasts me a long time - the paint in this picture was mixed over a year ago.
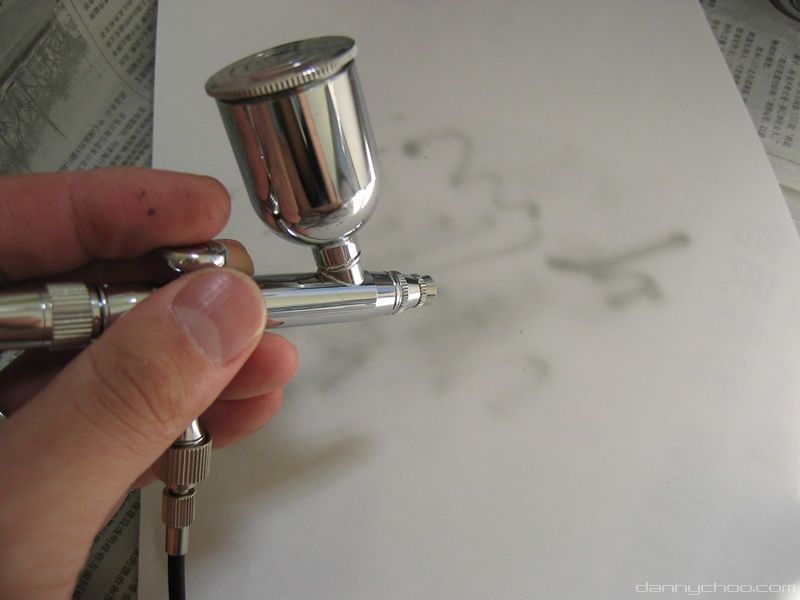
Do have a piece of paper handy - use something like A4 paper and not toilet paper - especially not used toilet paper - don't want yer Gundam to be smelly and brown. Regardless of the colors of the pieces, the white paper will help you adjust the airbrush which determines the amount of ink flow.
Before you spray any piece, make sure you spray *away* from the piece because the head of the airbrush will accumulate ink whenever you leave it for a period of time. If you sprayed directly on to the piece, the airbrush will splutter and your lovely Gundam piece will look like its been dipped in diarrhea (minus the spinach and corn).
Before you spray any piece, make sure you spray *away* from the piece because the head of the airbrush will accumulate ink whenever you leave it for a period of time. If you sprayed directly on to the piece, the airbrush will splutter and your lovely Gundam piece will look like its been dipped in diarrhea (minus the spinach and corn).
Make sure you have a bag of disposable gloves handy otherwise you will have ink in your ears - for those who pick your ears often.
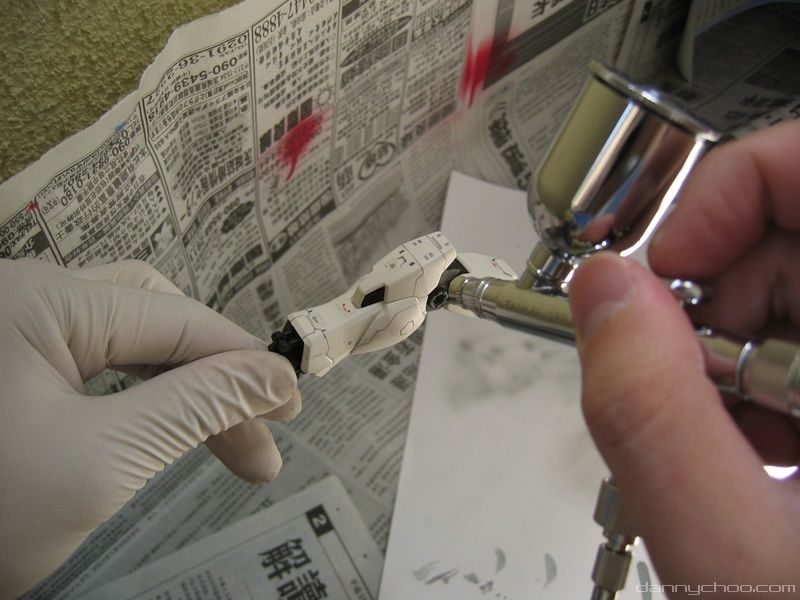
This is me applying some shadowing. When using the airbrush, be very careful how much you apply - you could be spraying away thinking that there is not enough shadow - then you hold the piece up to the light and start to cry realizing that you have applied too much. If you have applied too much shadow then you are screwed because the work to remove the shadowing is a pain in the armpits.
You will have to re-spray the piece in question, do the inking again and if you had some etching decals you would have to remove that too. At this moment in time, you may want to consider getting a nearby friend to kick you or decide that you want a battle damaged Gundam...
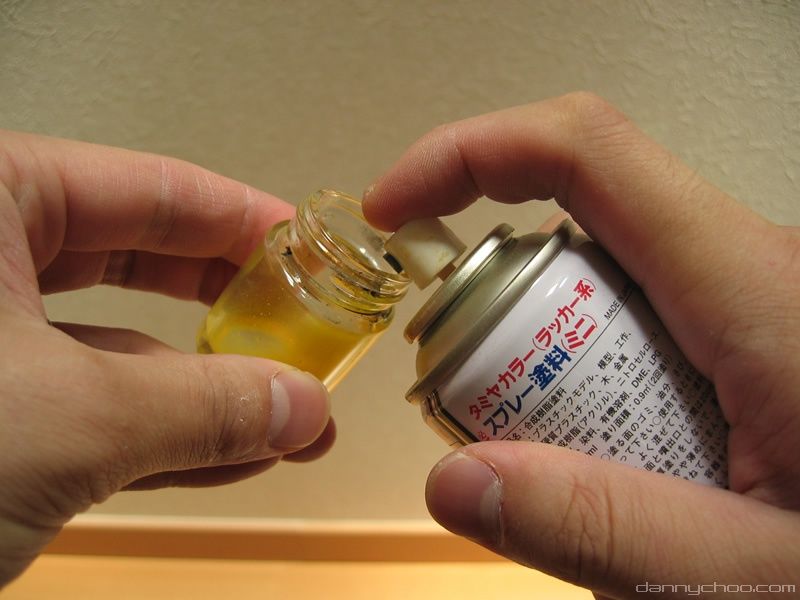
If all you have about you is spray cans but need some paint to paint some Vulcan cannons (for example), then do what you can see in the photo. Take an empty pot and spray into it. I thought that the spray would go everywhere but the spray can behaves quite well.
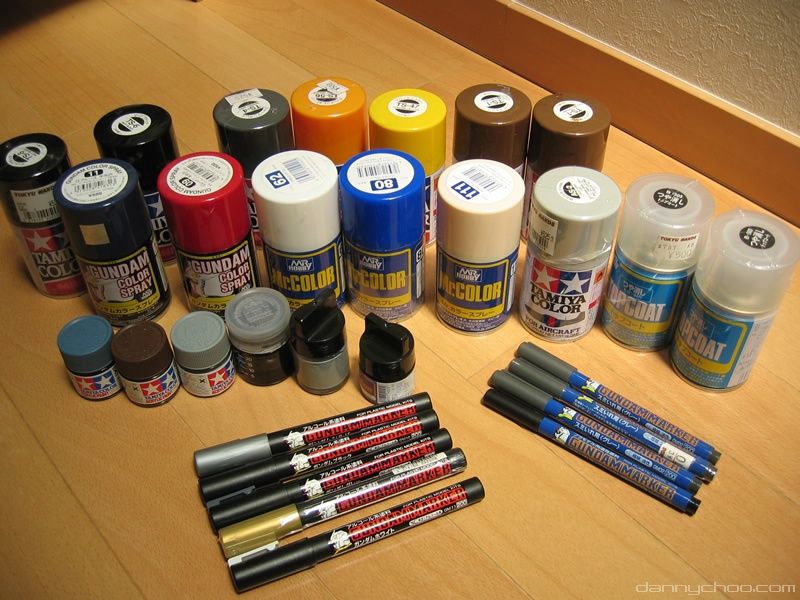
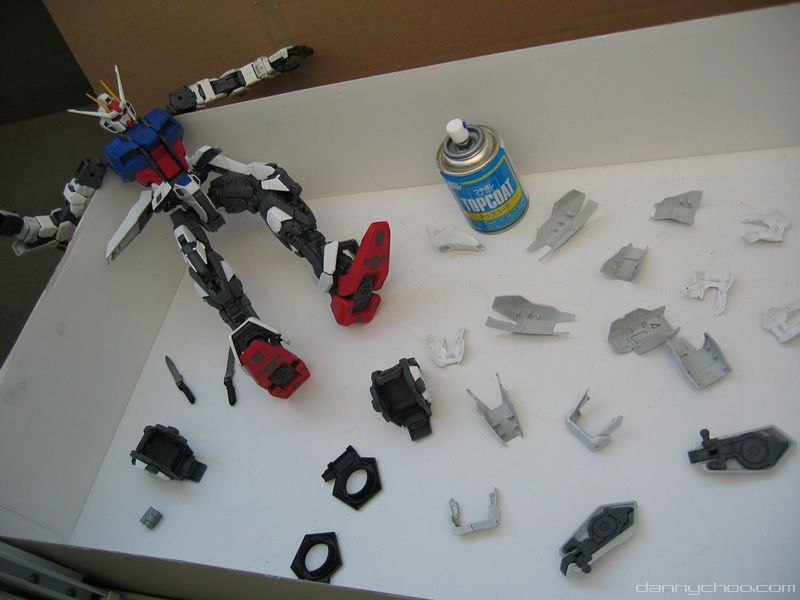
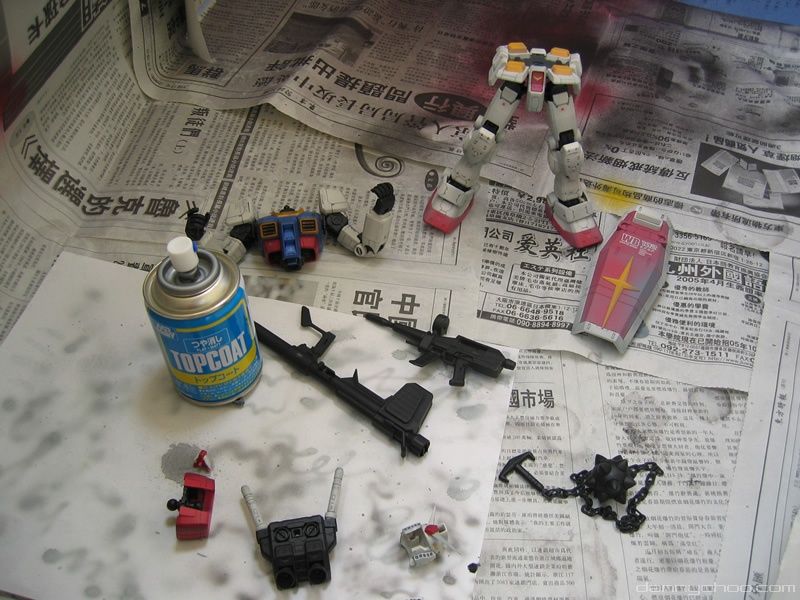
Here is a small collection of the paints that I use. Here you can see Gundam Color Spray (which is toxic), Mr Color and Tamiya Color.
The small pots are also Tamiya color and are used for small details on the models.
On the right you can see Top Coat. There are two types of Top Coat - one is gloss and the other matt. I prefer all my models to be matt. Even if I cant get hold of some matt paint (the red Gundam Color paint in this photo is gloss), when I use Top Coat to spray over gloss, the gloss will turn to matt. Top coat helps keep the paint n stickers from peeling away from the model but is not weather or drop-from-third-floor-balcony proof. if you like to pose your Gundam a lot, you will find that paint does wear off after a while even if you have used Top Coat.
At the bottom of the picture you can see some Gundam Markers. The fat markers are used for large grooves like the ones in PG GP01's legs and the thin markers for the other thin stuff.
Now here is a word of advice, if you need some grey - make sure you get a few pens and not just one. As you ink your Gundam, the nibs become blunt and depending on the piece you ink, the nib may even split apart. You can still use these split nibs for large grooves but if you try to use them on a thin groove then you will end up with a mess.
Now here is a word of advice, if you need some grey - make sure you get a few pens and not just one. As you ink your Gundam, the nibs become blunt and depending on the piece you ink, the nib may even split apart. You can still use these split nibs for large grooves but if you try to use them on a thin groove then you will end up with a mess.
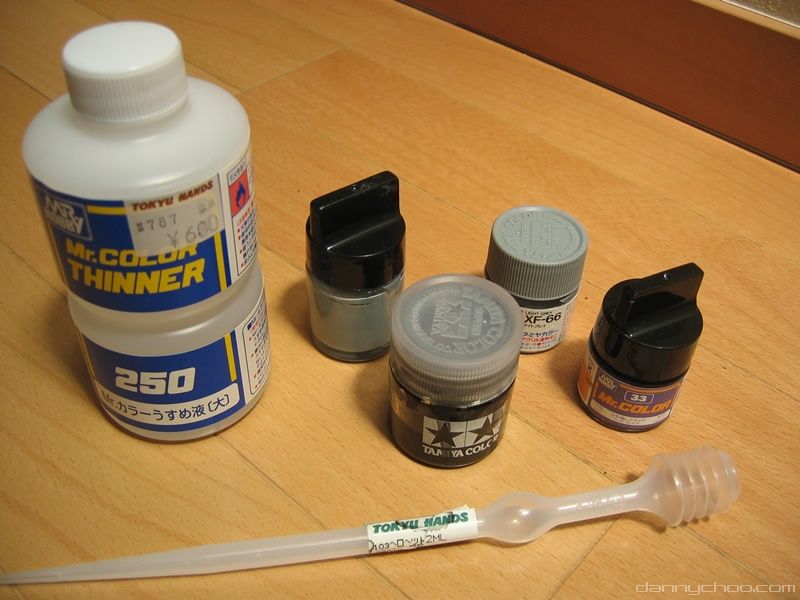
I use Mr Hobbys 250 thin type thinner - the jars on the right are used to make ink for shadowing. Make sure you have a droplet - pouring the thinner around just does not work without it.
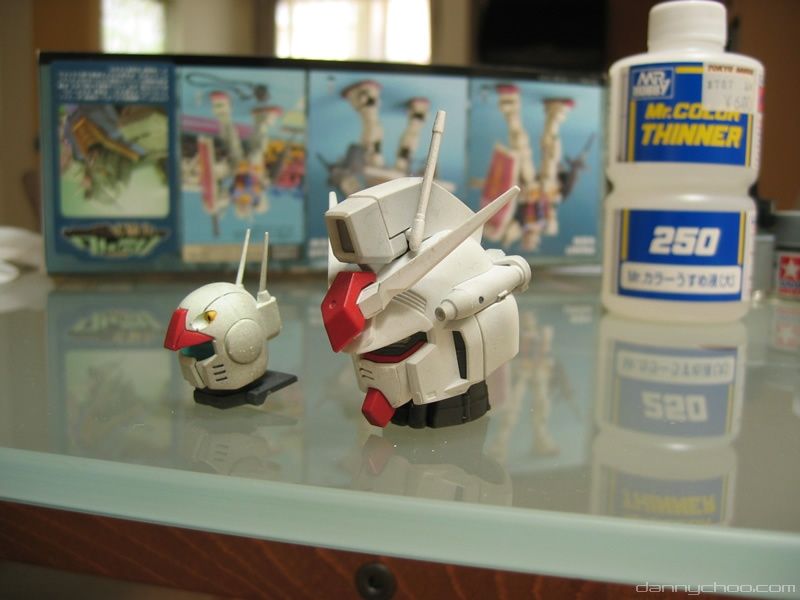
Just comparing the size between an MG Guncannon and a PG GP-01. Up until the One Year War MG Gundam that came out this year - most of the MG series only had a limited amount of mobility - the new MGs that are coming out now however are close to Perfect Grade specs which means that you can pose your MG to do the going-for-a-crap-in-the-woods pose with ease.
As you can see however, the MG models are much smaller than the PG models.
As you can see however, the MG models are much smaller than the PG models.
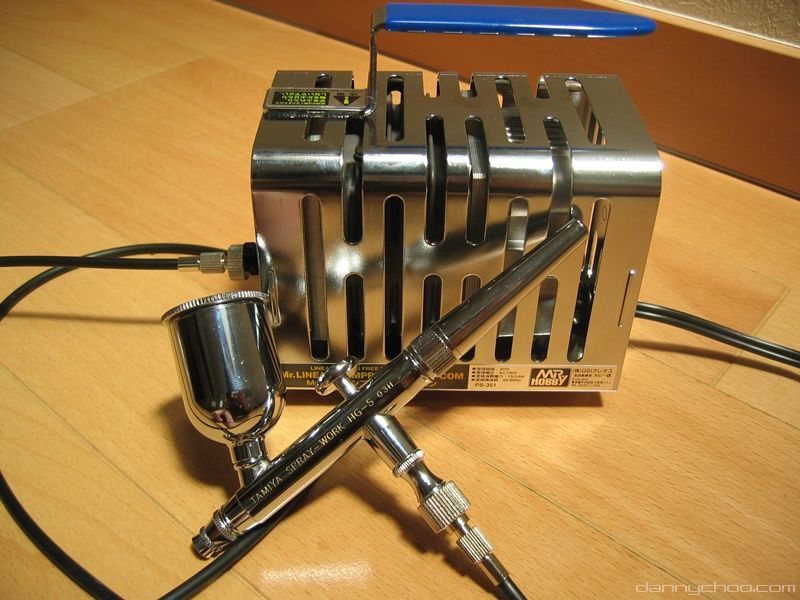
Mr Hobby Mini Compressor. I first started of modeling by using air canisters but after a few puffs, the canisters freeze over causing air pressure to destabilize which then causes your air brush to spit rather than blow. I tried the two canister trick but I would still have to wait for the other can to cool down. So I decided to splash out about 15,000 yen (cant remember) on this compressor. As long as I don't intend on attempting to make life size Gundams then this will be (and has been) quite adequate for now.The compressor comes with wobbly rubber feet so it does not rumble and the sound level is about the same as a mid range fart.
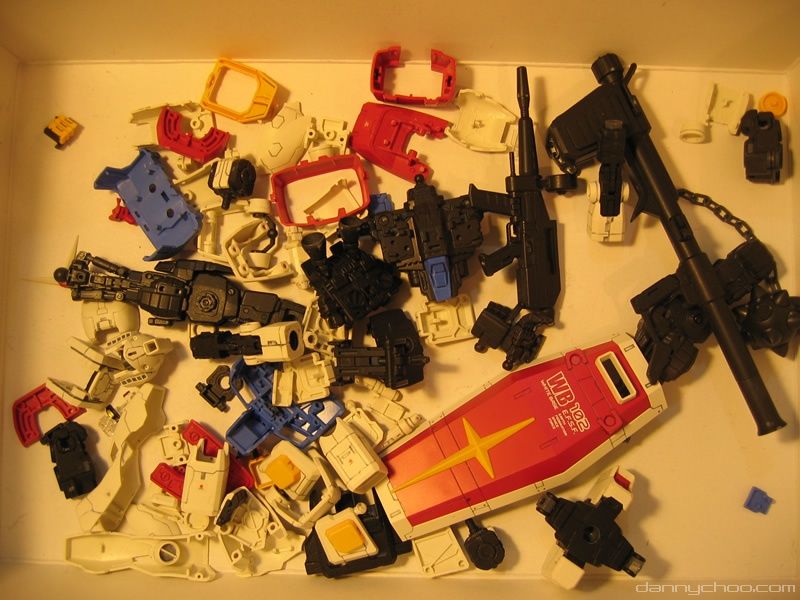
After construction, decal and inking is complete, its time to take everything apart to spray over the nip marks.
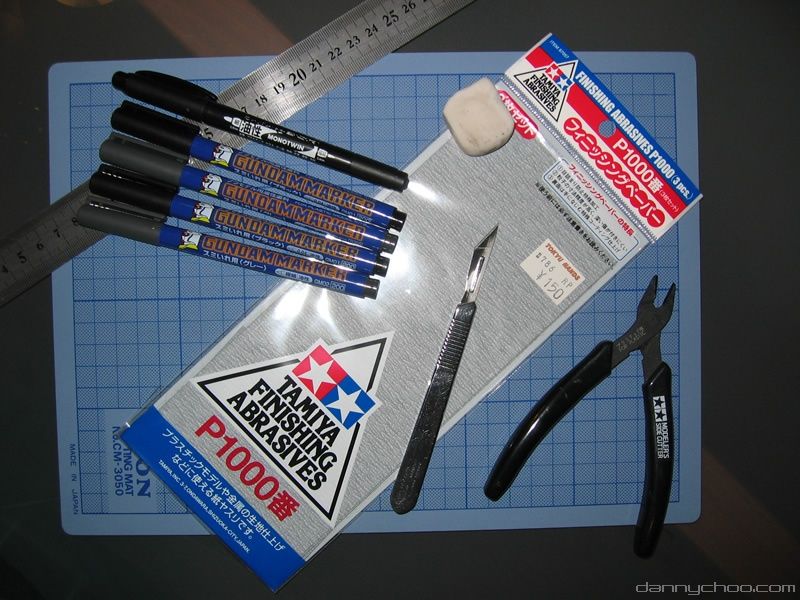
Some tools of the trade. The nipper cost about 700 yen. You cant use any old nipper - modeling nippers have one flat edge which is essential otherwise you will have the Gates sticking out the pieces.
From left to right - a comparison bewteen un-inked, inked and after-cleaning-up-the-inking.
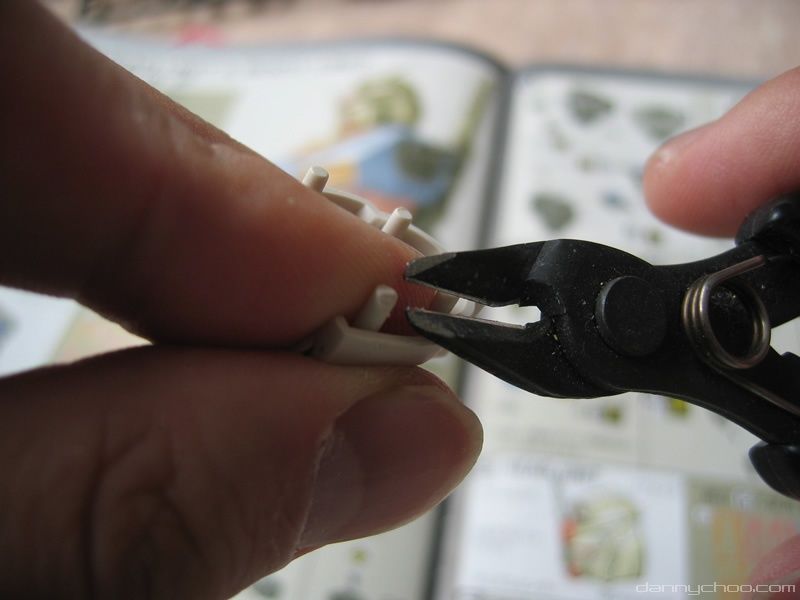
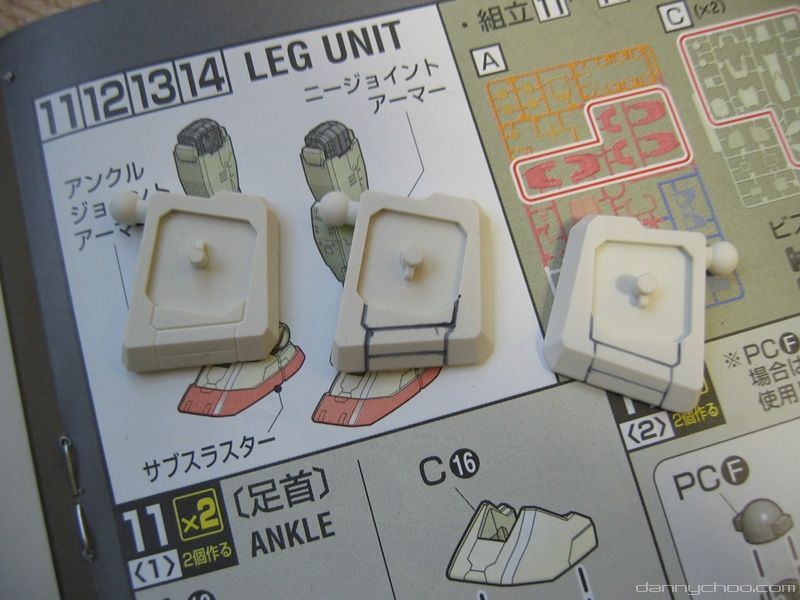
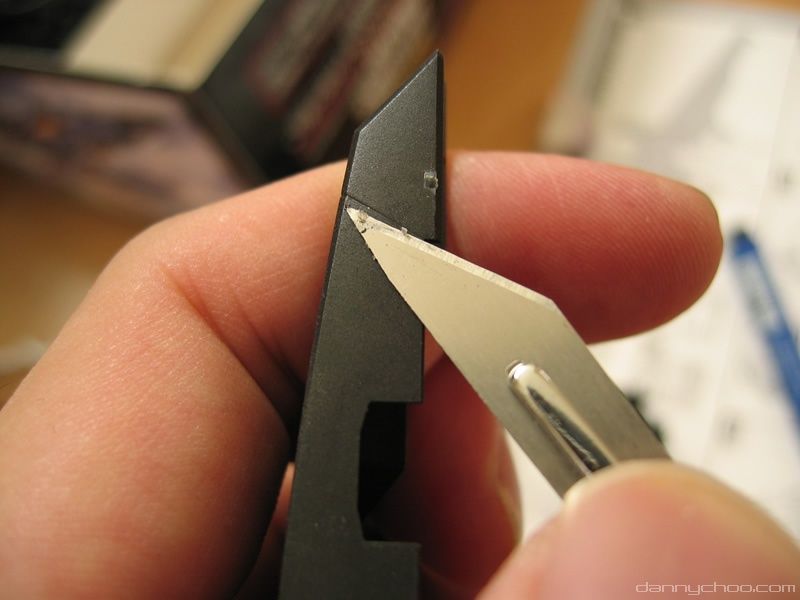
I hope you can see whats going on here - pieces like armor by default can be removed from the frame underneath - but sometimes these snap fit pieces have such long 'male-parts' (I have no idea what these bits are called) that once put together, you will have a hard time pulling the pieces apart - sometimes breaking something in the process. What you should do then is to snip these 'male parts' (ouch) at an angle like the one in the photo - this makes it easier to pull apart the snap fit parts.
I take no responsibility for those who get confused as to which 'male parts' people end up snipping.
I take no responsibility for those who get confused as to which 'male parts' people end up snipping.
MG Gundam in the process of being...born? This MG took about 3-4 hours to put together.
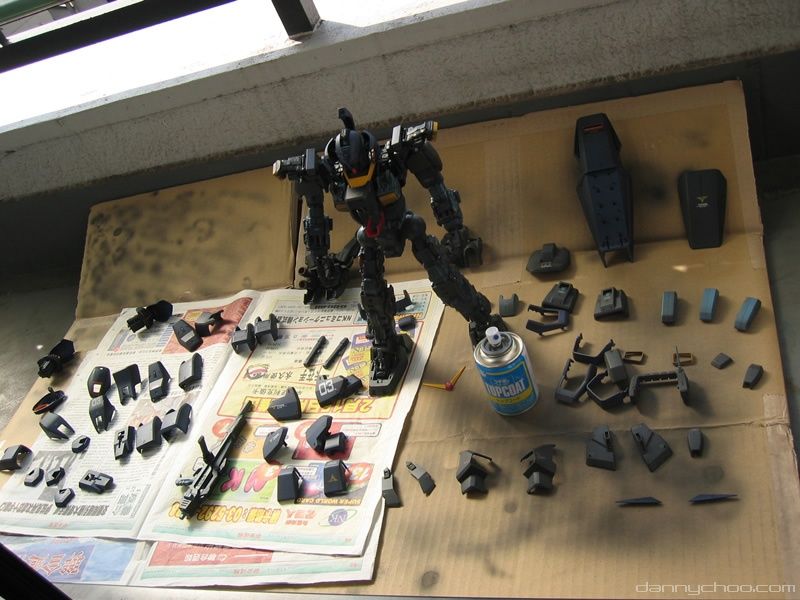
PG Strike Gundam ready for its dose of Top Coat. The trick (trick?) here is to take a deep breath and spray all over and then run away otherwise you may die from the toxic fumes.
Be sure to remove armor when spraying as you want Top Coat reaching and covering the frame underneath - otherwise you will have paint coming off the under frame and rubbing off on your armor.
Be sure to remove armor when spraying as you want Top Coat reaching and covering the frame underneath - otherwise you will have paint coming off the under frame and rubbing off on your armor.
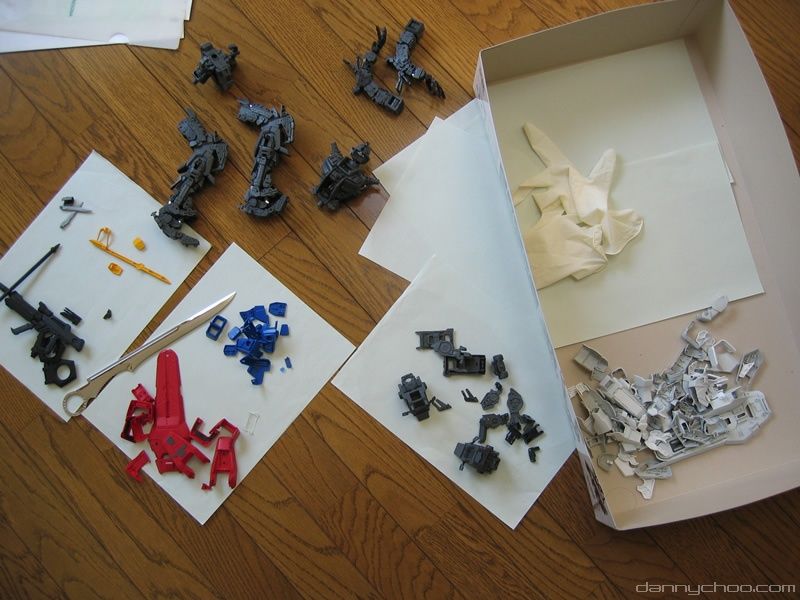
Before I put my kits together, I spray the whole Runner. After putting the pieces together, I take everything apart and separate them into their different colors. What I do now is then to spray over any visible nip marks - nip marks - especially on weapons - stick out like a half severed thumb so be sure to go over with a lick of paint.
Notice that I have left the legs, arms and torso in one piece - I dont bother to spray over nip marks which are not visible - and besides, if I did, this "Gundam modeling tutorial for busy people" would not be here.
Notice that I have left the legs, arms and torso in one piece - I dont bother to spray over nip marks which are not visible - and besides, if I did, this "Gundam modeling tutorial for busy people" would not be here.
PG Strike Gundam ready for a going over with a second coat of spray to cover up any visible nip marks.
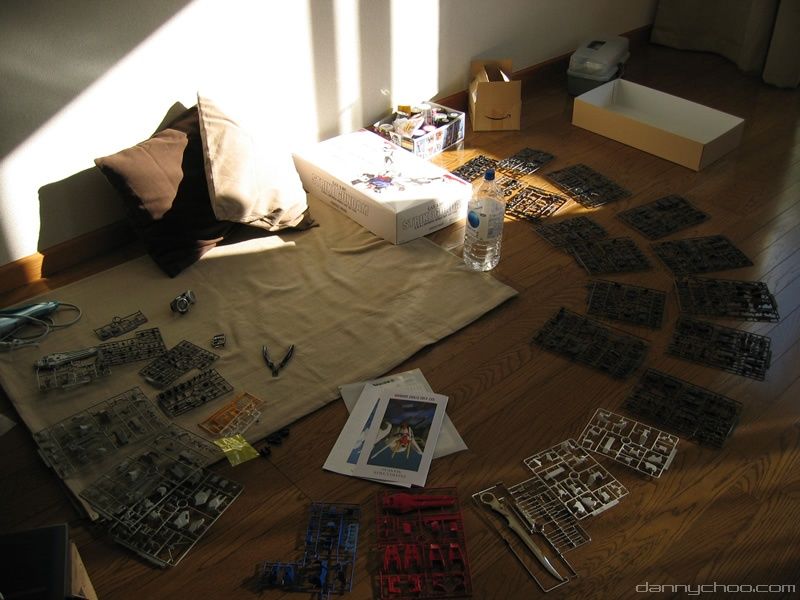
Getting ready for a bout of Gundam making.
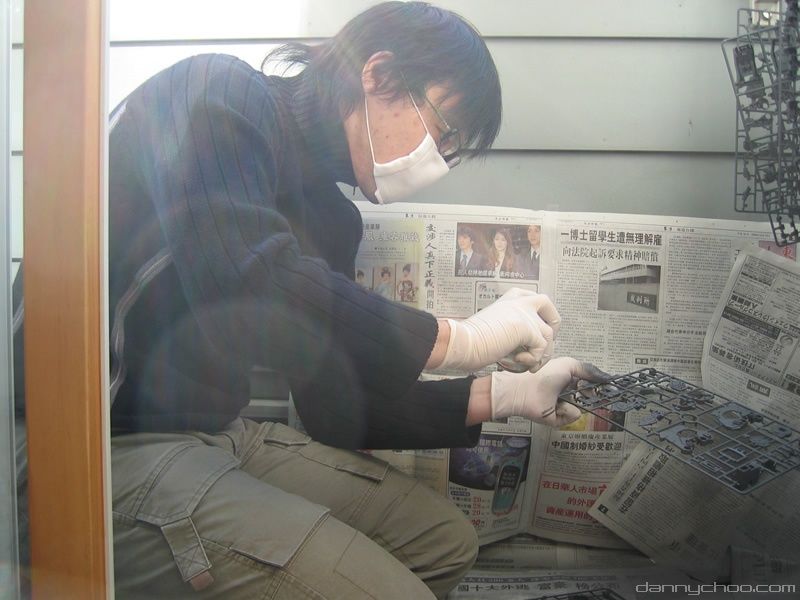
Make sure you have tons of newspaper, disposable gloves and most importantly a mask. Even with a mask on however, you are going to end up inhaling a ton of paint - go ahead and blow your nose after - you will notice that your bogies have turned black! Make sure you drink a ton of water while spraying. Your clothes will end up with paint too unless you are the type who likes to spray in your birthday suit...
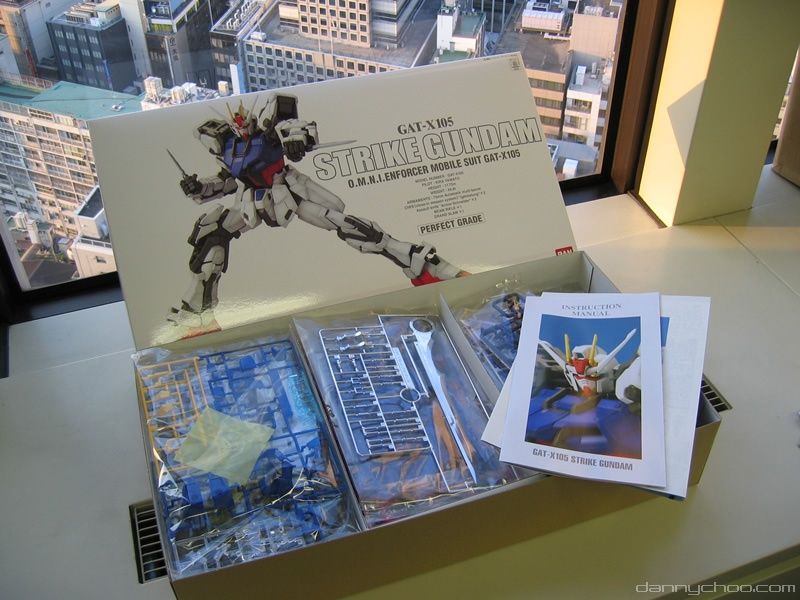
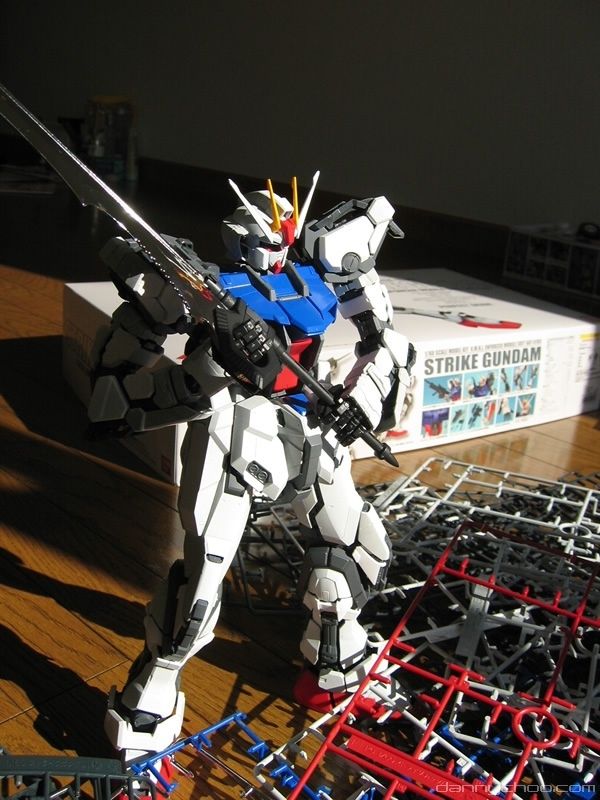
This is the box for Strike Gundam - it was waiting for me when I arrived back in Japan from Seattle - a nice welcome home present ;-)
Most PG boxes are of this size - the PG GP01 is twice the size of this box - take note when ordering.
Most PG boxes are of this size - the PG GP01 is twice the size of this box - take note when ordering.
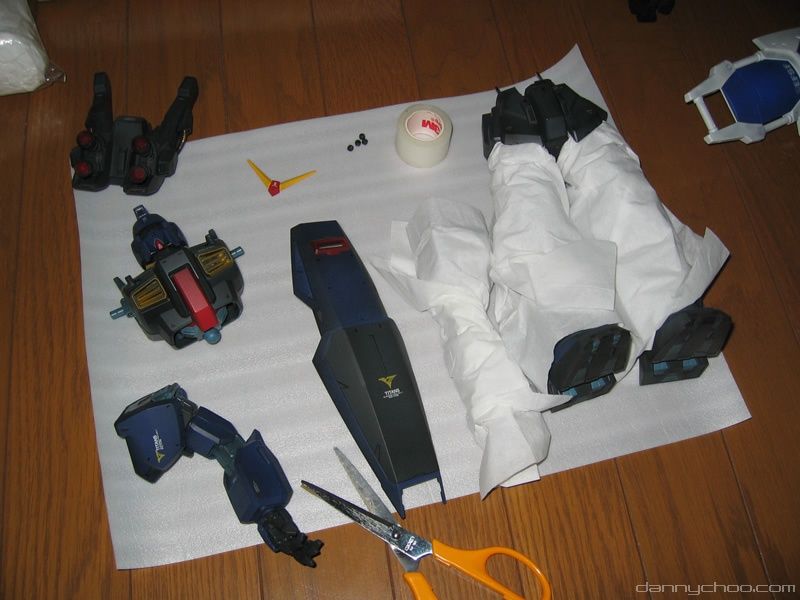
Packing up PG Gundam MK II to go to Seattle. If you are being relocated (or if you just want to pack away your Gundams) make sure that you pack the pieces in a way that they dont rub against each other.
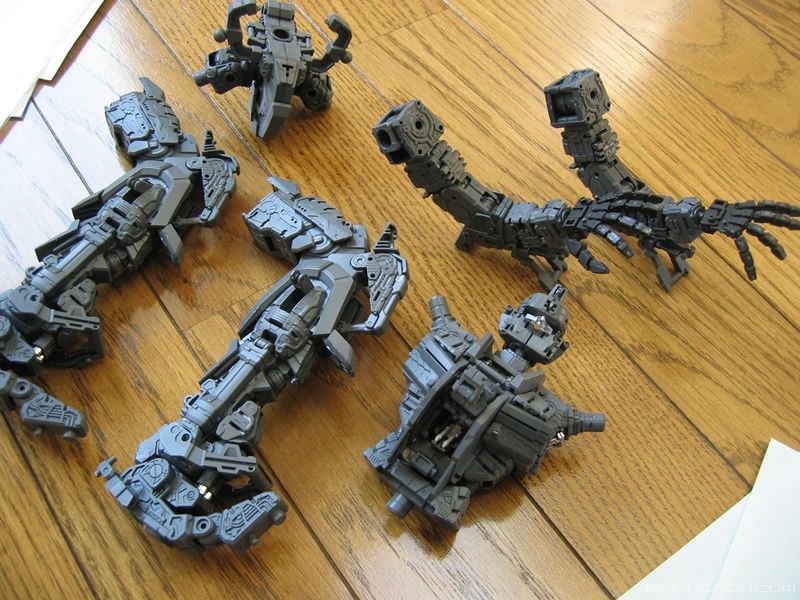
PG GP-01 armor pieces after shadowing - i think you can make out the difference. This was my second PG and still in the middle of learning. Now here is a useful piece of advice.....
When you have a part (like the leg of PG GP01) which has a few pieces joined up to make the armor - do the shadowing with all the pieces of armor in place instead of shadowing piece by piece. What I found after shadowing piece by piece is that when I put the armor back together, all the pieces had different amounts of shadowing making that part look extremely bad.
When you have a part (like the leg of PG GP01) which has a few pieces joined up to make the armor - do the shadowing with all the pieces of armor in place instead of shadowing piece by piece. What I found after shadowing piece by piece is that when I put the armor back together, all the pieces had different amounts of shadowing making that part look extremely bad.
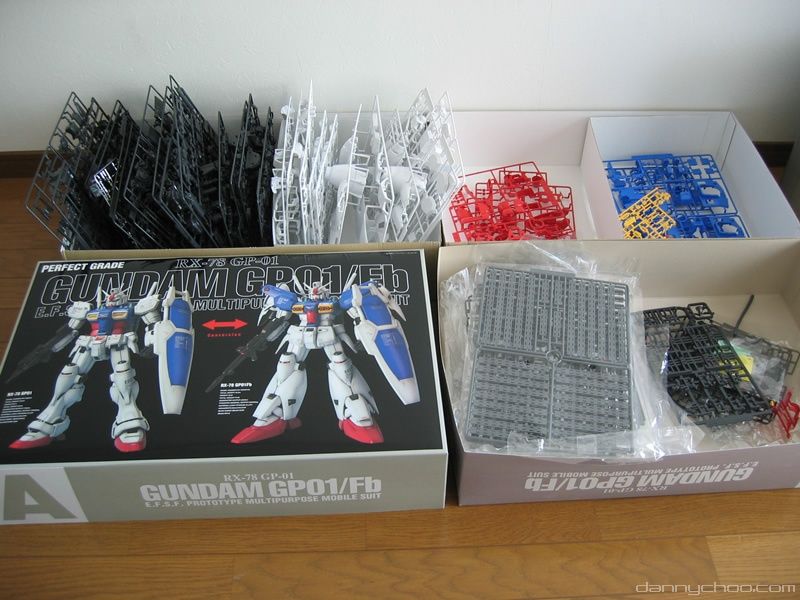
The box for PG GP01 - I did not bother to make the station that came with it - neither did I bother with the Full Vernian parts either which ended up ini the bin. You may want to keep some unwanted pieces to test out your airbrush though.
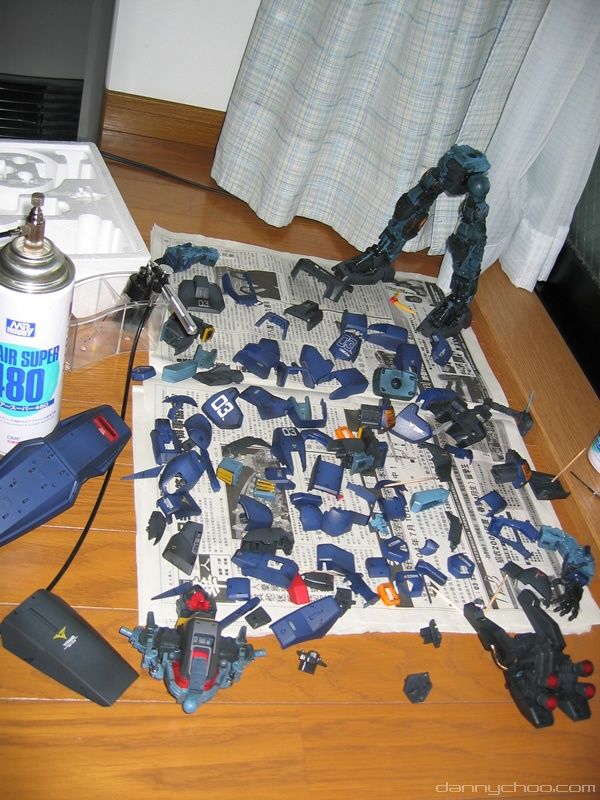
PG Gundam MKII after shadowing. You can make out the Air cannister in the corner of the pic - this was taken before I got an air compressor. If you are considering going serious with Gundam modeling then get yourself a small air compressor instead of trying out these cans - these cans are absolutely useless - what happens is that you would be spraying for a while and then notice the air pressure drop as the can freezes over. You replace the can with the standby can but that freezes over too - but the first can is still frozen! You will also end up spoiling your gundam because as the air pressure drops, the flow of ink being sprayed also changes and before you know it your Gundam looks like its been dragged through some Bantha pudoo.
PG Gundam MKII ready for its dose of Top Coat. Remember - they key here is to spray and run!
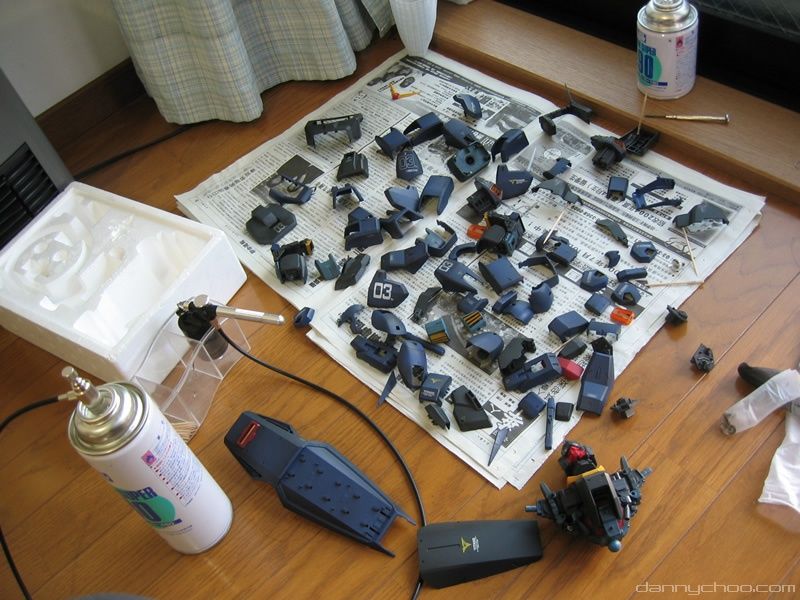
PG Gundam MKII after a bout of shadowing. I used toothpicks with a bit of blutac at the end to hold a piece - now I just use a scalpel.
I was down and out at the time and you can tell because of the crummy airbrush that you can see in the photo together with the two air canisters (Que. violin).
I was down and out at the time and you can tell because of the crummy airbrush that you can see in the photo together with the two air canisters (Que. violin).
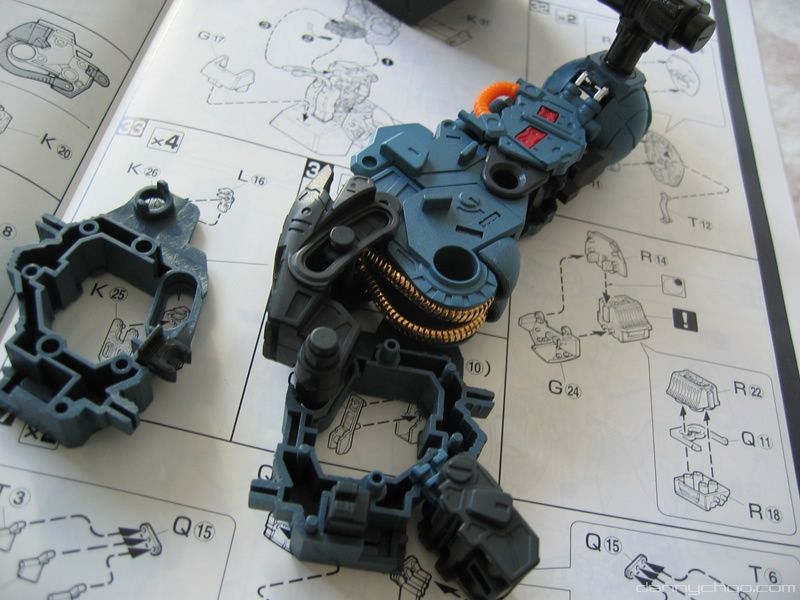
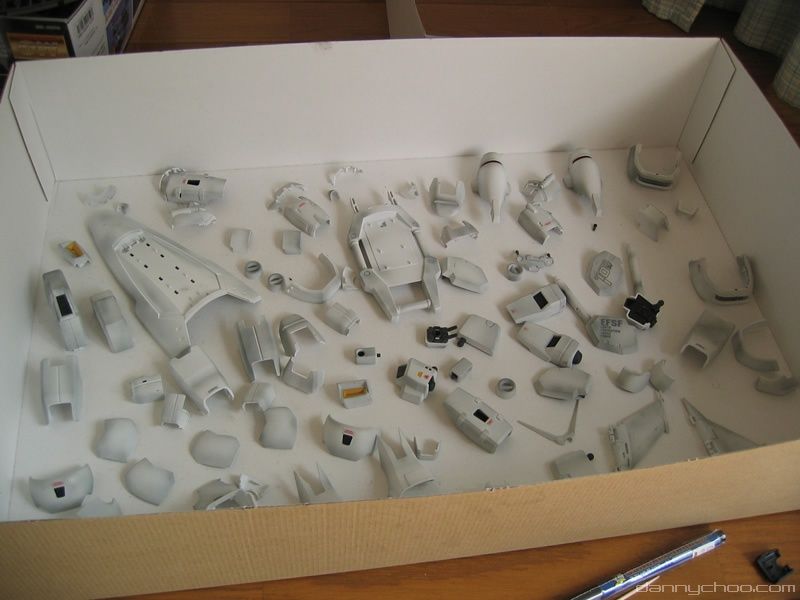
Construction of PG Gundam MKII leg. All PGs come with a frame underneath which is made up of a zillion pieces which seems a waste because the armor just covers it all up!
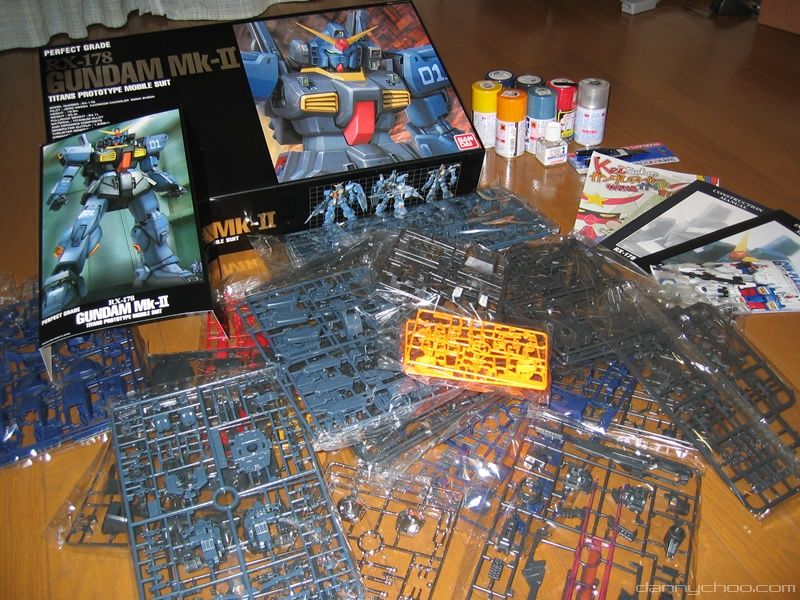
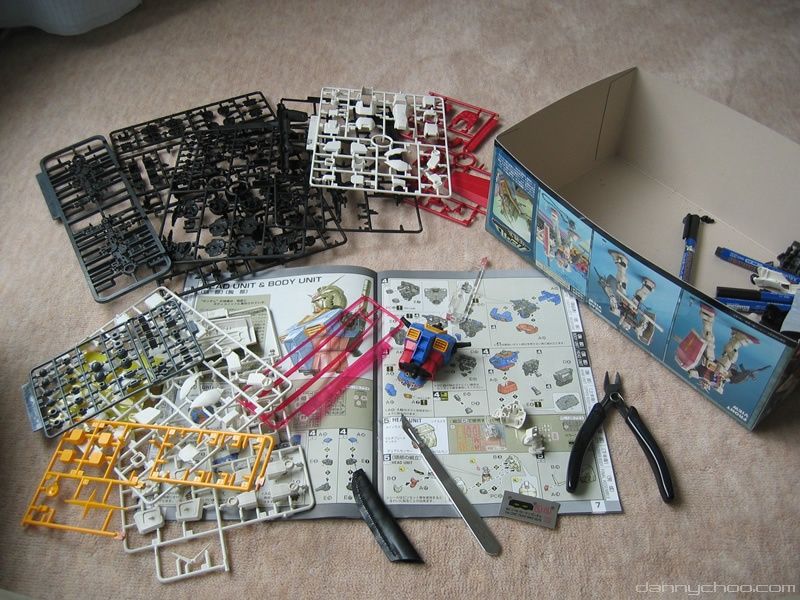
Runners fresh out of the PG Gundam MKII box - my first Gundam kit. In general, if you are buying a PG in Japan it will cost about 10000 yen (100 USD) and MGs in general cost 4000 yen.
Inking the wing of Aile Striker. Some people paint over the grooves and wipe off with a cotton bud but that kinda takes more time...
Even if you are really careful at snipping out a piece from a runner, you may still get a bit of plastic left over - cut off with a scalpel and sand down - then re-spray over the mark with the original spray that you initially used.
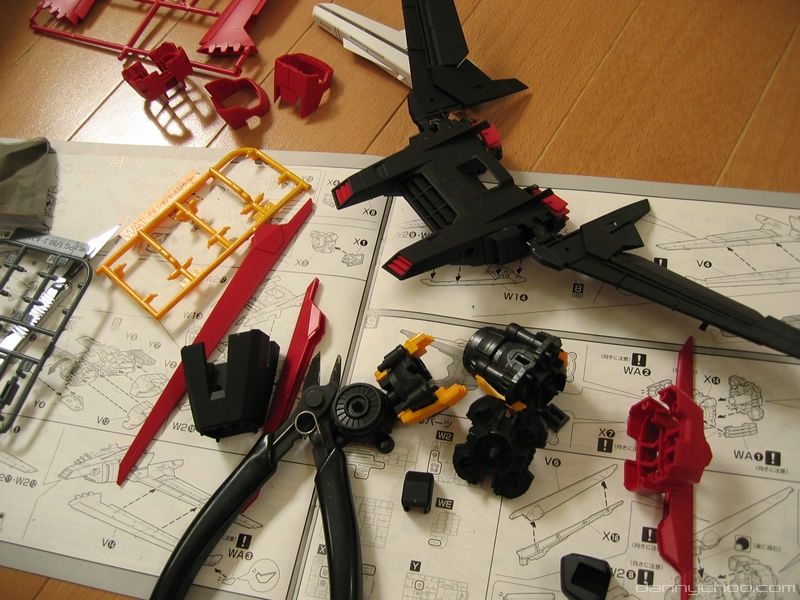
In the middle of constructing the Aile Striker. there are only a few parts and the whole thing can be put together in a few hours. Even if you cant read Japanese, the manuals are all "Lego standard."
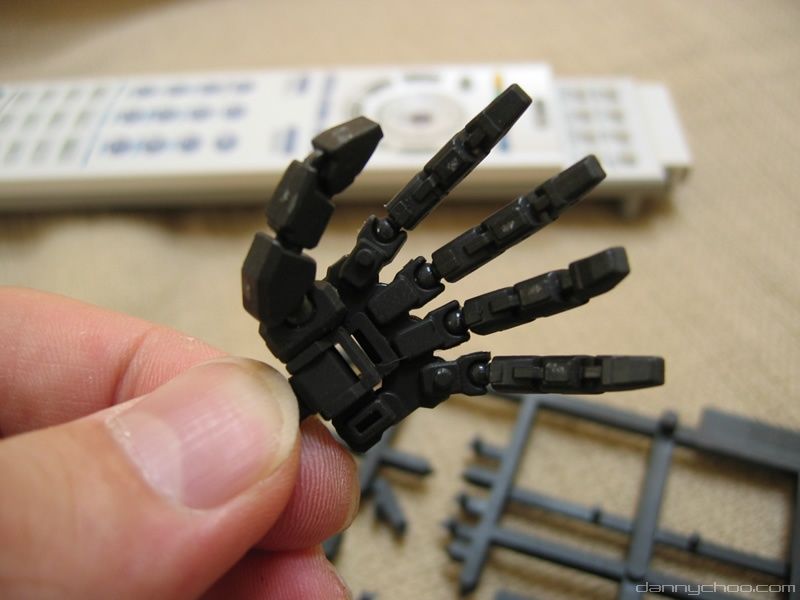
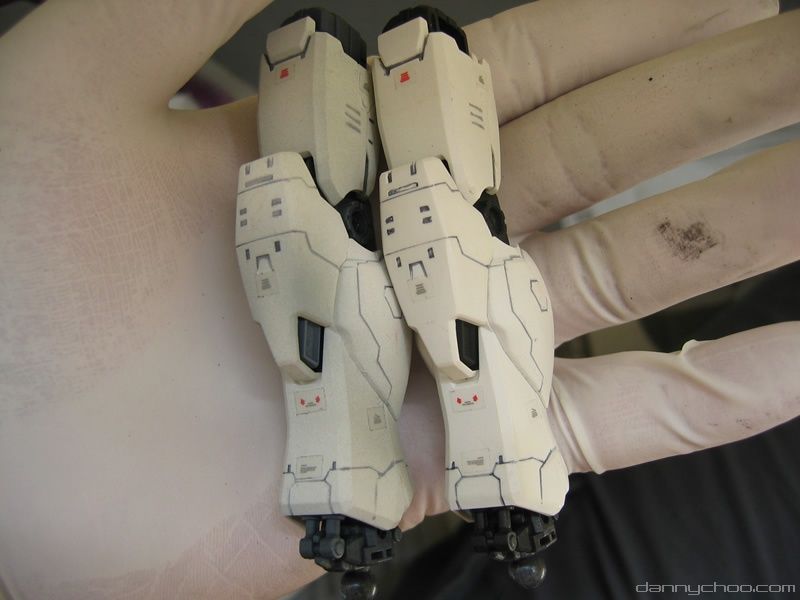
This is the hand which comes with PG Strike Gundam. Those who have a collection of PGs will know that it's a different mold from the previous PGs. The hands that came with previous PGs broke easily - my PG Gundam MKII has already lost a finger!
I went and ordered two pairs of PG Strike Gundam hands - re-sprayed and replaced the old hands on my pre-strike gundam models (PG GP01 and PG Gundam MKII).
The new mold is much stronger and looks much better too.
You will notice that in the instructions of any Gundam kit, that there is a little form - if you fill it in with the piece number and quantity, you can order replacement parts from Bandai's customer service center. Unfortunately it looks like you can make use of this service only if you live in Japan ><
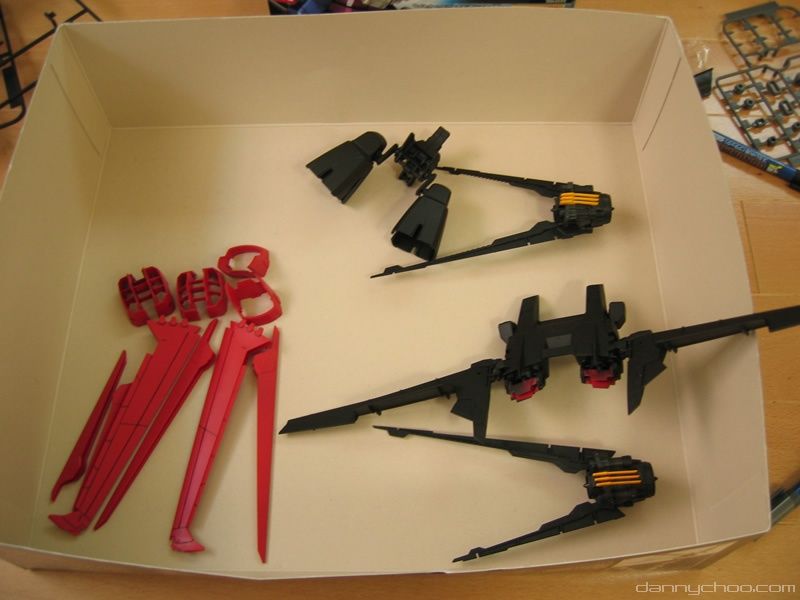
Parts from Aile Striker ready to have its nip marks covered up with a coat of spray.
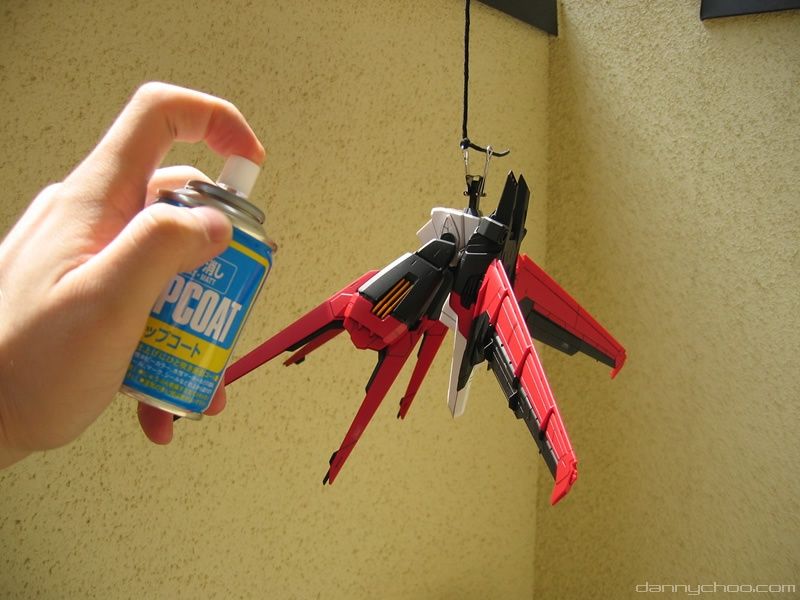
Aile Striker having its first and final dose of Top Coat. If you are going to use Top Coat - be sure to order a few cans.
Before you do the Top Coat, brush off any dust with a toothbrush or similar brush type object (like your eyelids or nasal hair).
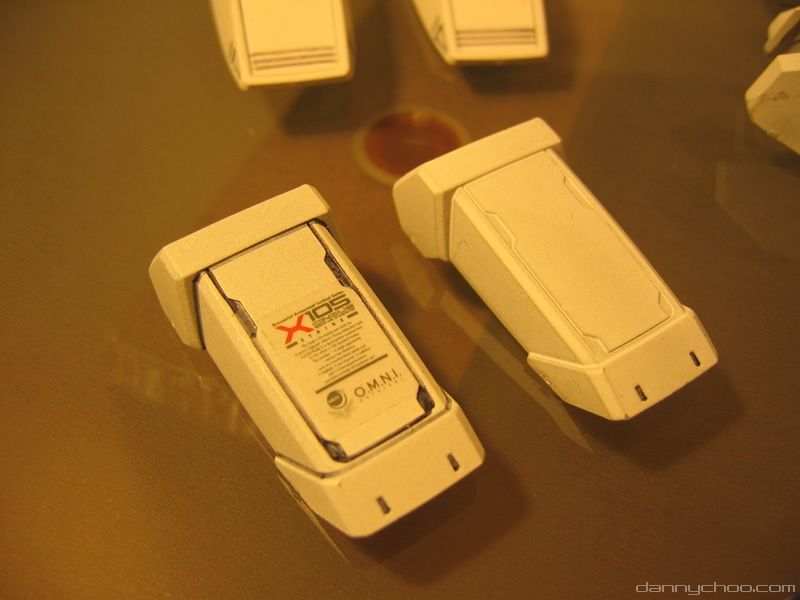
Parts from PG Strike Gundam before and after inking/stickering. Strike was another example where I initially decided on no-stickers/no-inking - the main reason was because I was worried that I was going to ruin it. But after doing the deeds, Strike Gundam looks totally different - much cooler and meaner than before.
MG Gundam ready for its Top Coat. As you can see - I screwed up the shield with too much shadowing but re-doing the shield takes 20 years so I decided to leave it and say that Gundam was in a fight with something grey and wet.
This is how I spray shadow my pieces - shove a scalpel in the back and you are done.
You can just about notice the difference between the shadowed and non shadowed piece. Unfortunately, the edges of the stickers start to stand out ;-(
So thats it for now - more to come as I buy more Gundams!
So thats it for now - more to come as I buy more Gundams!
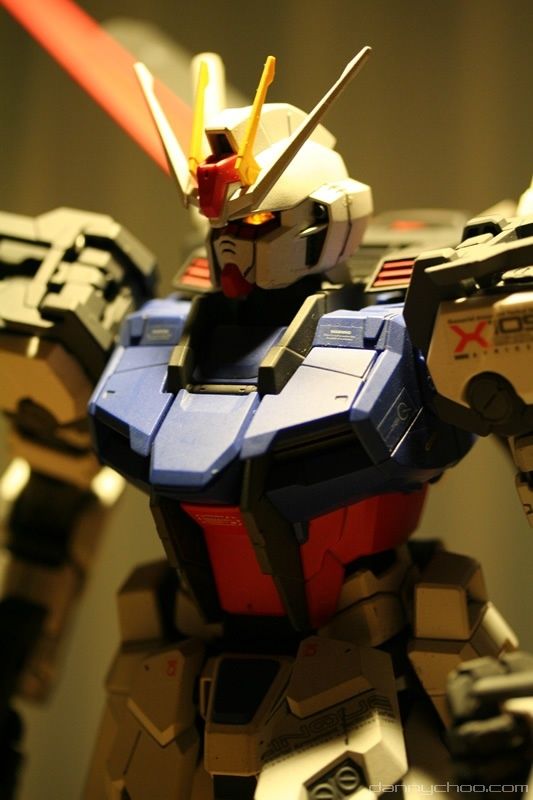
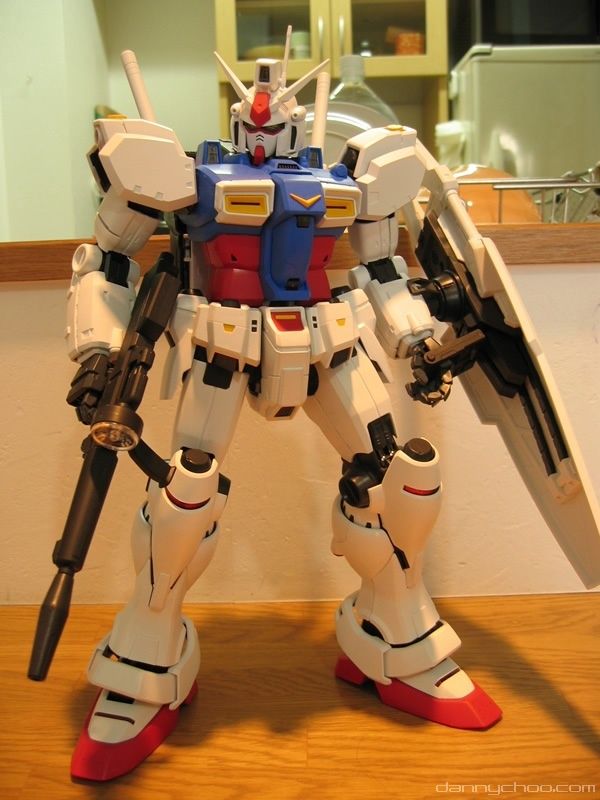
And hopefully you should end up something similar to this - or better ;-) Have a look in the galleries for more shots of completed Gundam kits.