3D Printer Reviews
Update - we now use the more reliable ATOM printer for all our masters and prototyping.
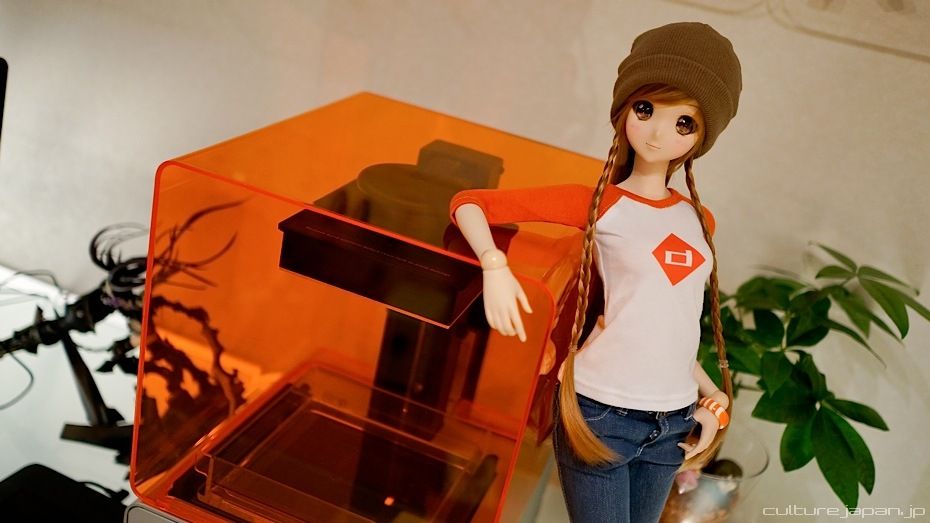
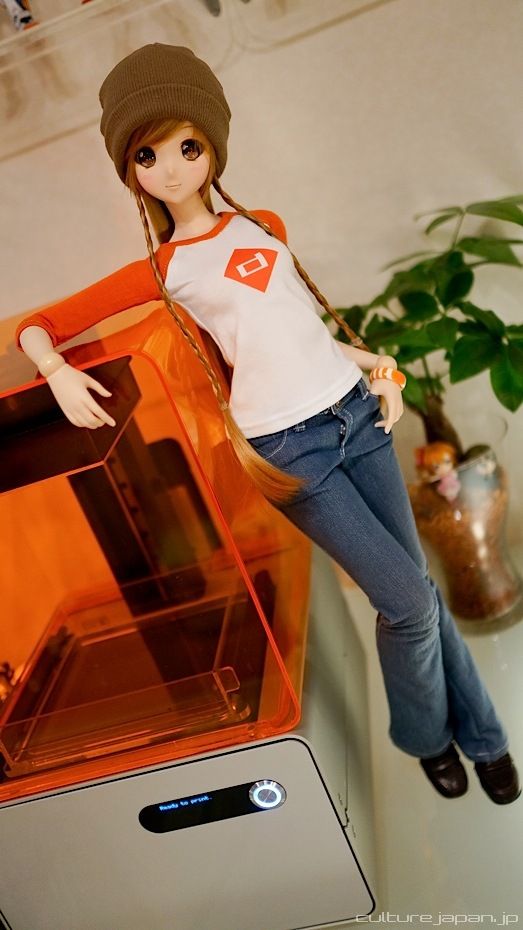
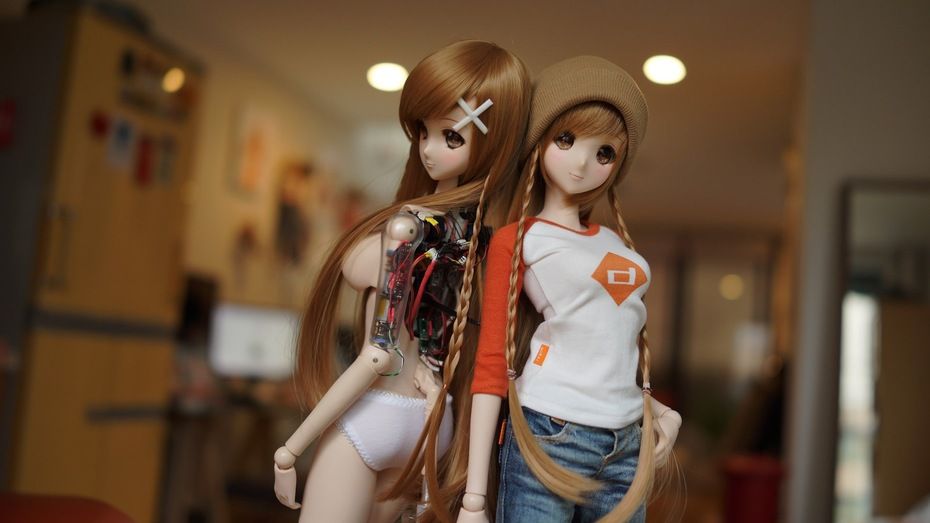
If you have been keeping up with my current life project Mirai Suenaga Smart Doll then you will know that 3D printing has played a vital part of the production process.
Today we are going to take a look at our new Form1 3D printer by Formlabs and how it plays a part in the production of our hand made doll.
To be honest I thought we were never going to receive the printer after backing the Kickstarter project in October 2012 - a year later and there was still no sign of the printer being shipped and all Formlabs would say is "its going to ship" - but after a while it looks like they got bored and they stopped sending replies. For example I got this mail in Feb 2013 after I payed 390 USD for shipping - the mail clearly stated "Ships Immediately."
Formlabs were kind enough however to give me coupons to buy discounted resin - for a printer that I didn't have. Maybe they wanted me to drink it ^^;
Then out of the blue, a Fedex guy turned up on my doorstep over a year later - he charged me 30000 yen import tax and handed me a huge box - it was the Form1 printer.
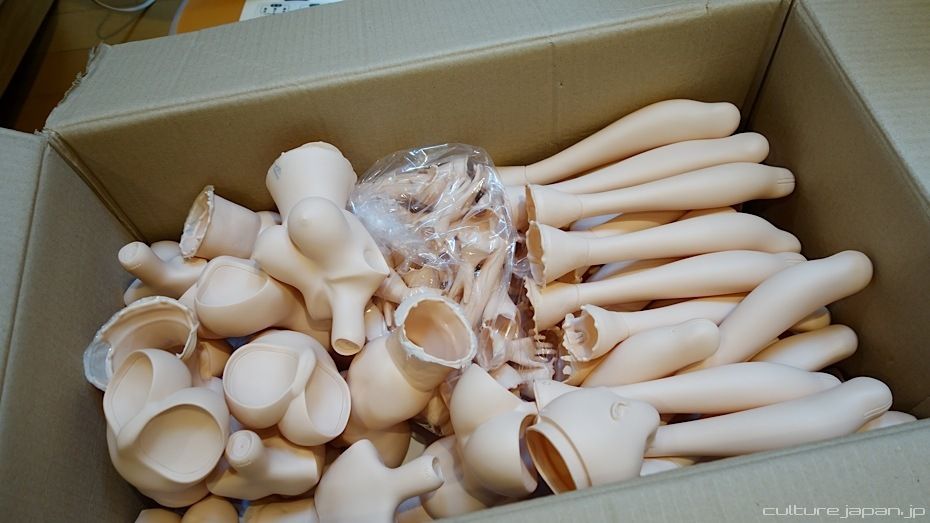
By the time the Form1 arrived however, I had already done the bulk of the printing using external 3D printing services such as Digimode in Kagurazaka ><
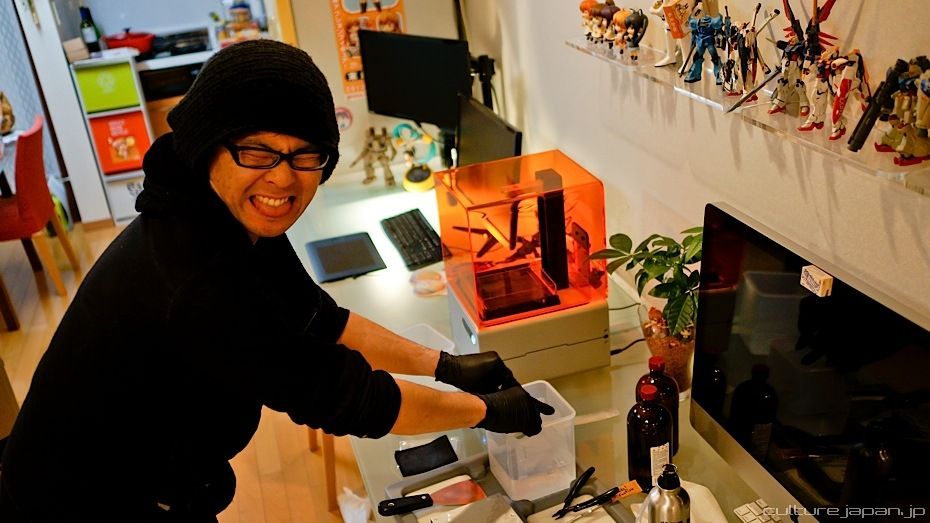
But Mirai still needs accessories too and we have been using the Form1 since its arrival to make this n that. An small object that would have previously cost me 300 USD to print externally now costs about 5 - 10 USD in resin costs.
Having our own 3D printer in the office helps speed up the production process and enables us to save costs at the same time.
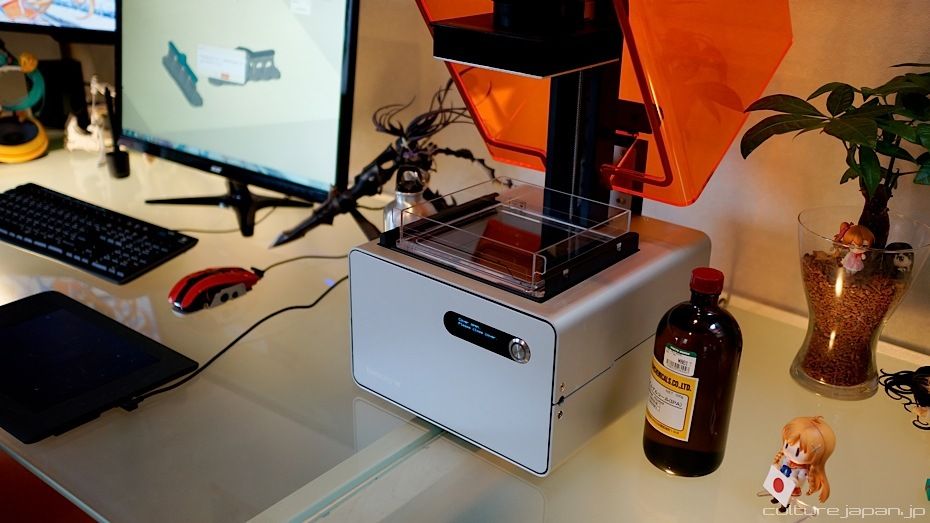
We use a variety of 3D software to create the data such as Autocad Inventor, SolidWorks, Maya, 3ds Max and ZBrush. We then export to STL (STereoLithography) format and open it with the Form1 software called PreForm available on both Mac and Windows.
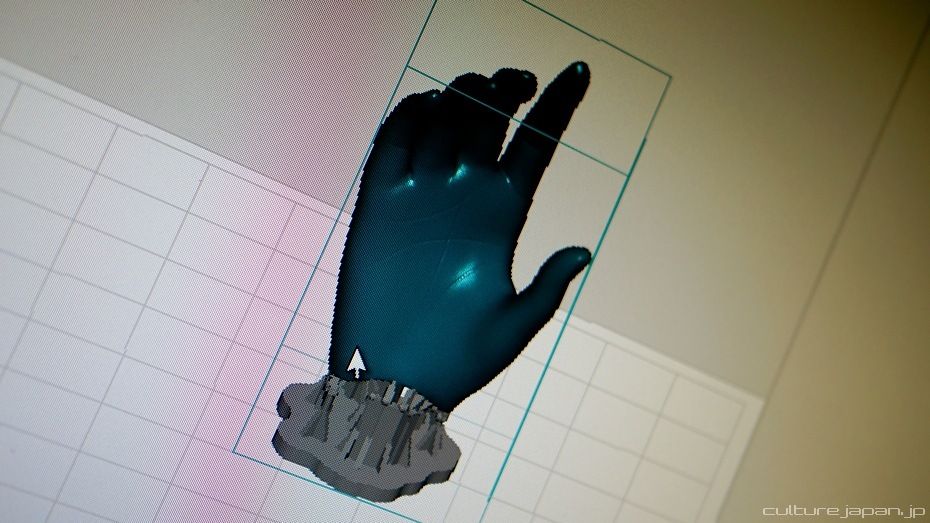
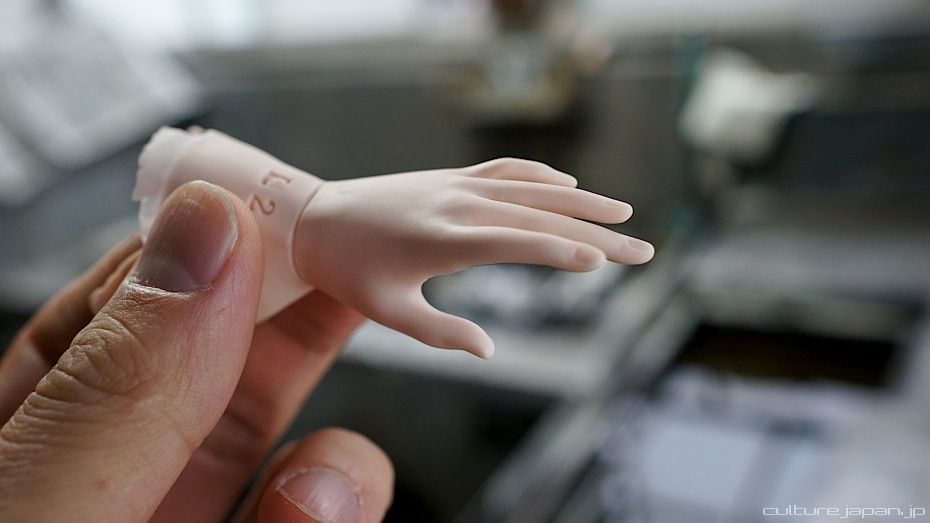
The gray bit below the hand are the Support Structures which is generated by the software depending on various settings.
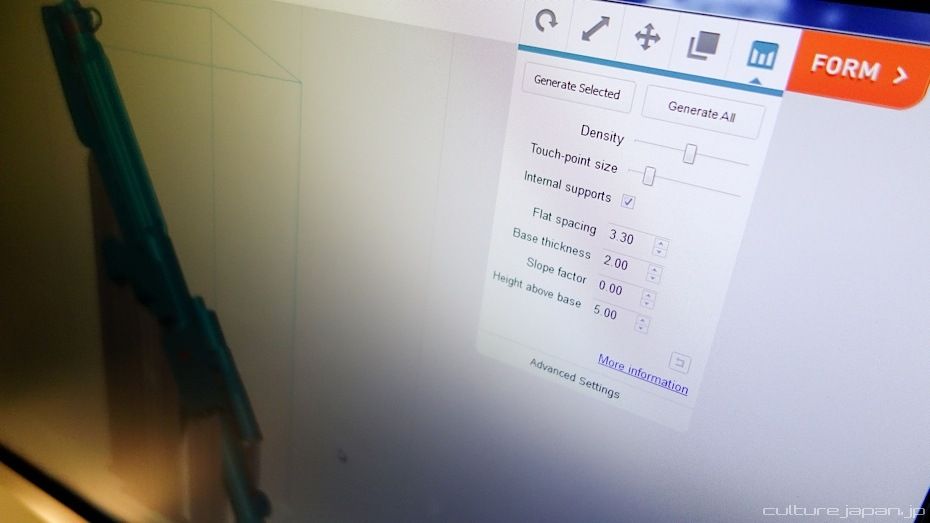
The software is pretty simple to use - a few clicks to change the orientation of the object (if needed) and create the Support Structures. Once thats done just attach your computer to the Form1 via the provided USB cable and send data to the printer - the computer can then be removed once the data has been uploaded to the printer.
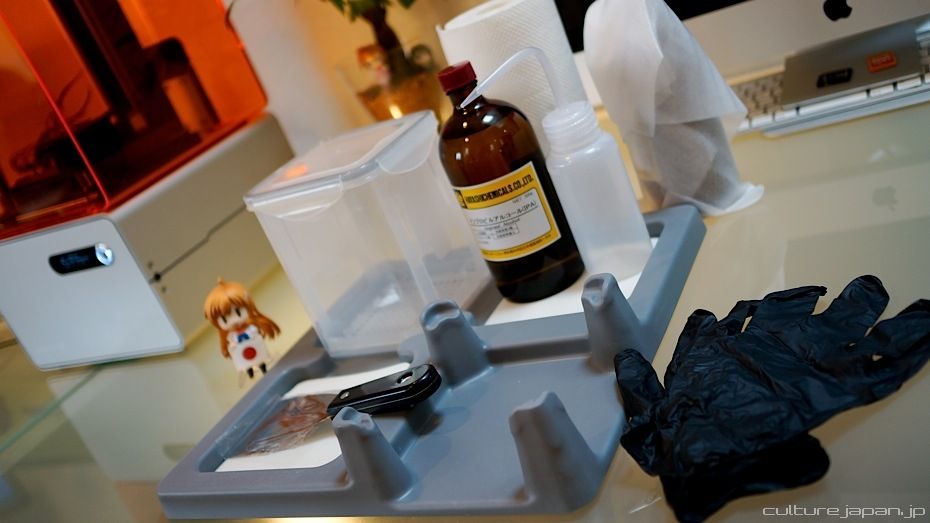
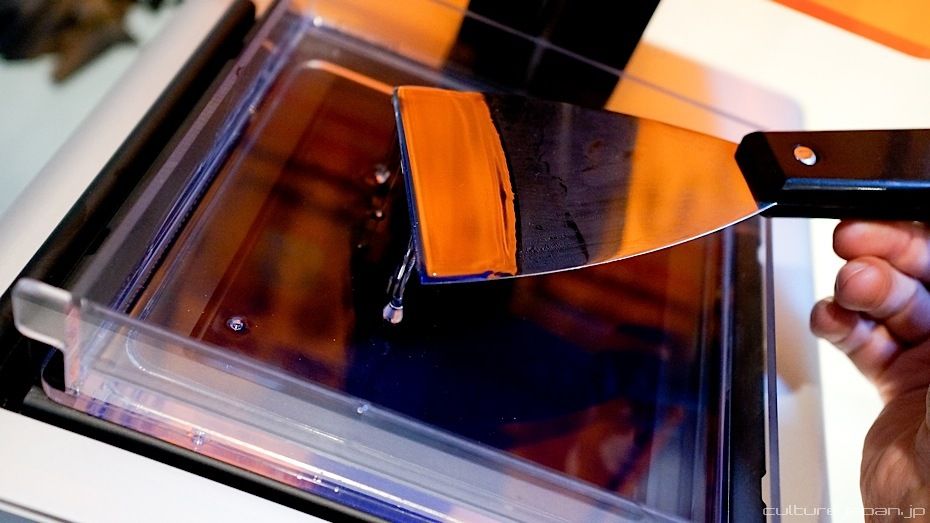
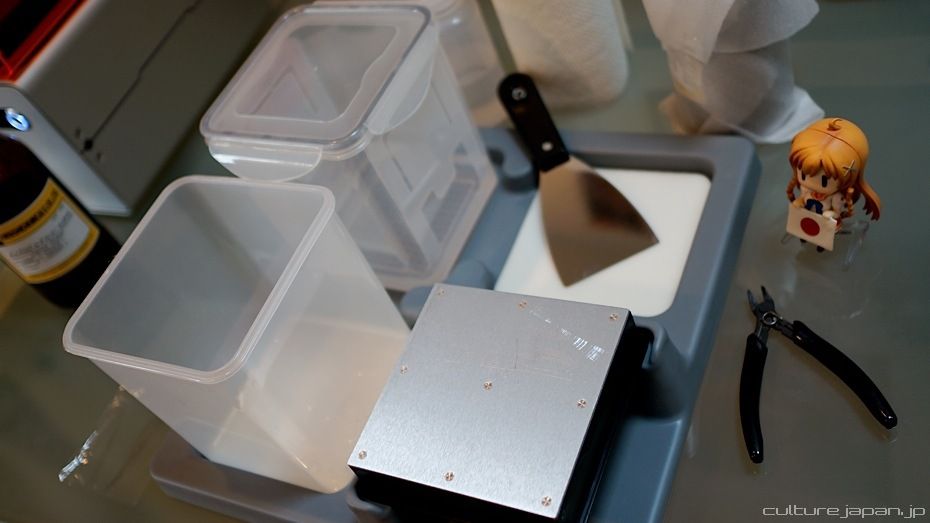
This is the Form Finish Kit thats provided with the Form1 printer.
While Stereolithography printing produces very detailed objects - there is quite a bit of cleaning to do after and this little station helps you to remove the printed object from the Build Platform and wash it.
While Stereolithography printing produces very detailed objects - there is quite a bit of cleaning to do after and this little station helps you to remove the printed object from the Build Platform and wash it.
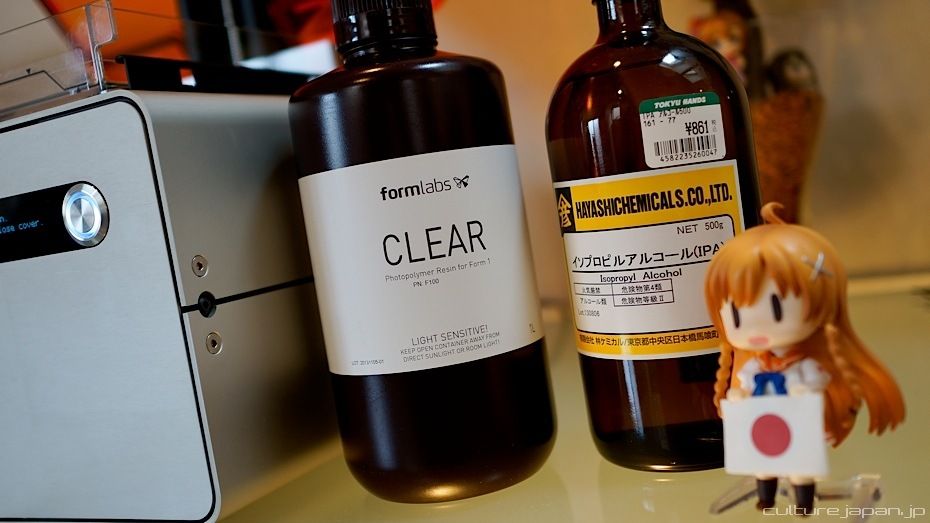
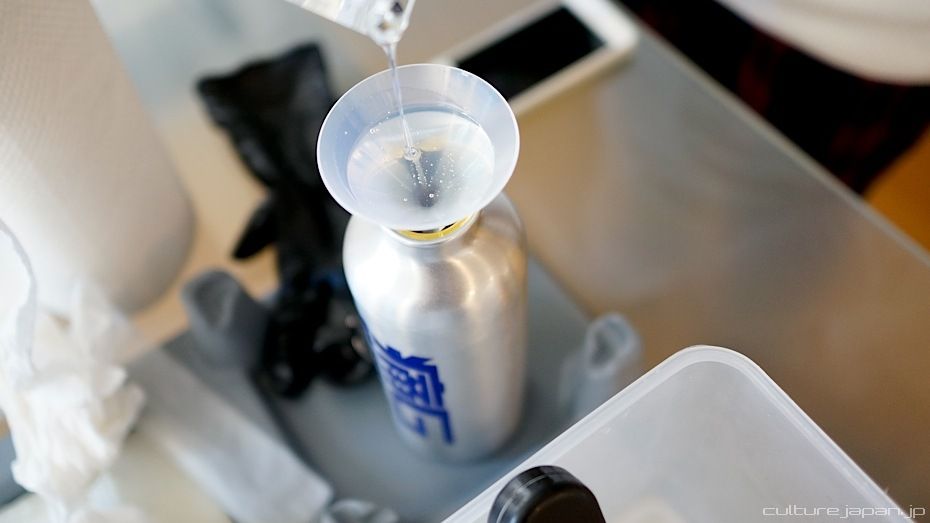
Clear resin supplied by Formlabs - available in 1 liter bottles. At 150 USD per bottle, the resin doesnt exatly come across as cost effective but comparing it to what I would normally pay external services then this is actually considered cheap. For the amount I can print with a liter of resin on my Form1, I would have to pay an external service about 250000 yen.
The bottle next to the resin is Isopropyl alcohol that is needed to wash the 3D printed parts. Folks in Japan can get some from Tokyu Hands or Rakuten. You would need about 2 liters depending on the size of your print object.
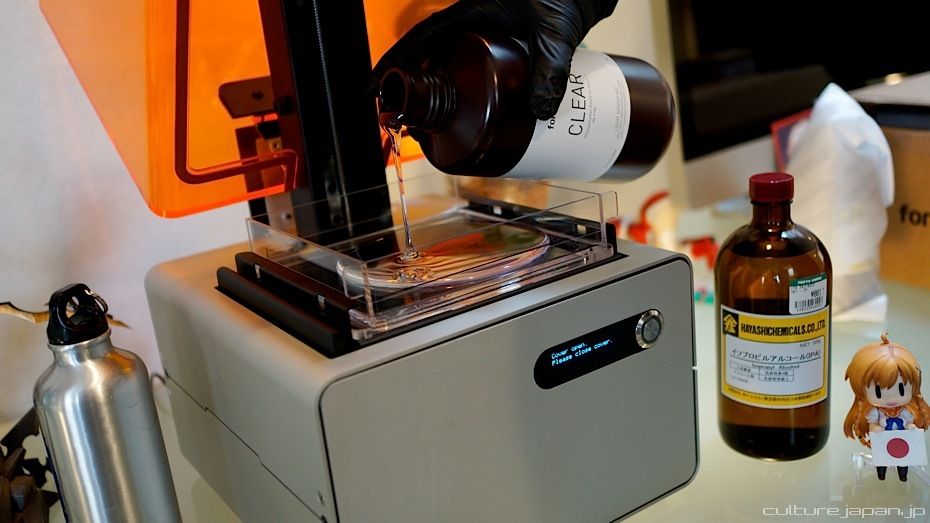
Resin is poured into the Resin Tank - fill it up depending on the size of your print object. For large objects you would need to fill in the tank periodically as your object is being printed.
The resin is viscous and you should not sniff, touch, drink or spread on toast.
The orange cover reduces the amount of light that hits the resin as exposure to light is what makes it solidify.
Apparently the resin can be kept in this tank for a few weeks without solidifying as long as the cover is closed.
Apparently the resin can be kept in this tank for a few weeks without solidifying as long as the cover is closed.
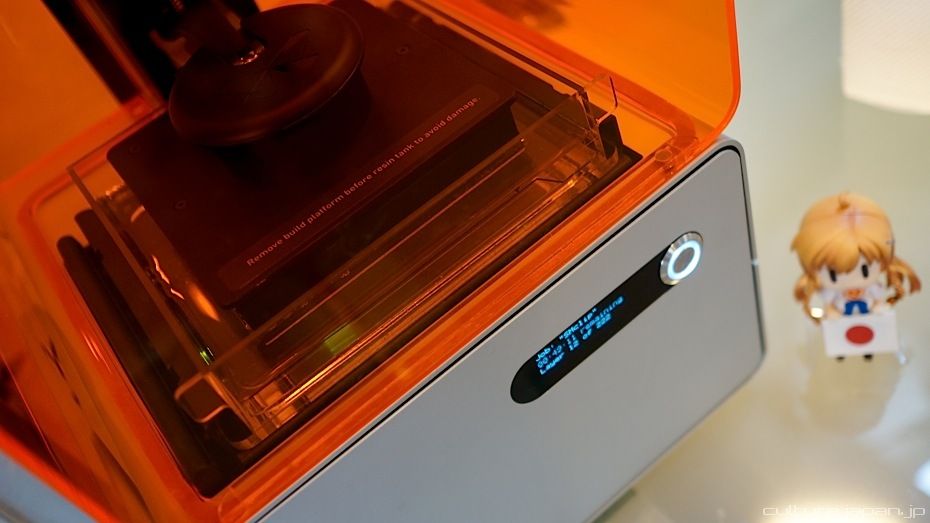
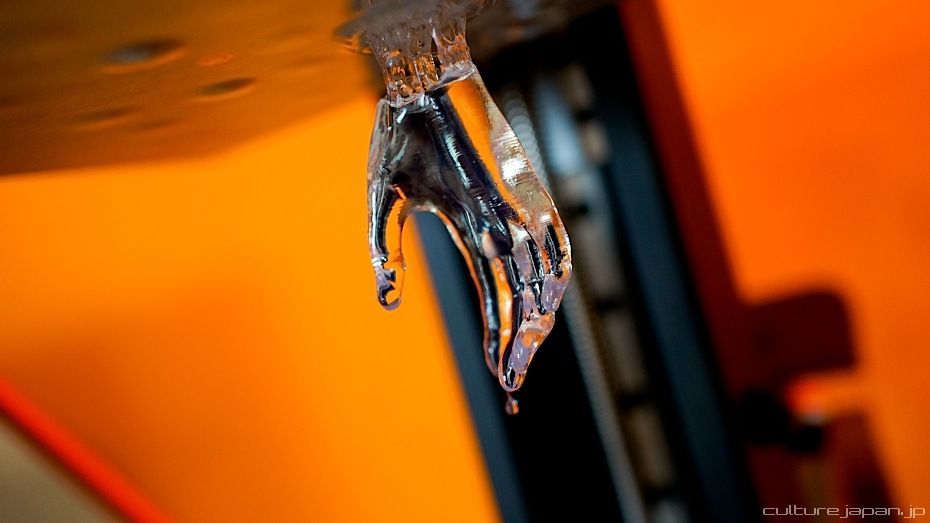
Even before all the data has been uploaded to the Form1, the printing begins. The Form1 will let you know when it is safe to unplug the USB cable from the computer.
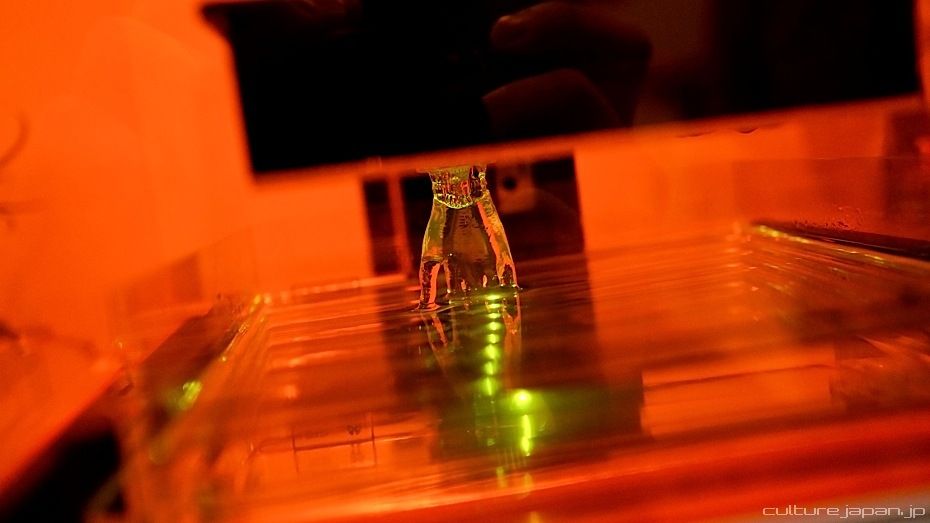
An ultraviolet laser beams up from inside the printer and hits the bottom of the tank to cure the resin. The Build Platform then moves up a wee bit and the process is repeated.
Print time is dependent on a variety of variables including layer thickness (0.1mm - 0.025mm), size of object, whether object is hollow etc.
Where possible, its generally a good idea to hollow out your 3D object to save on resin cost and print time.
Print time is dependent on a variety of variables including layer thickness (0.1mm - 0.025mm), size of object, whether object is hollow etc.
Where possible, its generally a good idea to hollow out your 3D object to save on resin cost and print time.
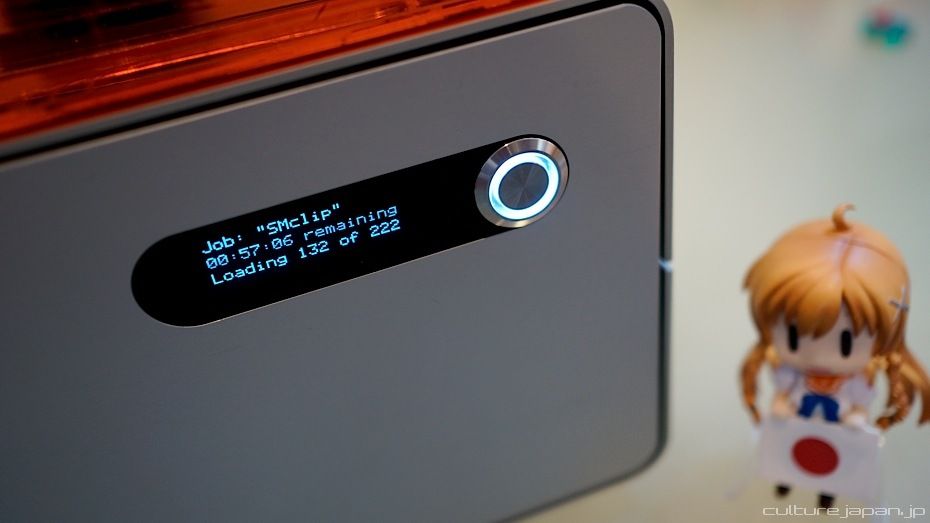
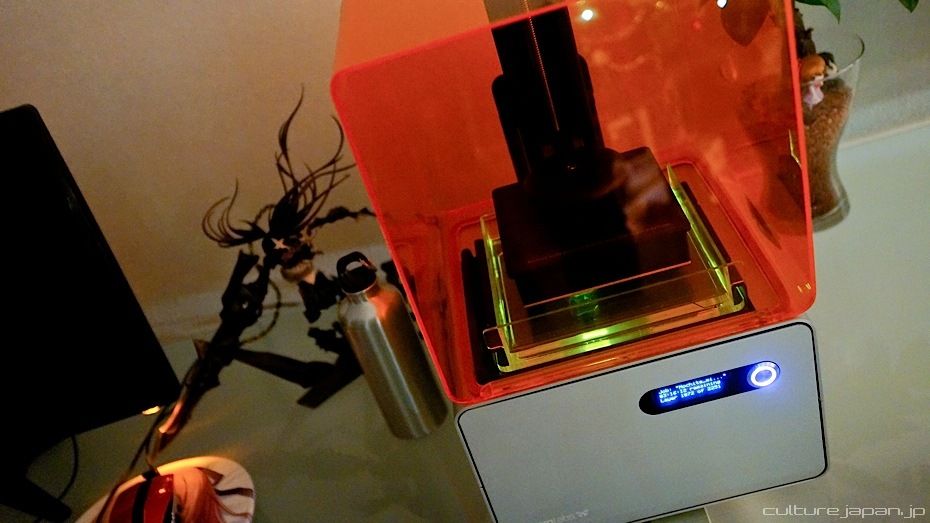
The Form1 has a display which shows you the status of the current print.
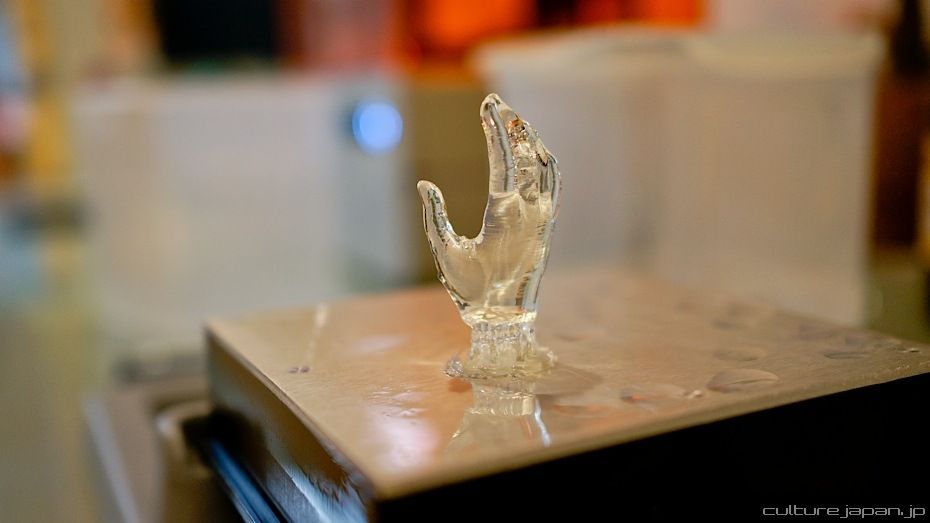
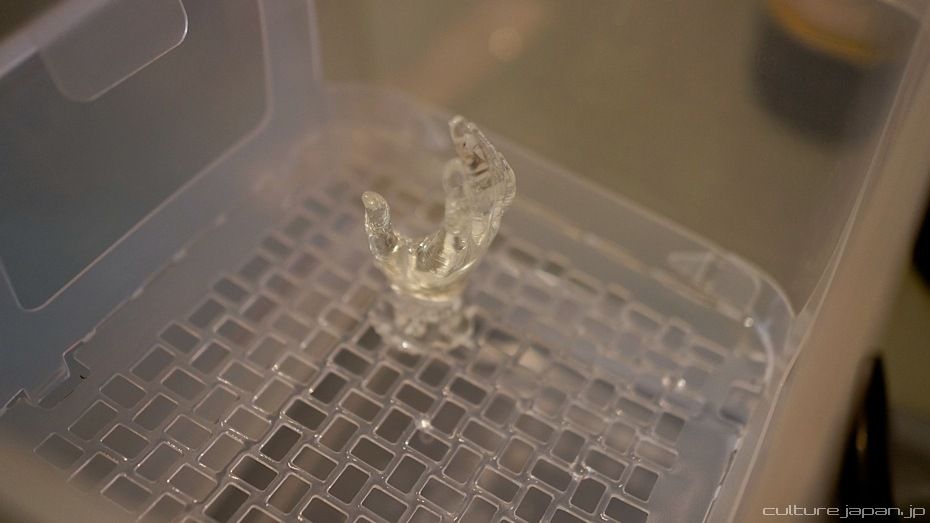
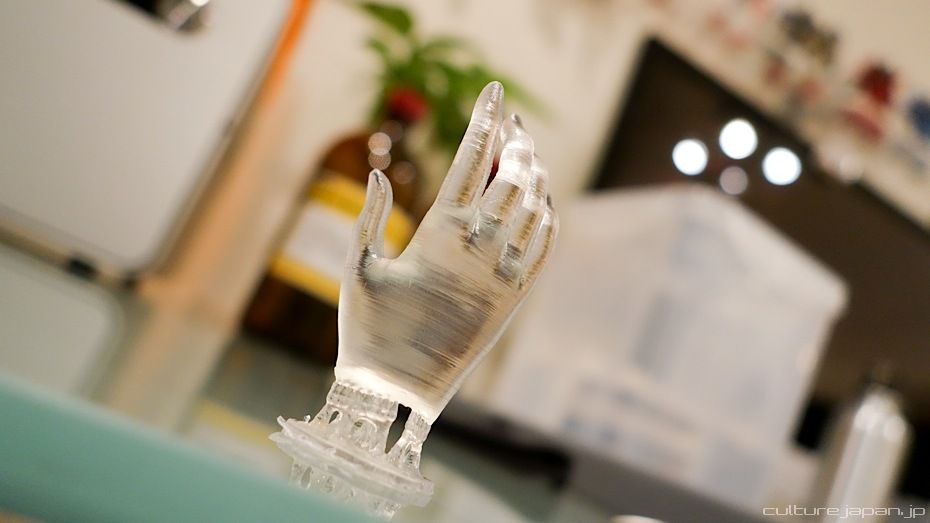
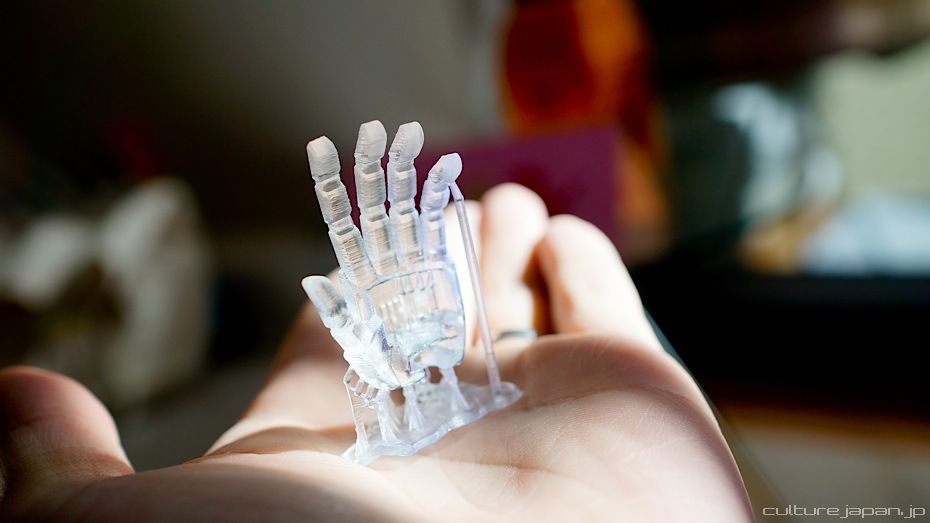
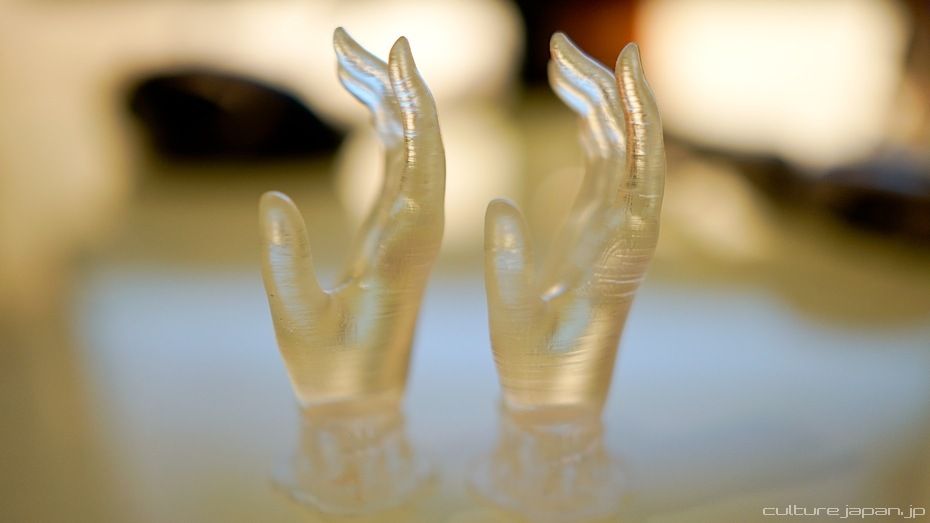
This hand can take between 2 and 6 hours depending on the layer thickness setting.
The hand is attached to the Build Platform with Support Structures which you would generate in the PreForm software. You dont have any control of where the Support Structures appear though as its all automatically calculated.
The hand is attached to the Build Platform with Support Structures which you would generate in the PreForm software. You dont have any control of where the Support Structures appear though as its all automatically calculated.
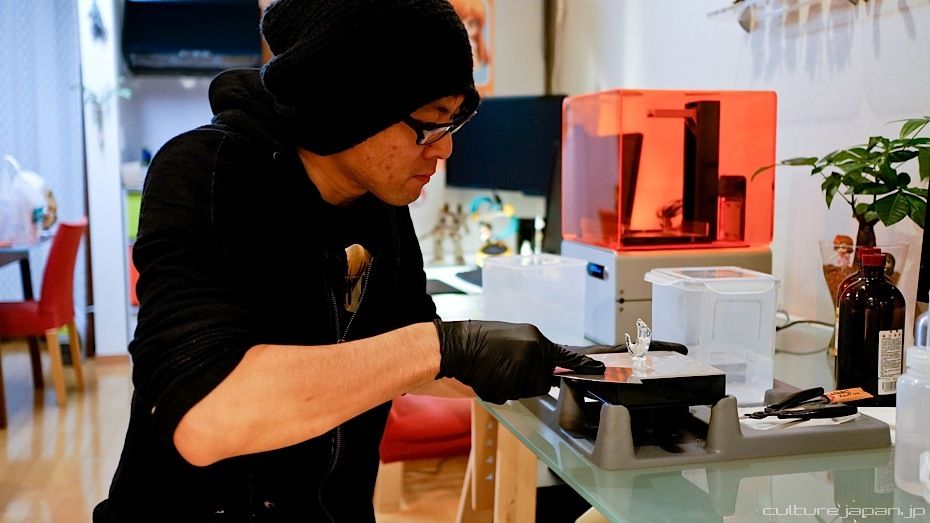
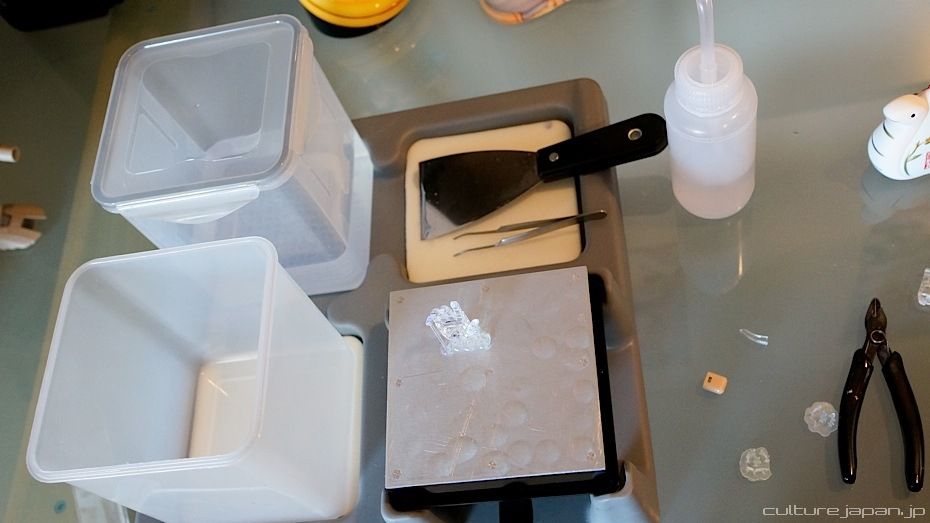
The Build Platform is removed from the Form1 and placed in the Form Finish Kit as described in the Post-Print steps.
You generally don't want to get any of the liquids on your skin. The resin is supposed to be safe but you don't want to find out a few years later that it wasnt safe after all ^^;
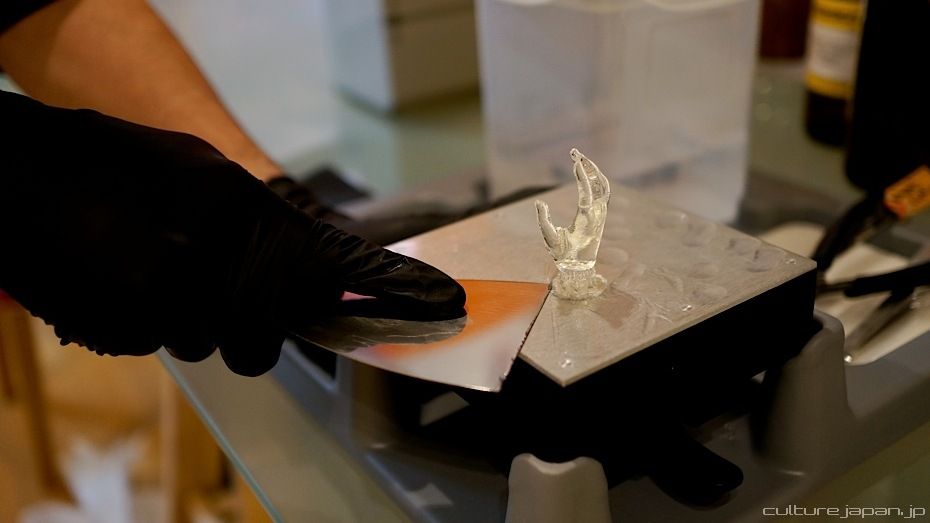
All completed objects on the Build Platform are incredibly difficult to remove and usually involves the piece in question flying across the room from the force of trying to scrape it off the platform ^^;
Wondering if there could be ejector pins inside the platform just like injection molding. The cost of the Build Platform would increase but at least we would not have to deal with broken pieces that went flying across the room.
In the latest version of PreForm, they tried to remedy this by having the Form1 build a gap at the base of the Support Structures to enable the scraper to be inserted below the object easily - but its still difficult to remove.
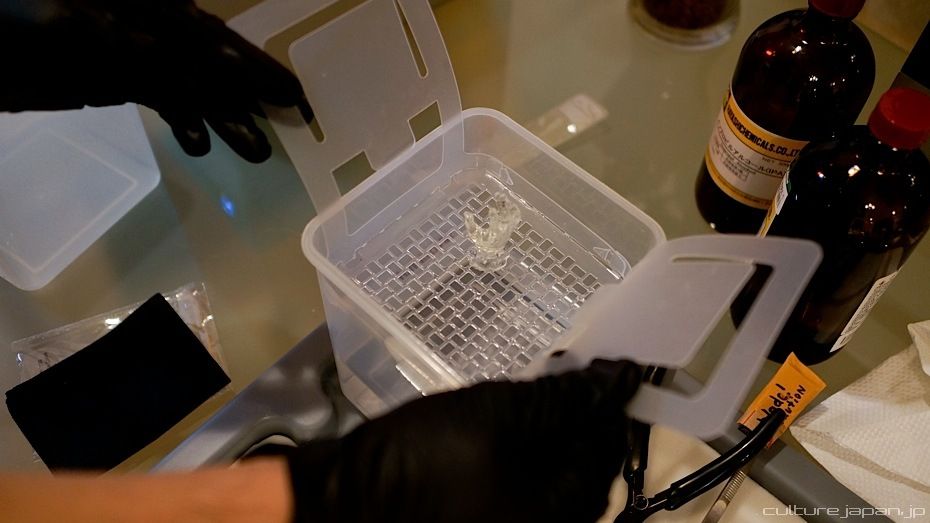
The 3D printed part is covered in a layer of wet uncured resin which needs to be washed off in the Rinse Tub that you filled with the isopropyl alcohol.
Unless you got a gas mask handy then it would be a good idea to open all the windows and take a deep breath when rinsing the part as the smell of isopropyl alcohol is whiffed upwards - surgical masks don't really help.
I generally rinse in the tub for about 30 seconds and then leave it inside covered up with the lid.
I generally rinse in the tub for about 30 seconds and then leave it inside covered up with the lid.
It should not really matter how long you leave the 3D part submerged in the tub - I usually go off to do other stuff while it's soaking.
Subtractive Manufacturing is when a block of material such as wood or metal is machines at to leave a desired shape.
Additive Manufacturing is where material deposits are formed layer upon layer until the desired shape is achieved. The Form1 uses this process to print which is why you can see lines across the whole 3D part. Unless you can get hold of a multi-million dollar 3D printing machine, consumer printers that use this form of Stereolithography will leave your part with these lines or "steps."
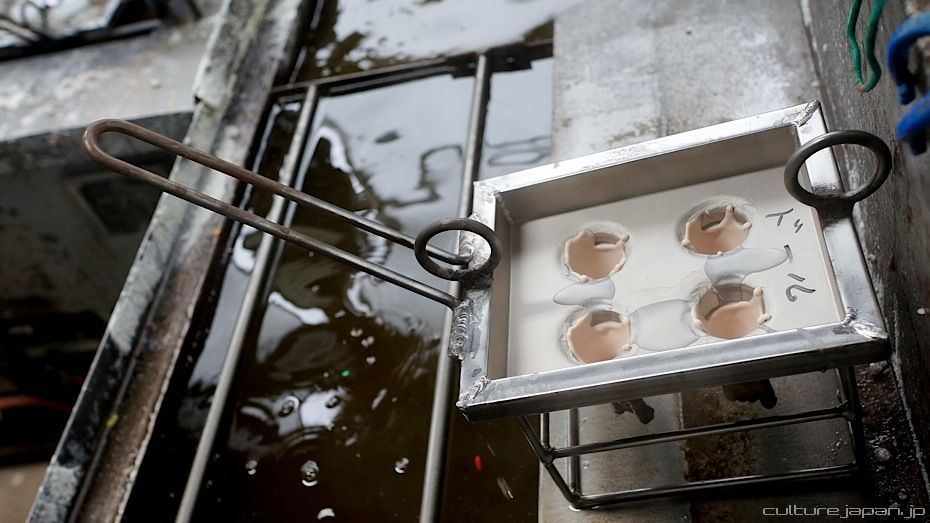
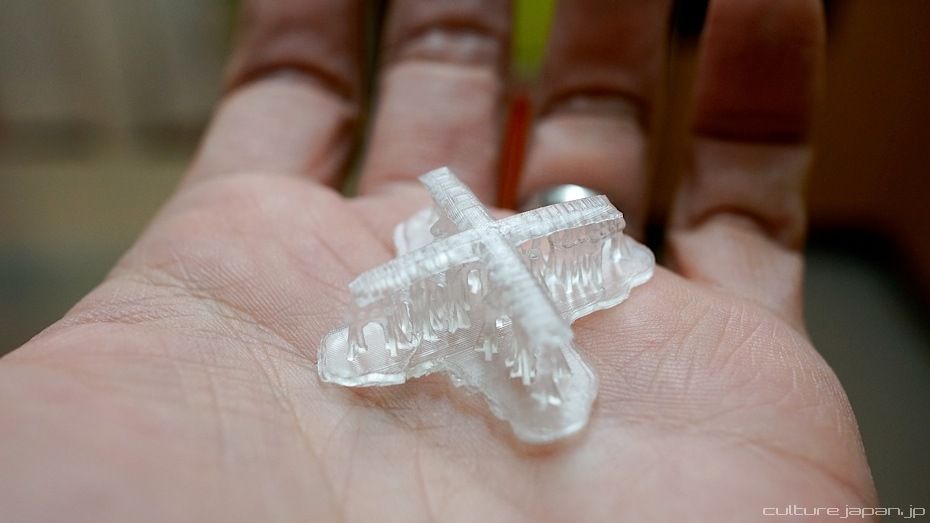
To use this printout for our doll production, I cut off the Support Structures and then sand down the surface with sandpaper preparing it for the next step which is Casting. My goal is to create a copper mold used for mass production of Soft Vinyl.
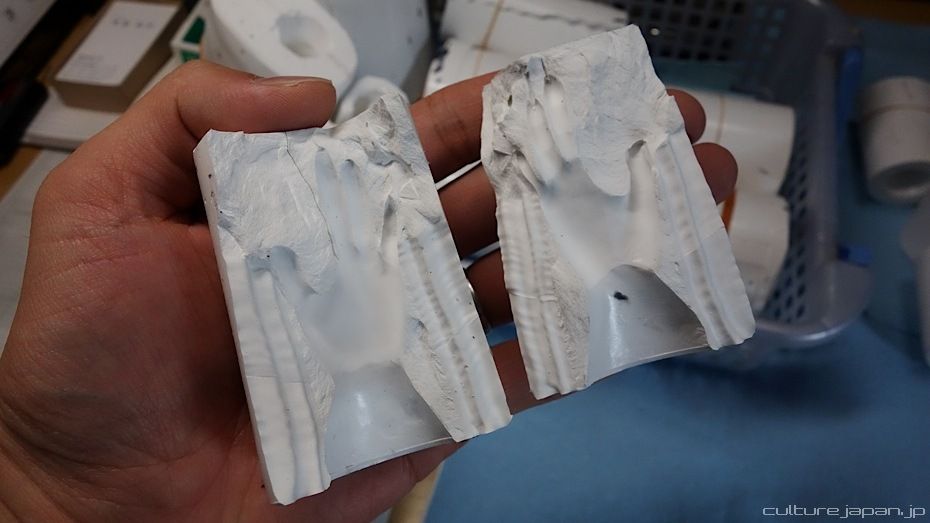
The 3D printout of the hand is used to make a silicon mold in a process called Casting. The mold is cut open once the silicon has solidified and now I can place both parts together and pour in hot wax to make a duplicate of the 3D part.
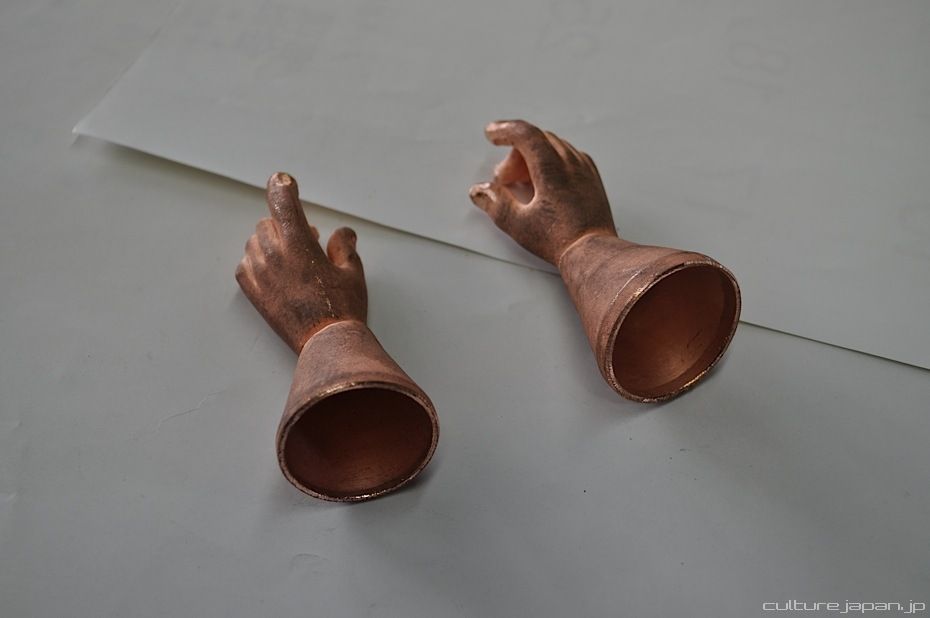
This is the copy of the 3D printed part. The wax fresh out of the silicon mold won't be a perfect clone however as it will have a parting seam and other imperfections which then need to be smoothed out.
A spout is also added at this stage to enable the soft vinyl to flow into the mold.
Ideally, I would use a 3D printer that can print wax directly but the costs are prohibitively expensive - a pair of hands like this would cost about 270000 yen to print using external printing services that do wax!
At this moment in time, I don't know of any consumer 3D printers that can print in wax at the level of detail we require.
At this moment in time, I don't know of any consumer 3D printers that can print in wax at the level of detail we require.
Now we start to make the molds using a process called Electroforming known as "Denchu" in Japanese.
In Electroforming, all these wax pieces are known as mandrels. A copper wire is attached to each mandrel and then sprayed with graphite-based ink that makes it electrically conductive.
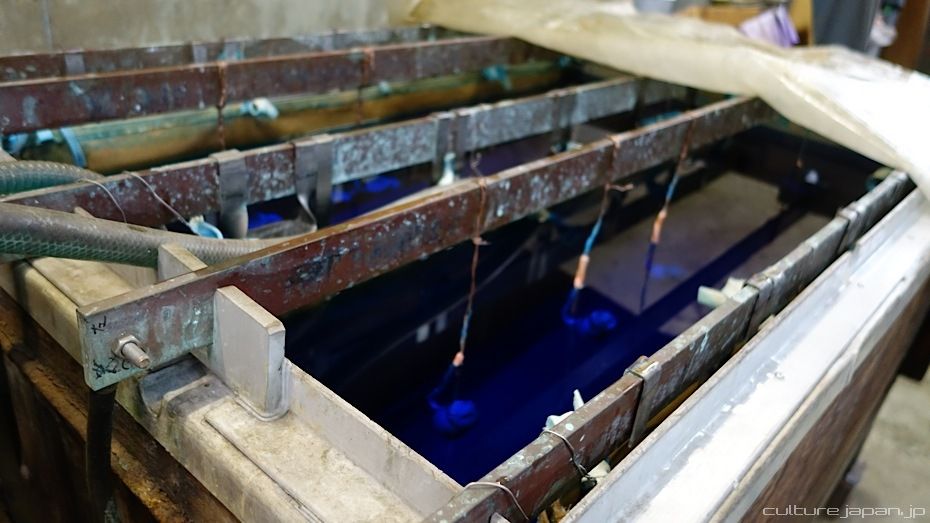
After each piece has dried, all pieces are then dipped into an electrolytic bath. Deposits of copper then build up on the conductive surface of the mandrel to replicate the surface atom by atom.
This is why it is crucial to ensure that the wax mandrels are perfect with absolutely no scratches or damage as it will show up in the molds - meaning that it will show up in the final vinyl product too.
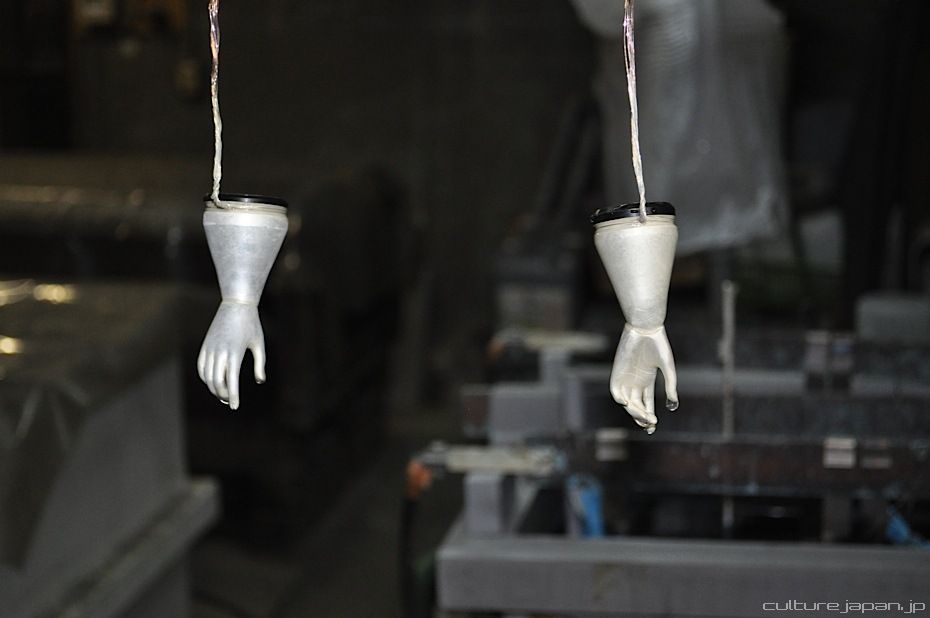
After a few days, the copper deposits have formed a mold around the wax. The wax is burned out in a process called De-Waxing and we are left with negative space inside the mold.
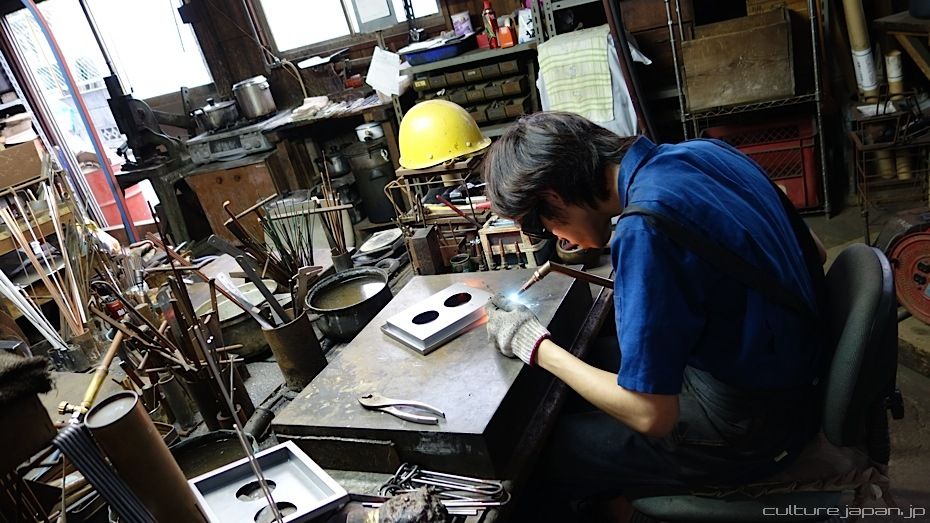
The copper molds are then welded on to a plate of metal called a "Frypan."
Soft vinyl is poured into the mold...
And here is the final product - we can now make 10,000 pulls-ish before the mold starts to degrade.
There is something very important that is not widely documented and thats Shrinkage. The 3D part must be printed at about 5 - 6% larger than the desired size. This is because shrinkage occurs through the process of Casting and Electroplating.
If you printed something the same size as it was going to be then you would end up with hands 5 - 6% smaller when its pulled out of the final copper mold - this is when you become You Wa Shock and cry.
If you printed something the same size as it was going to be then you would end up with hands 5 - 6% smaller when its pulled out of the final copper mold - this is when you become You Wa Shock and cry.
Shrinkage occurs in all types of casting and molding so always take it into consideration and find out what the % is depending on the materials you are using.
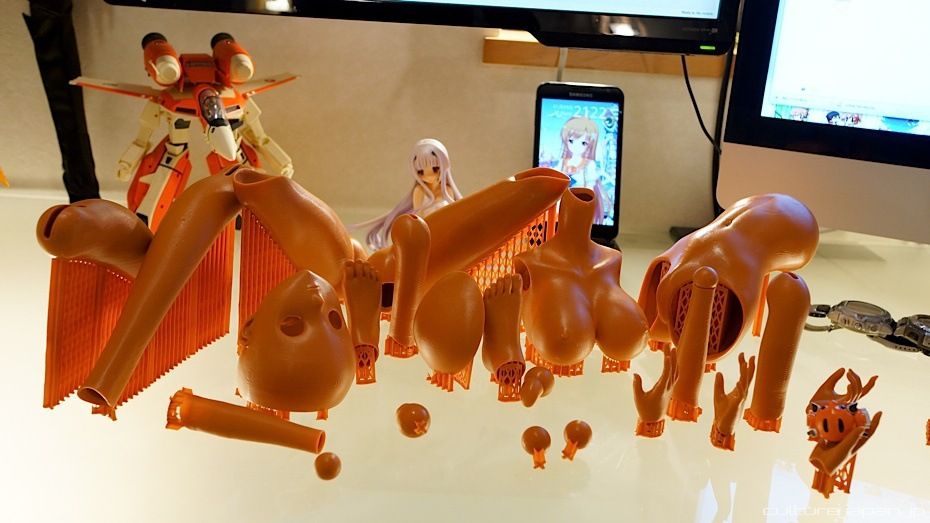
A full body set all created using the same process of 3D Printing > Casting > Electroforming - all done in the East end of Tokyo. A more detailed look into this process can be read iin my earlier article How To Mass Produce Your Own Products.

And finally the flash needs to be manually cut off - this is done using a craft knife or scalpel. I'm currently trying to come up with a more automated way of doing this.
Back to our Form1 3D printer. The Build Platform starts off with an even matt surface which over time...
...gets all scratched up. The 3D part cannot be simply pushed off the platform with ease. Once the surface becomes too uneven I guess we will need to replace the platform which FormLabs sells separately.
If you are not going to use the resin anytime soon, its a good idea to keep it out of light as thats what makes it solidify. Before I would stick it in a light proof bottle but now I just leave it in the tray, cover it with clingfilm and put the tray in a light proof box.
Formlabs recommend that you don't pour it back into the resin bottle but I personally think that it won't be a problem if you do.
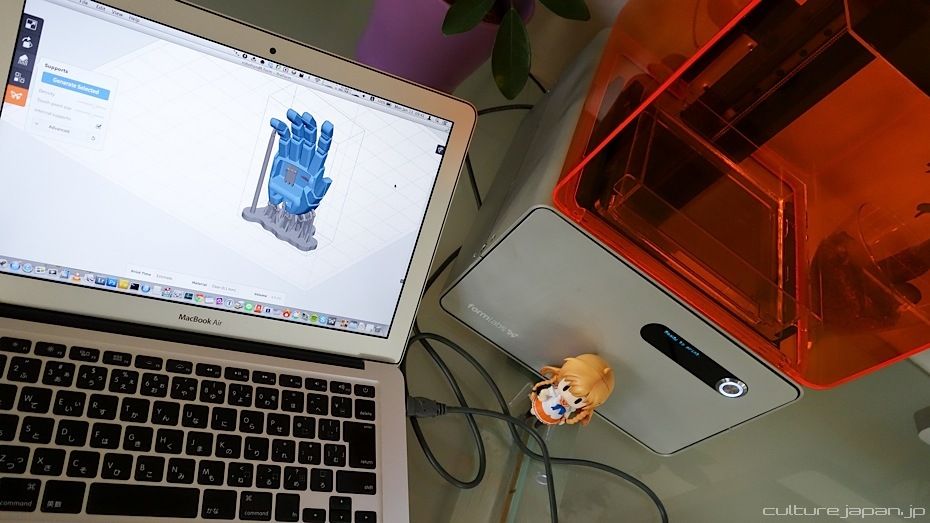
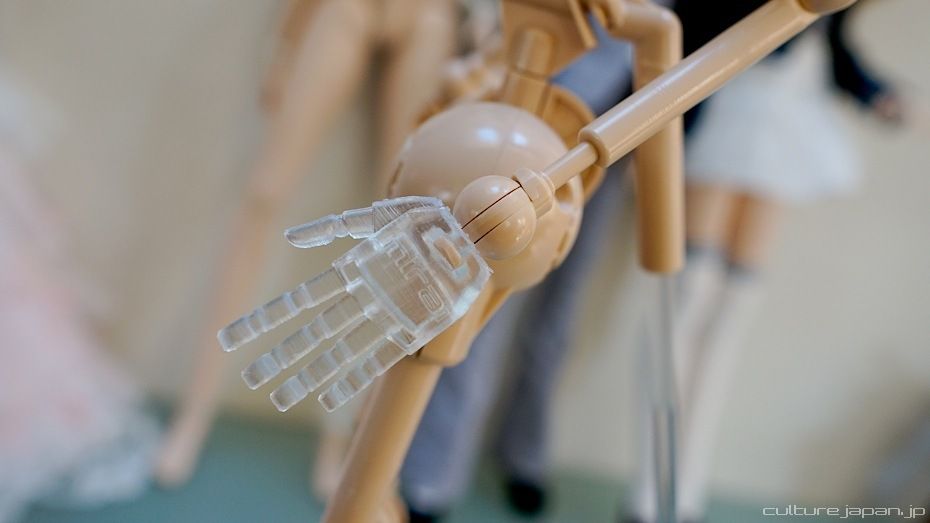
Here is another example of how I use the Form1 for production of our Smart Doll.
I've created a mecha hand in 3D using Autocad Inventor and then opened it in the PreForm software.
I then create support structures and decide where on the Build Platform it should be built - printing in the same spot all the time means that overtime, the Resin Tank will start to get cloudy due to the laser going through the same spot over and over again which will lead to print fails.
The tank is going to get cloudy overtime anyway but moving the build location around the platform will help prolong the life of the tank.
Once thats done, I upload the data to the Form1 printer via the USB cable.
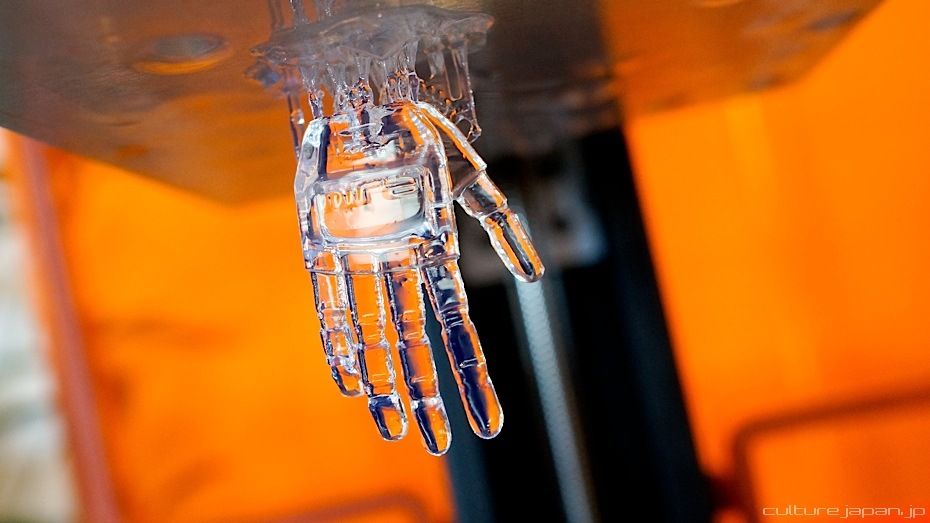
About 2 hours later the hand is ready covered with a layer of uncured resin that needs to be washed off.
Time to wrestle with the scraper and Build Platform ^^;
This was printed at the lowest quality setting - the lower the quality the faster it will print.
But as you can see, even with the lowest quality setting, it makes other domestic plastic extrusion (Fused Deposition Modeling) based printers look pretty bad.
But as you can see, even with the lowest quality setting, it makes other domestic plastic extrusion (Fused Deposition Modeling) based printers look pretty bad.
Folks who build Gunpla kits or cosplay would probably benefit from such a printer as they can print their own custom parts for their work.
The Form1 can create objects up to 125 x 125 x 165mm (4.9 x 4.9 x 6.5 inches) which just about covers all parts of our Smart Doll.
The Form1 can create objects up to 125 x 125 x 165mm (4.9 x 4.9 x 6.5 inches) which just about covers all parts of our Smart Doll.
If you broke a part of your Figma or Dollfie - just print another part! The next thing I've been meaning to do is to design and print my own custom glasses. I could then scale the model down and print one for the dolls too ^^;
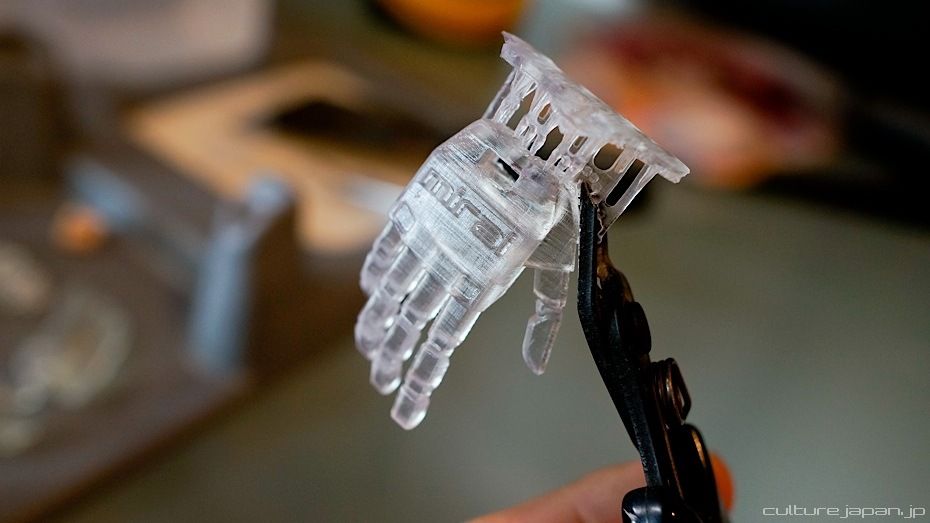
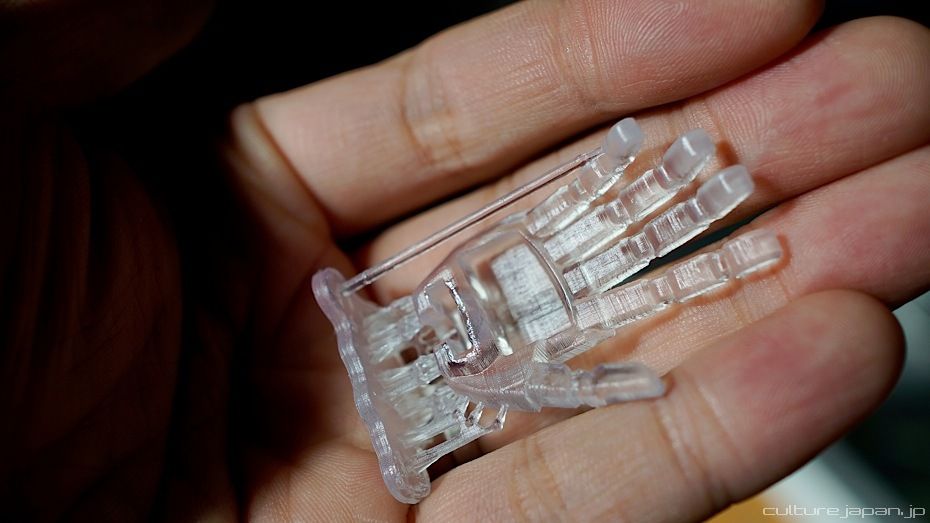
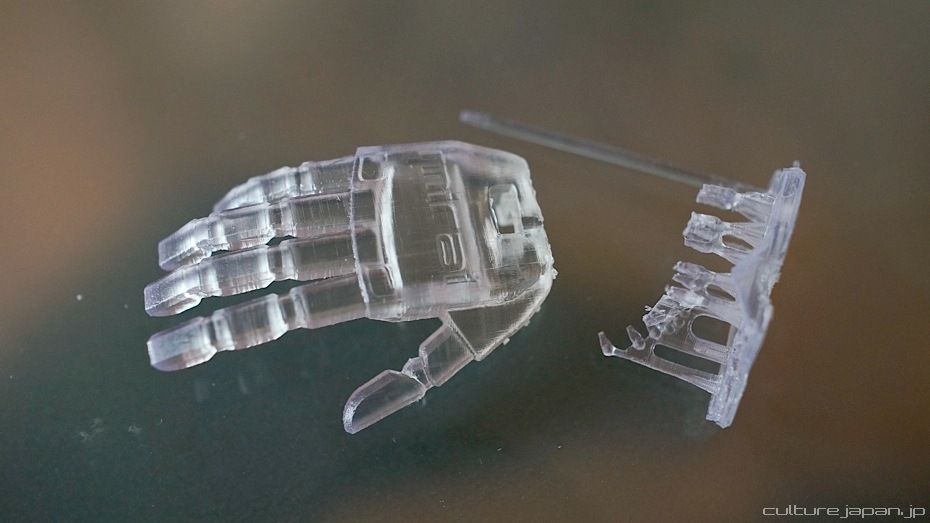
The Support Structures are easily cut off using a pair of modeling pliers.
The Support Structure Touch Point size can be set in the PreForm software. Generally, the bigger the structures, the more stable your print is going to be but also means that you will be bigger marks left over on your model.
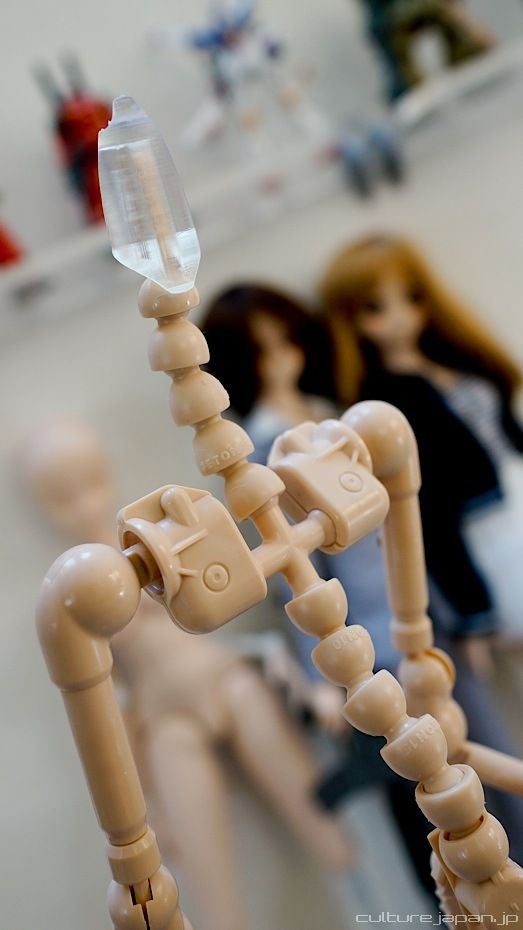
In this case, I printed the hand out to see how it will look like on the MiraiFrame which goes inside the Manual Version of Smart Doll. I want to sell the frame standalone as a kit but didn't like the fact that it didn't have hands or a head.
As I only decided to add hands (and a head) after most of the Injection mold creation was complete, I only had a wee bit of space left over in the mold to play with which is another reason why I needed to print the 3D model - to see if it looks decent on the frame and to see whether it will fit into the space I have left.
And here is the head unit that I designed. I didn't want it to look too humanoid or big so kept it simple.
The head unit looks pretty decent on the rest of the frame and can also be flipped 180 degrees to give it a Clone Wars Droid look.
The frame you see here is T2 which means we are still modifying the mold which is why you can see gaps here and there at this stage. By the time we get to T4, we should have a perfect frame with no gaps.
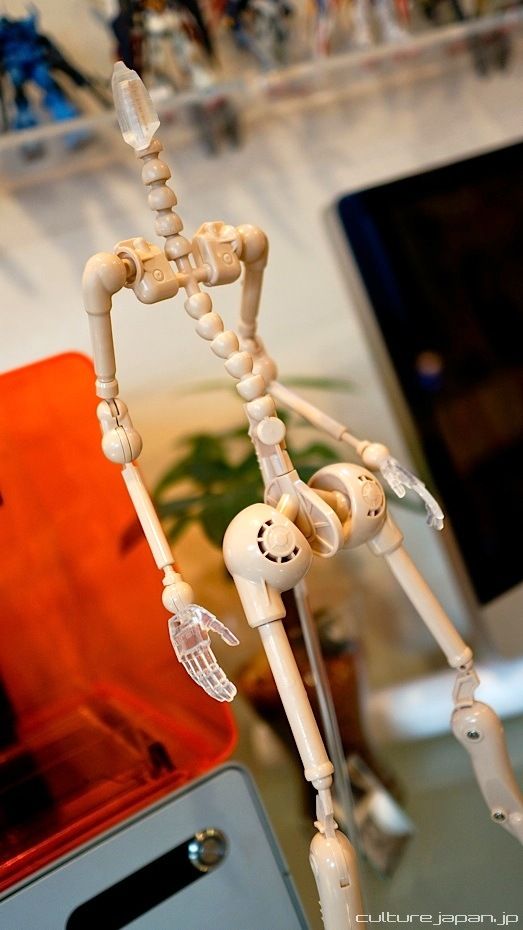
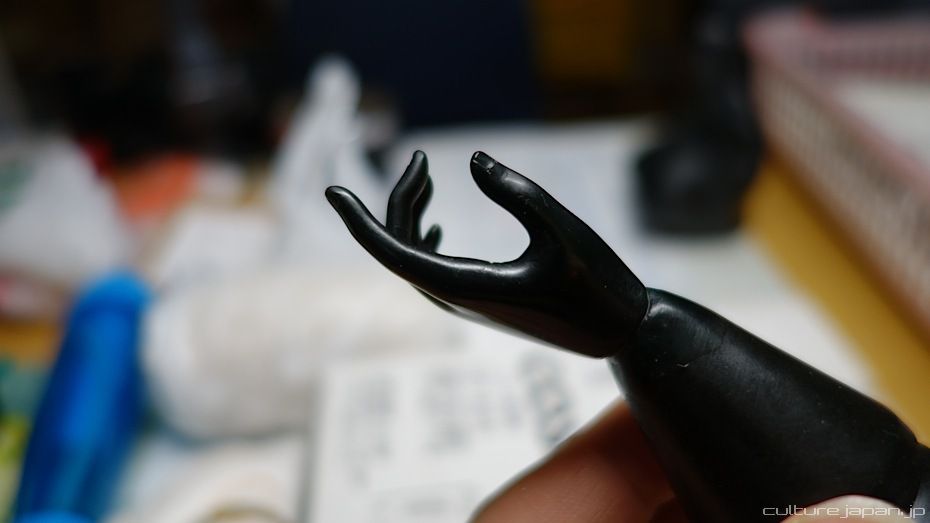
With the mecha hands attached to the MiraiFrame - looking pretty cool I think ^^;
The next step is to machine away at the Injection mold so that the hands and head will be on the same runner and thus the same material and color as the rest of the frame.
The next step is to machine away at the Injection mold so that the hands and head will be on the same runner and thus the same material and color as the rest of the frame.
Sometimes there are print fails which can be due to various factors. One is forgetting to clean the Resin Tank after a 3D print as there is usually some deposits of cured resin at the bottom.
Another reason could be that the Build Platform was not cleaned properly but am not sure whether this is a factor that contributes to print fails. Its always a good idea to keep an eye on the print process incase there is a fail so that you can cancel the print - or the laser will just keep shooting at the tank creating a blob of nothingness.
The bottom of the Resin Tank has a layer of silicon and care must be taken not to damage it when removing any cured silicon.
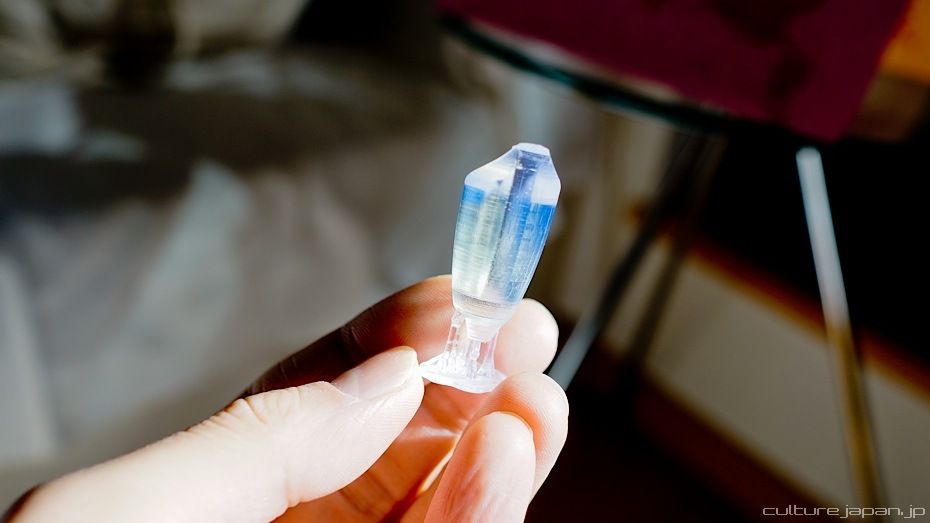
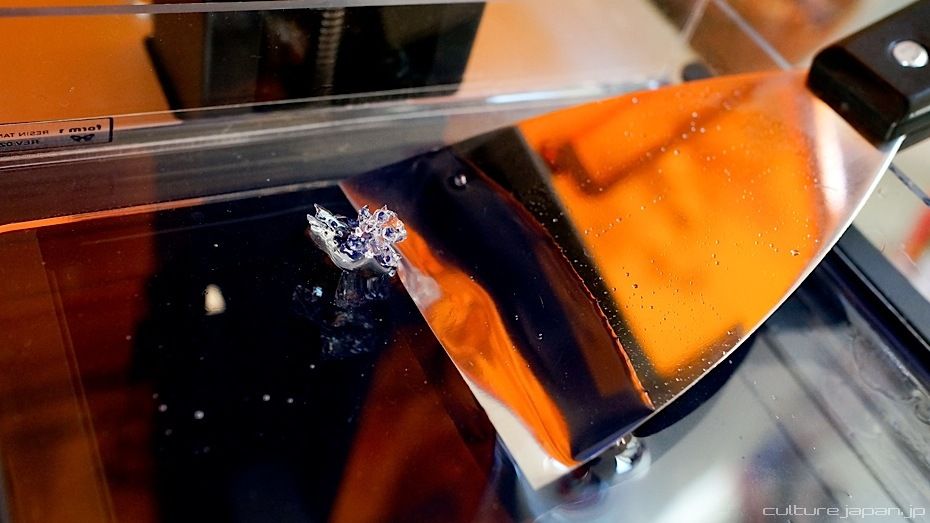
The Form1 can print very small objects but when the objects are thin like this hair clip for Mirai-chan, the material remains soft and bendy even after its dry. I printed this to check whether the magnet will fit in the hole beneath the clip before sending the data off to Protomold.
Protomold will then create a mold for me to create a few thousand hairclips in POM (Polyoxymethylene) at a more affordable price.
Protomold require data in the STP format.
Protomold will then create a mold for me to create a few thousand hairclips in POM (Polyoxymethylene) at a more affordable price.
Protomold require data in the STP format.

Testing out a print of the hairclip for Mirai's Solar Marine uniform.
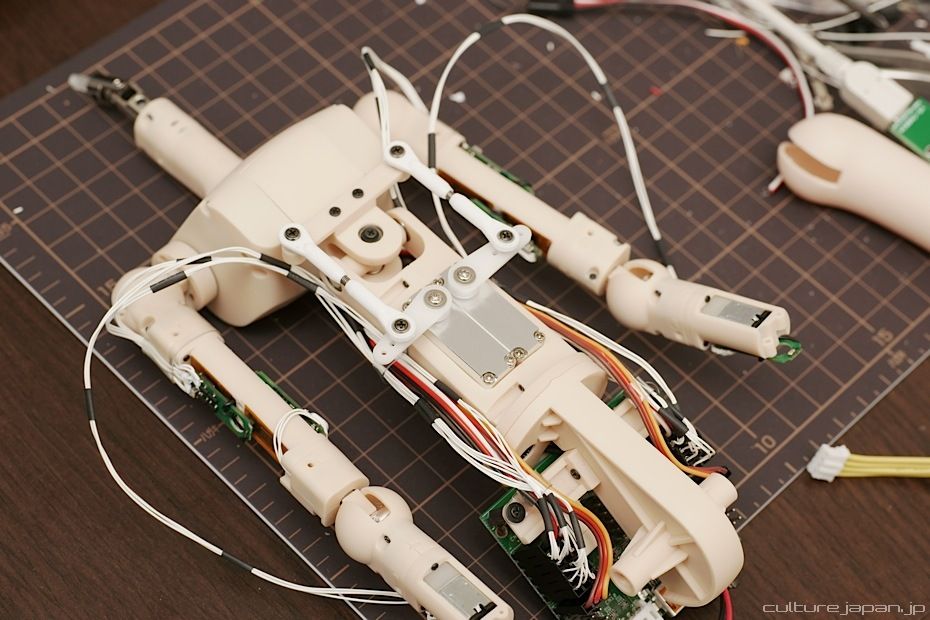
We also use 3D printing to assist us on the production of the Automated Version of Smart Doll. During the development of the AeonFrame, we use 3D printers to form the casing which will eventually be injection molded.
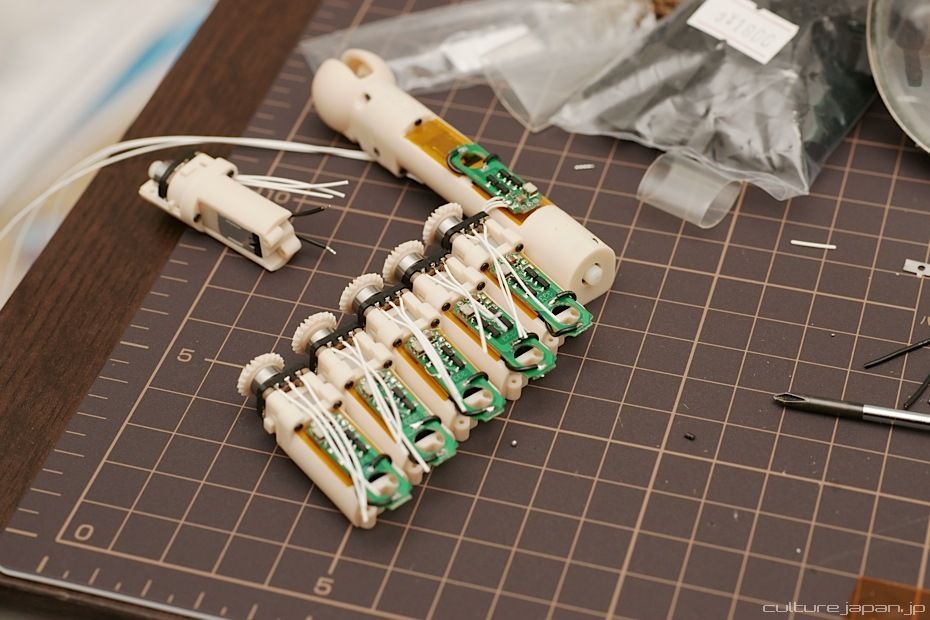
We have also developed our own Servomotors from scratch and 3D printing is used to print the case and cogwheels too. The cogwheels will eventually be metal.
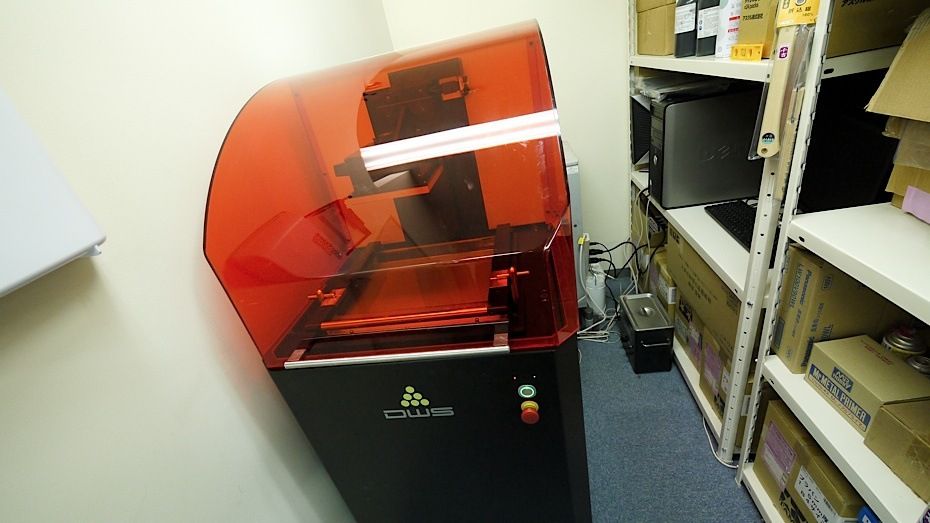
Now lets take a look at a few other options out there on the market. If you had the cash then going for a Digital Wax Systems printer would be a rather nice choice.
This is a photo of an older model snapped at the Good Smile Company offices but you can whip up a recent model like the XFab laser printer for about 5000 USD - that particular one can print rubber too.
This is a photo of an older model snapped at the Good Smile Company offices but you can whip up a recent model like the XFab laser printer for about 5000 USD - that particular one can print rubber too.
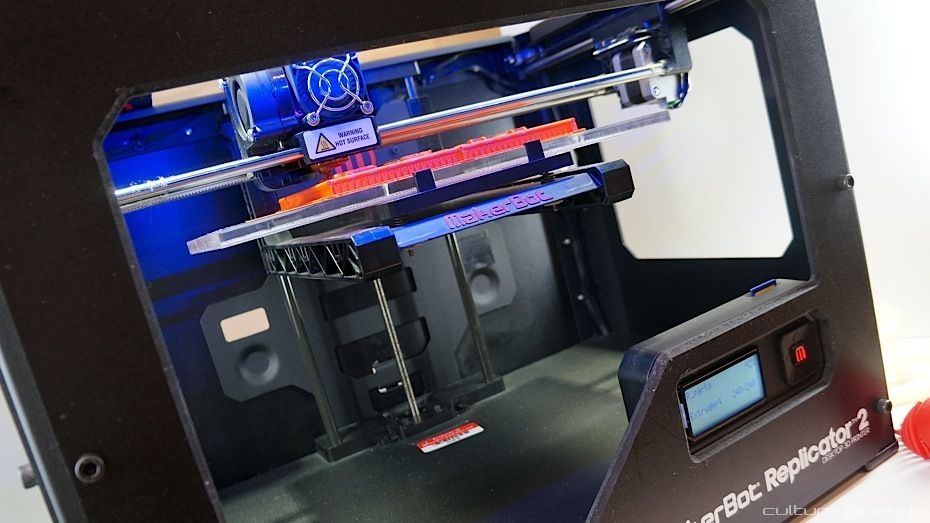
The Makerbot Replicator 2 is a consumer printer that uses Fused Deposition Modeling to print objects. Folks generally recommend one to use such printers when working on a budget and where surface finishes are not so important.
The Makerbot Replicator 2 costs 2208 USD while the material (filament) costs between 43USD and 130USD for a kilogram - see it in action below.
Japan currently has a 0.3% share of the 3D printer market at the moment - the US has 70%, Germany about 17% and China 3%.
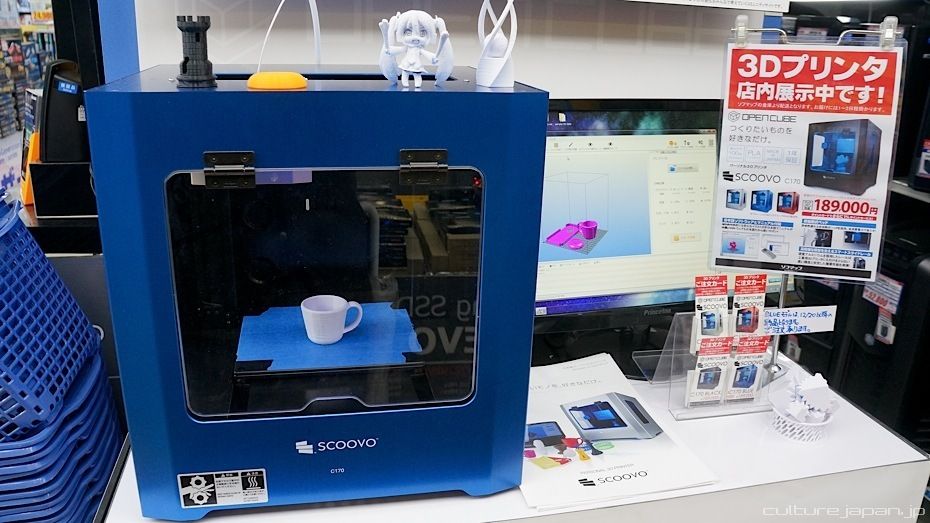
I read that the Japanese Ministry of Economy, Trade and Industry (of which I am a member of their CIIC) is working to help Japan gain more share through providing funding but not sure if Open Cube and their SCOOVO 3D printer is part of their project.
I read that the Japanese Ministry of Economy, Trade and Industry (of which I am a member of their CIIC) is working to help Japan gain more share through providing funding but not sure if Open Cube and their SCOOVO 3D printer is part of their project.
The SCOOVO uses the same Fused Deposition Modeling technology as Makerbot to create objects.
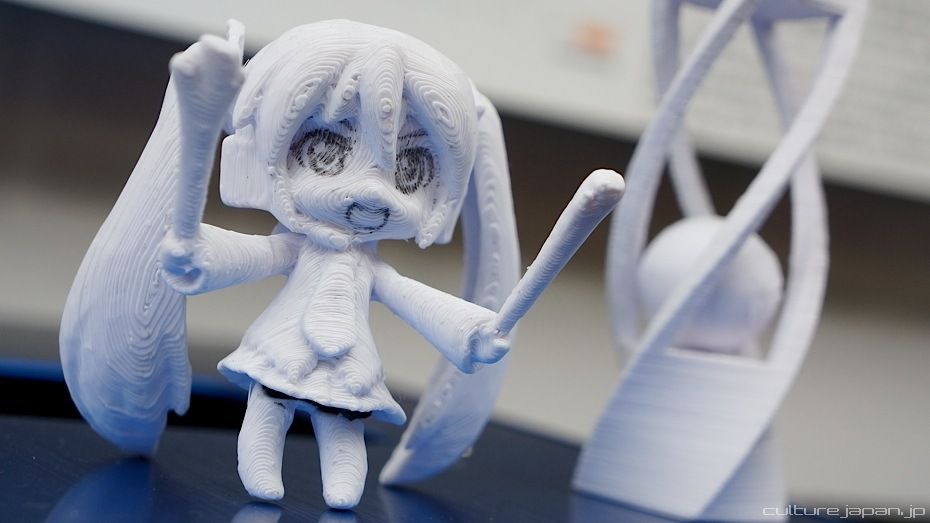
As you can see from the sample here - the level of detail is low quite a bit of sanding would be needed if I wanted to use this for casting and then electroplating.
However, for larger structures where detail or surface is not so important, one of these FDM printers may make more sense due to the lower cost. There is hardly any maintenance involved too unlike the Form1.
The Form1 costs 3299 USD while resin costs 149 USD per liter. Shipping cost me 390 USD to Japan and import tax was about another 300 USD bringing the total to about 4130 USD.
You get detail required for casting and electroplating from the Form1 but at a cost.
You get detail required for casting and electroplating from the Form1 but at a cost.
The Form1 meets my needs for the development of Smart Doll body parts and small accessories.
When developing furniture and vehicles for Smart Doll however, it would be more cost effective to use a FDM based printer such as Makerbot or SCOOVO.
When developing furniture and vehicles for Smart Doll however, it would be more cost effective to use a FDM based printer such as Makerbot or SCOOVO.
The Form1 has a sleek design that also looks cool on the desktop too - I particularly like the matt silver that goes with all the macs in the office - it also comes in Mirai colors too ^^;
There is another thing apart from the higher costs that one should take into consideration when thinking about owning the Form1 - the not so good customer service - particularly in regards to when the product is going to ship. I got countess unanswered emails and the ones which were answered were worded in a "yes we are shipping" tone.
I think the important thing for Formlabs is to set expectations and not make promises they can't keep. If I was told "It will ship over a year later" then at least that would be better than silence or more promises of "we are shipping."
The Form1 help center also seems to be vague regarding certain questions especially when it comes to resin which makes one think that they purposely do that so that you end up buying more Resin, Resin Tanks and Build Platforms.
Not being able to control placement of the Support Structures in the PreForm software is a bit fishy too. PreForm places Support Structures in places that other 3D printing software would not - makes you wonder if that is done to use as much resin as possible so that you buy more - you can only use resin from Formlabs.
But as long as we have Google Sensei, you don't really need the Form1 customer support. I guess I can look at it this way - I'd prefer poor customer service but good quality builds and not great quality service with crap builds ^^;
How many of you thinking of getting a 3D printer? Do you already have one or have access to one at school or work?

In an up n coming article, I'm going to talk about how 3D printing helped me to make the Injection Mold for the MiraiFrame that goes inside the Manual Version of Smart Doll and for that we head up to snowy Yamagata a few hours North of Tokyo by Shinkansen bullet train.

Mirai-chan all wrapped up in Winter gear joins us too ^o^
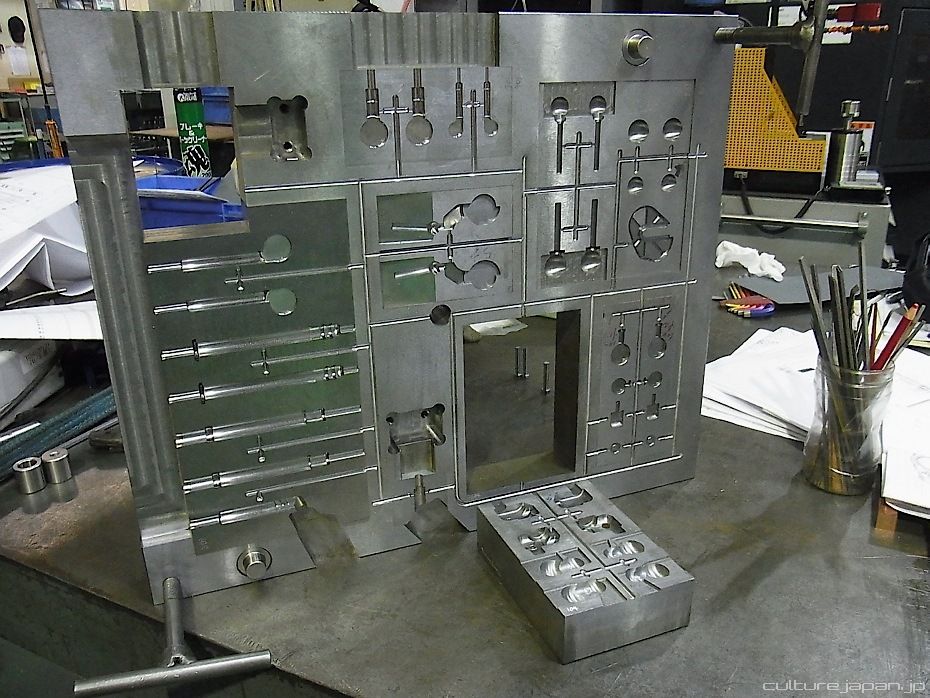
And this is what the Injection mold for MiraiFrame looks like so far. The invoice for this was 16000000 yen - good thing I saved a wee bit of cash from my days at Amazon and Microsoft.
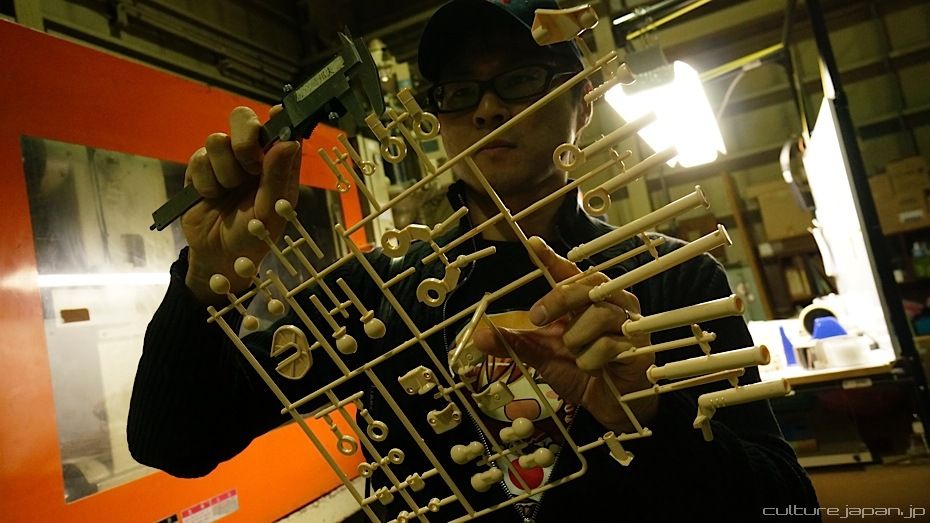
And this is the result - all parts on the runner (also known as Gates) that will also be sold separately as a kit for mecha kit fans ^^;
Update! Mirai Suenga Smart Doll was released June 2014 and seems to be doing rather well! Now available at http://smartdoll.jp